Table of Contents
Advertisement
HPE ProLiant DL20 Gen9 Server
Maintenance and Service Guide
Abstract
This guide describes identification and maintenance procedures, diagnostic tools, specifications
and requirements for hardware components and software. This guide is for an experienced
service technician.
Part Number: 826317-002
Published: May 2017
Edition: 2
Advertisement
Table of Contents

Related Manuals for HPE ProLiant DL20


Summary of Contents for HPE ProLiant DL20
- Page 1 HPE ProLiant DL20 Gen9 Server Maintenance and Service Guide Abstract This guide describes identification and maintenance procedures, diagnostic tools, specifications and requirements for hardware components and software. This guide is for an experienced service technician. Part Number: 826317-002 Published: May 2017...
- Page 2 © 2015, 2017 Hewlett Packard Enterprise Development LP Notices The information contained herein is subject to change without notice. The only warranties for Hewlett Packard Enterprise products and services are set forth in the express warranty statements accompanying such products and services. Nothing herein should be construed as constituting an additional warranty. Hewlett Packard Enterprise shall not be liable for technical or editorial errors or omissions contained herein.
-
Page 3: Table Of Contents
Replacing the two-slot PCIe riser board.................... 58 Replacing the system battery......................60 Replacing the front I/O assembly...................... 62 Replacing the system board......................63 Replacing the HPE DL20 Gen9 290-W Non-hot plug power supply..........69 Replacing the RPS backplane......................70 HP Trusted Platform Module......................71 Troubleshooting..................72... - Page 4 Product QuickSpecs....................... 73 Active Health System......................73 HPE ProLiant Pre-boot Health Summary................73 Integrated Management Log....................73 HPE Insight Remote Support....................74 HPE Insight Remote Support central connect............. 74 HPE Insight Online direct connect................74 Insight Online....................... 74 UEFI System Utilities.........................74 Using UEFI System Utilities....................75 Embedded Diagnostics option....................
- Page 5 HPE 290W non-hot-plug power supply cabling..............100 Redundant power supply backplane cabling................ 101 Specifications..................102 Environmental specifications......................102 Mechanical specifications........................102 Power supply specifications......................102 Support and other resources..............104 Accessing Hewlett Packard Enterprise Support................104 Accessing updates.......................... 104 Customer self repair........................104 Remote support..........................
-
Page 6: Customer Self Repair
Customer self repair Hewlett Packard Enterprise products are designed with many Customer Self Repair (CSR) parts to minimize repair time and allow for greater flexibility in performing defective parts replacement. If during the diagnosis period Hewlett Packard Enterprise (or Hewlett Packard Enterprise service providers or service partners) identifies that the repair can be accomplished by the use of a CSR part, Hewlett Packard Enterprise will ship that part directly to you for replacement. - Page 7 REMARQUE: Certaines pièces Hewlett Packard Enterprise ne sont pas conçues pour permettre au client d'effectuer lui-même la réparation. Pour que la garantie puisse s'appliquer, Hewlett Packard Enterprise exige que le remplacement de la pièce soit effectué par un Mainteneur Agréé. Ces pièces sont identifiées par la mention "Non"...
- Page 8 Per ulteriori informazioni sul programma CSR di Hewlett Packard Enterprise, contattare il centro di assistenza di zona. Per il programma in Nord America fare riferimento al sito Web. Servizio di garanzia per i soli componenti La garanzia limitata Hewlett Packard Enterprise può includere un servizio di garanzia per i soli componenti. Nei termini di garanzia del servizio per i soli componenti, Hewlett Packard Enterprise fornirà...
- Page 9 Reparaciones del propio cliente Los productos de Hewlett Packard Enterprise incluyen muchos componentes que el propio usuario puede reemplazar (Customer Self Repair, CSR) para minimizar el tiempo de reparación y ofrecer una mayor flexibilidad a la hora de realizar sustituciones de componentes defectuosos. Si, durante la fase de diagnóstico, Hewlett Packard Enterprise (o los proveedores o socios de servicio de Hewlett Packard Enterprise) identifica que una reparación puede llevarse a cabo mediante el uso de un componente CSR, Hewlett Packard Enterprise le enviará...
- Page 10 • Verplicht—Onderdelen waarvoor reparatie door de klant verplicht is. Als u Hewlett Packard Enterprise verzoekt deze onderdelen voor u te vervangen, worden u voor deze service reiskosten en arbeidsloon in rekening gebracht. • Optioneel—Onderdelen waarvoor reparatie door de klant optioneel is. Ook deze onderdelen zijn ontworpen voor reparatie door de klant.
- Page 11 Conforme a disponibilidade e o local geográfico, as peças CSR serão enviadas no primeiro dia útil após o pedido. Onde as condições geográficas permitirem, a entrega no mesmo dia ou em quatro horas pode ser feita mediante uma taxa adicional. Se precisar de auxílio, entre em contato com o Centro de suporte técnico da Hewlett Packard Enterprise para que um técnico o ajude por telefone.
- Page 12 Customer self repair...
- Page 13 Customer self repair...
- Page 14 Customer self repair...
-
Page 15: Illustrated Parts Catalog
Hewlett Packard Enterprise continually improves and changes product parts. For complete and current supported parts information, see the Hewlett Packard Enterprise PartSurfer website. Item Description Spare part Customer number self repair HPE Smart Storage Battery holders 823806-001 Mandatory PCIe riser cage — — Access panel —... - Page 16 Non—Certaines pièces Hewlett Packard Enterprise ne sont pas conçues pour être remplacées par le client. Afin de se conformer aux exigences de la garantie la garantie du client, Hewlett Packard Enterprise demande à un fournisseur de services agréé de procéder au remplacement de la pièce. Ces pièces sont signaléespar le mot «...
-
Page 17: System Components
Opcional—Peças cujo reparo feito pelo cliente é opcional. Essas peças também são projetadas para o reparo feito pelo cliente. No entanto, se desejar que a Hewlett Packard Enterprise as substitua, pode haver ou não a cobrança de taxa adicional, dependendo do tipo de serviço de garantia destinado ao produto. Não—Algumas peças da Hewlett Packard Enterprise não são projetadas para o reparo feito pelo cliente. - Page 18 Item Description Spare part Customer number self repair HPE 900-W AC 240VDC Power Input Module 830219-001 Mandatory HPE DL20 Gen9 290-W Non-hot Plug Power Supply 823805-001 Mandatory HPE Smart Storage Battery 815983-001 Mandatory Fan module kit 725264-001 Mandatory a) Fan module* —...
- Page 19 Item Description Spare part Customer number self repair DIMMs designed for Intel Xeon E3-1200 v6 processors, the — — 3.50-GHz Intel Pentium G4560 processor, the 3.60-GHz Intel Pentium G4600 processor, the 3.90-GHz Intel Core i3-7100 processor, and the 4.00-GHz Intel Core i3-7300 processor a) 8 GB, single-rank x8 PC4-2400T-E* 869537-001 Mandatory...
- Page 20 Mandatory Two-bay LFF hot-plug drive backplane 823794-001 Mandatory Two-bay LFF non-hot-plug drive backplane 823796-001 Mandatory HPE 900-W AC 240VDC RPS Power Backplane 830022-001 Mandatory GPU accelerators a) NVIDIA Quadro K2200 GPU Module* 765148-002 Optional b) NVIDIA Quadro M2000 GPU Module*...
- Page 21 Non—Certaines pièces Hewlett Packard Enterprise ne sont pas conçues pour être remplacées par le client. Afin de se conformer aux exigences de la garantie la garantie du client, Hewlett Packard Enterprise demande à un fournisseur de services agréé de procéder au remplacement de la pièce. Ces pièces sont signaléespar le mot «...
- Page 22 Opcional—Peças cujo reparo feito pelo cliente é opcional. Essas peças também são projetadas para o reparo feito pelo cliente. No entanto, se desejar que a Hewlett Packard Enterprise as substitua, pode haver ou não a cobrança de taxa adicional, dependendo do tipo de serviço de garantia destinado ao produto. Não—Algumas peças da Hewlett Packard Enterprise não são projetadas para o reparo feito pelo cliente.
-
Page 23: Removal And Replacement Procedures
• T-25 Torx screwdriver (for screws located inside the front panel quick-release levers) • Flathead scrwedriver • HPE Insight Diagnostics software Safety considerations Before performing service procedures, review all the safety information. Preventing electrostatic discharge About this task To prevent damaging the system, be aware of the precautions you must follow when setting up the system or handling parts. -
Page 24: Server Warnings And Cautions
This symbol indicates the presence of a hot surface or hot component. If this surface is contacted, the potential for injury exists. WARNING: To reduce the risk of injury from a hot component, allow the surface to cool before touching. This symbol indicates that the component exceeds the recommended weight for one individual to handle safely. -
Page 25: Rack Warnings
CAUTION: Do not operate the server for long periods with the access open or removed. Operating the server in this manner results in improper airflow and improper cooling that can lead to thermal damage. Rack warnings WARNING: To reduce the risk of personal injury or damage to the equipment, be sure that: •... -
Page 26: Removing The Security Bezel
If the rack environment, cabling configuration, or the server location in the rack creates awkward conditions, remove the server from the rack. • Remove the access panel. • Remove the PCI riser cages. • Remove the air baffle. Removing the security bezel About this task To access the front panel components, unlock and remove the security bezel. -
Page 27: Extending The Server From The Rack
Extending the server from the rack About this task CAUTION: To reduce the risk of personal injury or equipment damage, be sure that the rack is adequately stabilized before extending a component from the rack. Procedure Power down the server. Disconnect all peripheral cables from the server. - Page 28 After performing the installation or maintenance procedure, slide the server back into the rack, and then press the server firmly into the rack to secure it in place. Do one of the following: • In a server that uses thumbscrew rack ears, tighten the captive thumbscrews. •...
-
Page 29: Removing The Server From The Rack
Removing the server from the rack About this task WARNING: The server is very heavy. To reduce the risk of personal injury or damage to the equipment: • Observe local occupational health and safety requirements and guidelines for manual material handling. -
Page 30: Removing The Pci Riser Cage
4. Do one of the following: • Extend the server from the rack. • Remove the server from the rack. 5. If the locking latch is locked, use a T-15 Torx screwdriver to unlock the latch. 6. Open the locking latch. The access panel slides back, releasing it from the chassis. -
Page 31: Removing The Air Baffle
• Extend the server from the rack. • Remove the server from the rack. 5. Remove the access panel. 6. Disconnect all cables connected to existing expansion boards. 7. Remove the existing PCI riser cage. Retain the cage for future use. Removing the air baffle About this task CAUTION:... -
Page 32: Replacing The Non-Hot-Plug Drive Carrier
Replacing the non-hot-plug drive carrier About this task CAUTION: To prevent improper cooling and thermal damage, do not operate the sever unless all bays are populated with either a component or a blank. Procedure 1. If installed, remove the security bezel. 2. -
Page 33: Replacing The Non-Hot-Plug Drive
Replacing the non-hot-plug drive About this task CAUTION: To prevent improper cooling and thermal damage, do not operate the sever unless all bays are populated with either a component or a blank. Procedure 1. Back up all server data on the drive. 2. -
Page 34: Replacing The Hot-Plug Drive Blanks
Replacing the hot-plug drive blanks About this task CAUTION: To prevent improper cooling and thermal damage, do not operate the sever unless all bays are populated with either a component or a blank. Procedure 1. If installed, remove the security bezel. 2. -
Page 35: Replacing The Two-Bay Lff And Four-Bay Sff Hot-Plug Drive Backplanes
To replace the component, reverse the removal procedure. Replacing the two-bay LFF and four-bay SFF hot-plug drive backplanes About this task Procedure 1. Back up all data. 2. If installed, remove the security bezel. 3. Power down the server. 4. Remove all power: a. - Page 36 9. Remove the drive backplane. • Two-bay LFF hot-plug drive backplane • Four-bay SFF hot-plug drive backplane Removal and replacement procedures...
-
Page 37: Replacing The Two-Bay Lff Non-Hot-Plug Drive Backplane
To replace the component, reverse the removal procedure. Replacing the two-bay LFF non-hot-plug drive backplane About this task Procedure 1. Back up all data. 2. If installed, remove the security bezel. 3. Power down the server. 4. Remove all power: a. -
Page 38: Replacing The Hpe Smart Storage Battery Holders
9. Remove the drive backplane. To replace the component, reverse the removal procedure. Replacing the HPE Smart Storage Battery holders About this task WARNING: To reduce the risk of personal injury from hot surfaces, allow the drives and the internal system components to cool before touching them. - Page 39 Remove the server from the rack 5. Remove the access panel. 6. Remove the air baffle. 7. Disconnect the battery cable from the system board connector and remove the HPE Smart Storage Battery. 8. Remove the holders: a. Lift the chassis to access the bottom and push the latch of each holder.
-
Page 40: Replacing The Fbwc Module
To replace the component, reverse the removal procedure. Replacing the FBWC module About this task WARNING: To reduce the risk of personal injury from hot surfaces, allow the drives and the internal system components to cool before touching them. CAUTION: In systems that use external data storage, be sure that the server is the first unit to be powered down and the last to be powered back up. -
Page 41: Replacing The Fan Module
7. If the cache module is covered by an air scoop, remove the air scoop. 8. Disconnect the cache module backup power cable from the cache module. 9. Remove the cache module. To replace the component, reverse the removal procedure. Replacing the fan module About this task CAUTION:... - Page 42 a. Disconnect each power cord from the power source. b. Disconnect each power cord from the server. 4. Do one of the following: • Extend the server from the rack • Remove the server from the rack 5. Remove the access panel. 6.
- Page 43 b. Remove the fan cage. c. Remove the fan module. • Fan 1 Removal and replacement procedures...
- Page 44 • Fan 2 9. If replacing fan 3, do the following: a. Disconnect the fan cables. Removal and replacement procedures...
- Page 45 b. Disconnect all system cables secured in the cable clip from the system board or controller board, then release them from the clip and fan wall. c. Lift the chassis to access the bottom and remove the screws. d. Remove the fan wall. Removal and replacement procedures...
-
Page 46: Replacing The Dimm
e. Remove the failed fan module from the fan wall. To replace the component, reverse the removal procedure. Replacing the DIMM This section provides guidelines to help make informed decisions about replacing a DIMM. Memory and processor information The memory subsystem in this server supports UDIMMs only. The following processors are optimized for single-rank and dual-rank PC4-2133 (DDR4-2133) UDIMMs operating at up to 2133 MT/s: •... - Page 47 • Intel Xeon E3-1200 v6 processors • 3.50-GHz Intel Pentium G4560 processor and 3.60-GHz Intel Pentium G4600 processor • 3.90-GHz Intel Core i3-7100 processor and 4.00-GHz Intel Core i3-7300 processor For the latest memory configuration information, see the product QuickSpecs on the Hewlett Packard Enterprise website.
-
Page 48: Removing The Dimm
DIMM type DIMM rank Maximm capacitiy UDIMM Single-rank (4 GB) UDIMM Single-rank (8 GB) UDIMM Dual-rank (8 GB) UDIMM Dual-rank (16 GB) Intel Xeon E3-1200 v6 processor, 3.50-GHz Intel Pentium G4560 processor, 3.60-GHz Intel Pentium G4600 processor, 3.90-GHz Intel Core i3-7100 processor, or 4.00-GHz Intel Core i3-7300 processor: DIMM type DIMM rank Maximm capacitiy... -
Page 49: Replacing The Heatsink
Replacing the heatsink About this task WARNING: To reduce the risk of personal injury from hot surfaces, allow the drives and the internal system components to cool before touching them. CAUTION: To prevent damage to electrical components, take the appropriate anti-static precautions before beginning any installation, removal, or replacement procedure. - Page 50 Install the heatsink: a. Position the heatsink on the processor backplate. b. Tighten one pair of diagonally opposite screws halfway, then tighten the other pair of screws. c. Finish the installation by completely tightening the screws in the same sequence. 10.
-
Page 51: Replacing The Processor
Replacing the processor About this task WARNING: To reduce the risk of personal injury from hot surfaces, allow the drives and the internal system components to cool before touching them. CAUTION: To avoid damage to the processor and system board, only authorized personnel should attempt to replace or install the processor in this server. - Page 52 CAUTION: To avoid damage to the processor, do not touch the bottom of the processor, especially the contact area. CAUTION: The pins on the processor socket are very fragile. Any damage to them may require replacing the system board. Open the processor locking lever, then open the processor retaining bracket. Grasp the processor by the edges, then lift it out of the socket.
- Page 53 11. Install the processor by using the notches on both sides of the processor to properly align it into the socket. CAUTION: Be sure to close the processor socket retaining bracket before closing the processor locking lever. The lever should close without resistance. Forcing the lever closed can damage the processor and socket, requiring system board replacement.
- Page 54 15. Install the heatsink: a. Position the heatsink on the processor backplate. b. Tighten one pair of diagonally opposite screws halfway, then tighten the other pair of screws. c. Finish the installation by completely tightening the screws in the same sequence. 16.
-
Page 55: Replacing The Flexiblelom Riser Board
Replacing the FlexibleLOM riser board About this task WARNING: To reduce the risk of personal injury from hot surfaces, allow the drives and the internal system components to cool before touching them. CAUTION: To prevent damage to electrical components, take the appropriate anti-static precautions before beginning any installation, removal, or replacement procedure. -
Page 56: Replacing The Gpu Riser Board
9. Remove the FlexibleLOM riser board. To replace the component, reverse the removal procedure. Replacing the GPU riser board About this task WARNING: To reduce the risk of personal injury from hot surfaces, allow the drives and the internal system components to cool before touching them. - Page 57 Procedure 1. If installed, remove the security bezel. 2. Power down the server. 3. Remove all power: a. Disconnect each power cord from the power source. b. Disconnect each power cord from the server. 4. Disconnect all cables from the GPU. 5.
-
Page 58: Replacing The Two-Slot Pcie Riser Board
To replace the component, reverse the removal procedure. Replacing the two-slot PCIe riser board About this task WARNING: To reduce the risk of personal injury from hot surfaces, allow the drives and the internal system components to cool before touching them. CAUTION: To prevent damage to electrical components, take the appropriate anti-static precautions before beginning any installation, removal, or replacement procedure. - Page 59 8. Remove the expansion board. • Slot 1 • Slot 2 Removal and replacement procedures...
-
Page 60: Replacing The System Battery
9. Remove the two-slot PCIe riser board. To replace the component, reverse the removal procedure. Replacing the system battery About this task If the server no longer automatically displays the correct date and time, then replace the battery that provides power to the real-time clock. - Page 61 WARNING: The computer contains an internal lithium manganese dioxide, a vanadium pentoxide, or an alkaline battery pack. A risk of fire and burns exists if the battery pack is not properly handled. To reduce the risk of personal injury: • Do not attempt to recharge the battery.
-
Page 62: Replacing The Front I/O Assembly
For more information about battery replacement or proper disposal, contact an authorized reseller or an authorized service provider. Replacing the front I/O assembly About this task CAUTION: To prevent damage to electrical components, take the appropriate anti-static precautions before beginning any installation, removal, or replacement procedure. Improper grounding can cause electrostatic discharge. -
Page 63: Replacing The System Board
To replace the component, reverse the removal procedure. Replacing the system board About this task WARNING: To reduce the risk of personal injury from hot surfaces, allow the drives and the internal system components to cool before touching them. CAUTION: To prevent damage to electrical components, take the appropriate anti-static precautions before beginning any installation, removal, or replacement procedure. - Page 64 Remove the DIMMs. Remove the heatsink. a. Loosen one pair of diagonally opposite screws halfway, then loosen the other pair of screws. b. Completely loosen all screws in the same sequence. c. Remove the heatsink from the processor backplate. CAUTION: To avoid damage to the processor, do not touch the bottom of the processor, especially the contact area.
- Page 65 14. Replace the system board. CAUTION: The pins on the system board and easily damaged. To avoid damage to the system board: • Do not touch the processor socket contacts. • Do not tilt or slide the processor when lowering the processor into the socket. 15.
- Page 66 16. Remove the processor socket cover. 17. Install the processor by using the notches on both sides of the processor to properly align it into the socket. CAUTION: Be sure to close the processor socket retaining bracket before closing the processor locking lever. The lever should close without resistance.
- Page 67 18. Close the processor retaining bracket, then secure the processor locking lever. 19. Clean the old thermal grease from the heatsink with the alcohol swab. Allow the alcohol to evaporate before continuing. 20. Apply all the grease to the top of the processor in the following pattern to ensure even distribution. 21.
- Page 68 22. Install all components removed from the failed system board. 23. Connect all cables disconnected from the failed system board. 24. Install the air baffle. 25. Install the access panel. 26. Do one of the following: • Slide the server into the rack. •...
-
Page 69: Replacing The Hpe Dl20 Gen9 290-W Non-Hot Plug Power Supply
Remove the server from the rack 6. Remove the access panel. 7. Remove the air baffle. 8. Remove the HPE Smart Storage Battery and holders. 9. Remove the power supply. Replacing the HPE DL20 Gen9 290-W Non-hot plug power supply... -
Page 70: Replacing The Rps Backplane
Do one of the following: • Extend the server from the rack • Remove the server from the rack Remove the access panel. Remove the air baffle. Remove the HPE Smart Storage Battery and holders. Disconnect the RPS backplane cables. Replacing the RPS backplane... -
Page 71: Hp Trusted Platform Module
10. Remove the RPS backplane. 11. Remove the power input module. To replace the component, reverse the removal procedure. HP Trusted Platform Module About this task The TPM is not a customer-removable part. CAUTION: Any attempt to remove an installed TPM from the system board breaks or disfigures the TPM security rivet. -
Page 72: Troubleshooting
• Simplified Chinese The HPE ProLiant Gen9 Troubleshooting Guide, Volume II: Error Messages provides a list of error messages and information to assist with interpreting and resolving error messages on ProLiant servers and server blades. To view the guide, select a language: •... -
Page 73: Diagnostic Tools
Diagnostic tools HPE iLO iLO is a remote server management processor embedded on the system boards of HPE ProLiant and Synergy servers. iLO enables the monitoring and controlling of servers from remote locations. HPE iLO management is a powerful tool that provides multiple ways to configure, update, monitor, and repair servers remotely. -
Page 74: Hpe Insight Remote Support
For more information, see the product documentation on the Hewlett Packard Enterprise website. Insight Online HPE Insight Online is a capability of the Support Center portal. Combined with Insight Remote Support central connect or Insight Online direct connect, it automatically aggregates device health, asset, and support information with contract and warranty information, and then secures it in a single, personalized dashboard that is viewable from anywhere at any time. -
Page 75: Using Uefi System Utilities
• Configuring system devices and installed options • Enabling and disabling system features • Displaying system information • Selecting the primary boot controller • Configuring memory options • Selecting a language • Launching other preboot environments such as the Embedded UEFI Shell and Intelligent Provisioning For more information, see the UEFI System Utilities user guide for your product on the Hewlett Packard Enterprise website. -
Page 76: Re-Entering The Server Serial Number And Product Id
ProLiant Gen8 servers, HPE SSA replaces ACU with an enhanced GUI and additional configuration features. The HPE SSA exists in three interface formats: the HPE SSA GUI, the HPE SSA CLI, and HPE SSA Scripting. Although all formats provide support for configuration tasks, some of the advanced tasks are available in only one format. -
Page 77: Usb Support
• For supported controllers, provides access to additional features. For more information about HPE SSA, see the Hewlett Packard Enterprise website. USB support Hewlett Packard Enterprise servers support both USB 2.0 ports and USB 3.0 ports. Both port types support installing all types of USB devices (USB 1.0, USB 2.0, and USB 3.0), but might run at lower speeds in specific... -
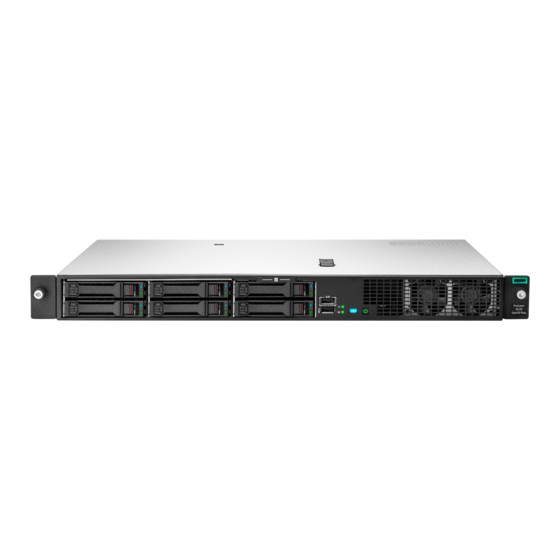
Page 78: Component Identification
Component identification Front panel components • Two-bay LFF non-hot-plug drive model Item Description Optical drive (optional) Serial label pull tab USB 2.0 connectors Drive bays • Two-bay LFF hot-plug drive model Component identification... - Page 79 Item Description Optical drive (optional) Serial label pull tab USB 2.0 connectors Drive bays • Four-bay SFF hot-plug drive model Item Description Optical drive (optional) Serial label pull tab USB 2.0 connectors Drive bays Component identification...
-
Page 80: Front Panel Leds And Buttons
Front panel LEDs and buttons Item Description Status NIC status LED Solid green = Link to network Flashing green (1 flash per second) = Network active Off = No network activity Health LED Solid green = Normal Flashing green (1 flash per second) = iLO is rebooting Flashing amber = System degraded Flashing red = System critical UID button/LED... -
Page 81: Power Fault Leds
2 flashes Memory 3 flashes Riser board PCIe slots 4 flashes FlexibleLOM 5 flashes Removable HPE Flexible Smart Array 6 flashes controller/Smart SAS HBA controller System board PCIe slots 7 flashes Power backplane or storage backplane 8 flashes Power supply... -
Page 82: Rear Panel Leds
Item Description NIC connector 2 Video connector NIC connector 1/iLO management connector USB 3.0 connectors (2) Rear panel LEDs Item Description Status NIC link LED Green = Network link Off = No network link NIC activity LED Solid green = Link to network Flashing green = Network active Off = No network activity Table Continued... -
Page 83: System Board Components
Item Description Status UID LED Solid blue = Activated Flashing blue: • 1 flash per second = Remote management or firmware upgrade in progress • 4 flashes per second = iLO manual reboot sequence initiated • 8 flashes per second = iLO manual reboot sequence in progress •... -
Page 84: Dimm Slot Locations
Item Description System battery Front I/O connector 14-pin power connector 4-pin power connector 8-pin power connector Power supply sideband signal connector Smart Storage Battery connector SATA connector for M.2 SSD/optical drive Storage backup power connector Mini-SAS connector SATA connector for M.2 SSD Fan connector 3 Internal USB 3.0 connector System maintenance switch... -
Page 85: System Maintenance Switch
Slot number Form factor Slot description FlexibleLOM slot FlexibleLOM PCIe x8 PCIe 3 PCIe3 x8 (8,4,2,1) • Two-slot riser board Slot number Form factor Slot description Low-profile PCIe3 x8 (8,4,2,1) Full-height, half-length PCIe3 x8 (8,4,2,1) • GPU riser board Slot number Form factor Slot description —... -
Page 86: Nmi Functionality
CMOS and NVRAM. IMPORTANT: Before using the S7 switch to change to Legacy BIOS Boot Mode, be sure the HPE Dynamic Smart Array B140i Controller is disabled. Do not use the B140i controller when the server is in Legacy BIOS Boot Mode. -
Page 87: Hot-Plug Drive Led Definitions
• Four-bay SFF hot-plug drive model Hot-plug drive LED definitions Hot-plug drive LED definitions... - Page 88 Item Status Definition Locate Solid blue The drive is being identified by a host application. Flashing blue The drive carrier firmware is being updated or requires an update. Activity ring Rotating green Drive activity. No drive activity. Do not remove Solid white Do not remove the drive.
-
Page 89: Fan Locations
Fan locations Fan locations... -
Page 90: Cabling
Cabling Cabling overview This section provides guidelines to help make informed decisions about cabling the server and hardware options to optimize performance. For information on cabling peripheral components, see the white paper on high-density deployment at the Hewlett Packard Enterprise website. CAUTION: When routing cables, always be sure that the cables are not in a position where they can be pinched or crimped. -
Page 91: Two-Bay Lff Hot-Plug Drive Cabling
Two-bay LFF hot-plug drive cabling Item Description Mini-SAS cable Drive power cable Four-bay SFF hot-plug drive cabling Item Description Mini-SAS cable Drive power cable M.2 SSD cabling • Single M.2 SSD SATA cabling Two-bay LFF hot-plug drive cabling... - Page 92 NOTE: M.2 SSD cabling is the same for both LFF and SFF configurations. ◦ Slot 2 of the FlexibleLOM riser cage assembly ◦ Slot 1 of the two-slot PCI riser cage assembly ◦ Slot 2 of the two-slot PCI riser cage assembly Cabling...
- Page 93 • Dual M.2 SSD SATA cabling NOTE: M.2 SSD cabling is the same for both LFF and SFF configurations. ◦ Slot 2 of the FlexibleLOM riser cage assembly Item Description M.2 SSD 1 SATA cable M.2 SSD 2 SATA cable ◦...
-
Page 94: Fbwc Cabling
Item Description M.2 SSD 1 SATA cable M.2 SSD 2 SATA cable ◦ Slot 2 of the two-slot PCI riser cage assembly Item Description M.2 SSD 1 SATA cable M.2 SSD 2 SATA cable FBWC cabling The FBWC solution is a separately purchased option. This server only supports FBWC module installation when a Smart Array P-Series controller is installed. -
Page 95: Smart Storage Battery Cabling
Smart Storage Battery cabling H240 Hot Bust Adapter cabling • Two-bay LFF hot-plug configuration Smart Storage Battery cabling... - Page 96 • Four-bay SFF hot-plug configuration • Two-bay LFF non-hot-plug configuration Cabling...
-
Page 97: P440 Smart Array Controller Cabling
P440 Smart Array Controller cabling • Two-bay LFF hot-plug drive configuration • Four-bay SFF hot-plug drive configuration P440 Smart Array Controller cabling... -
Page 98: Optical Drive Cabling
Optical drive cabling • Two-bay LFF configuration • Four-bay SFF configuration Optical drive cabling... -
Page 99: Fan Cabling
Item Description SATA cable Power cable 4-pin to 4-pin power extension cable Fan cabling Item Description Fan 3 power cable Fan 3 power extension cable Fan 2 power cable Fan 1 power cable Fan cabling... -
Page 100: Front I/O Cabling
Front I/O cabling Power supply cabling HPE 290W non-hot-plug power supply cabling Item Description 14-pin power cable 16-pin power supply sideband signal cable Front I/O cabling... -
Page 101: Redundant Power Supply Backplane Cabling
Redundant power supply backplane cabling Item Description 24-pin power cable 24-pin to 14-pin power extension cable Power supply sideband extension cable 16-pin power supply sideband signal cable Redundant power supply backplane cabling... -
Page 102: Specifications
• HPE 900-W AC 240VDC Power Input Module (PN 775595-B21) This is supported when the two-bay HPE 900-W AC 240VDC RPS Power Backplane option (PN 814835- B21) is installed. These are Entry Level Power Supply products for ProLiant servers. For more information about the power supply features, specifications, and compatibility, see the Hewlett Packard Enterprise website. - Page 103 Hot-plug power supply calculations For hot-plug power supply specifications and calculators to determine electrical and heat loading for the server, see the Hewlett Packard Enterprise Power Advisor website. Specifications...
-
Page 104: Support And Other Resources
IMPORTANT: Access to some updates might require product entitlement when accessed through the Hewlett Packard Enterprise Support Center. You must have an HPE Passport set up with relevant entitlements. Customer self repair Hewlett Packard Enterprise customer self repair (CSR) programs allow you to repair your product. If a CSR part needs to be replaced, it will be shipped directly to you so that you can install it at your convenience. -
Page 105: Remote Support
Documentation Feedback (docsfeedback@hpe.com). When submitting your feedback, include the document title, part number, edition, and publication date located on the front cover of the document. For online help content, include the product name, product version, help edition, and publication date located on the legal notices page. -
Page 106: Acronyms And Abbreviations
Canadian Standards Association Customer Self Repair DDR3 double data rate-3 DDR4 double data rate-4 file allocation table FBWC flash-backed write cache host bus adapter HPE SIM HPE Systems Insight Manager HPE SSA HPE Smart Storage Administrator Acronyms and abbreviations... - Page 107 International Electrotechnical Commission Integrated Lights-Out Integrated Management Log International Organization for Standardization JBOD just a bunch of disks JSON JavaScript Object Notation large form factor Lights-Out Management LRDIMM load reduced dual in-line memory module NAND Not AND nonmaskable interrupt NVDIMM non-volatile dual in-line memory module NVRAM nonvolatile memory...
- Page 108 RBSU ROM-Based Setup Utility RDIMM registered dual in-line memory module REST representational state transfer RoHS Restriction of Hazardous Substances serial attached SCSI SATA serial ATA Secure Digital SELV separated extra low voltage small form factor Service Pack for ProLiant solid-state device standard (DIMM voltage) TMRA recommended ambient operating temperature...
- Page 109 Version Control Agent VCRM Version Control Repository Manager Acronyms and abbreviations...
Need help?
Do you have a question about the ProLiant DL20 and is the answer not in the manual?
Questions and answers