Table of Contents
Advertisement
Quick Install Guide
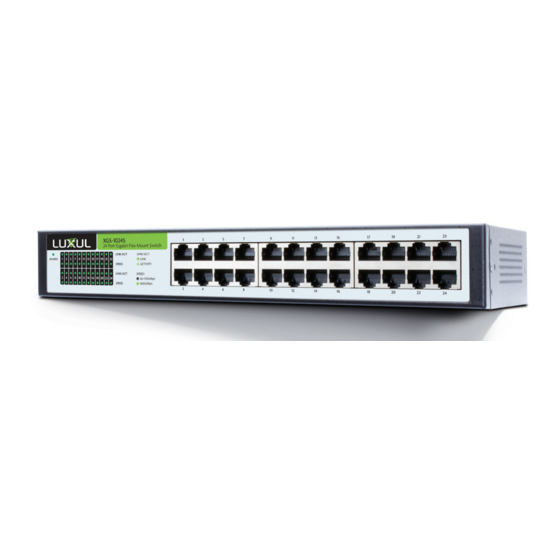
24 Port Gigabit Flex Mount Switch
Expand Your Home or Offi ce Network with
„
24 Gigabit Ethernet Ports
Future Proof Your Network with Gigabit Speeds
„
(10X Performance of Fast Ethernet)
Set-up a Dedicated Network for Optimizing VoIP,
„
Video, Security, or Gaming Applications.
Simply Connected
XGS-1024S
Advertisement
Table of Contents

Related Manuals for Luxul XGS-1024S


Summary of Contents for Luxul XGS-1024S
-
Page 1: Quick Install Guide
Simply Connected Quick Install Guide XGS-1024S 24 Port Gigabit Flex Mount Switch Expand Your Home or Offi ce Network with „ 24 Gigabit Ethernet Ports Future Proof Your Network with Gigabit Speeds „ (10X Performance of Fast Ethernet) Set-up a Dedicated Network for Optimizing VoIP, „... -
Page 2: Document Conventions
No part of this publication may be modifi ed or adapted in any way, for any purposes without permission in writing from Luxul. The material in this manual is subject to change without notice. Luxul reserves the right to make changes to any product to improve reliability, function, or design. No license is granted, either expressly or by implication or otherwise under any Luxul intellectual property rights. -
Page 3: Package Contents
HARDWARE DESCRIPTION Front Panel The front panel of the XGS-1024S includes 24 10/100/1000Mbps RJ45 ports on the right side and LED indicators on the left side. Each port has one Link/Activity LED and one Speed LED. There is also a power LED for indicating whether or not power is being applied to the XGS-1024S. -
Page 4: Rear Panel Layout
XGS-1024S Quick Install Guide The following chart shows the LED indicators of the XGS-1024S along with an explanation of the indicator’ s properties: Status Description Power LED This indicator lights up when the XGS-1024S is properly powered. If this indicator is not lit, please check the AC power cord to ensure proper connection to the outlet and the XGS-1024S. -
Page 5: Rack Mounting
„ XGS-1024S INSTALLATION The XGS-1024S is designed for fl exible mounting options. It can easily be mounted in a standard 19” rack , on a wall or simply placed on a fl at surface using the included Mounting brackets or rubber foots pads. -
Page 6: Desktop Setup
Connecting Devices Use standard Ethernet CAT5, CAT5e, or CAT6 cable to connect the XGS-1024S to a device as described below (CAT6 must be used in order to achieve full Gigabit bandwidth). The XGS-1024S will automatically adjust to the characteristics (speed/ duplex) of the device to which it is connected. -
Page 7: Connecting To A Router Or Other Switch
When a device is properly connected, the Link/Activity LED for each port lights up. Please refer to the LED Indicators section for indicator definitions and troubleshooting. © 2014 Luxul. All Rights Reserved. Other trademarks and registered trademarks are the property of their respective owners... -
Page 8: Warnings And Safety Information
„ ACCESSORIES OUT OF THE REACH OF CHILDREN! The XGS-1024S may become warm when in use for extended time periods. This is normal and is „ not a malfunction. DO NOT install where it will be exposed to paper, cloth or other flammable materials.
Need help?
Do you have a question about the XGS-1024S and is the answer not in the manual?
Questions and answers