
Related Manuals for Nibe SPLIT ACVM 27


Summary of Contents for Nibe SPLIT ACVM 27
- Page 1 MOS GB 0923-1 INSTALLATION AND MAINTENANCE INSTRUCTIONS NIBE™ SPLIT NIBE™ SPLIT 031211 ACVM 270, AMS 10...
-
Page 3: Table Of Contents
Pump capacity diagram Product information Connecting the climate system Features of NIBE SPLIT Connecting the hot water heater Principle of operation NIBE SPLIT Connection of external heat source Waste exchanger part Front panel, indoor module Connecting refrigerant pipes (not supplied) -
Page 4: N] Supply Temp
Outdoor sensor alarm Accessories Accessories Electrical circuit diagram ACVM 270 Safety precautions AMS 10 Caution Care Temperature sensor Especially for units intended for R410A Sensor placement Data for sensor in AMS 10 Item register Data for sensor in ACVM 270 NIBE™ SPLIT... -
Page 5: For Home Owners
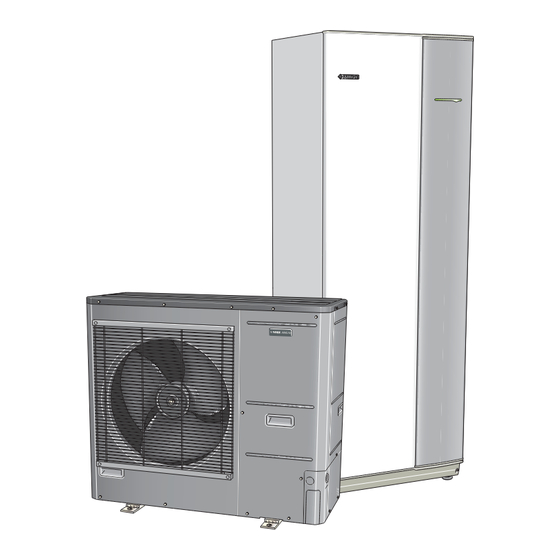
(AMS 10), which utilises the energy in the outdoor air and sends it to the indoor module (ACVM 270), which takes care of the regulation and heat distribution in the house. In order to get the greatest benefit from the system NIBE SPLIT you should read through the For Home Owners section in this Installation and Maintenance Instruction. -
Page 6: Information About The Installation Product Information
1. The refrigerant in AMS 10 retrieves heat from the out- door air then compresses it, which increases the temper- NIBE SPLIT is a complete modern heat pump system that of- ature further. fers effective technical energy saving and reduced carbon 2. -
Page 7: Front Panel, Indoor Module
All control functions connected. Status lamp Shutdown During normal operation, the status lamp lights green. Emergency mode In the event of an alarm, it lights red. Only the circulation pump and electrical addition (electrical step 2) are operational. NIBE™ SPLIT... -
Page 8: How To Use The Front Panel
A key lock can be activated in the main menus by simultan- eously pressing the plus and the minus buttons. The key symbol will then be shown on the display. The same procedure is used to deactivate the key lock. NIBE™ SPLIT... -
Page 9: Comfort Setting Heating General
The addition is only used for anti-freeze if it is deactivated in the menu system, for all operating modes. The different operating modes are: 1. ”Auto” NIBE™ SPLIT... -
Page 10: Default Setting
15 14 13 12 11 - 40 °C - 10 - 20 - 30 OUTSIDE FÖRSKJUTNING UTETEMPERATUR VÄRMEKURVA (+2) OFFSET HEAT CURVE TEMPERATURE Readjusting the default settings If the required room temperature is not obtained, readjust- ment may be necessary. NIBE™ SPLIT... - Page 11 2.1.2 by one incre- ment. Warm weather conditions If the room temperature is low, increase the “Heating curve offset” setting by one step clockwise. If the room temperature is high, reduce the “Heating curve offset” setting by one step anti-clockwise. NIBE™ SPLIT...
-
Page 12: Comfort Setting Cooling General
When the room temperature has dropped below the set room temperature in menu 6.3 by the set value in menu 8.2.5 or the outdoor temperature falls below the set value in menu 8.2.4 by the set value in menu 8.2.5, cooling switches off. NIBE™ SPLIT... -
Page 13: Comfort Setting Hot Water
(A) when the button is pressed and when you continue to press the button the mode changes between 3 hours and standby mode. The increased temperature is maintained by the electrical addition until the period of time has expired. NIBE™ SPLIT... -
Page 14: Maintenance
ACVM 270 and AMS 10 require minimal maintenance after Emptying the vessel commissioning. Contact your installer if the vessel in ACVM 270 needs NIBE SPLIT contains many components and is why monitoring emptying. functions are integrated to help you. If something abnormal occurs, a message appears about Maintenance of AMS 10 malfunctions in the form of different ”alarm”... -
Page 15: Dealing With Comfort Disruption
Activate operating mode ”Only additional heat”. Display not lit. Check and replace any blown circuit and main fuses. Check that the circuit breakers to the indoor unit are off. Check that the switch (SF1) is in normal pos- ition (1). NIBE™ SPLIT... -
Page 16: Operating Mode "Add. Heat Only
ACVM 270 are active. An electrical step of 4 kW is connected. The immersion heater is controlled by a separate thermostat (BT30). The automatic heating control system is not operational, so manual shunt operation is required. Call installer. NIBE™ SPLIT... -
Page 17: Alarm Indications
For Home Owners Alarm indications Alarm indications There are many monitoring functions integrated in NIBE SPLIT Different types of alarms to alert you to any malfunctions, the control computer Alarms with automatic reset (do not need to be acknow- transmits alarm signals that can be read from the front panel ledged when the cause has disappeared). -
Page 18: For The Installer
Weak wind: > 0.5 km Strong wind: > 3 km Weak wind: > 1 km Strong wind: > 10 km Current sensor, 3 phase Safety valve with manometer The enclosed kit is located behind the front service cover in ACVM 270. NIBE™ SPLIT... -
Page 19: Dimensioning Expansion Vessel
2. Install the refrigerant pipes according to the description on page 21. 3. Connect the current limiter, any centralised load control and external contacts as well as the cable between ACVM 270 and AMS 10. See page 28. NIBE™ SPLIT... - Page 20 For the Installer General information for the installer 4. Connect incoming supply to ACVM 270. See page 27. 5. Follow the commissioning instructions on page 31. NIBE™ SPLIT...
-
Page 21: Pipe Installation General
100 l is required. Install the bleed valves where necessary. If this is not fulfilled, volume vessel (NIBE UKV) must be in- The safety valve (FL2) must be installed on (XL15) as illus- stalled. -
Page 22: Connecting The Hot Water Heater
If necessary, a hose extension can be connected. Ventilkoppel-del VALVE CONNECTION-SPLIT Vv från värmepump HW OFF ACVM 270 Proppas PLUGGING Backventil NON-RETURN VALVE Blandningsventil-del MIXING VALVE-SPLIT VALVE CONNECTION-SPLIT MIXING VALVE-SPLIT Hose to waste NIBE™ SPLIT... -
Page 23: Connecting Refrigerant Pipes (Not Supplied)
Pipe dimension Ø15.88 mm (5/8") Ø9.52 mm (3/8") Connection Flare - (5/8") Flare - (3/8") Material Copper quality SS-EN 12735-1 or C1220T, JIS H3300 Minimum material 1.0 mm 0.8 mm thickness Note! Gas shielding must be used when soldering. NIBE™ SPLIT... - Page 24 Evacuate the system down to 4 mbar and fill the system with dry nitrogen to atmospheric pressure to the finish the evacuation. Filling refrigerant AMS 10 is delivered complete with the refrigerant required for the installation. NOTE The refrigerant does not need to be topped up. NIBE™ SPLIT...
- Page 25 The insulation should be at least 13 mm thick. Principle: or connecting indoor Wiring Exterior t Tape tdoor units Gas pipi Gas pipe Liquid piping Liquid pipe Insulation Insulation Connections: and (accessory) Strap Pipe cover (accesso Pipe protection NIBE™ SPLIT...
-
Page 26: Dockings
For the Installer Pipe installation Dockings General NIBE SPLIT can be connected in several different ways , some of which are shown on the following pages. For more de- tailed docking descriptions, see www.nibe.eu. Installation requirements Max pressure, climate system 0.25 MPa (2.5 Bar) - Page 27 For the Installer Pipe installation NIBE SPLIT with climate system and any addition RG10/ RE10 Distributionssystem Climate system Required safety Erf. säker- hetsutr. equipment BT 1 External addition Tillsats Indoor unit Outdoor unit NOTE These are outline diagrams. Actual installations must be planned according to applicable standards.
- Page 28 Temperature sensor, outdoor EP21 Shunt group 2 QN12 Shuttle valve Temperature sensor, supply line 2 EP22 Cooling/heating QN25 Shunt valve Temperature sensor, return 2 GP10 Circulation pump Non-return valve Expansion vessel GP12 Circulation pump Buffer vessel UKV External control NIBE™ SPLIT...
-
Page 29: Electrical Installation General
Terminal block, incoming mains supply Current sensor* Terminal block, outgoing supply and communication Terminal block, external addition Switch Miniature circuit breaker, control sys- Miniature circuit breaker, outdoor unit BT30 Thermostat, standby mode * Only in a 3-phase installation. Temperature limiter NIBE™ SPLIT... -
Page 30: Connecting The Supply
100°C and can be manually reset. Resetting The temperature limiter (FD1) is accessible behind the front cover. The temperature limiter is reset by firmly pressing in its button. NOTE Reset the temperature limiter, it may have tripped during transport. NIBE™ SPLIT... -
Page 31: Setting Max Power, Electrical Addition
Connect the sensor to terminal block X1:1 and X1:2 on A closed contact results in the electrical output being discon- the current limiter board (AA22) via cable gland UB4. Use a nected. 2 core cable of at least 0.5 mm NIBE™ SPLIT... -
Page 32: Connecting External Contacts
3 hours. Alarm outputs External indication of common alarms is possible through the relay function on the current limiter board (AA22), ter- minal block X2:1–2. The wiring diagram on page 65 shows the relay in the alarm position. NIBE™ SPLIT... -
Page 33: Start-Up And Inspection Preparations
The factory setting 100% in menu 2.2.5 is recommended. 1. Check that the temperature limiter (FD1) has not tripped. 2. Switch on the main circuit breaker and check that the miniature circuit breaker (FA1) in ACVM 270 is on. NIBE™ SPLIT... -
Page 34: Commissioning Acvm 270 Without Ams 10 Connected
Use the check list on the following page. The above applies to closed heating systems. Do not replace any part of the split-system without carrying out new checks. NIBE™ SPLIT... -
Page 35: Checklist: Checks Before Commissioning
Shuttle valve (QN12) Refrigerant system Notes Checked Pipe length Height difference Pressurization test Leak testing End pressure vacuum Electrical installation Notes Checked Property's main fuse Group fuse Current limiter/current sensor Accessories Notes Checked External circulation pump Overflow valve Room sensor NIBE™ SPLIT... -
Page 36: Miscellaneous
The Enter button is used to select submenus of the current menu, to permit parameters to be changed and to confirm any changes to parameters. When the menu number ends with a zero this indicates that there is a submenu. NIBE™ SPLIT... -
Page 37: Menu Tree
1.10.9 [S] HW reg value for xP 1.10.10 [S] Return 1.11.0 [S] CompFreq HW set- tings 1.11.1 [S] CompFreq HW set 1.11.2 [S] CompFreq manual 1.11.3 [S] CompFreq at +20 1.11.4 [S] CompFreq at -5 1.11.5 [S] Return 1.12 [N] Return NIBE™ SPLIT... - Page 38 2.2.3.2 [U] Supply temp.at +40 2.2.3.3 [U] Return 2.2.4 [U] Min supply cooling 2.2.5 [U] Circ-pump speed cool 2.2.6 [N] Return 2.3 [U] Max supply temp. 2.4 [U] External adjustment 2.5 [U] Supply/Return temp. 2.6 [U] Degree minutes 2.7 [N] Return NIBE™ SPLIT...
- Page 39 3.5 [U] External adjust. 2 3.6.0 [U] Own heating curve 2 3.6.1 [U] Supply temp.at +20 3.6.2 [U] Supply temp.at -20 3.6.3 [U] Buckling temperature 3.6.4 [U] Supply t. at buckl 3.6.5 [U] Return 3.7 [U] Supply/Return temp 2 3.8 [N] Return NIBE™ SPLIT...
- Page 40 5.14.0 [U] CompFreq act/set 5.14.1 [U] OU current CT 5.14.2 [U] Inverter temp Tho-IP 5.14.3 [U] Return 5.15.0 [S] OU communication 5.15.1 [S] Com. error rate 5.15.2 [S] Com. errors 5.15.3 [S] Reset com. errors 5.15.4 [S] Return 5.16 [N] Return NIBE™ SPLIT...
- Page 41 7.5.4 [U] Offset heating curve 8.3.7 [U] Return 7.5.5 [U] HW off 8.5.0 [U] Period settings 8.5.1 [U] Period time 7.5.6 [U] Return 8.5.2 [U] Max time for HW 7.6 [N] Return 8.5.3 [U] Return 8.6 [N] Return NIBE™ SPLIT...
- Page 42 9.3.7.9 [S] K8 9.3.7.10 [S] K9 9.3.7.11 [S] K10 9.3.7.12 [S] K11 9.3.7.13 [S] K12 9.3.7.14 [S] K13 9.3.7.15 [S] K14 9.3.7.16 [S] Alarm 1 9.3.7.17 [S] Alarm 2 9.3.7.18 [S] Return 9.3.8 [S] Factory setting 9.3.9 [S] Operating state NIBE™ SPLIT...
- Page 43 9.6.8 [S] CompFreq GMz 9.6.9 [S] Return 9.7 [S] Reset alarm 9.8.0 [S] Alarm log 9.8.1.0 [S] Log 1 9.8.x.1 [S] Time 9.8.x.2 [S] Alarm type 9.8.x.3 [S] Run status 9.8.x.4 [S] Run status last 9.8.x.5 [S] Run status time NIBE™ SPLIT...
- Page 44 9.8.x.24 [S] Relay status 9-14 9.8.x.25 [S] Program status 1-8 9.8.x.26 [S] Program status 9-16 9.8.x.27 [S] Return 9.8.2.0 [S] Log 2 9.8.3.0 [S] Log 3 9.8.4.0 [S] Log 4 9.8.5 [S] Clear alarm log 9.8.6 [S] Return 9.9 [S] Return NIBE™ SPLIT...
-
Page 45: Main Menus
Different temperature reductions and increases at selected times are also set from this menu. Menu 8.0 [N] Other adjustments Settings regarding the menu type, language, operating mode settings and load monitor reading are made in the sub-menus to this menu. NIBE™ SPLIT... -
Page 46: 1.0 [N] Hot Water Temp
Next periodic increase to the “Extra hot water” level shown here. Setting range: 1.0 – 10.0 Menu 1.9 [U] HW run time Default value: 2.5 Shows how long hot water charging with the compressor has been in progress (accumulated). NIBE™ SPLIT... -
Page 47: N] Supply Temp
You set the required flow temperature for the break point Menu 1.12 [N] Return here. Return to menu 1.0. Setting range: 0 – 80* °C Default value: 30 °C Menu 2.1.3.5 [U] Return Return to menu 2.1.3.0. * Limited by menu 2.3 Max supply temp.. NIBE™ SPLIT... - Page 48 Menu 2.7 [N] Return +40 °C is selected here. Return to menu 2.0. Setting range: 0 – 25* °C Default value: 10 °C Menu 2.2.3.3 [U] Return Return to menu 2.2.3.0. * Limited by menu 2.3 Max supply temp.. NIBE™ SPLIT...
-
Page 49: N] Supply Temp. 2
You select a break point and the associated temperatures. Note! The “Curve slope” in menu 3.2 must be set to 0 to activate this function. * Limited by menu 3.4 Max supply temp. 2. NIBE™ SPLIT... -
Page 50: 4.0 [N] Outdoor Temp
The actual and set point value for the compressor frequency are shown here. Menu 5.14.1 [U] OU current CT The present phase current to AMS 10 is shown here. Menu 5.14.2 [U] Inverter temp Tho-IP The current inverter temperature is shown here. NIBE™ SPLIT... -
Page 51: 6.0 [N] Room Temperature
Return to menu 5.0. Menu 6.5 [U] Room integrator time Select the integration time for room control here. Setting range: 0 – 120 Default value: 0 Menu 6.6 [N] Return Return to menu 6.0. *Requires accessory and activation in menu 9.3.6. NIBE™ SPLIT... -
Page 52: 7.0 [N] Clock
When the holiday function is deactivated, the heat pump heats the water for an hour, before periodic extra hot water is activated (if periodic extra hot water is activate din menu 1.7). Note! The holiday setting does not deactivate cooling. NIBE™ SPLIT... -
Page 53: 8.0 [N] Other Adjustments
Selected if electric addition is to be used to produce hot The transfer value must be defined depending on the current water and heat. sensors used for the EBV card. Setting range: Off, On Setting range: 100 – 1250 Default value: Off Default value: 300 NIBE™ SPLIT... -
Page 54: 9.0 [S] Service Menus
Setting range: 10 – 43 °C Default value: 43 °C Menu 9.1.7 [S] Time bet. starts Minimum time interval in minutes between compressor starts in the heat pump. Setting range: 0 – 60 min Default value: 0 min NIBE™ SPLIT... - Page 55 Here you select whether the Room unit (RE 10) is to be activ- ated or not (accessory required). Menu 9.2.5 [S] Reg. integrator time Setting range: Off, On I section for additional control. Default value: Off Setting range: 5 – 60 Default value: 10 NIBE™ SPLIT...
- Page 56 Setting range: 1 – 5 days Default value: 1 days Menu 9.3.10.5 [S] Temp. period 2 Selection of the flow temperature in period 2. Setting range: 15 – 50 °C Default value: 40 °C Menu 9.3.10.6 [S] Return Return to menu 9.3.10.0. NIBE™ SPLIT...
- Page 57 Setting range: Yes, No Menu 9.5.6 [S] Run time hot water Default value: Yes The accumulated operating time in hours for hot water pro- duction with compressor since the first start-up is shown here. NIBE™ SPLIT...
- Page 58 Menu 9.8.1.0 – 9.8.4.0 [S] Log 1 – Log 4 Setting range: Off, On The alarm logs are shown in the sub-menus of this menu. Default value: Off Log 1 is the last alarm, log 2 the next to last, etc. NIBE™ SPLIT...
- Page 59 Setting range: Yes, No Inverter error Menu 9.8.6 [S] Return Inverter error Return to menu 9.8.0. Inverter error Menu 9.9 [S] Return Fan alarm LP alarm Return to menu 9.0. Inverter error Sensor fault OU LP alarm Low refrigerant Inverter error NIBE™ SPLIT...
-
Page 60: Alarm List
Occurs if the alarm 77 occurs 10 times in succes- - Low flow during defrost sion. - Abnormally low temperature in the climate sys- S. fault HP Sensor fault, high pressure (BP4). - Open-circuit or short-circuit on sensor input - Sensor does not work NIBE™ SPLIT... -
Page 61: Ams 10 Alarm
- Defective control board in AMS 10 S. fault Tho-D Sensor fault, hot gas in AMS 10 (Tho-D). - Open-circuit or short-circuit on sensor input - Sensor does not work (see "Temperature sensor" section) - Defective control board in AMS 10 NIBE™ SPLIT... - Page 62 - Defective control board in AMS 10 - Fault in the refrigerant circuit Inverter error Failed start for compressor - Defective circuit board for inverter in AMS 10 - Defective control board in AMS 10 - Compressor fault NIBE™ SPLIT...
-
Page 63: Hot Water Alarm
The following alarms set so that the system runs at minimum permitted supply temperature. Alarm Alarm text on the dis- Description May be due to play Sensor fault UG Sensor fault, outdoor temperature (BT1). - Open-circuit or short-circuit on sensor input - Sensor does not work (see "Temperature sensor" section) NIBE™ SPLIT... -
Page 64: Electrical Circuit Diagram Acvm
Miscellaneous Electrical circuit diagram Electrical circuit diagram ACVM 270 NIBE™ SPLIT... - Page 65 Miscellaneous Electrical circuit diagram NIBE™ SPLIT...
- Page 66 Miscellaneous Electrical circuit diagram NIBE™ SPLIT...
- Page 67 Miscellaneous Electrical circuit diagram NIBE™ SPLIT...
- Page 68 Miscellaneous Electrical circuit diagram NIBE™ SPLIT...
-
Page 69: Ams 10
FM01 Fan motor Intelligent power module Induction coil LED1 Indication lamp (red) LED2 Indication lamp (green) Low pressure transmitter Expansion valve for cooling Expansion valve for heating Pump setting Local settings Terminal block Tho-A Temperature sensor, outdoor air NIBE™ SPLIT... -
Page 70: Temperature Sensor Sensor Placement
Temperature sensor, suction gas 7.62 3.09 5.97 2.80 Data for sensor in AMS 10 4.71 2.50 Tho-D 3.75 2.22 (kΩ) 3.00 1.95 2.42 1.70 1.96 1.47 1.60 1.27 1.31 1.09 1.08 0.94 0.746 0.70 0.525 0.51 100 120 140 160 (ºC) NIBE™ SPLIT... -
Page 71: Component Positions Indoor Unit
Miscellaneous Component positions Component positions Indoor unit Component image XL15 XL13 XL14 QM20 QM30 QM31 QN11 QA10 AA22-R26 AA22-R25 AA22-R24 AA22 BT30 AA21 AA23 BT24 BT19 NIBE™ SPLIT... - Page 72 R26 Setting, max boiler temperature AA23 Communication board Contactor Contactor Contactor QA10 Contactor Sensor, thermostats Temperature sensor, HW charging BT19 Temperature sensor, immersion heater BT24 Temperature sensor, docking BT30 Thermostat, standby mode Temperature limiter Component location according to IEC 62400. NIBE™ SPLIT...
-
Page 73: Outdoor Unit
4-way valve Compressor PWB1 Control board PWB2 Inverter board PWB3 Filter board QM35 Service valve, liquid side QM36 Service valve, gas side EEV-H Expansion valve, heating EEV-C Expansion valve, cooling Terminal block, incoming supply and communication Serial number plate NIBE™ SPLIT... -
Page 74: Dimensions
Miscellaneous Dimensions Dimensions Indoor unit (42) 95 65 52 NIBE™ SPLIT... -
Page 75: Outdoor Unit
Opening for pipe and wiring and wiring Opening for pipe and wiring Opening for pipe and wiring Gas pipe Gas pipe Liquid pipe Liquid pipe Cable gland Cable gland Opening for pipe and wiring Opening for pipe and wiring NIBE™ SPLIT... - Page 76 Miscellaneous Technical specifications Technical specifications NIBE SPLIT 1 x 230 V 3 x 400 V Working range during heating with compressor (ambient temperature) -20 – +43 °C Working range during cooling (ambient temperature) +15 – +43 °C Max temperature flow line 65 °C...
-
Page 77: Technical Specifications Performance
3.05 2.86 -15/35 °C (floor) 2.47 2.42 2.38 7/45 °C 3.61 3.55 3.28 2/45 °C 3.04 2.93 2.82 -7/45 °C 2.25 2.44 2.35 -15/45 °C 1.86 1.96 1.89 7/55 °C 2.72 2.75 2.70 -7/55 °C 1.77 1.78 1.87 NIBE™ SPLIT... -
Page 78: Sound Pressure Levels
Sound power level at heating 7/45 (EN 14511) 64.5 65.5 Sound pressure level at 10 m free standing dB(A) 32.5 Noise 10 m Sound pressure level at max compressor, heating 7/45. dB(A) 59.5 47.5 39.5 * Data not available when printed. NIBE™ SPLIT... -
Page 79: Accessories Accessories
Cable kit for ESV 22 or VCC 22. steel. Part no. 067 004 Part no. 067 047 Part no. 067 049 UKV 40: Part no. 088 470 UKV 100: Part no. 088 207 EMK270 Energy measuring ACVM 270 Part no. 067 050 NIBE™ SPLIT... -
Page 80: Safety Precautions Caution
- Locations where the system is exposed to chimney smoke. and personal injury. Only use original accessories. The installation must be carried out by a qualified installer. NIBE™ SPLIT... -
Page 81: Especially For Units Intended For R410A
Dispose of any packaging material correctly. worse. Any remaining packaging material can cause personal injury as it contains - When filling refrigerant, the refrigerant must always leave the bottle nails and wood. in liquid form. Do not touch any buttons with wet hands. NIBE™ SPLIT... -
Page 82: Item Register
Serial number, 3 Sound pressure levels, 76 Supplied components, 16 Key lock, 6, 34 System flow, 31 Lifting, 16 Tariff control, 29 Load monitor, 29 Temperature limiter, 28 Location, 16 Temperature sensor, 68 Transport, 16 Troubleshooting, 13 Maintenance, 12 NIBE™ SPLIT... - Page 84 Tel: +43 (0)7662 8963-0 Fax: +43 (0)7662 8963-44 E-mail: mail@knv.at www.knv.at NIBE Wärmetechnik AG, Winterthurerstrasse 710, CH-8247 Flurlingen Tel: (52) 647 00 30 Fax: (52) 647 00 31 E-mail: info@nibe.ch www.nibe.ch Druzstevni zavody Drazice s.r.o, Drazice 69, CZ - 294 71 Benatky nad Jizerou Tel: +420 326 373 801 Fax: +420 326 373 803 E-mail: nibe@nibe.cz www.nibe.cz...
Need help?
Do you have a question about the SPLIT ACVM 27 and is the answer not in the manual?
Questions and answers