
Subscribe to Our Youtube Channel
Related Manuals for Nibe AirSite GreenMaster-HP Series


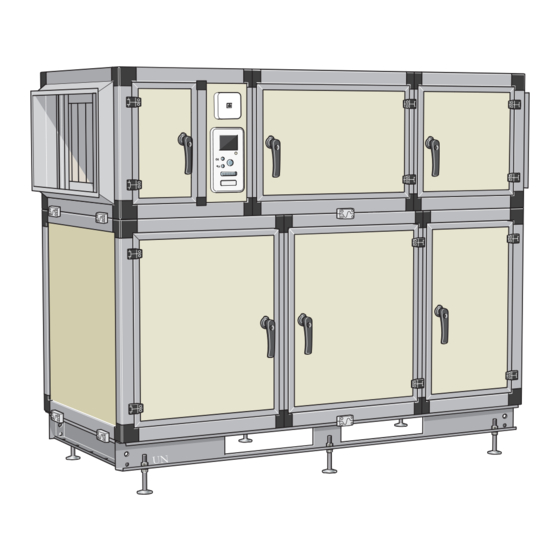
Summary of Contents for Nibe AirSite GreenMaster-HP Series
- Page 1 Installer manual GreenMaster-HP 3-12/12, 3-16/12, 3-16/15, 4-16/12, 4-16/15, 4-16/20, 4-16/30, 5-16/30 Exhaust air heat pump for properties IHB EN 1901-2 431719...
-
Page 3: Table Of Contents
Table of Contents 1 Important information 11 Technical data Safety information Dimensions and technical data Electrical circuit diagram 2 Delivery and handling Item register Transport and storage Assembly Supplied components Dismantling and assembly 3 Design of the exhaust air heat pump General Distribution boxes... -
Page 4: Important Information 4 11 Technical Data
Loose connections or cable mountings can cause abnormal heat This is an original manual. It may not be production or fire. translated without the approval of NIBE Check, after completed installation or service, that no refriger- ant leaks from the system in gas form. - Page 5 Always use a fuse with the correct rating in the locations where Do not dispose of used products with normal household fuses are to be used. waste. It must be disposed of at a special waste station Connecting the unit with copper wire or other metal thread can or dealer who provides this type of service.
- Page 6 Inspection of the installation Current regulations require the heating installation to undergo an installation inspection before it is commissioned. The inspection must be carried out by a suitably qualified person. In addition, fill in the page for information regarding the installation data in the User Manual. Description Notes Signature...
- Page 7 Description Notes Signature Date ✔ Fuses GreenMaster-HP Fuses property Outside sensor Room sensor Current sensor Safety breaker Earth circuit-breaker Setting of emergency mode thermostat GreenMaster-HP Chapter 1 | Important information...
-
Page 8: Delivery And Handling
NIBE AirSite design as- unit’s upper section. sumes that the unit is installed on a sealed roof, which... -
Page 9: Supplied Components
NOTE NOTE Water seals placed outdoors must be protected Some cables are installed with cable ties in with heating cable (accessory set; electric the cable tray. Cut the cable ties when dis- heating coil) to prevent freezing when it is cold mantling and replace them with new ones outdoors. - Page 10 8. Lift off the rear inspection cover from the heat ex- 15. Remove the switch on the level vessel. changer section. 16. Undo the screw joint securing the level vessel to the stay. 17. Lift off the heat exchanger section. 9.
-
Page 11: Design Of The Exhaust Air Heat Pump
3 Design of the exhaust air heat pump On a unit with right-hand inspection, the fan (GQ2) is General located at the top right and the filter (HQ10) to the left. In the lower part, the design is the same for both variants. Picture and text describe a unit with left-hand inspection. - Page 12 4-16/12, 4-16/15, 4-16/20, 4-16/30, 5-16/30 BP14 QM21 EP16 HQ10 BP13 BP12 AA4-SF1 AA4-XJ3 AA4-X9 XJ13 AA4-XJ4 EP14-XL2 EP14-XL1 XL40 EP15-XL2 EP15-XL1 EP14-PF2 EP14 EP15-PF2 EP15 AA101-X3 AA101-X6 AA101-X8 AA101-X10 AA101-X6 AA101-X22 -FC1 -AA101 -AA101 -AA101 -AA3 -AA101 -AA101 -AA101 -AA101 -AA101 -AA3 -AA3...
- Page 13 -XJ7 -XJ11 -AA26 -XJ9 -XJ8 -AA2 -XJ6 -XJ10 -AA27 -AA101-X2 -AA3 -AA101-X1 -AA101 AA25 Pipe connections AA101-X7 Terminal block, step controlled or shunted additional heat. EP14-XL1 Connection, heating medium return AA101-X8 Emergency mode relay EP14-XL2 Connection, heating medium flow AA101-X9 Alarm relay, AUX relay EP15-XL1 Connection, heating medium return...
- Page 14 HQ10 Air filter Miscellaneous Identification plate, cooling module Designations according to standard EN 81346-2. Chapter 3 | Design of the exhaust air heat pump GreenMaster-HP...
-
Page 15: Distribution Boxes
Electrical components Distribution boxes AA10 Soft-start card GreenMaster-HP has various distribution boxes on the Motor cut-out cooling modules (EP14, EP15). The distribution box on Miniature circuit-breaker EP15 differs between the different variants of GreenMas- QA10 Contactor, compressor ter-HP. QA11 Contactor, compressor Distribution box EP14 Choke Distribution box EP15... -
Page 16: Cooling Modules
GreenMaster-HP 3-16/12, 3-16/15, 4-16/15, 4-16/20, Cooling modules 4-16/30, 5-16/30 GreenMaster-HP has two cooling modules, EP14 and BT12 AA100 EP15. BT10 The upper image shows the whole cooling module. In the lower image, the pipe section is hidden in order to show the compressor section. - Page 17 Cooling module EP15 Cooling module EP15 GreenMaster-HP 3-16/12, 4-16/12 GreenMaster-HP 3-12/12 BT12 BT10 BT12 BT10 AA100 AA100 BT11 BT11 BT14 GQ10 BT14 GQ10 BT17 BT17 XL21 XL21 BT15 BT15 XL20 EB10 XL20 EB10 GreenMaster-HP 3-16/15, 4-16/15 BT12 BT10 AA100 BT11 BT14 GQ10 BT17...
- Page 18 GreenMaster-HP 4-16/20 Pipe connections XL20 Service connection, high pressure BT12 AA100 XL21 Service connection, low pressure HVAC components X401 BT10 Circulation pump Brine pump Drainage, climate system Draining, brine side BT11 Sensors etc. High pressure pressostat Low pressure pressostat Sensor, low pressure Temperature sensors, heating medium return BT14 BT10...
-
Page 19: Pipe And Ventilation Connections
4 Pipe and ventilation connections As soon as possible after installation, the ventilation General should be adjusted to ensure the air flow is set according to the planned value for the property. Incorrect adjust- Pipe and ventilation installation has to be performed ment can result in impaired function, recovery and according to applicable regulations. - Page 20 3-12/12, 3-16/12, 3-16/15, 4-16/12, 4-16/15 -BP13 -BP15 -BF2 -BP12 -BT20 -GQ2 -BT21 -QM21 -EP16 EB100 -XL27 -EB100-BT1 -QZ2 -QM21 -XL28 -EP15 -RM13 -EP15-QM34 -EP15-QM42 -QM57 -QM3 -BP6 -QM21 -EP15-QM33 -HQ15 -QM56 -EP15-QM43 -QM21 -FL3 -CM3 -BL1 -EP14 -EP14-QM34 -EP14-QM42 -RM12 -QM55 -BT25 -RM11...
-
Page 21: Dimensions And Pipe Connections
Dimensions and pipe connections 3-12/12, 3-16/12, 3-16/15 Pipe dimensions Connection EP14-XL1 Heating medium 28 mm IN (return) 4-16/12, 4-16/15, 4-16/20, 4-16/30 EP14-XL2 Heating medium 28 mm OUT (supply) EP15-XL3 Heating medium 3-12/12, 3-16/12, 3-16/15, IN (return) 4-16/12, 4-16/15: 28 mm 4-16/20, 4-16/30, 5-16/30: 35 mm EP15-XL4 Heating medium... -
Page 22: Water Heater
A climate system is a system that regulates indoor com- fort with the aid of the control system in GreenMaster- HP, e.g. radiator heating and exhaust air ventilation. Install shut-off valves (not enclosed) as close to the ■ unit as possible, so the flow to the cooling modules can be shut off. -
Page 23: Electrical Connections
5 Electrical connections General EP15-FC1 All internal electrical equipment is connected at the factory. External connections have to be connected ac- cording to the applicable unit specification. Disconnect the air treatment unit before insulation ■ testing the house wiring. If the building is equipped with an earth-fault breaker, ■... -
Page 24: Connections
Connecting external operating voltage for Connections the control system NOTE NOTE To prevent interference, unscreened commu- Mark up any junction boxes with warnings for nication and/or sensor cables to external con- external voltage. nections must not be laid closer than 20 cm from high voltage cables. - Page 25 Temperature sensor, hot water charging (BT6) Temperature sensor, external supply line (BT25) The temperature sensor, hot water charging (BT6) is placed in the submerged tube on the water heater. Connect temperature sensor, external supply line (BT25) to terminal block AA3-X6:5 and AA3-X6:6. Use a twin Connect the sensor to terminal block AA3-X6:7 and AA3- core cable with a cable area of at least 0.5 mm².
-
Page 26: Optional Connections
Connection of fire alarm (BR1) Optional connections Connect fire alarm (BR1) to accessory board (AA5) ter- minal block X2:19-20. Load monitor When many electrical appliances are connected in the property at the same time as the electric additional heat is operating, there is a risk of the property's main fuse tripping. - Page 27 The settings for step controlled additional heat are made AA101-X10 in menu 4.9.3 and menu 5.1.12. 14 15 16 17 18 19 NOTE District heating valve with supply other than 230 V must be powered from a separate supply F1345 GreenMaster-HP source.
- Page 28 The emergency mode relay can be used to activate ex- ternal additional heat, an external thermostat must then be connected to the control circuit to control the temper- AA101-X7 ature. Ensure that the heating medium circulates through 1 2 3 4 the external additional heating.
-
Page 29: External Connection Options
myUpway External connection options When placed indoors, a network-connected cable GreenMaster-HP has five software-controlled AUX inputs (straight, Cat.5e UTP) with RJ45 contact (male) is connec- for connecting the external switch function. This means ted to network socket X9 above the display unit (as illus- that an external switch function can be connected to trated). - Page 30 simply block the additional heat and/or compressor Possible selections for AUX inputs in GreenMaster-HP at certain times of the day (can be selected in menu 4.1.5 after the function is activated). Temperature sensor Activate the function by connecting potential-free Temperature sensor can be connected to GreenMaster- switch functions to two inputs selected in menu 5.4 HP.
-
Page 31: Connecting Accessories
Possible selections for AUX output AA101-X9 It is possible to have an external connection through the 1 2 3 relay function via a potential-free variable relay (max 2 A) on terminal block AA101-X9. NOTE F1345 GreenMaster-HP An accessory board is required if several func- Externt External tions are to be connected to terminal block... -
Page 32: Commissioning And Adjusting
6 Commissioning and adjusting 2. Connector (HR10) next to the fan is in position AUTO. Preparations 3. Air filters (HQ10) are clean and intact. 4. The heat exchanger’s (EP10) fins and pipes are clean and intact. If the ventilation is to be adjusted before heat 5. -
Page 33: Pressure And Leakage Tests
Vent valve (QM21), heat exchanger Pressure gauge, brine Level vessel QM21 EP16 Expansion vessel, brine QM2.1 Drain valve, brine QM2.2 Drain valve, brine QM34 Shut-off valve XL27 Filler connection, brine XL28 Filler connection, brine Flushing with water and cleaning 1. Connect a water hose from the property’s cold water supply to the filler connection (XL27). -
Page 34: Cleaning And Filling
2. Connect water hoses from the property’s cold water Connections, heating medium: 4-16/12, 4-16/15, 4- supply to connections (EP14-XL1) and (EP15-XL1). 16/20, 4-16/30, 5-16/30 3. Open the water supply and flush the system for 10 minutes. 4. Shut off the water supply, empty the system and disconnect the drain hoses from (EP14-XL2) and (15). -
Page 35: Post Adjustment And Venting
2. When filling the brine system, mix the water with 3. When the water that exits the venting valve is not antifreeze in the filling pump’s mixing vessel (2). The mixed with air, close the valve. After a while the mixture should have freezing protection down to pressure starts to rise. - Page 36 Pump adjustment, manual operation Readjusting, venting, collector side Brine side Expansion vessel GreenMaster-HP has brine pumps that are automatically Check the pressure level in the pressure ex- controlled. For manual operation: deactivate “auto” in pansion vessel (CM3) in GreenMaster-HP. If menu 5.1.9 and then set the speed according to the the pressure drops, the system should be diagrams below.
-
Page 37: Control - Menus
7 Control - menus If you do not make all settings via the start guide or need type of fire alarm to change any of the settings, this can be done in the Make settings for the fire alarm in GreenMaster-HP here. menu system. - Page 38 operating time damper Make settings for the max. actuating time before an alarm triggers here. Set the max. actuating time before an alarm is activated here. Setting range: 1–300 s Factory setting: 150 s Compen. due to outd. temp Compensation Kompensering (Pa) (Pa)
-
Page 39: Service And Maintenance
For the following functions to work the USB memory must contain files with software for GreenMaster-HP from NIBE AirSite. The fact box at the top of the display shows information (always in English) of the most probable update that the update software has selected form the USB memory. - Page 40 start updating Menu 7.2 - logging Select “start updating" if you want to start the update. logging7.2 You are asked whether you really want to update the software. Respond "yes" to continue or "no" to undo. If you responded"yes" to the previous question the up- date starts and you can now follow the progress of the update on the display.
- Page 41 When replacing components on GreenMaster- 1. Connect a hose to the bleed valve (QM1) and open HP only replacement parts from NIBE AirSite the valve. Some liquid will run out. may be used. 2. Air must get into the system for the remaining liquid to run out.
- Page 42 Draining the brine system Temperature sensor data If, for example, the brine pump requires replacing or the Temperature Resistance Voltage (VDC) cooling module requires servicing, drain the brine system (°C) (kOhm) 1. Close the shut-off valve (QM34) and the filterball 351.0 3.256 (QZ2) for the brine system.
- Page 43 Pulling out the cooling module Weight of the cooling module Type (GreenMaster-HP) EP14 EP15 3-12/12 120 kg 126 kg 3-16/12, 4-16/12 125 kg 126 kg 3-16/15, 4-16/15 125 kg 134 kg 4-16/20 125 kg 144 kg 4-16/30, 5-16/30 125 kg 144 kg NOTE Switch off GreenMaster-HP and turn off the...
- Page 44 For the following functions to work the USB memory must contain files with software for GreenMaster-HP from NIBE AirSite. The fact box at the top of the display shows information (always in English) of the most probable update that the update software has selected form the USB memory.
- Page 45 start updating Menu 7.2 - logging Select “start updating" if you want to start the update. logging7.2 You are asked whether you really want to update the software. Respond "yes" to continue or "no" to undo. If you responded"yes" to the previous question the up- date starts and you can now follow the progress of the update on the display.
- Page 46 Menu 7.3 - manage settings manage settings 7.3 save settings recover settings Here you can manage (save as or retrieve from) all the menu settings (user and service menus) in GreenMaster- HP with a USB memory. Via "save settings" you save the menu settings to the USB memory in order to restore them later or to copy the settings to another GreenMaster-HP.
-
Page 47: Disturbances In Comfort
9 Disturbances in comfort Disturbances in comfort Text in display Cause It is reset by May be due to ■ Control deviation BP12 The fan cannot maintain its Resets automatically when Check fan. set point value, can be set the sensor measures below ■... - Page 48 Text in display Cause It is reset by May be due to time for filt. change Time set in menu 5.3.22 has It is reset manually in menu. The counter for filter re- expired. placement has reached the set value in the menu since the most recent reset to zero.
-
Page 49: Accessories
10 Accessories Accessory card AXC 50 Docking kit Solar 42 Part no 067 153 An accessory board is required if, for example, a ground water pump or external circulation pump is to be connected Energy measurement kit EMK 300 to GreenMaster-HP at the same time as the indication of common alarm is activated. -
Page 50: Greenmaster-Hp
Immersion heater IU 3 kW 6 kW Part no. 018 084 Part no. 018 088 9 kW Part no. 018 090 SIOX SC:DUO Fire/fire damper module for controlling and monitoring 2 fire dampers. Part no. 800 9213 SIOX SC:UNO Fire/fire damper module for controlling and monitoring 1 fire dampers. - Page 51 11 Technical data Dimensions and technical data For dimensions and technical data, see separate unit specification. GreenMaster-HP Chapter 11 | Technical data...
-
Page 52: Electrical Circuit Diagram
Electrical circuit diagram Air treatment section Chapter 11 | Technical data GreenMaster-HP... - Page 53 GreenMaster-HP 3-12/12 GreenMaster-HP Chapter 11 | Technical data...
- Page 54 Chapter 11 | Technical data GreenMaster-HP...
- Page 55 GreenMaster-HP Chapter 11 | Technical data...
- Page 56 Chapter 11 | Technical data GreenMaster-HP...
- Page 57 GreenMaster-HP Chapter 11 | Technical data...
- Page 58 Chapter 11 | Technical data GreenMaster-HP...
- Page 59 GreenMaster-HP Chapter 11 | Technical data...
- Page 60 Chapter 11 | Technical data GreenMaster-HP...
- Page 61 GreenMaster-HP Chapter 11 | Technical data...
- Page 62 GreenMaster-HP 3-16/12, 4-16/12 Chapter 11 | Technical data GreenMaster-HP...
- Page 63 GreenMaster-HP Chapter 11 | Technical data...
- Page 64 Chapter 11 | Technical data GreenMaster-HP...
- Page 65 GreenMaster-HP Chapter 11 | Technical data...
- Page 66 Chapter 11 | Technical data GreenMaster-HP...
- Page 67 GreenMaster-HP Chapter 11 | Technical data...
- Page 68 Chapter 11 | Technical data GreenMaster-HP...
- Page 69 GreenMaster-HP Chapter 11 | Technical data...
- Page 70 Chapter 11 | Technical data GreenMaster-HP...
- Page 71 GreenMaster-HP 3-16/15, 4-16/15 GreenMaster-HP Chapter 11 | Technical data...
- Page 72 Chapter 11 | Technical data GreenMaster-HP...
- Page 73 GreenMaster-HP Chapter 11 | Technical data...
- Page 74 Chapter 11 | Technical data GreenMaster-HP...
- Page 75 GreenMaster-HP Chapter 11 | Technical data...
- Page 76 Chapter 11 | Technical data GreenMaster-HP...
- Page 77 GreenMaster-HP Chapter 11 | Technical data...
- Page 78 Chapter 11 | Technical data GreenMaster-HP...
- Page 79 GreenMaster-HP Chapter 11 | Technical data...
- Page 80 GreenMaster-HP 4-16/20 Chapter 11 | Technical data GreenMaster-HP...
- Page 81 GreenMaster-HP Chapter 11 | Technical data...
- Page 82 Chapter 11 | Technical data GreenMaster-HP...
- Page 83 GreenMaster-HP Chapter 11 | Technical data...
- Page 84 Chapter 11 | Technical data GreenMaster-HP...
- Page 85 GreenMaster-HP Chapter 11 | Technical data...
- Page 86 Chapter 11 | Technical data GreenMaster-HP...
- Page 87 GreenMaster-HP Chapter 11 | Technical data...
- Page 88 Chapter 11 | Technical data GreenMaster-HP...
- Page 89 GreenMaster-HP 4-16/30, 5-16/30 GreenMaster-HP Chapter 11 | Technical data...
- Page 90 Chapter 11 | Technical data GreenMaster-HP...
- Page 91 GreenMaster-HP Chapter 11 | Technical data...
- Page 92 Chapter 11 | Technical data GreenMaster-HP...
- Page 93 GreenMaster-HP Chapter 11 | Technical data...
- Page 94 Chapter 11 | Technical data GreenMaster-HP...
- Page 95 GreenMaster-HP Chapter 11 | Technical data...
- Page 96 Chapter 11 | Technical data GreenMaster-HP...
- Page 97 GreenMaster-HP Chapter 11 | Technical data...
- Page 98 12 Item register Item register Accessibility, electrical connection, 23 Heating medium side, 21 Accessories, 49 Connecting the climate system, 22 Assembly, 8 Helping the circulation pump to start, 42 Hot water heater, 22 Connecting the hot water heater, 22 Cable lock, 23 Commissioning and adjusting Post adjustment and bleeding, 35 Important information, 4...
- Page 99 Temperature sensor data, 42 USB service outlet, 39, 44 Shunt controlled additional heat, 27–28 Standby mode, 41 Step controlled additional heat, 27 System diagram, 19 Technical data, 51 Temperature sensor, external flow line, 25 Temperature sensor, hot water charging, 25 Temperature sensor, hot water top, 25 Temperature sensor data, 42 Transport and storage, 8...
- Page 104 WS name: -Gemensamt WS version: a613 WS release date: 2019-01-02 09:15 Publish date: 2019-01-28 16:20 NIBE AirSite AB Elementvägen 1 437 36 LINDOME Phone: +46 31 311 32 00 info@nibeairsite.se www.nibeairsite.com 431719...
Need help?
Do you have a question about the AirSite GreenMaster-HP Series and is the answer not in the manual?
Questions and answers