
Related Manuals for RadioLink RC3S


Summary of Contents for RadioLink RC3S
- Page 1 Digital 4-Channel Proportional RC System Instruction Manual RadioLink Electronics Co., Ltd CE FCC ROHS Http://www.radiolink.com.cn *.This manual also appllies to RC4G...
-
Page 2: Table Of Contents
MENU 1. Introduction and service………………………………………………………….2 2. Safety guides………………………………………………………………..…. 2 3. Battery recharge notice……………………………………………………..….…3 4. Contents and specifications………………………………………………..…..….4 5. Receiver installation and binding…………………………………………………5 Usage method of receiver intergrated with gyro and settings........6 7. Display when power switch turned on…………………………………….……...7 ………………..……………………………..9 8. Language Select "LANGUAGE" ………………………………………………....9 9. -
Page 3: Introduction And Service
Introduction and Service Thank you for choosing RadioLink RC system, if you are the first time to use this type of products, please read this statement carefully and strictly in accordance with the requirements of operation. You could refer to the Manual if you meet any problems during the operation . -
Page 4: Battery Recharge Notice
The sequence to shut down is that turn off the receiver power first, and then shut down the transmitter. If the above operations are reverse, it might lead to uncontrolled situation and cause accidents The transmitter needs to be powered by 4 AA alkaline 5# batteries or Ni-MH batteries. -
Page 5: Contents And Specifications
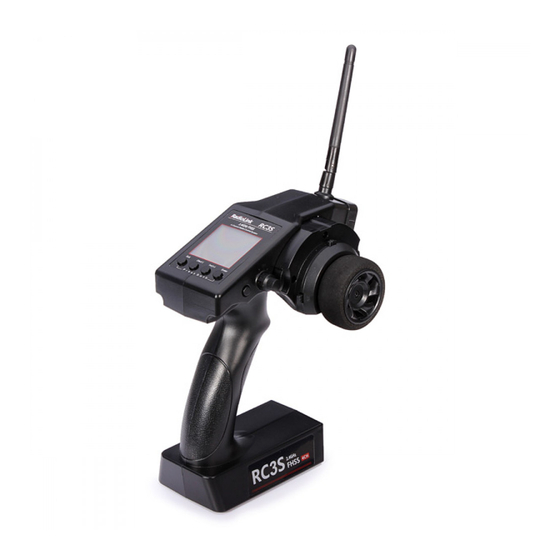
Contents and specifications Contents and Specifications: Contents: 1.Antenna 2.Binding key 3.Channel connection pin Specs: Size:51.5*24*15(mm) Channel number:4 channels Power standard: 4.6-10 Frequency:2.4GHz Weight:5g Contents: 1. Antenna 2. LCD 3. Menu key 4. Turning wheel 5. Function key A throttle 6. Function key B Direction 7. -
Page 6: Receiver Installation And Binding
Failsafe: in 1 second receiver fail getting signal from TX, the throttle will be 0, servos keep the last status. * RC3S standard equipment:A transmitter and a R4EH-H receiver. * RC4G standard equipment:A transmitter and a R4EH-G receiver. Receiver installation and binding Receiver’s connection and installation:... -
Page 7: Usage Method Of Receiver Intergrated With Gyro And Settings
was not damaged, large circuit occurred. 4. Do not cut off or bind the receiver antenna, and try the best to keep it far away from metal and carbon graphite material. 5. Receiver is made up from precise electronic components, it need to be protected from vibration by packaged with sponge or other shock absorption materials. -
Page 8: Display When Power Switch Turned On
3.Gyro usage method in forward and backward direction: When gyro in working state, pull remote acceleraterto keep the car move forward for a distance, release the accelerator in the premise of not playing the direction key, turn around the car body, if the steering engine doesn't move to short press the... - Page 9 LCD Screen When you power on the transmitter, LCD screen shows battery voltage, R/C control system name, model name, steering trim,throttle trim ,the red light flashes two times Model Name can store the data for 10 models, model name will show on the LCD when The system you power on the transmitter.
-
Page 10: Language Select "Language
Language Select "LANGUAGE" Both English and Chinese version menu are available for system, which is convenient for Chinese and English-speaking players to personalize function menus. 1. Access the function menu (By pressing “Exit” and “Enter” buttons simultaneously and holding them down for one second), the Language select function will be chosen. 2. -
Page 11: End Point Adjuster "Epa
End Point Adjuster "EPA" Use this when performing left and right steering angle adjustments, throttle high side/brake side operation amount adjustment, and channel 3 servo up side/down side operation amount adjustment during linkage. Correct the maximum steering angle and left and right steering angles when there is a difference in the turning radius due to the characteristics, etc. -
Page 12: Steering Exp "Stexp
button to select the desired setting item , press “Enter” key the initial value of your selected setting item will blink, then you can press “Dec(-)” or “Inc(+)” button to adjust the value of your selected setting item. (Note: In the interface of adjusting the value, return to the initial value "120" by pressing “Dec(-)”... -
Page 13: Steering Speed "Stspd
3. Press “Enter” button, the adjusted value of the rate stops blinking, now the value of the rate has been set. 4.Return to the initial screen by pressing“ Exit ” button twice. Note: the Vertical cursor shown in the figure moves in step with steering wheel operation. -
Page 14: Throttle Exp "Thexp
4. Press “Enter”button, the adjusted value of the selected setup item stops blinking, now the value of the selected setup item has been set. 5.Return to the initial screen by pressing “Exit” button twice. Throttle EXP "THEXP" This function makes the throttle high side and brake side direction servo operation quicker or milder. - Page 15 “FWD-VTR” function. 2. Press “Dec(-)” or “Inc(+)” button to select RATE for forward side adjustment that you want, when the “MODE” value is “INT” the VTR will not work, only the “MODE” value set to “ACT” the VTR function is available. From the graph you will clearly see the changes you have made on TG.P and RATE.
-
Page 16: Throttle Speed "Thspd
side when you want to make the rise milder. (Note: In the interface of adjusting the value, return to the initial value"0" by pressing “Dec(-)” and “Inc(+)” buttons simultaneously for about 1 second.) (2). Press “Enter” button, the adjusted BRK value stops blinking, now the BRKvalue has been set. - Page 17 function. 2. Press “Enter” button to get into THSPD function interface. 3.If initial MODE setup item is SPEED1,{ if initial MODE setup item is SPEED 2 or OFF, you need to select SPEED 1 by pressing “Dec(-)” or “ Inc(+) ” button to select MODE setup item , then press “Enter”...
-
Page 18: A.b.s. Function "A.b.s
3.If initial MODE setup item is SPEED 2,{ if initial MODE setup item is SPEED 1, you need to select SPEED 2 by pressing “Dec(-)” or “Inc(+)” button to select MODE setup item , then press “Enter” key, SPEED 1 or OFF will blink, press “Dec(-)” or “Inc(+)”... - Page 19 DLY:Delay amount CYC: Cycle speed TGP:Operation point DTY:Cycle duty ratio STM:Steering mixing -ABP : Amount of brake returnSets the rate at which the ser-vo returns versus trigger oper-ation for brake release. When set to 0%, the ABS function is not performed.
- Page 20 Select the setting item "ABP" by pressing “Dec(-)” or “Inc(+)” button,then press “Enter” key and the initial value of “ABP” will blink. Use “Dec(-)” or “Inc(+)” button to adjust the return amount. (Note: In the interface of adjusting the value, return to the initial value "50" by pressing “Dec(-)”...
- Page 21 3. (Pulse speed adjustment) Select setting item "CYC" by pressing “Dec(-)” or “Inc(+)” button, then press “Enter” key and the initial value of “CYC” will blink. Use “Dec(-)” or “Inc(+)” button to adjust the pulse speed (cycle). (Note: In the interface of adjusting the value, return to the initial value "5"by pressing “Dec(-)”...
- Page 22 (Note: In the interface of adjusting the value, return to the initialvalue"0"by pressing “Dec(-)” and “Inc(+)” buttons simultaneously for about 1 second.) Press “Enter” button, the adjusted value stops blinking, now the value has been set. "-3":Brake application time becomes shortest. (Brakes lock with difculty) "+3":Brake application time becomes longest (Brakes lock easily) (Remark) For low grip, set at the - side and for high grip, set at the + side.
-
Page 23: Throttle Acceleration "Accel
7. When ending setting, return to the initial screen by pressing “Exit” button twice. Throttle Acceleration "ACCEL" Function which adjusts the movement characteristic from the throttle neutral position The servo will jump to the input position at its maximum possible speed. Unlike exponential, which adjusts the whole throttle movement into a curve, throttle acceleration simply "jumps"... -
Page 24: Idle-Up "Idlup
Initial value: 0 2. (Brake side acceleration amount adjustment) Press “Dec(-)” or “Inc(+)” button to select “ BRAK ”, press“Enter”key to confirm and the initial value of “BRAK” will blink,then use“Dec(-)”or“Inc(+)”button adjust the acceleration amount. (Note: In the interface of adjusting the value, return to the initial value"0" by pressing “Dec(-)”... -
Page 25: Subtrim "Subtr
1.Enter the function menu and use “Dec(-)” or “Inc(+) ” button to access IDLUP function. 2.Press “Enter” button to get into IDLUP function interface. 3.Press “Enter” key, and the initial value of RATE will blink. Use “ Dec(-)” or “Inc(+)” button to adjust the value. (Note: In the interface of adjusting the value,return to the initial value "... -
Page 26: Servo Reverse "Rev
3. Use “Dec(-)” or “Inc(+)” button to select ST channel, press “Enter” key,and the initial value of ST will blink. Use “Dec(-)” or “Inc(+)” button to adjust the center. (Note: In the interface of adjusting the value, return to the initial value"0"bypressing “Dec(-)”... -
Page 27: Steering Dual Rate/Throttle Dual Rate "D/R
Steering Dual Rate/Throttle Dual Rate "D/R" Dual rate The steering left and right servo travels are adjusted simultaneously.When you want to increase the servo travel, adjust the + side.When you want to decrease the servo travel, adjust the – side. Setup Item Steering D/R RATE... -
Page 28: Atl Function "Atl
ATL Function "ATL" Brake side adjustment This function decreases the set value when the braking effect is strongand increases the set value when the braking effect is weak. Setup Item RATE:Brake amount Brake amount (RATE) 0~100% Initial value: 100% 1.Enter the function menu and use “Dec(-)”... - Page 29 MXMD:Mix mode Enter the function menu and use “ Dec(-)” or “Inc(+)” button to access PMIX function, then press “Enter” button to get into PMIX function interface. 1.(Master channel) Channel selection (MST) ST, TH, CH3 Initial value: ST Select setup item"MST" by pressing “Dec(-)” or “Inc(+)” button, press “ Enter ” button, the initial master channel will blink.
- Page 30 “Dec(-)” and “Inc(+)” buttons simultaneously for about 1 second.) Press “Enter” key, the adjusted value stops blinking,the selected mixing amount has been adjusted. 4.(Right, brake or down side mixing amount adjustment) Mixing amount -100~0~+100 Select the setting item "RGHT", "BRAK", or "DOWN"(These setup items are different depend on the master channel.ST:"RGHT ";...
-
Page 31: Channel 3 Position "Aux
“Dec(-)” or “Inc(+)” button to select “VR” or “SW”. Press “Enter” button, the adjusted value stops blinking, now the value has been set. Model name "NAME" RC3S stores model memories for five models.Each model memory can be named separately according to user’s requirement. Factory default name: MODEL5 1.Enter the function menu and use... -
Page 32: Low Voltage Alarm
3.After accomplish ment of naming,all characters of current name will stop blinking, the new namewill be stored automatically. 4.When ending setting,return to the initial screenby pressing“Exit” button twice.(the new setting model name will appear on the initial screen) Low battery voltage alarm depands battery, The transmitter’s low voltage alarm... - Page 33 Be sure to reset Press “Enter” key, the symbol “YES” will stop blinking, and return to the initial screen. Now the model data is reset to the initial setting that is the default value set at the factory. Not to reset Press “Dec(-)”...
Need help?
Do you have a question about the RC3S and is the answer not in the manual?
Questions and answers