Table of Contents
Advertisement
Quick Links
Advertisement
Table of Contents

Related Manuals for 3D Systems ProJet 2500


Summary of Contents for 3D Systems ProJet 2500
- Page 1 ProJet 2500 ® 3D Printer System User Guide Original Instructions...
-
Page 2: Table Of Contents
INTRODUCTION TO THE PROJET 2500 . . . . . . . . . . . . . . . . . . - Page 3 ProJet 2500 Material Safety Data Sheets/Safety Data Sheets (MSDS/SDS) . . . . . . . . . . . . . . . .
- Page 4 ProJet 2500 Shutdown . . . . . . . . . . . . . . . . . . .
-
Page 6: Introduction To The Projet 2500
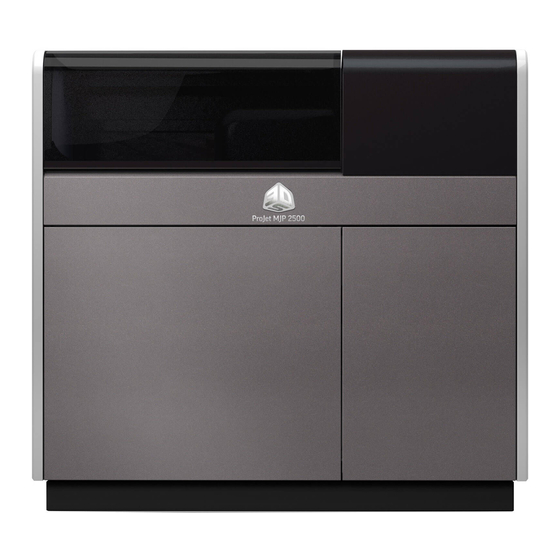
INTRODUCTION TO THE PROJET 2500 The ProJet 2500 3D printer system is a Multi-Jet Printer (MJP) printer . The solid imaging 3D printer produces plastic prototype parts from 3D solid Computer-Aided Design (CAD) models and through the 3D printer system client software . -
Page 7: Safety Guidelines
Do not attempt to access, service, or adjust printer components . Do not attempt to perform any maintenance procedures unless specifically trained to do so. Certified service personnel are those who completed the 3D Systems service training package and are certified to perform service •... -
Page 8: Disposal
3D Systems certified reseller or 3D Systems Technical Support. • 3D Systems assumes no liability or responsibility for proper disposal of uncured part material . Proper disposal of uncured part material is the sole responsibility of the user . HEALTH HAZARDS/IRRITANT Irritant •... -
Page 9: Material Handling
3D Systems or a certified servicing reseller. Assume any liquid or paste-like material is part material. Do not directly touch uncured part material without protective nitrile gloves . Discontinue use of the printer pending service by a 3D Systems Technical Support Representative . -
Page 10: Spilled Material
Promptly remove spilled material, dispose of waste material, and clean up materials per local regulatory requirements . Discontinue use of the 3D printer system, and contact 3D Systems Technical Support for a service visit to determine and repair the source of the leak . -
Page 11: Storing A Partially Used Material Cartridge
. This will cause damage to the material cartridge if used for a later print . To store a partially used Material Cartridge, place it in a ProJet 2500 Cartridge Holder and tighten the vent cap . -
Page 12: Material Characteristics
The photopolymers used in stereolithography may be hazardous if handled improperly . Repeated skin contact with materials may cause sensitization. Consult the manufacturer’s Global Harmonized Standards/Safety Data Sheet (GHS/SDS) for information on specific materials . For further information on this and related topics, consult the 3D Systems – Materials website at http://www.3dsystems.com/ support/materials/msds . -
Page 13: Environmental Conditions
1.4 kW. We recommend an HVAC system that changes the air two to five times per hour. To avoid adversely affecting part quality, do not expose the ProJet 2500 3D printer system to direct air flow from the air conditioning system . -
Page 14: Product Features
The ProJet 2500 material cartridges incorporate smart cartridge technology that contain information about the material that is in the cartridge and the MDM . This information enables the ProJet 2500 to verify that the user does not use the wrong material, use material incorrectly, or use an empty or expired cartridges, ensuring the material is safe to use . -
Page 15: Additional Documentation
ProJet 2500 Installation Guide The Installation Guide details the procedures required to properly install and set up the ProJet 2500 3D Printer at the customer’s site . Only a 3D Systems Certified Field Service Engineer or a Certified Reseller is allowed to install the 3D printer system. An electronic version of this document is available at https://3dscentral.3dsystems.com . -
Page 16: At A Glance
AT A GLANCE PROJET 2500 PRINTER SYSTEM Print Engine : The Print Engine contains major systems such as the Printhead, Planarizer, UV Lamp Assembly, Wave Amp and the IGUS Track . Print Zone: Print Zone is the area where the print platform can be found . All print jobs are built on the print platform . For... -
Page 17: Printing Area
The actual area that you can print a job consists of the length x width 212mm plus the maximum height of a job . This diagram illustrates exactly 8.35in what the maximum build area is for the ProJet 2500 . 288mm 11.34in 3D PRINTER SYSTEM COMPONENTS... -
Page 18: Prints Menu
Status - Active or Non-Active • Type - Type of material in cartridge • Weight - Weight of material remaining in cartridge • Batch - Date batch of material was made • Expires - Date material expires on 3D Systems, Inc. -
Page 19: Tools Menu
. 3D Systems, Inc. -
Page 20: Settings Menu
Printer Shutdown - The user uses this screen to shut down the printer, reboot the printer and do a software restart . Settings Menu In the Settings tab is where you manage the Printer Connection, Network Settings, and Alert Settings . 3D Systems, Inc. - Page 21 Printer Connection - This is where user can add a printer, either manually or by searching through a list of available printers on the network . Email Alerts - User can sign up to enable email alerts here, edit and view admin settings, and alert settings . 3D Systems, Inc.
-
Page 22: Material Delivery Module (Mdm)
MDM . This information enables the ProJet 2500 to verify that the user does not use the wrong material, use material incorrectly, or use empty or expired containers, ensuring the material is safe to use . -
Page 23: Steps For Printing Your First Print
(3b) . Selecting Print Mode The next option to select is the print mode . Available print modes will automatically populate after your select your material . Click on desired mode (4a) and select Next (4b) . 3D Systems, Inc. -
Page 24: Printing The File
Printing the File In the Print Setup tab select File > Import Navigate to the file you wish to print, click Open . Select Auto Place (4a) > Set (4b) . 3D Systems, Inc. - Page 25 A verification box will come up. Check the file name and when you are sure it is the correct file, select Add to Queue (6b) . Print Queue will display current parts being printed (7) and where your job is in the queue . 3D Systems, Inc.
-
Page 26: Post Processing Procedures
. After parts are cooled sufficiently, wearing nitrile gloves, place parts in a metal basket . NOTE: Nitrile gloves must be worn when handling all parts that have not been processed . 3D Systems, Inc. - Page 27 . Place parts in a clean warm mineral bath (approx . 65°C (149°F) ) for 30 minutes . After 30 minutes wipe parts dry and they are ready to use . 3D Systems, Inc.
-
Page 28: Cleaning And Maintenance Procedures
CAUTION: Blade is sharp, be careful not to cut yourself when wiping blade . NOTE: If buildup cannot be cleaned off, or if there are signs of damage to the blade, it may be necessary to replace it . See Replacing Planarizer Blade instructions . 3D Systems, Inc. - Page 29 Loosen 2x5 cap screw holding planarizer blade in place with a 1 .5mm Allen wrench . Carefully pull blade out of aluminum housing . CAUTION: Blade is sharp, be careful not to cut yourself when removing blade . 3D Systems, Inc.
- Page 30 Replace 2x5 cap screw, and tighten with a 1 .5mm Allen wrench while holding blade in place with other hand, as shown . Return planarizer to the Home position . Printer is now ready to use . 3D Systems, Inc.
-
Page 31: Inspect And Clean Planarizer Housing
. For stubborn areas, use a bit of isopropyl alcohol on the cotton swab before wiping . Continue this process for everywhere you see buildup . Rotate planarizer so the two planarizer ducts (A) can be easily accessed as shown . 3D Systems, Inc. - Page 32 . Wipe up any excess material . When all excess material has been cleaned up, planarizer can be returned to Home position and printer is ready to use . 3D Systems, Inc.
- Page 33 NOTE: This is a customer replaceable part . Particulate Filter with Handle - P/N 310259-00 . Photo at right illustrates a filter that needs to be changed. Photo at right illustrates a filter that is clean and new. 3D Systems, Inc.
- Page 34 Options Button WAITING ON SHRINK COMPENSATION INFORMATION FROM WILSONVILLE . Within the Options panel, enter shrink compensation values for X, Y, and Z if necessary (compensation is rarely necessary, see chart on previous page for values) . 3D Systems, Inc.
- Page 35 Enter these two numbers in the corresponding scaling boxes for X and Y . Build Part with Scaling Factors and measure Additional iterations of adjusting scaling factors and taking measurements may be necessary with certain geometries . 3D Systems, Inc.
-
Page 36: Print Platform Removal And Installation
The printer will move the plate into place in order to allow access to the build platform . When prompted, open the door to access the print platform . Wearing nitrile gloves, lift platform off of plate . 3D Systems, Inc. - Page 37 Place new, cleaned print platform on plate . Close top door . The plate will automatically lower and clamp the print platform in place . Before a print will run a message will display asking user to confirm that the platform is clean, verify the platform is clean. 3D Systems, Inc.
-
Page 38: Material Cartridge Removal And Installation
Dispose of the empty cartridge according to local regulations . Wearing nitrile gloves, use a disposable paper towel and wipe all material from the container seal assembly, if necessary you can use some isopropyl alcohol on the paper towel to wipe up the excess material . 3D Systems, Inc. -
Page 39: Installing New Material Cartridge
Vent each cartridge by loosening the material cap (A) by a 1/2 turn counterclockwise . Close the MDM drawer (B), until it’s latched securely . Check the material level under the Materials tab on the UI to ensure cartridge is ceded properly into MDM and ready to print . 3D Systems, Inc. -
Page 40: Material Change Over Procedure (Mco)
Yes, otherwise change the waste bag and select Yes . Close material drawer and continue . The next thing you will be asked is to remove the part material . Remove both cartridges of part material and select OK . 3D Systems, Inc. - Page 41 Next you will be asked to remove the clear part material cartridges . Remove both cartridges and select OK . The next screen that appears is this one with the Prime Build Material checked as shown . 3D Systems, Inc.
- Page 42 . Install the new part material cartridges and select OK . If the MCO completed to satisfaction you will get a popup that states Material Changeover Complete . Select OK . When would this screen appear? If there was an error? 3D Systems, Inc.
-
Page 43: Mdm Maintenance
. Cleaning Metal Surfaces Do not remove any outer panels when cleaning the printer. Panels must only be removed by qualified 3D Systems Technical Support Representatives . Remove dust from outer surfaces of printer by wiping with a clean, dry, lint-free cloth . -
Page 44: Waste Bag Maintenance
Inspect waste bin for any remaining waste . If necessary, wipe out any waste that exists with a lint free cloth and isopropyl alcohol . Replace bag and close MDM . Return printer ONLINE and it is ready to use . 3D Systems, Inc. -
Page 45: Troubleshooting
Hotline. Before you call Customer Support with a problem or question, please make sure that you have the following information: • The serial number of your ProJet 2500 (located on the rear panel) . • A brief description of the problem, including the exact error message . -
Page 46: General
GENERAL ProJet 2500 service procedures must be performed only by a 3D Systems-certified service technician unless this guide explicitly states otherwise. If your 3D printer system needs service, contact 3D Systems Technical Support at the following numbers: • In the United States or Canada, call 800-793-3669 In Europe, call +49-6151-357357 •... -
Page 47: Legal Notices
Copyright 3D Systems, Inc . All rights reserved . Subject to change without notice . This document is copyrighted and contains proprietary information that is the property of 3D Systems, Inc . The licensed user, in the name of whom this document is registered (the “Licensed User”) does not have the right to copy, reproduce, or translate this document in any way or to any media without the prior written... -
Page 48: Basic Regulations
. Changes or modifications to this equipment not approved by 3D Systems can void the authority of the user to operate this equipment. Canada Ce dispositif est conforme aÌ... - Page 49 LA DÉCLARATION DE CE DE CONFORMITÉ We, 3D SYSTEMS, INC . herewith declare that the following described 3D printer system in our delivered version complies with the basic safety and health requirements of the EC Directive 2006/42/EC of the European Parliament and of the Council of 17 May 2006, based on its design and type, as brought into circulation by us .
-
Page 51: Glossary
Print Applicator - The print applicator is the assembly of the ProJet 2500 that applies material to the part as the applicator moves across the material surface . Print Engine - The Print Engine contains major systems such as the Printhead, Planarizer, UV Lamp Assembly, Wave Amp and the IGUS Track Printing - The 3D printer system uses part and support material to create three-dimensional plastic prototype parts . - Page 52 .stl File - The files thate are created using a three-dimensional solid Computer-aided design (CAD) software. These files are used to produce parts . .3dprint File - Files tht have been saved through the Prepare and Print Setup area of 3DSPRINT are saved in this file format. These files will also be added to the Files module. 3D Systems, Inc.
- Page 53 3D Systems, Inc . 333 Three D Systems Circle | Rock Hill, SC | 29730 www .3dsystems .com ©2015 3D Systems, Inc . All rights reserved . P/N 311004-00 Rev . A...
Need help?
Do you have a question about the ProJet 2500 and is the answer not in the manual?
Questions and answers