
Related Manuals for Schulthess SPIRIT Eco WA 4800


Summary of Contents for Schulthess SPIRIT Eco WA 4800
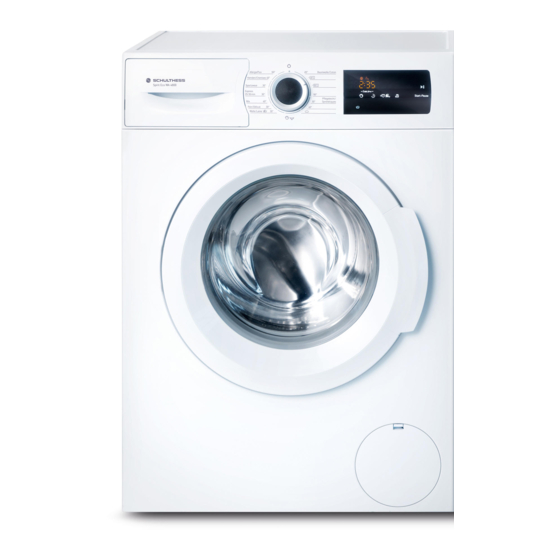
- Page 1 Instruction Manual and Installation Instructions Washing machine SPIRIT Eco WA 4800 Bianca 400...
-
Page 2: Your New Washing Machine
Your new washing machine Display rules : Warning! You have chosen a Schulthess washing machine. This combination of symbol and signal word indicates a possibly dangerous Please take a few minutes to read and situation. Not heeding the warning can become familiar with the advantages of cause death or injuries. -
Page 3: Table Of Contents
Contents e n I n s t r u c t i o n M a n u a l a n d I n s t a l l a t i o n I n s t r u c t i o n s Change the programme default settings Intended use. -
Page 4: Intended Use
Intended use After-sales service ..27 Intended use Technical data ....27 For private domestic use only. ■ I n t e n d e d u s e The washing machine is suitable for ■... -
Page 5: Safety Instructions
Safety instructions If you lean on the washing Safety instructions ■ machine door when it is open, the washing machine Electrical safety may tip over and cause S a f e t y i n s t r u c t i o n s injuries. -
Page 6: Safety For Children
Safety instructions Safety for children Warning Risk of poisoning! Warning Detergents and care products Danger of death! may be poisonous if If children play with the washing consumed. machine, they may get into life- Keep detergents and care threatening situations or injure products out of the reach of themselves. -
Page 7: Environmental Protection
Environmental protection consumption in the selected Environmental programs. The more indicator lights light up, protection the higher the program's consumption. Packaging/used appliance This enables you to compare the E n v i r o n m e n t a l p r o t e c t i o n consumption levels of the different Dispose of packaging in an programs when choosing your... -
Page 8: Getting To Know The Appliance
Getting to know the appliance Getting to know the appliance Washing machine G e t t i n g t o k n o w t h e a p p l i a n c e Detergent drawer ~ Page 17 Operating/display panel Door with door handle 9S Open the door... -
Page 9: Control Panel
Getting to know the appliance Control panel Control panel depending on the model P Select additional program ( Program selector settings if necessary: ~ Page 15 for selecting a program and Speed/Eco switching the machine on and off ■ Water&Rinse+ * via the Off position (Off);... -
Page 10: Display Panel
Getting to know the appliance Display panel More information on the display panel Program progress: Washing ß Rinse à Spin Program end - - - - 0 Program end during Rinse Stop Washing machine door: The washing machine door cannot You will find settings and Note: ú... -
Page 11: Laundry
Laundry Some examples of soiling levels can Laundry be found on ~ Page 13. – Light: Do not prewash, select the P repare the laundry Speed setting if necessary L a u n d r y – Normal Caution! – Heavy: Load less laundry, select Damage to the appliance/fabrics a program with prewash –... -
Page 12: Starching
Detergent Starching Detergent Laundry should not be treated Note: C orrect selection of detergent with fabric softener. D e t e r g e n t The care label is crucial for selecting Liquid starch can be used to stiffen the correct detergent, temperature and fabrics particularly in the Rinse and treatment of the laundry. -
Page 13: Saving Energy And Detergent
Programme default settings Saving energy and detergent Programme default For light and normal soiling, you can settings save energy (lower washing temperature) and detergent. The default program settings are P r o g r a m m e d e f a u l t s e t t i n g s displayed in the display panel after Saving Soiling/note... -
Page 14: Spin
Programme default settings 0 Spin The length of the program is Note: automatically adjusted when the (0, rpm, Spin) program is running. Certain factors can affect the program Depending on what stage the program length, e.g.: is in, you can change the spin speed (in Program settings, rpm;... -
Page 15: Additional Programme Settings15
Additional programme settings Easy Iron Additional programme (3, Easy Iron) settings Button depending on the model You can find an overview of all possible Reduces creasing thanks to a special A d d i t i o n a l p r o g r a m m e s e t t i n g s additional settings on the spin sequence followed by fluffing and supplementary sheet for the installation... -
Page 16: Operating The Appliance
Operating the appliance Change the programme Operating the default settings appliance You can use the default settings for Preparing the washing each wash cycle or change them. O p e r a t i n g t h e a p p l i a n c e machine To do this, repeatedly press the corresponding button until the required... -
Page 17: Measure And Add Detergent And Care Products
Operating the appliance Water hardness (ask your water Notes ■ supply company) Mix items of laundry of varying ■ The manufacturer's instructions on sizes.Laundry items of different sizes ■ the packaging distribute themselves better during The amount of laundry the spin cycle.Individual laundry ■... -
Page 18: Start The Programme
Operating the appliance Childlock Measuring aid* for liquid detergent Position the measuring aid for dosing (3sec.E) the correct amount of liquid detergent: You can lock the washing machine to Pull out the detergent drawer.Press prevent the functions you have set from down the insert and fully remove the being changed inadvertently. -
Page 19: Changing The Programme
Operating the appliance Selecting a spin speed or setting the To continue the program, press the ■ button Start - Pause í.The program program selector to 0 Spin/Drain// continues automatically. Spin/Empty ` and then pressing the Start - Pause í button. Notes Do not leave the door open for too Programme end... -
Page 20: Sensors
Sensors Sensors Setting the signal A utomatic load sensing You can change the following settings: S e n s o r s S e t t i n g t h e s i g n a l The automatic load sensing function The volume of the buttons and ■... -
Page 21: Cleaning And Maintenance
Cleaning and maintenance Remove the detergent residue ■ Cleaning and immediately. Do not clean with a water jet. maintenance ■ Drum Warning C l e a n i n g a n d m a i n t e n a n c e Danger of death! Use chlorine-free cleaning agents, do There is a risk of electric shock if you... -
Page 22: Detergent Solution Pump Blocked
Cleaning and maintenance Leave the detergent drawer open impeller in the detergent solution Note: so that any residual water can pump must be able to rotate. evaporate. Refit the pump cover and screw it on tightly. The handle must be in a vertical position. -
Page 23: Filter In The Water Supply Blocked
Faults and what to do about them. Reattach the drainage hose and Faults and what to do secure the connection using the hose clamp. about them. Emergency release Filter in the water supply F a u l t s a n d w h a t t o d o a b o u t t h e m . blocked e.g. -
Page 24: Information On The Display Panel
Faults and what to do about them. Switch off the appliance. Disconnect the mains plug. Drain the detergent solution Pull the emergency release downwards with a tool and release. The washing machine door can then be opened. Information on the display panel Display Cause/remedy ú... -
Page 25: Faults And What To Do About Them
Faults and what to do about them. Display Cause/remedy E:93 The hot water pressure is too low: (on models with hot Turn on the hot water tap fully. ■ and cold water con- The supply hose for hot water is kinked/trapped. Correct the position of the ■... - Page 26 Faults and what to do about them. Faults Cause/remedy The appliance restarts the Not a fault – the unbalanced load detection system is adjusting an imbalance. spin cycle several times. The programme is taking Not a fault – the unbalanced load detection system is adjusting an imbal- ■...
-
Page 27: After-Sales Service
After-sales service After-sales service Technical data If you cannot correct the fault yourself, Dimensions: A f t e r - s a l e s s e r v i c e T e c h n i c a l d a t a (see section, Faults and what to do 60 x 55 x 85 cm about them) , please contact our after-... -
Page 28: Positioning And Connecting
Positioning and connecting @ Water drain hose Positioning and H Elbow for securing the water connecting drain hose* P Cold water supply hose for models standard/Aqua-Secure, Included with the appliance for models with hot water P o s i t i o n i n g a n d c o n n e c t i n g connection additionally a hot Check the machine for transport Note:... -
Page 29: Installation Surface
Positioning and connecting Installing the appliance in a Caution! Water damage kitchenette The connection points for the water supply hose and water drain hose are Warning under high water pressure. To prevent Danger of death! leaks and water damage, you must There is a risk of electric shock if you follow the instructions in this section. -
Page 30: Hose And Cable Lengths
Positioning and connecting Take the hoses out of the holders. Right-hand connection ■ Unscrew and remove all four transport brace screws. Remove the sleeves. To do this, remove the mains cable from the holders. The following are available from Tip: specialist dealers/the after-sales service: An extension for Aqua-Stop or cold... - Page 31 Positioning and connecting Do not use a used supply hose. Only ■ use the supply hose supplied or one that was purchased from an authorised specialist retailer. Do not bend, squash, modify or cut ■ through the water supply hose (otherwise its strength is no longer guaranteed).
-
Page 32: Water Outlet
Positioning and connecting You can lay the water drain hose as Connection to the appliance follows: Outlet in a sink ■ Warning Risk of scalding! When you are washing at high temperatures, there is a risk of scalding if you come into contact with hot detergent solution e.g. -
Page 33: Levelling
Positioning and connecting Never touch or hold the mains plug Outlet into a plastic pipe with ■ ■ with wet hands. rubber bushing or into a drainage Only pull out the mains cable by the ■ plug and never by the cable, as this could damage it. -
Page 34: Before Washing For The First Time
Positioning and connecting Before washing for the first Preparatory work: Turn off the water tap. time Reduce the water pressure in the supply hose. The washing machine was thoroughly Maintenance – filter in the water tested before leaving the factory. To supply ~ Page 23 remove any water that may be left over Drain the remaining detergent... - Page 36 Central customer service numbers for Switzerland: Schulthess Maschinen AG Phone. 0844 888 222 0844 888 223 Merker AG Phone. 0844 844 222 0844 844 223 9001235365 4800 9608 538741...
Need help?
Do you have a question about the SPIRIT Eco WA 4800 and is the answer not in the manual?
Questions and answers