
Subscribe to Our Youtube Channel
Related Manuals for Vuly Lift Pro


Summary of Contents for Vuly Lift Pro
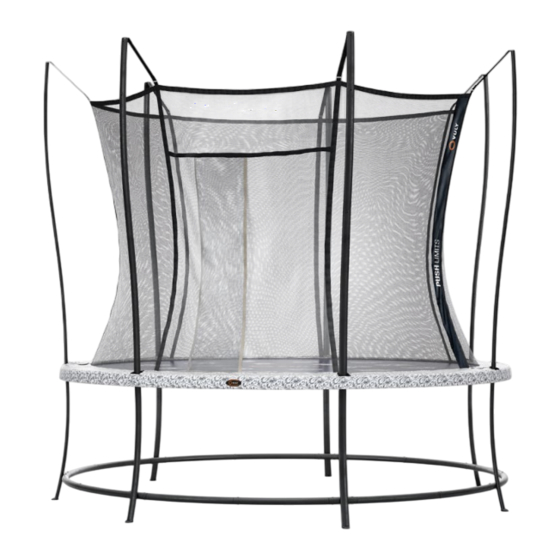
- Page 1 Lift Pro ASSEMBLY MANUAL ATTENTION! SAFETY INFORMATION, INSTALLATION, CARE AND MAINTENANCE INSTRUCTIONS. READ PRIOR TO ASSEMBLING AND USING THE TRAMPOLINE.
-
Page 3: Table Of Contents
Contents Read and follow all instructions in this manual before Responsibility rests with the owner and supervisors of using your trampoline, and do not use the trampoline in the trampoline to make sure that all users are aware of any way that is not described in this manual. the practices specified in this manual. -
Page 4: Disclaimer
The following Conditions of Sale will apply to, and bind the Vuly, its employees, directors and agents are not liable to purchaser of, any Vuly Trampolines Pty. Ltd. ABN: 91 160 793 the customer, their dependents or legal representatives 706 product. -
Page 5: Care And Maintenance
• Wipe dry with an absorbent cloth any water left after rain, Record your date of purchase here: cleaning or use of the Vuly Mister accessory. The mat may discolour or form spots, if left to dry in the sun. -
Page 6: Inspection Checklist
Please follow these usage and behaviour If you discover any safety issues, do not use the trampoline. instructions to ensure safe play. Contact Vuly to order and replace any parts. 3.1. Safe use information Frame Trampolines are great fun, encourage the development of Bending, cracking, twisting or breakage of the Frame Tubes gross motor skills;... -
Page 7: Safe Use Instructions
• For further information or additional instructional Better design, good construction and improved safety material, contact Vuly or an authorised retailer. To learn features go a long way towards minimising the hazards more advanced trampolining skills, contact a suitable associated with trampoline use; however, trampolines need gymnastics / trampoline club. -
Page 8: Hexvex™ Games
Invent new games with HexVex™, and tell Vuly to have them have their turn. For those games that do not require standing published for everyone to enjoy! or bouncing, exercise caution while playing. -
Page 9: Installation
5.0. Installation 5.1. Location planning • Place the trampoline on a flat, level surface with impact attenuating properties – such as grass. • Ensure that the trampoline is sufficiently stable, to prevent the trampoline from tipping over or blowing away. Sandbags or pegs may be suitable anchorage devices. -
Page 10: Assembly Instructions
Spring tool Joiner poles Lower frame tubes (7xA, 7xB) (8xA, 8xB) (9xA, 9xB) 5.3. Assembly instructions – Vuly Lift Pro PRE-ASSEMBLY REMEMBER: WEAR THE VULY • Find level ground, and make sure that there are no GLOVES AT ALL TIMES WHEN obstructions nearby. - Page 11 Frame STEP M, L AND XL MODELS ONLY A. Connect each Lower Frame Tube A to a Lower Frame Tube B. Lower Frame Tubes are those without spring holes or square ends. B. Connect each Upper Frame Tube A to an Upper Frame Tube B. Ensure that the push buttons lock these components together.
- Page 12 Note: The net entrance will be between the two Joiner Poles to the right of the Batch Tag. Rotate your Mat to the desired position, but always ensure that the Batch Tag lines up with a Joiner Pole. The Vuly logo should be centred between two Joiner Poles. STEP A.
- Page 13 A. Unravel your Safety Net and lay it atop your trampoline mat. B. Find the the Vuly Batch Tag on the Safety Net, and rotate the Net so that this Batch Tag lines it up with the one on the Mat.
- Page 14 Springs. Ensure that all openings in the Safety Padding are over the Net Pole holes in the Joiner Poles and that the Vuly logo lines up with the entrance. STEP A. Lift up the Safety Padding, and completely remove the Spring to the left of a Joiner Pole.
- Page 15 WARNING: Make sure that all push buttons are locked and secured before using your trampoline. Bouncing on a trampoline with push buttons that are not locked will cause damage and injury. CONGRATULATIONS! You have finished assembling your Lift Pro trampoline.
-
Page 16: Product Registration
8.0. Warranty To access the Half-Price Parts for Life programme or to lodge All Vuly products are sold with a manufacturing warranty, a Warranty Claim, customers must ensure that their Vuly which assure that the item is free of defects in workmanship product is registered with Vuly. -
Page 17: Exclusions
• Rusting of steel components, 8.4. Warranty Claims • UV deterioration of textile components, If a customer believes that a Vuly product is faulty or defective, • Stretching of springs. they must discontinue use and submit a Warranty Claim. As outdoor products that are actively used, trampolines and A customer must not attempt to use a product if any part is their accessories will experience wear and tear over time. -
Page 18: Australian Consumer Law
Goods fail to be of acceptable quality and the failure does not amount to a major failure. 9.0. Missing parts If a customer believes that a Vuly product does not include all necessary parts, they must immediately lodge a Missing Parts Claim at www.vulyplay.com/support. - Page 20 Vuly warranty policies, terms and conditions.
Need help?
Do you have a question about the Lift Pro and is the answer not in the manual?
Questions and answers