Table of Contents
Advertisement
Attention!
SAFETY INFORMATION, INSTALLATION, CARE AND MAINTENANCE
INSTRUCTIONS. READ PRIOR TO ASSEMBLING AND USING THE PRODUCT.
Vuly cares about safety. Adult supervision is required at all times whilst
equipment is in use.
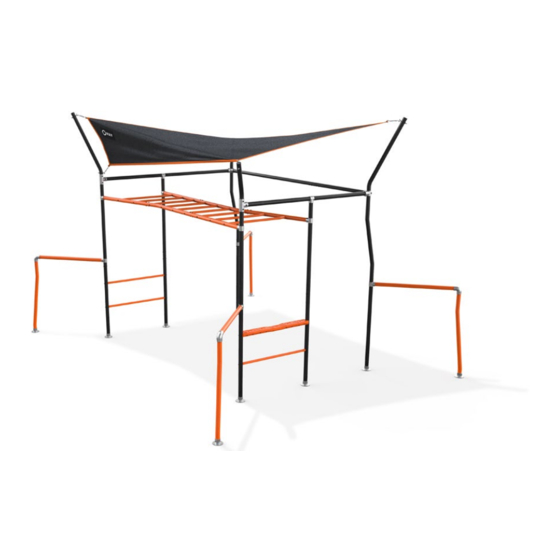
Quest
MANUAL
Large
Visit
www.vulyplay.com/install
for step by step video instructions,
or scan this QR code:
Advertisement
Table of Contents

Subscribe to Our Youtube Channel
Related Manuals for Vuly Quest Large


Summary of Contents for Vuly Quest Large
- Page 1 QR code: SAFETY INFORMATION, INSTALLATION, CARE AND MAINTENANCE INSTRUCTIONS. READ PRIOR TO ASSEMBLING AND USING THE PRODUCT. Vuly cares about safety. Adult supervision is required at all times whilst equipment is in use.
- Page 2 • Ensure that the system is secured with anchors or bolts before use. YOU WILL NEED FOR ASSEMBLY! • Ladder • Rubber mallet • Tape measure or ruler Vuly Play 95 Ingleston Rd, Brisbane QLD 4154 AU: 1300 667 514 US: 1-800-467-1421 www.vulyplay.com...
-
Page 3: Table Of Contents
1.4. Weather care 2.0. Usage and behaviour 2.1. Safe use information 2.2. Safe use instructions 3.0. Pre-assembly 3.1. Parts Reference 4.0. Assembly instructions – Vuly Quest 5.0. Product registration 6.0. Half-price replacement parts 7.0. Warranty 8.1. Warranty periods 8.2. Inclusions 8.3. -
Page 4: Care And Maintenance
Check all swing attachments, chains, ropes and other mechanisms for deterioration, and replace when neccessary. • If you any components are showing signs of rust or deterioration, please contact Vuly to acquire replacement parts. Ensure that these checks are carried out to ensure the safety of this system. -
Page 5: Usage And Behaviour
1.0. Care and maintenance cont. RAIN: Remove any fallen debris after rain and wipe off residual water with a dry cloth. Moisture left on the WIND: Disconnect any accessories, and cover the frame with a storm cover. HEAT: Cover when not in use to minimise UV damage. 2.0. -
Page 6: Pre-Assembly
3.0. Pre-assembly • Install the system on level ground and in a well- lit area, impact-attenuating properties – such as grass. A fall no less than 2 m (6 ft) from any structure or obstruction – onto a hard surface can result in serious injury or such as a fence, garage, house, overhanging branches, death to the equipment user. -
Page 7: Parts Reference
3.2.2. Uneven Ground If assembling the Quest on uneven ground adjusting the flip rails will reduce rocking. If the Quest still seems unsteady, loosen the feet and move them down slightly. 3.3. Parts Reference DO NOT REMOVE PARTS FROM CARTONS UNTIL REQUIRED, OR MIX CARTON CONTENTS. BOX A LARGE: 2x 3-hole Climbing Rail... - Page 8 BOX B LARGE: 4x Lower Frame Tube 1x Step Attachment 3x Step Tube 4x Step Bolts & Nuts 1x Step 8x Foot 8x Frame Bolts & Nuts 8x Locking bolts & Washers LARGE: BOX C 4x Flip Rail 4x Flip Tube 4x Angled 4x T-Joiner Joiner...
- Page 9 BOX F LARGE: 2x Upper Outer Leg Tube 2x Joiner Tube 2x Lower Outer Leg Tube 2x 4-Way Joiner 2x Feet 7x Accessory Joiner 4x Frame Bolts & Nuts BOX G LARGE : 4x Upper Frame Tube 2x Large Top Rail 4x Joiner Tube 2x Large T-Joiner 6x T-Joiner...
-
Page 10: Assembly Instructions - Vuly Quest
4.0. Assembly instructions – Vuly Quest PRE-ASSEMBLY You will require the following: • Ladder • Rubber mallet • Tape measure or ruler ENSURE THAT AS YOU ASSEMBLE THE PRODUCT, YOU FIRMLY TIGHTEN ALL NUTS AND BOLTS, UNLESS DIRECTED. STEP Insert a 3-hole Climbing Rail (A1) into the... - Page 11 STEP Insert a T-Joiner (G5) into one end of each of an Upper Frame Tube (G1), and slide it down. Repeat for the remaining 3 Upper Frame Tubes. STEP Use a rubber mallet to insert a Joiner Tube (G3) into the top of a Lower Frame Tubes (B1), and insert a Foot (B5) into the bottom.
- Page 12 STEP CARGO NET: Insert 2 Lower Frame Tube assemblies into the Cargo Net. CARGO NET: STEP Slide the Step Tube (B2) through the loops at the bottom of the Cargo Net and secure them in the holes in the lower frame tubes. Secure using Locking Bolts & Washers.
- Page 13 STEP A. Insert Step Tubes (B2) between two pairs of Lower Frame Tubes (B1), into the bottom holes on the sides. STEP Attach the four Upper Frame Tubes to the ends of the Climbing Rails, via the T-Joiners. Secure using Joiner Grub Screws .
- Page 14 STEP Connect a Large T-Joiner (G4) to the larger end of a Large Top Rail (G2), and connect a T-Joiner (G5) into the other. Repeat for the 1 remaining Large Top Rail. STEP Attach the completed Large Top Rails to the top of the Upper Frame Tubes.
- Page 15 STEP Insert the Long Shade Tube (L2) and Long Short Shade Tube (L4) into the Large Shade T-Joiner as indicated below. Tube Important: must Short attach the Shade Tubes Shade as directed, otherwise the Tube Shade Cover will be very difficult to fit.
- Page 16 L1/3 STEP Insert a 4-way Joiner (F4) into the top of both Upper Outer Tubes. Connect a Long Outer Shade Tube (L1) through the top end of one 4-way Joiner (F4), and a Short Outer Shade Tube (L3) on the top of the other 4-way Joiner.
- Page 17 STEP Slide the Long Side Rail and Short Side Rail into the Top Rails above the climbing bars. Important: Ensure that your frame matches the below – If you are installing a Flying Fox attachment. particularly the Shade Tubes. Position your Flying Fox Rail and connectors here. STEP WARNING: Do not force any part too far into the Angled Joiner.
- Page 18 STEP Insert i-Bolts at all four top corners of the Shade Tubes, With two people: Attach the Shade Cover using and a fifth at the bend of one Long Shade Tube. Tension Hooks, as shown for your model. STEP Secure your completed Quest to the ground with the Anchors provided. Ensure that Anchors are installed on a grass surface and that the top is level with ground surface, to reduce tripping hazard.
-
Page 19: Product Registration
Vuly. and completing the form with a proof of purchase. Customers who purchase directly from Vuly (through VulyPlay. com, at the Vuly Showroom or over the phone) automatically have their product registered. 6.0. Half-price replacement parts... -
Page 20: Inclusions
7.4. Warranty Claims 7.3.2. Damage through weather conditions If a customer believes that a Vuly product is faulty or defective, Damage to the product that results from weather events – they must discontinue use and submit a Warranty Claim. -
Page 21: Australian Consumer Law
7.4.5 Claiming on non-Vuly products 8.0. Missing parts If a customer believes that a Vuly product does not include Vuly products are delivered to Vuly warehouses prepackaged; all necessary parts, they must immediately lodge a Missing we are unable to check the boxes prior to delivery to ensure Parts Claim at VulyPlay.com/Support. - Page 24 vulyplay.com...
Need help?
Do you have a question about the Quest Large and is the answer not in the manual?
Questions and answers