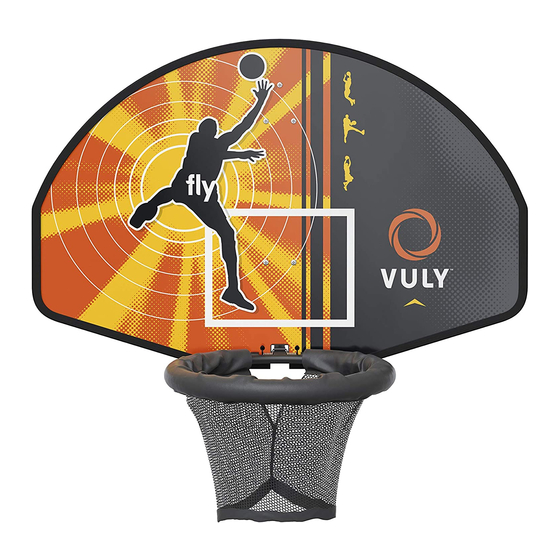
Vuly Basketball Set Manual
Hide thumbs
Also See for Basketball Set:
- Installation instructions (4 pages) ,
- Installation instructions (4 pages) ,
- Manual (20 pages)
Advertisement
Quick Links
Advertisement

Subscribe to Our Youtube Channel
Summary of Contents for Vuly Basketball Set
- Page 1 Basketball Set MANUAL...
- Page 2 BASKETBALL SET | INDEX Assembly for Thunder, Lift and Vuly series PAGE 6 Assembly for Classic Assembly for Ultra Assembly for Flare PAGE 8 PAGE 5 PAGE 10 Assembly for 360 Pro Assembly for Max PAGE 14 PAGE 15...
- Page 3 • Keep water, or other organic material, away from the • Wipe dry any water used to clean the hoop with an Basketball Set; it may cause the system to rust and fail. absorbent cloth; do not leave the hoop to dry in the sun.
- Page 4 BASKETBALL SET | PARTS LIST PARTS Pre-assembled Hoop and Backboard Basketball Pump Upper Support Pole Lower Support Pole, with Bracket Long Bolt Elastic Ties Bolts Spanner Long Foam Short Foam (8ft and 10ft only require 1x) Adapter D-ring Replacement Lower Net Pole...
- Page 5 STEP Remove original net pole STEP Install the new shade cover pole Insert the Lower Net Pole provided with your Basketball Set Assemble your Basketball Set following the instructions provided with that Adaptor into the provided Upper Net Pole. accessory.
- Page 6 ASSEMBLY INSTRUCTIONS | LIFT, THUNDER AND VULY SERIES STEP Click the frame on the backboard into position. STEP Remove the cap on your chosen Upper Net Pole. STEP Insert the Basketball Set frame into the top of the Upper Net Pole. Ensure that all push buttons lock.
- Page 7 ASSEMBLY INSTRUCTIONS | LIFT, THUNDER AND VULY SERIES CONGRATULATIONS! You have attached the Basketball Set to your Lift, Thunder or Vuly series trampoline...
- Page 8 Ensure that the Net Pole is facing the correct way and that the PP belt is not twisted. Remove the U-Shackle from the stitched belt on the Safety Net, and replace it with the D-Ring sold with your Basketball Set.
- Page 9 ASSEMBLY INSTRUCTIONS | ULTRA SERIES STEP A. Insert the Basketball Set into the Adapter at the top of the Upper Net Pole. Note: Ensure that the push button locks. B. Reinsert the full Net Pole into the T-Joiner on your trampoline.
- Page 10 ASSEMBLY INSTRUCTIONS | CLASSIC STEP Push in the spring button on the net pole to remove the net pole from your trampoline. Take off the elastic ties, covers and foams from the net pole. Note: If you have the original model Classic, you may need to unscrew a bolt in the net pole before you can remove it.
- Page 11 ASSEMBLY INSTRUCTIONS | CLASSIC STEP Insert each Bolt, from the front side, through both plates. Fit the nuts loosely, and tighten each incrementally for an even fit. STEP Slide on a Long Foam piece to cover the Lower Support Pole. Note: For 12 and 14 ft models, also slide on a Short Foam piece.
- Page 12 ASSEMBLY INSTRUCTIONS | CLASSIC STEP Attach the Upper Net Pole. Insert the top foam and cover from your net pole into the completed net pole. STEP Fix a Long Bolt Elastic Tie into the top hole. STEP Slide on a Short Foam piece and a cover. STEP Slide on a Long Foam piece and a cover.
- Page 13 B - Fix the Long Bolt Elastic Tie through the net pole. Use a spanner to tighten the nut on the bolt. C - Re-connect the elastic tie to the safety net. CONGRATULATIONS! You have attached the Basketball Set to your Classic trampoline.
- Page 14 STEP A. Click the Basketball Set frame into position. B. Insert the Basketball Set frame into the Accessory Extender – ensuring that the push buttons lock it into place. CONGRATULATIONS! You have attached the Basketball Set to your 360 Pro.
- Page 15 1 : 10 STEP Step 2:take off the cap A. Click the Basketball Set frame into position. B. Insert the Basketball Set frame into the Accessory Extender – ensuring that the push buttons lock it into place. CONGRATULATIONS! You have attached the Basketball Set to your Max..
- Page 16 vulyplay.com...


Need help?
Do you have a question about the Basketball Set and is the answer not in the manual?
Questions and answers