Table of Contents
Advertisement
Quick Links
Advertisement
Table of Contents

Related Manuals for RocketFish RF-HTN102


Summary of Contents for RocketFish RF-HTN102
- Page 1 RocketFish RF-HTN102 Wi-Fi Invite Home Hub User Manual...
-
Page 2: Preface
Preface RocketFish reserves the right to modify this document at any time without obligation or notification of any person or organization of such revisions or changes. Manual Revisions Revision Date Description November 23, 2010 First Draft December 9, 2010 Second Draft... -
Page 3: Table Of Contents
Table of Contents Preface......................................................2 Manual Revisions..................................................2 Trademarks..................................................... 2 Product Overview..................................................5 Package Contents ................................................... 5 System Requirements ................................................5 Introduction....................................................6 Features....................................................7 Hardware Overview................................................8 Hardware Overview (Continued) ............................................9 Installation....................................................12 Connecting the Hub to your Network ............................................13 Configuration....................................................14 Web-based configuration utility............................................17 Accessing the web-based configuration utility ........................................18... - Page 4 Changing the IP Address of the Hub..........................................24 Remote Management ..............................................24 Backing up and Restoring Hub Settings..........................................26 Updating the Firmware of the RF-HTN102........................................26 Rebooting the Hub ................................................27 Configuring Wireless Settings...............................................28 Connecting to a Wireless Network...........................................28 Configuring Advanced Wi-Fi 2.4GHz Settings........................................31 Configuring Advanced 5GHz Wi-Fi Settings........................................33 Configuring WPS (Wi-Fi Protected Setup)........................................14...
-
Page 5: Product Overview
Product Overview Package Contents RF-HTN102 Wi-Fi Invite Home Hub Ethernet Cable (1M RJ45) Quick Start Guide Power Adapter (12V DC 1.25A) CD-ROM with Manual System Requirements an Ethernet-based Cable or DSL Modem • Network requirements IEEE 802.11n or 802.11a/b/g wireless clients •... -
Page 6: Introduction
The RF-HTN102 is a high performance wireless hub designed to easily fit into your network and provide you with an easy way to connect all your devices and enjoy multimedia and games throughout your home. -
Page 7: Features
The performance of this 802.11n wireless hub gives you the freedom of wireless networking at speeds 650% faster than 802.11g. Compatible with 802.11a, 802.11b, and 802.11g Devices - The RF-HTN102 is fully compatible with the IEEE 802.11a, 802.11b, and 802.11g standards, so it can •... -
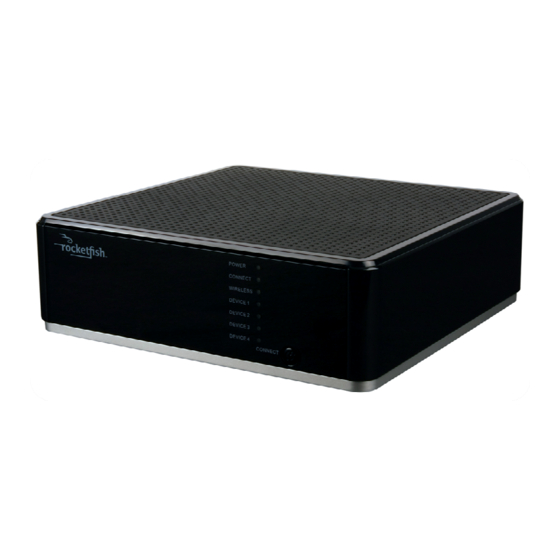
Page 8: Hardware Overview
Hardware Overview FRONT PANEL... -
Page 9: Hardware Overview (Continued)
Hardware Overview (Continued) REAR PANEL... - Page 11 Hardware Overview (Continued) LED Indicators INDICATOR STATUS DESCRIPTION Power Solid Light Router is ON Light Off Router is OFF Connect Blinking Light WPS or Wi-Fi Invite connection in progress Wireless Solid Light Hub is connected to router Data is being sent and received between the hub and a Blinking Light remote router.
-
Page 12: Installation
The RocketFish RF-HTN102 wireless hub allows you to access your network via a wireless connection from anywhere within its operating range. However, keep in mind that there are factors that affect the signal strength and range of your connection. The number of objects the signal must pass through together with the number of radio frequencies in the area will have an effect on the range. -
Page 13: Connecting The Hub To Your Network
Connecting the Hub Connect the Hub 1. Position your hub close to your router which is already online. Connect an Ethernet cable from your computer to one of the DEVICE ports on the back of the hub. 2. Connect the supplied power adapter into the POWER receptor on the back of the hub and then plug into a power outlet or surge protector. -
Page 14: Configuration
Using Wi-Fi to connect to a router You can connect the Wi-Fi Invite Home Hub to your router using either Wi-Fi Invite or Wi-Fi Protected Setup (WPS). Once a Wi-Fi connection is successfully established, you are ready to begin using your Wi-Fi Invite Home Hub. Using WPS The Wi-Fi Protected Setup (WPS) system is a simplified method for: Securing your wireless network during the initial setup... - Page 15 1. Position the router and hub together for the initial Wi-Fi connection procedure. 2. Power on the router and wait approximately 1 minute for it to start before powering on your Wi-Fi Invite Home Hub. 3. Locate the PIN number on the bottom of the Wi-Fi Invite Home Hub and make a note of it. If you are unable to find it, you can: Reset the PIN to the default by clicking Reset PIN Code to Default.
- Page 16 RF-HTN102 by default. 4. On your RocketFish Wi-Fi Invite Home Hub, you should see the CONNECT button flashing if you have invited it successfully. If the CONNECT button is not flashing, confirm that you have invited the correct device from the router and try again. Press the CONNECT button on the front to accept the invitation. Within 2 minutes, the router will connect with the hub and display “WIFI invite connection established!”.
-
Page 17: Web-Based Configuration Utility
Setting the computer’s IP address The RF-HTN102 does not have a DHCP Server. Therefore, the first time you connect your computer to the hub, the hub will not be able to give you a local IP address. You will need to manually set your IP address to a local one in order to connect to the hub. -
Page 18: Accessing The Web-Based Configuration Utility
Configuring the hub This section will describe how to set up the RF-HTN102 using the web-based configuration utility. Accessing the web-based configuration utility To access the web-based configuration utility, open a web browser, such as Internet Explorer and enter the IP address of the hub (192.168.1.50) . -
Page 19: Checking The General Status Of The Hub
Checking the General Status of the Hub After logging in, the Device Basic Status screen is displayed. This is the home screen, denoted by an icon of a house. This screen displays the device uptime and the version of firmware The menu on the left side of the screen allows you to select various status screens which provide information about the status of the various functions of the hub. - Page 20 is connected to.
-
Page 21: Checking The Traffic Statistics
Checking the Traffic Statistics This screen shows the number of packets and bytes received and transmitted for each wireless radio (2.4Ghz and 5GHz) of the hub. -
Page 22: Changing The Administrator Account
Changing hub configuration settings 1. Login to the hub as described in the section titled “Configuring the hub” 2. Click the icon from the animated menu at the bottom of the web- configuration utility. 3. The Date and Time Properties screen is displayed along with a menu on the left from which you can select what you would like to configure. -
Page 23: Changing The Host Name Of The Hub
Changing the Host Name of the Hub The host name of the device is the name which is used to identify the hub on your network. On this screen you may change the host name of the hub to make it easily identifiable. To change the host name, enter a name of up to 15 characters and press the button. -
Page 24: Changing The Ip Address Of The Hub
Changing the IP Address of the Hub The IP Address is the address used to locate and identify the hub on your network. The default IP address of the hub is 192.168.1.50. On this screen you may change the IP address and subnet mask allocated to your hub if you have another device on your network which uses 192.168.1.50, for example. - Page 25 Table is empty, no restrictions are applied and any IP address on your LAN can access the hub.
-
Page 26: Backing Up And Restoring Hub Settings
Updating the Firmware of the RF-HTN102 From time to time, RocketFish may provide firmware updates to add or improve the existing features of your hub. If you need to update the firmware, click the Browse button and select the firmware file you downloaded and click Open. -
Page 27: Rebooting The Hub
Rebooting the Hub To reboot the device, click the Reboot button. The device will power up again and retain your configuration. -
Page 28: Configuring Wireless Settings
Configuring Wireless Settings To connect to a wireless network using your hub, login to the hub and click the icon. The Wi-Fi-2.4GHz Band page appears. Connecting to a Wireless Network To connect to another wireless network using 2.4GHz Wi-Fi: 1. Click the Scan button on the right hand side of the screen. A list of available networks appears after the hub scans for networks in range, including information about the broadcast channel, security type and signal strength. - Page 29 To connect to another wireless network using 5GHz Wi-Fi: 1. Click the Scan button on the right hand side of the screen. A list of available networks appears after the hub scans for networks in range, including information about the broadcast channel, security type and signal strength. . If there are more than 10 networks found, you can press the Next button to see those not listed on the first page.
-
Page 31: Configuring Advanced Wi-Fi 2.4Ghz Settings
Configuring Advanced Wi-Fi 2.4GHz Settings To adjust the advanced settings of the 2.4GHz Wi-Fi function, login to the hub and click on the icon, then select Performance-2.4GHz from the menu on the left. Note: It is only recommended that you change these settings if you are experienced and familiar with what each of these settings does. Wi-Fi Mode: Select a mode from the drop down menu. - Page 32 RTS Threshold: Request To Send (RTS) is an optional feature which can reduce collisions on your network. Set a packet size between 0 and 2346. If the packet that the is transmitting is larger than the threshold, it will initiate the RTS function. If the packet size is equal to or less than the threshold, the will not kick off RTS.
-
Page 33: Configuring Advanced 5Ghz Wi-Fi Settings
Configuring Advanced 5GHz Wi-Fi Settings To adjust the advanced settings of the 5GHz Wi-Fi function, login to the hub and click on the icon, then select Performance-5GHz from the menu on the left. Note: It is only recommended that you change these settings if you are experienced and familiar with what each of these settings does. Wi-Fi Mode: Select a mode from the drop down menu. - Page 34 Click the button to save your settings when you have finished. If you wish to cancel, press the button.
-
Page 35: Troubleshooting
ROM chip in the device itself. Your computer must be on the same IP subnet to connect to the web-based utility. The RF-HTN102 does not have a DHCP Server. Therefore, the first time you connect your computer to the hub, the hub will not be able to give you a local IP address. - Page 36 Close your web browser (if open) and open it. Access the web management. Open your web browser and enter the IP address of your RocketFish router in the address bar. This should open the login page for your web management.
-
Page 37: Technical Specifications
Technical Specifications STANDARDS IEEE 802.11n IEEE 802.11g IEEE 802.11b IEEE 802.11a IEEE 802.3 IEEE 802.3u DEVICE INTERFACE 4 10/100 LAN Ports SECURITY Wi-Fi Protected Access (WPA, WPA2) ADVANCED FEATURES AP-Client supports up to 4 device Wi-Fi Invite DEVICE MANAGEMENT Internet Explorer 6 or later Mozilla Firefox 3.0 or later Safari 3 or later LEDS... - Page 38 Federal Communication Commission Interference Statement This equipment has been tested and found to comply with the limits for a Class B digital device, pursuant to Part 15 of the FCC Rules. These limits are designed to provide reasonable protection against harmful interference in a residential installation. This equipment generates, uses and can radiate radio frequency energy and, if not installed and used in accordance with the instructions, may cause harmful interference to radio communications.
- Page 39 Industry Canada statement: This device complies with Industry Canada licence-exempt RSS standard(s). Operation is subject to the following two conditions: (1) This device may not cause harmful interference, and (2) this device must accept any interference received, including interference that may cause undesired operation. Règlement d’Industry Canada Le présent appareil est conforme aux CNR d'Industrie Canada applicables aux appareils radio exempts de licence.
Need help?
Do you have a question about the RF-HTN102 and is the answer not in the manual?
Questions and answers