
Related Manuals for ALTAI A2C


Summary of Contents for ALTAI A2C
-
Page 1: Quick Setup Guide
Quick Setup Guide Altai A2c Indoor Dual- Band 2x2 802.11ac AP _________________________________________________ Quick Setup Guide Version 1.0 Altai Technologies Ltd. All rights reserved... -
Page 2: Package Contents
Quick Setup Guide Introduction Thank you for purchasing the Altai A2c. This guide provides instructions to install the product and set it up as AP with minimal effort. Package Contents PoE Injector A2c Main Unit (Optional Item) T-Rail Mounting Kit... -
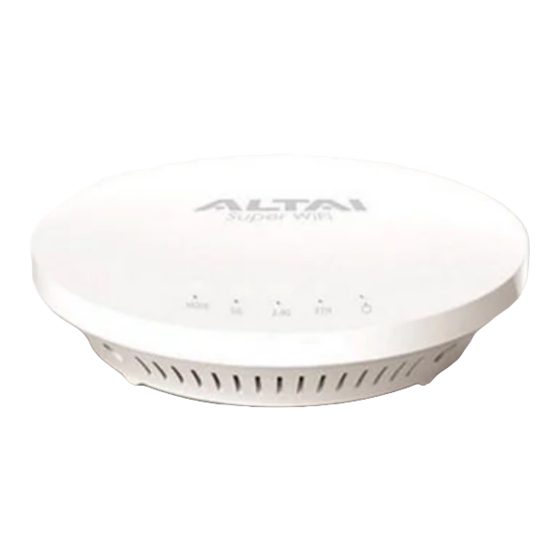
Page 3: Hardware Overview
Power LED 2-3 seconds until the Power LED blink once. Reboot Factory Reset Factory Reset: Press and hold the Reset Button for 5-8 seconds until the Power LED blink twice consecutively. 5-8s 2-3s Altai Technologies Ltd. All rights reserved... -
Page 4: Mounting Options
Clip Clips Clip Spacer 1. Attach the small T-Rail clips to the bottom cover of A2c using the provided short screws (P2.6*10). If extra space is required, use the provided spacers and large T-Rail clips with long screws (P2.6*25). 2. Line up the connected T-Rail clips with an appropriately sized rail and press the unit onto the rail until it snaps into place. - Page 5 Two Cat 5e/6 Ethernet cables AltaiCare account (Optional) for cloud management service Power Options and Cable Connection Instructions You can follow one of the options below for A2c configuration as described in the following sections. Option 1: 802.3at-compliant PoE switch 1.
- Page 6 For Windows 7 users, 1. Go to Control Panel, click Network and Sharing Center and then choose the adapter that you want to connect to A2c unit. In this example, adapter “Local Area Connection 2” is in connection with A2c. Click it and then click Properties.
- Page 7 1. Open a web browser. Type 192.168.1.222 in the address bar and then hit Enter. 2. Login page will come up and you are required to enter username and password. By default, the credentials are: Username: admin Password: admin 3. Click Login. Altai Technologies Ltd. All rights reserved...
- Page 8 2. Make sure the box of Enable Radio is checked. Select AP mode for the field of Radio Mode. Then click Submit. 3. Click WLAN and click More… in Detail of WLAN 0 to go to another page for SSID and security configuration. Altai Technologies Ltd. All rights reserved...
- Page 9 6. Click Save & Apply at the top right corner to have all changes take effect. 7. Hook up the A2c as shown in Network Scenario. The SSID should now be broadcast from A2c and can be seen in the computer for wireless connection.
- Page 10 4. Select one of the following ways for Internet Connection Type. If you are not sure about the connection options, consult your ISP for correct settings. Static Enter IP Address, Subnet Mask, Default Gateway and DNS Server IP Address as provided by ISP. Altai Technologies Ltd. All rights reserved...
- Page 11 - Choose “Disable” for manual input of valid DNS info provided by ISP. DHCP Configuration: For DNS manual input, select “Disable” For PPPoE connection type, enter PPPoE Username and Password provided by ISP for user authentication. PPPoE Configuration (Minimal): For DNS manual input, select “Disable” Altai Technologies Ltd. All rights reserved...
- Page 12 6. Hook up the A2c as shown in Network Scenario and connect a laptop to the broadcast SSID. The laptop will get an IP address 192.168.98.x with x between 2 and 254 and should be ready for Internet access.
- Page 13 A2c_2 (AP) Note: For AltaiCare support, A2c should operate in Switch Mode (Section 3). 1. Users can manage their A2c and set up their hotspot service for subscribers with AltaiCare, which is a cloud-based system. 2. Go to Configuration > Network > General. Make sure A2c can reach Internet and communicate with AltaiCare by inputting valid IP settings either via DHCP or with Static IP configuration.
- Page 14 6. Follow AltaiCare Quick Start Guide and register the A2c in the system for access management of AP and user service and admission control. 7. A2c will appear as online in AltaiCare AP list if the connection is successful. Altai Technologies Ltd. All rights reserved...
- Page 15 Warning A2c may require professional installation depending on the deployment scenario. Only use the power adaptor supplied with A2c. Using a different power adaptor might damage A2c. Disclaimer All specifications are subject to change without prior notice. Altai Technologies assumes no responsibilities for any inaccuracies in this document or for any obligation to update information in this document.
- Page 16 Quick Setup Guide Copyright © 2016 Altai Technologies Limited ALL RIGHTS RESERVED. Altai Technologies Limited Unit 209, 2/F, Lakeside 2, 10 Science Park West Avenue, Hong Kong Science Park, Shatin, New Territories, Hong Kong Telephone: +852 3758 6000 Fax: +852 2607 4021 Web: www.altaitechnologies.com...
Need help?
Do you have a question about the A2C and is the answer not in the manual?
Questions and answers