Table of Contents

Related Manuals for Houghton H2000C


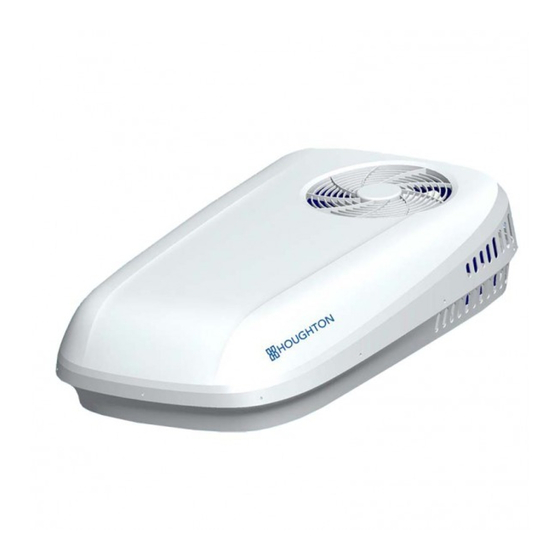
Summary of Contents for Houghton H2000C
- Page 2 Safety Notices Dear user, thank you for choosing a HOUGHTON caravan air-conditioner. For your ease of use and safe maintenance we have included the following symbols in this manual: All the contents with this “Warning” logo are about the safety of the product and the user, the user shall operate in strict compliance with the instructions.
-
Page 4: Table Of Contents
Table of Contents Safety Notes ..............................1 Product Introduction ........................... 3 Packing List ..............................3 Installation Guidance ..........................4 Instructions for Use ........................... 10 Operation Instruction of the Remote Controller ..................11 Product Maintenance ..........................14 Specification Parameters ........................... 15 Exploded Diagram and Parts List ...................... -
Page 6: Safety Notes
Safety Notes Make sure the external electric supply socket of the caravan air-conditioner is effectively grounded in accordance with your local regulations. Failure to ground the unit correctly may cause electric shock or fire. The caravan air-conditioner shall be switched on for electric leakage detection after installation. -
Page 8: Product Introduction
Many factors will affect the total heat load within the caravan and many factors can also affect the working efficiency of the air-conditioner. Before purchasing HOUGHTON BELAIRE, the user shall consult with the caravan manufacturer to understand the total heat load of the caravan and to choose the correct air-conditioner for the application. - Page 9 HOUGHTON BELAIRE requires an AC power source. and may require for generator driving in some remote areas. Requirements for generator include: efficient power source, stable currency, output waveform: sine wave, that shall meet the driving requirements of the compressor. The user shall consult with the generator supply and fully refer to their suggestions.
-
Page 10: Packing List
Packing List Installation parts list Main parts: 1.BELAIRE air-conditioner outdoor unit×1 2.Outlet air duct ×1 3.Chassis reinforced support ×1 4.Plenum mounting bracket ×1 5.Return air filter ×2 6.Plenum assembly ×1... -
Page 11: Installation Guidance
Do not add other parts or restructure the product in the installation. The installers shall be equipped with refrigeration technician qualification certificates. Consult with HOUGHTON or the local distributor in the case of unusual applications or installation conditions that are not specifically covered by this manual. - Page 12 Load bearing of roof: The roof shall be able to bear the weight of the air-conditioner and shall be level without accumulating water. It is suggested that the caravan manufacturer confirms the suitability of the roof for load bearing. ...
- Page 13 Angle of inclination of the air-conditioner shall not be larger than 5° and the back part of the air-conditioner shall not be higher than the front part. For advice on installations outside of these limits please contact with HOUGHTON or the local distributor. Back ...
-
Page 14: Chassis Reinforced
The right lower figure shows the minimum distance of the installation position of the panel, measure in reference to 400x 400mm holes. 400x400 Installation of chassis reinforced support Make sure the roof is clean and dry and free from oil & grease. ... -
Page 15: Plenum Mounting
Installation of outdoor unit Remove the outdoor unit from the carton and move it to the installation position on the roof. Put the outdoor unit over the chassis reinforced support and properly adjust the position to make sure they mate and the four bolt holes on the corners align. - Page 16 Connect M8 bolts, washers and fixing metal plates in Connect the power supply order as the following figure. Pay attention to the local wiring regulations that need Lift the plenum mounting bracket toward the machine. to be followed when connecting to mains supply. ...
- Page 17 Grasp the free end of the flexible air duct and pull it downwards towards the top of the mounting bracket. Pull the air duct down until it engages with the plenum mounting bracket. The duct connects to the bracket with four catches that will clicks when secure.
- Page 18 When you have heard 4 clicks and the end of the duct is firmly parallel to the top side of the bracket then you have successfully connected. Installation of the plenum assembly Connect the socket and plug of the display panel wires Loop and the controller wires;...
-
Page 19: Return Air
bracket with 4 provided pan head screws; Fix the plenum assembly on the plenum mounting Take out the return air filter and fix the plenum to the Finally, fit both return air filter into the plenum ceiling with 4 provided countersunk head screws; properly and the installation is all completed. -
Page 21: Instructions For Use
Instructions for Use Switch on the power to the air-conditioner at the isolation breaker. Start the air-conditioner by switching to FAN mode to select the fan speed; Operate in low speed, medium speed and high speed in turn to check normal operation; ... -
Page 22: Operation Instruction Of The Remote Controller
Operation Instruction of the Remote Controller Remote controller Plenum display Touch screen key Temperature Mode display display... - Page 23 1. Operation of the remote controller Turn unit on Press the on/off key , the machine turns on, the buzzer of the plenum beeps one time and the running mode and temperature will be displayed. Press the fan speed key, high/medium and low speed are available in succession.
- Page 24 Notes Decrease the setting temperature In the heat mode, the inner air blower Press the downward key to set the temperature lower features cold protection function and will have than the room temperature. a time delay for starting up; when in a very low environment temperature, the inner air blower will possibly be on and off.
- Page 25 temperature is 24℃ in high fan speed. Display symbols of panel modes are as: cooling , dry , heating automatic Notes In case the plenum touch screen key is locked by the remote controller, operations of the key would be not available. Press the lock key on the remote controller again to unlock! Tips When in the automatic mode, according...
-
Page 26: Product Maintenance
Filter The return air filters are the only components that n Check and clean the filter screen each week when by dirt. Product Maintenance The filter should be washed frequently to ensure eff Pull out the filter from the panel before washing in Maintena ... - Page 27 Specification P...
- Page 28 Model H2000C H2400 H2600 Power supply 220-240V/50Hz 220-240V/50Hz 220-240V/50Hz Refrigerant charged R407C/450g R407C/450g R407C/420g Rated cooling capacity (W) 2000 2400 2600 —— Rated heating capacity (W) 2400 2600 Input power for cooling (W) 1150 —— Input power for heating (W) 1050 Rated current for cooling(A)
-
Page 29: Exploded Diagram And Parts List
Exploded Diagram and Parts List... - Page 30 No four-way valve components for cooling only units!
- Page 31 4728-1000-08 Evaporator housing 4728-1000-07 External motor bracket 4728-1000-13 Motor screw 4728-1700-27 Outer rotor fan 4618-1000-06 Compressor 1(H2400) 4718-1000-06 Compressor 1(H2000C) 4738-1000-06 Compressor 1(H2600) 4728-1210-00 Condenser components 4728-1030-00 Four-way valve components 4638-1220-00 Evaporator components 4638-1230-04 Evaporator retaining plate 4728-1000-11 Compressor capacitor cap...
- Page 32 4709-0000-04 Air duct 4729-0000-05 Plenum mounting bracket 18-10-59 M8 bolt 4709-1100-01 Fixing metal plate 4729-1000-00 Plenum assembly Trouble shoo To make sure the mode is chosen as Cooling, and the No display of the plenum when press the On/Off light of cooling mode is on;...
- Page 33 The temperature setting value on the remote controller should be higher than the indoor temperature; the compressor has a delay start for three minutes; More time would be needed for starting heating under extremely cold condition. Poor cooling capacity ...
- Page 34 Circuit Di H2400 、 H2600 H2000C...
- Page 35 Service Book Service 1 (Within 12 months from mounting date) Service 2 (Within 36 months from mounting date) Service 3 (Within 60 months from mounting date) Service:...
- Page 36 Clean below head cover of roof unit. Control all cables and connectors. Remove inner plenum and tighten 4 bolts with correct torque. Check ventilator can move freely. Test the unit performance in heat, cool and dry mode. Test the unit for noise and vibrations.
Need help?
Do you have a question about the H2000C and is the answer not in the manual?
Questions and answers
Ma clim ne refroidi plus elle indique le code E3 et E4 , comment puis-je résoudre le problème ?
Comment régler le problème de ma clim qui indique un code d'erreur E3 et E4