Advertisement
Table of Contents
Advertisement
Table of Contents

Related Manuals for Houghton BELAIRE T135C


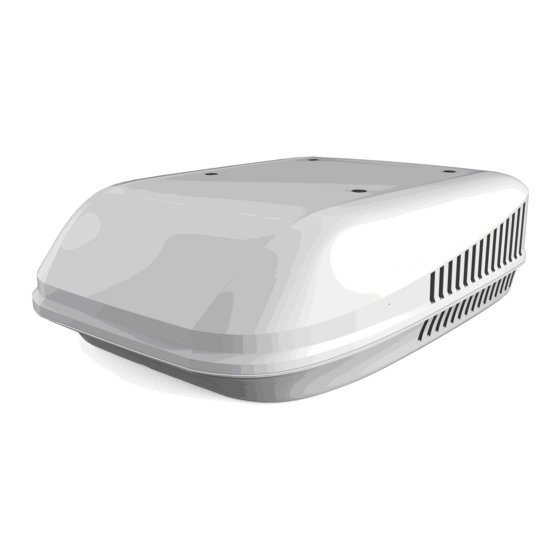
Summary of Contents for Houghton BELAIRE T135C
- Page 2 Safety Notices Dear user, thank you for choosing a HOUGHTON caravan air-conditioner. For your ease of use and safe maintenance, we have included the following symbols in this manual: All the contents with this “Warning” logo are about the safety of the product and the user, the user shall operate in strict compliance with the instructions.
-
Page 3: Table Of Contents
Table of Contents Safety Notes ............................1 Product Introduction ..........................2 Packing List ............................3 Installation Guidance ..........................4 Instructions for Use ..........................10 Operation Instruction ......................... 11 Product Maintenance ......................... 116 Specification Parameters ........................17 Exploded Diagram and Parts List ......................18 Trouble Shooting Guide ........................ -
Page 4: Safety Notes
Safety Notes Make sure the external electric supply socket of the caravan air-conditioner is effectively grounded in accordance with your local regulations. Failure to ground the unit correctly may cause electric shock or fire. The caravan air-conditioner shall be switched on for electric leakage detection after installation. -
Page 5: Product Introduction
Please be noted that losses caused by the condensate water are not within warranty scope. D. Choosing and using of generator HOUGHTON BELAIRE requires an AC power source and may require for generator driving in some remote areas. Requirements for generator include efficient power source, stable currency, output power ≥2800W, output waveform: sine wave, that shall meet the driving requirements of the compressor. -
Page 6: Packing List
Packing List Installation parts list Main parts: 1.BELAIRE air-conditioner outdoor unit ×1 2.Outlet gasket ×1 3.Outlet air duct ×1 4.Plenum mounting bracket ×1 5.Return air filter ×2 6.Plenum assembly ×1 7.M8x120mm blots ×4 8.Fixing metal plate ×4 9.Large washer 10.Flat head screw 11.Pan head tapping screw ×4 12.Countersunk head tapping screw... -
Page 7: Installation Guidance
Do not add other parts or restructure the product in the installation. The installers shall be equipped with refrigeration technician qualification certificates. Consult with HOUGHTON or the local distributor in the case of unusual applications or installation conditions that are not specifically covered by this manual. - Page 8 Installation position Before the installation, consider the installation position: At least 150mm is needed on the left and right side. At least 200mm is need at the front and back area. Moving direction of caravan At least 50mm is needed for the height. ...
- Page 9 Install outlet gasket Mare sure the roof is dry, clean and without oil before installation. Take off the paper from the back of the outlet gasket and stick the outlet gasket onto the roof over the square hole. ...
- Page 10 Install outlet air duct Cut the 4 cable ties and fix the outlet air duct to the outdoor unit from inside of caravan using 4 flat head screws. (This step can be done before installing outdoor unit, but please note do not damage the outlet air duct). This face down Note The outlet air duct has the up and...
- Page 11 Install plenum mounting bracket Overlap M8 bolt with washer and fixing metal plates Tighten M8 bolt to make sure the plenum mounting and get bolts through the 4 holes on corners of the bracket is connected with outdoor unit tightly. ...
- Page 12 Install plenum assembly Fix the plenum assembly on the plenum mounting Connect the socket and plug of the display panel wires bracket with 4 provided pan head tapping screws. and the controller wires; please notice that colors of the wires should be matching (yellow to yellow, red to red, etc.);...
-
Page 13: Instructions For Use
Instructions for Use Switch on the power to the air-conditioner at the isolation breaker. Start the air-conditioner by switching to FAN mode to select the FAN. Operate in low FAN, medium FAN and high FAN in turn to check normal operation. ... -
Page 14: Operation Instruction
Operation Instruction Remote controller Plenum display Touch screen key Temperature Mode display display... - Page 15 1. Operation of the remote controller Turn on Press the on/off “ ” key, the machine turns on, the buzzer of the plenum beeps one time and the running mode and temperature will be displayed. FAN mode Press the “MODE” key, select the “ ”...
- Page 16 DRY mode ” mode, Press the down“▼”key to set the temperature 1℃ lower than the room Press the“MODE”key, select the“ temperature , and the plenum will display and the setting temperature. HEAT mode Press the “MODE” key, select the mode, Press the up“▲”key to set the temperature higher than the room temperature ,Press the “...
- Page 17 Note When in the AUTO mode, according to the difference between the setting temperature and the ”and “ ”(automatic heating) , or environmental temperature , the plenum will display“ “ ” and “ ” (automatic cooling) in the same time. Celsius and Fahrenheit degree change ...
- Page 18 2. Plenum operation ->COOL ->FAN Press the touch screen “ ” key on the plenum, the setting will be circularly from “ OFF ->HEAT ” modes for every pushing. The setting temperature is 24℃ in high fan FAN. Mode display of the plenum are as: COOL “...
-
Page 19: Product Maintenance
Product Maintenance Filter The return air filters are the only components that need to be maintained periodically. Check and clean the filter screen each week when in use to prevent the filter from being blocked by dirt. The filter should be washed frequently to ensure effective cooling and heating. -
Page 20: Specification Parameters
Specification Parameters Model T135C T150 T3500 Power supply 115V~/60Hz 115V~/60Hz 220-240V~/50Hz Refrigerant charged R410A/470g R410A/650g R410A/590g Rated cooling capacity 13500BTU/H 15000BTU/H 3500W Rated heating capacity ------- 15000BTU/H 3500W Input power for cooling (W) 1300 1500 1300 Input power for heating (W) ------- 1300 1200... -
Page 21: Exploded Diagram And Parts List
Exploded Diagram and Parts List... -
Page 23: Trouble Shooting Guide
Trouble Shooting Guide No display of the plenum when press the On/Off E1: Room temperature sensor Fault in connection to temperature sensor or Check whether the access to the power of the RV OK? other damage. Check whether the remote battery is OK? E2: Indoor coil temperature sensor ... -
Page 24: Circuit Diagram
Circuit Diagram T135C T150 T3500...
Need help?
Do you have a question about the BELAIRE T135C and is the answer not in the manual?
Questions and answers