Table of Contents
Advertisement
Quick Links
Advertisement
Table of Contents

Related Manuals for Inflight Fitness MULTI-FLY/DELT


Summary of Contents for Inflight Fitness MULTI-FLY/DELT
-
Page 3: Important Notices
Maintain your machine in good working order by following the maintenance schedule provided on the equipment. It is strongly recommended that a qualified dealer assemble this MULTI-FLY/DELT machine Should there be any question during assembly contact your authorized Inflight Fitness dealer or call direct to 714 821 4177. -
Page 4: M Fd Parts And Hardware
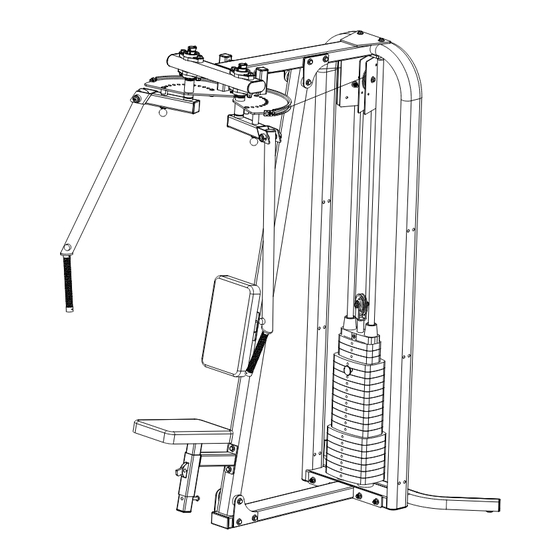
M FD PARTS AND HARDWARE H ARDWARE D ESCRIPTION QUANTITY Bolts 3/8” x 8 ½” 3/8” x 5 ½” 3/8” x 3” 3/8” x 2 ¾” 3/8” x 2” 3/8” x 1 ¾” 3/8” x 1 ¼” ½”” x 3 ¾” ¼”... - Page 5 M FD PARTS AND HARDWARE P ARTS W HITE / PLATINUM FRAME PARTS Loop Upright Stabilizer Base Tube Top Beam L/H Corner Bracket (2) R/H Corner Bracket (2) Upper Pulley Bracket L/H Pivot Arm R/H Pivot Arm L/H Arm Seat Support Back Support R/H Arm Plate (2 hole)
-
Page 6: M Ain Structure Assembly
M FD ASSEMBLY INSTRUCTIONS M AIN STRUCTURE ASSEMBLY A. Attach Loop Upright, Base Tube, and Stabilizer using 4 – 3/8” x 8 ½” bolts, 4 – curved 3/8” washers, 4 – 3/8” flat washers and 4 - 3/8” nuts. B. Attach Main Upright to Base Tube using one L/H Corner Bracket and one R/H Corner Bracket and 3 –... - Page 8 M FD ASSEMBLY INSTRUCTIONS CAM AND ARM ASSEMBLY G. Attach the four Flange Bearings to the Top Beam using 4 – ½” x 3 ¾” bolts, 8 – ½” flat washers, and 4 - ½” nuts. Do not fully tighten nuts. H.
-
Page 10: Cable And Pulley Installation
C ABLE ADJUSTMENT S. Once the Multi-Fly/Delt is completely assembled, loosen the jam-nuts behind the rubber bumpers above the Cams. Thread the bumper in or out to remove slack from the cables and align the arms. Make sure that the Weight Pin still engages all weight plates with the Selector Stem. - Page 12 M FD ASSEMBLY INSTRUCTIONS PLACARDS AND LABELS T. Remove backing from foam tape on Instruction Placard. Attach Instruction Placards to Loop Upright aligning outside edge of placard to top and outside edge of Loop Upright. U. Attach Weight Labels in recess provided on front of Weight Plates. All the recesses should be aligned and to the right as you face the weight stack.
Need help?
Do you have a question about the MULTI-FLY/DELT and is the answer not in the manual?
Questions and answers