VeriFone VX 680 Installation Manual
Hide thumbs
Also See for VX 680:
- Reference manual (192 pages) ,
- User manual (15 pages) ,
- Troubleshooting manual (2 pages)
Table of Contents
Advertisement
Advertisement
Table of Contents

Subscribe to Our Youtube Channel
Related Manuals for VeriFone VX 680


Summary of Contents for VeriFone VX 680
-
Page 1: Installation Guide
VX 680 Installation Guide VeriFone Part Number DOC268-003-EN-C, Revision C.4... - Page 2 VeriFone, Inc. The information contained in this document is subject to change without notice. Although VeriFone has attempted to ensure the accuracy of the contents of this document, this document may include errors or omissions. The examples and sample programs are for illustration only and may not be suited for your purpose.
-
Page 3: Table Of Contents
® VX 680 Bluetooth Support ........24 ®... - Page 4 VeriFone Cleaning Kit ........
- Page 5 ......... 63 N D E X VX 680 I NSTALLATION...
- Page 6 ONTENTS VX 680 I NSTALLATION UIDE...
-
Page 7: Preface
Troubleshooting Guidelines. Provides troubleshooting guidelines, should you encounter a problem in terminal installation and configuration. Related To learn more about the VX 680 terminal, refer to the following set of documents: Documentation VX 680 Certifications and Regulations Sheet VPN DOC268-001-EN-A... -
Page 8: Conventions And Acronyms
The lightning symbol is Due to risk of shock do not use the WARNING used as a warning when terminal near water. bodily injury might occur. VX 680 I NSTALLATION UIDE... -
Page 9: Acronym Definitions
Registered Jack 45 RS-232 Recommended Standard 232 R-UIM Removable User Identity Module Security Access Module Secure Digital Subscriber Identity Module Thin Film Transistor UART Universal Asynchronous Transmitter/Receiver Universal Serial Bus VeriFone Part Number Wi-Fi Wireless Fidelity VX 680 I NSTALLATION UIDE... - Page 10 REFACE Conventions and Acronyms VX 680 I NSTALLATION UIDE...
-
Page 11: Hapter
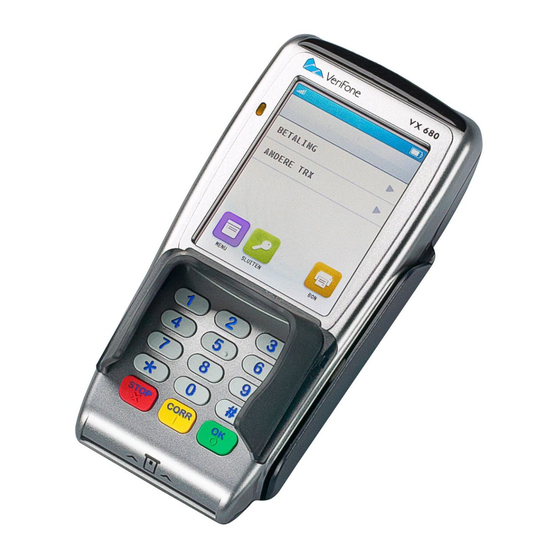
HAPTER Terminal Overview This chapter provides a brief description of the VX 680 terminal. This terminal features a large color and touchscreen display, fast processor, abundant memory, PCI 2.0 and PCI 3.0 security, and integrated contactless features. The VX 680 terminal is a portable, battery-powered device designed to fit comfortably during handheld consumer-facing applications. -
Page 12: Features At A Glance
Features and VX 680 terminals provide the right combination of features and functions including Benefits a triple-track magnetic stripe card reader, smart card reader, integrated PIN pad, color touchscreen display, optional contactless support, and a quiet yet fast internal thermal printer (ITP). -
Page 13: Performance And Durability
Contactless version accepts EMV and mag-stripe contactless payments as well as PIN-based transactions. Communication • VX 680 GPRS and 3G: Long-range wireless payment for retailers that have no Technology physical location limitations. • VX 680 CDMA: Long-range wireless payment for Non-GPRS coverage areas. - Page 14 ERMINAL VERVIEW Features and Benefits VX 680 I NSTALLATION UIDE...
-
Page 15: Hapter
Examining Terminal Features. • Examining Connection Ports. • Establishing Telephone Line Connections. ® • VX 680 Bluetooth Support. • Installing the Paper Roll. • Installing and Replacing MSAM Cards. • Installing the SIM or R-UIM Card (GPRS and CDMA Models). -
Page 16: Selecting Terminal Location
Terminal Location Environmental • The VX 680 unit is a portable terminal. Select a flat support surface, such as a Factors countertop or table, to keep the terminal safe in between uses. • Do not use the terminal where there is high heat, dust, humidity, moisture, or caustic chemicals or oils. -
Page 17: Unpacking The Shipping Carton
Open the shipping carton and carefully inspect its contents for possible tampering Shipping Carton or shipping damage. The VX 680 device is a secure product and any tampering may cause the terminal to cease to function properly. To unpack the... -
Page 18: Examining Terminal Features
STYLUS INTERNAL THERMAL INDICATOR LED PRINTER (AT THE BACK) TERMINAL DISPLAY / TOUCHSCREEN MAGNETIC CARD TELEPHONE-STYLE READER KEYPAD ENTER KEY CLEAR KEY CANCEL KEY SMART CARD READER Figure 2 VX 680 Terminal Features (Front Panel) VX 680 I NSTALLATION UIDE... -
Page 19: Front Panel
The VX 680 terminal contains an MSAM cardholder to support stored-value card programs or other merchant card requirements. VeriFone ships variants of the VX 680 terminal for different markets. Your terminal NOTE may have a different configuration. The following devices may or may not be present: a smart card reader, or an MSAM cardholder. -
Page 20: Power Adapter Cable
Power Adapter Cable Connection to a VX 680 Terminal USB Host Cable The VX 680 terminal also provides a 2 wire USB host port (VPN CBL268-003-01- A) for supporting external peripherals. A connector adaptor provides for standard USB host connection for the Modem Dongle or the RS-232 UART dongle. -
Page 21: Multi-Port Adapter
USB Modem Dongle Use the USB Modem Dongle (VPN 24123-04-R) to provide the VX 680 terminal with modem communication over a telephone line at speeds of up to 33,600 bps. It can also be connected to the full-featured Base Station (see... -
Page 22: Usb Serial Dongle (Rs-232 Uart)
Attaching the USB Dongles to the Base Station). A Base Station may be purchased with the VX 680 terminal or purchased as a NOTE separate option. The full-featured Base Station has two USB host ports for external dongles as well as a battery charger slot for charging an extra Li-ion battery pack. -
Page 23: Establishing Telephone Line Connections
ERMINAL ETUP Establishing Telephone Line Connections Establishing The VX 680 supports telephone line connections through a USB Modem Dongle Telephone Line connected to the phone cable. Connections To connect a telephone line Connect one end of the telephone cable to the USB Modem Dongle. -
Page 24: Vx 680 Bluetooth ® Support
Verix Commserver, the terminal may easily be switched among paired devices. Any number of VX 680 terminals may be paired with a single base station but the base station is only able to relay a single transaction at any one time. When more than three terminals are required on a site, additional base stations suitably positioned to obtain maximum radio coverage are recommended. -
Page 25: Bluetooth ® Ap Charging Base Station Connector Sockets
® Bluetooth Communication with the Bluetooth Base Stations are encrypted according to the Charging Base ® Bluetooth Standard. VX 680 terminals that are not paired cannot communicate Station Connector ® with the Bluetooth AP Charging Base Station. Sockets ® There are three connector sockets on the Bluetooth... -
Page 26: Mounting The Bluetooth ® Ap Charging Base Station
ERMINAL ETUP ® VX 680 Bluetooth Support Mounting the The base station’s status is shown on its different LED indicators: ® Bluetooth ® • The green LED indicates that the Bluetooth AP Charging Base Station is Charging Base powered ON and capable of communication with other terminals. -
Page 27: Power Connection To The Bluetooth ® Ap Charging Base Station
ERMINAL ETUP ® VX 680 Bluetooth Support Power Connection ® The Bluetooth AP Charging Base Station comes with a universal-input power ® pack capable of operating from voltages of 100V-240V AC. to the Bluetooth AP Charging Base Station ® To Connect the Power... -
Page 28: Telephone Line Connection To The Bluetooth ® Ap Charging Base Station
VX 680 Bluetooth Support Telephone Line The VX 680 supports telephone line connections through a USB Modem Dongle Connection to the connected to the phone cable. However, the VX 680 WiFi/BT variant does not ® support this feature. Bluetooth Charging Base... -
Page 29: Installing The Paper Roll
ETUP Installing the Paper Roll Installing the A fast, quiet thermal printer is built into the VX 680 terminal. Before you can Paper Roll process transactions that require a receipt or record, you must install a roll of thermal-sensitive paper in the printer. - Page 30 To prevent damaging the print roller, always gently press down on the paper roll cover to close it. Figure 15 Closing Paper Roll Cover Tear the paper off against the serrated plastic strip in the printer. VX 680 I NSTALLATION UIDE...
-
Page 31: Installing/Replacing Msam Cards
ERMINAL ETUP Installing and Replacing MSAM Cards Installing and When you first receive your VX 680 terminal, you may need to install an MSAM Replacing MSAM card or you may need to replace old cards. Cards Observe standard precautions when handling electrostatically sensitive devices. - Page 32 The MSAM compartment door will not close properly if the MSAM card is installed incorrectly. Figure 18 Installing MSAM Card Screw back the MSAM compartment latch. Figure 19 Closing the Printer Cover VX 680 I NSTALLATION UIDE...
-
Page 33: Installing The Sim Or R-Uim Card (Gprs And Cdma Models)
Close the printer cover. Figure 20 Closing the Printer Cover Installing the The VX 680 terminal for GPRS modems supports the installation of a GSM SIM SIM or R-UIM (Subscriber Identity Module). While the VX 680 terminal for CDMA modems Card (GPRS and supports the installation of a R-UIM (Removable User Identity Module). - Page 34 The SIM/R-UIM card has a notch on one corner to ensure that it fits into the connector base in only one way. Figure 22 Inserting the SIM or R-UIM Card Install the battery (see Figure 24). VX 680 I NSTALLATION UIDE...
-
Page 35: Installing/Replacing Sd Card
ERMINAL ETUP Installing and Replacing SD Card Installing and The VX 680 terminal supports the installation of an SD card on certain Replacing SD configurations. Use the following procedures to replace or install an SD card. Card To install or replace Turn off the terminal. -
Page 36: Using The Smart Battery
The VX 680 terminal will operate on battery power or on power pack power. The NOTE smart battery charger in the terminal will be active whenever the power pack is connected. -
Page 37: Battery Behavior (No Power Cable)
Battery Behavior (No Power Cable) Battery Behavior The terminal shifts to cabled power mode and starts up automatically when the (No Power VX 680 is connected to a non-battery power source, regardless of the battery Cable) charge state. Manual Startup Hold the green key down for about 4 seconds until the terminal displays the startup screen. -
Page 38: Installing The Smart Battery
ERMINAL ETUP Installing the Smart Battery Installing the The VX 680 smart battery fits in a slot on the back of the VX 680 terminal, as Smart Battery shown in Figure 24. The locking tab clicks when the battery is in place. The slot is keyed, so that there is only one way to insert the battery. -
Page 39: Connecting The Terminal Power Pack
The VX 680 unit comes with a universal input power pack capable of operating from voltages of 100V to 240V AC. -
Page 40: Charging The Smart Battery
Smart Battery pack to the unit for 6 hours or until fully charged. NOTE The terminal charges the VX 680 smart battery when the terminal is in the Base Station. For more information, see Mounting the Terminal Onto the Base Station. -
Page 41: Using The Base Station
Bluetooth Access Point Charging Base. Standard Base The standard Base Station can charge the VX 680 terminal. However, it does not Station have any external ports and has a single LED to indicate power status. Figure 27... -
Page 42: Bluetooth ® Access Point Charging Base
LED indicators: power indicator, bluetooth traffic and modem traffic. Figure 29 The VX 680 Bluetooth Access Point Charging Base Station Powering Up the Use the procedure in this section to connect the VX 680 Base Stations to a power Base Station source. To power up the base... -
Page 43: Mounting The Terminal Onto The Base Station
Mounting the Terminal Onto the Base Station Mounting the The VX 680 terminal can be placed on the Base Station when not in use for Terminal Onto continuous charging of its battery. External peripherals can also be attached to the... -
Page 44: Attaching The Usb Dongles To The Base Station
Attaching the USB Dongles to the Base Station Attaching the With the VX 680 mounted on the Base Station, use the USB dongles to connect to USB Dongles to external peripherals. Only one Modem Dongle and one Serial Dongle can be the Base Station connected to the Base Station. - Page 45 Place the spare battery pack onto the Base Station. Figure 33 Charging a Spare Battery Pack Using the Base Station Place the VX 680 terminal onto the Base Station to charge both the spare and installed battery packs at the same time. Figure 34...
-
Page 46: Conducting Wireless Transactions
To conduct a Bluetooth transaction: ® Bluetooth ® • Ensure the terminal is paired with the Bluetooth AP Charging Base Station Transactions not more than 100 meters away. • Follow the on-screen instructions provided with your application. VX 680 I NSTALLATION UIDE... -
Page 47: Using The Magnetic Card Reader
Figure 36 Using the Magnetic Card Reader Using the Stylus The VX 680 terminal has a touchscreen capability which allows the use of a stylus on a transaction. To Use the Stylus Remove the stylus from the top portion of the terminal, as shown in... - Page 48 Extending the Stylus Loop a piece of cable or string (not supplied) through the stylus hole and the base of the printer cover to secure the stylus. Figure 39 Securing the Stylus to the Terminal VX 680 I NSTALLATION UIDE...
-
Page 49: Specifications
HAPTER Specifications This chapter discusses power requirements, dimensions, and other specifications of the VX 680 terminal. Power 12V DC 2.0 A DC Power Pack UL, ITE listed, LPS power supply: Input rated: 100-240V AC, 50/60 Hz Output rated: 12V DC 2.0 A Barrel connector polarity: ... - Page 50 PECIFICATIONS External Dimensions VX 680 I NSTALLATION UIDE...
-
Page 51: Cleaning The Terminal
Contacts important that the exposed contacts of the VX 680 battery stay clean and unbent. Avoid touching the contacts of the VX 680 battery and the recessed area on the CAUTION terminal. Finger oils tarnish contacts, causing bad connections. When operating on battery power and experiencing a high occurrence of bad or incomplete data transfers, clean the contacts. - Page 52 AINTENANCE Smart Card Reader VX 680 I NSTALLATION UIDE...
-
Page 53: Verifone Service And Support
Terminal or you must obtain an MRA number. The following procedure describes how to Smart Battery return one or more VX 680 terminals, smart batteries, or Base Stations for repair for Service or replacement (U.S. customers only). Customers outside the United States are advised to contact their local VeriFone... - Page 54 • Reference the model and part number in the Note box. NOTE One MRA number must be issued for each VX 680 terminal you return to VeriFone, even if you are returning several of the same model. Describe the problem(s).
-
Page 55: Accessories And Documentation
ERVICE AND UPPORT Accessories and Documentation Accessories and VeriFone produces the following accessories and documentation for the Documentation VX 680 terminal. When ordering, please refer to the part number in the left column. • VeriFone online store at www.store.verifone.com •... -
Page 56: Documentation
VPN DOC268-002-EN-A VX 680 Quick Installation Guide VPN DOC268-004-EN-B VX 680 Reference Guide VPN DOC268-005-EN-A VX 680 Standard Base Quick Installation Guide VPN DOC268-006-EN-A VX 680 Full-Featured Base and Dongle Quick Installation Guide VPN DOC268-012-EN-A VX 680 CDMA Certifications and Regulations Sheet... -
Page 57: Guidelines Terminal Display Does Not Show Correct/Readable Info
If the problem persists even after performing the outlined guidelines or if the problem is not described below, contact your local VeriFone representative for assistance. The VX 680 terminal comes equipped with tamper-evident labels. The VX 680 unit NOTE contains no user serviceable parts. Do not, under any circumstance, attempt to disassemble the terminal. -
Page 58: Smart Battery Does Not Charge
The VX 680 smart battery must initially receive a full charge to ensure proper Does Not Charge operation. • Allow the VX 680 terminal to remain connected to the power pack for 6 hours NOTE to ensure the battery receives a full charge. •... -
Page 59: Terminal Does Not Dial Out
• Verify that the printer door is properly latched. • If the problem persists, contact your VeriFone distributor or service provider. Printer Paper If paper jams inside the printer: • Press the button at the bottom of the terminal to unlatch the paper roll cover, then open the cover. -
Page 60: Keypad Does Not Respond
• Ensure that you are swiping cards properly. With the VX 680 card reader, the black magnetic stripe on the card should face down and inward, toward the keypad and must be inserted from the top of the terminal (see Figure 36). - Page 61 Transactions Fail to Process Check the Telephone Line • Disconnect the telephone line from the VX 680 terminal and connect it to a working telephone to check for a dial tone. If there is no dial tone, replace the telephone cable.
- Page 62 ROUBLESHOOTING UIDELINES Transactions Fail to Process VX 680 I NSTALLATION UIDE...
-
Page 63: Index
AC version electrostatic discharges connecting prevention DC version environmental factors ordering VX 680 I NSTALLATION UIDE... - Page 64 USB modem dongles contacting VeriFone ordering returning a battery for repair or replacement USB serial dongles returning a terminal for repair or replacement ordering telephone line connections telephone line cords ordering terminal features general VX 680 I NSTALLATION UIDE...
- Page 65 NDEX VX 680 starting on battery power VX 680 startup battery mode wireless transactions VX 680 I NSTALLATION UIDE...
-
Page 66: Vx 680 I Nstallation G Uide
VeriFone, Inc. 2099 Gateway Place, Suite 600 San Jose, CA, 95110 USA 1-800-VERIFONE www.verifone.com VX 680 Installation Guide VeriFone Part Number DOC268-003-EN-C, Revision C.4...
Need help?
Do you have a question about the VX 680 and is the answer not in the manual?
Questions and answers