Table of Contents
Advertisement
Advertisement
Table of Contents

Related Manuals for VeriFone VX 680


Summary of Contents for VeriFone VX 680
-
Page 1: Installation Guide
VX 680 Installation Guide VeriFone Part Number DOC268-003-EN-A, Revision A... - Page 2 VeriFone, Inc. The information contained in this document is subject to change without notice. Although VeriFone has attempted to ensure the accuracy of the contents of this document, this document may include errors or omissions. The examples and sample programs are for illustration only and may not be suited for your purpose.
-
Page 3: Table Of Contents
Standard Base Station ......... 33 VX 680 I... - Page 4 VeriFone Cleaning Kit ........
-
Page 5: Preface
Troubleshooting Guidelines. Provides troubleshooting guidelines, should you encounter a problem in terminal installation and configuration. Related To learn more about the VX 680 terminal, refer to the following set of documents: Documentation VX 680 Certifications and Regulations Sheet VPN DOC268-001-EN-A... -
Page 6: Conventions And Acronyms
Acronym Definitions Acronym Definitions Alternating Current CDMA Code Division Multiple Access Europay MasterCard and VISA GPRS General Packet Radio Service Global System for Mobile Communication HDMI High-Definition Multimedia Interface Internal Thermal Printer Liquid Crystal Display VX 680 I NSTALLATION UIDE... - Page 7 PIN Entry Device Personal Identification Number RJ45 Registered Jack 45 RS-232 Recommended Standard 232 Security Access Module Secure Digital Subscriber Identity Module UART Universal Asynchronous Transmitter/Receiver Universal Serial Bus VeriFone Part Number Wi-Fi Wireless Fidelity VX 680 I NSTALLATION UIDE...
- Page 8 REFACE Conventions and Acronyms VX 680 I NSTALLATION UIDE...
-
Page 9: Hapter
HAPTER Terminal Overview This chapter provides a brief description of the VX 680 terminal, the smallest all- in-one wireless handheld payment device. This terminal packs a wallop: large color/touch display, blazing fast processor, abundant memory, the latest PCI 2.0 security, and integrated contactless, all in the same familiar small V 670 form factor. -
Page 10: Features And Benefits
Features and VX 680 terminals provide the right combination of features and functions including Benefits a triple-track magnetic-stripe card reader, smart card reader, integrated PIN pad, color/touch display, optional contactless support, and a quiet yet fast internal thermal printer (ITP). -
Page 11: Performance And Durability
Contactless version accepts EMV and mag-stripe contactless payments as well as PIN-based transactions Communication • VX 680 GPRS and 3G: Long-range wireless payment for retailers that have no Technology physical location limitations • VX 680 CDMA: Long-range wireless payment for Non-GPRS coverage areas •... - Page 12 ERMINAL VERVIEW Features and Benefits VX 680 I NSTALLATION UIDE...
-
Page 13: Hapter
Attaching the USB Dongles to the Base Station. • Charging the Spare Battery on the Base Station. • Conducting Wireless Transactions. • Conducting Smart Card Transactions. • Using the Magnetic Card Reader. • Using the Stylus. VX 680 I NSTALLATION UIDE... -
Page 14: Selecting Terminal Location
Terminal Location Environmental • The VX 680 unit is a portable terminal. Select a flat support surface, such as a Factors countertop or table, to keep the terminal safe in between uses. • Do not use the terminal where there is high heat, dust, humidity, moisture, or caustic chemicals or oils. -
Page 15: Examining Terminal Features
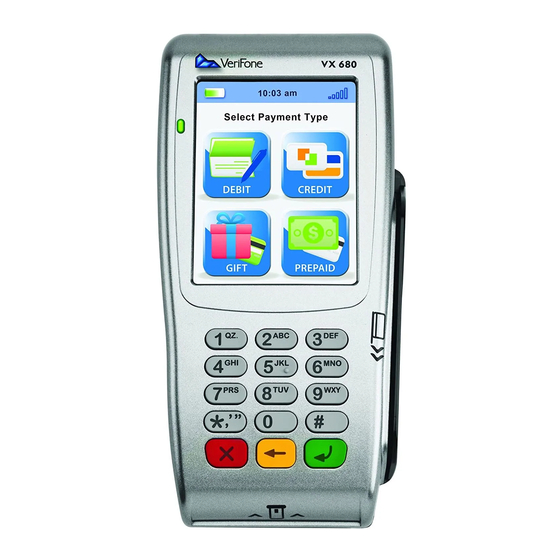
KEYPAD ENTER KEY CANCEL KEY CLEAR KEY SMART CARD READER Figure 2 VX 680 Terminal Features (Front Panel) Front Panel The front panel includes the following features: • A Large 3.5” color TFT and touchscreen display. • Two types of keys: A 12-key, telephone-style keypad (keypads may vary in style). -
Page 16: Examining Connection Ports
The VX 680 terminal contains an MSAM cardholder to support stored-value card programs or other merchant card requirements. VeriFone ships variants of the VX 680 terminal for different markets. Your terminal NOTE may have a different configuration. The following devices may or may not be present: a smart card reader, or an MSAM cardholder. -
Page 17: Power Adapter Cable
ERMINAL ETUP Examining Connection Ports Power Adapter Each VX 680 terminal comes with a power adapter cable (VPN 08641-01-R) that Cable completes the connection between the power pack and the terminal. Figure 4 Power Adapter Cable Connection to a VX 680 Terminal... -
Page 18: Multiport Adapter
(see Attaching the USB Dongles to the Base Station). A Base Station may be purchased with the VX 680 terminal or purchased as a NOTE separate option full-feature Base Station has two USB host ports for external dongles as well as a battery charger slot for charging an extra lithium-ion battery pack. -
Page 19: Establishing Telephone Line Connections
ERMINAL ETUP Establishing Telephone Line Connections The Modem Dongle and Serial Dongle are intended for use with the VX 680 CAUTION terminal and Base Station only. They should not be installed or used with any equipment other than the VX 680 terminal or Base Station. -
Page 20: Installing The Paper Roll
ETUP Installing the Paper Roll Installing the A fast, quiet thermal printer is built into the VX 680 terminal. Before you can process transactions that require a receipt or record, you must install a roll of Paper Roll thermal-sensitive paper in the printer. - Page 21 Hold the roll so the paper feeds from the bottom of the roll when the terminal is inverted (see Figure 10). Drop the paper roll into the printer tray. Figure 10 Loading Paper Roll Pull paper up past the glue residue on the paper roll. VX 680 I NSTALLATION UIDE...
-
Page 22: Installing/Replacing Msam Cards
Closing Paper Roll Cover Tear the paper off against the serrated plastic strip in the printer. Installing/ When you first receive your VX 680 terminal, you may need to install an MSAM Replacing MSAM card or you may need to replace old cards. - Page 23 Unlocking the Printer Cover Unscrew the latch to expose the MSAM compartment. (see Figure Figure 13 Exposing the MSAM Compartment Remove any previously installed MSAM card by pushing the snap that keeps the SAM in place. VX 680 I NSTALLATION UIDE...
- Page 24 The MSAM compartment door will not close properly if the MSAM card is installed incorrectly. Screw back the MSAM compartment latch. Close the printer cover (See Figure 15). Figure 15 Closing the Printer Cover VX 680 I NSTALLATION UIDE...
-
Page 25: Installing/Replacing Sim Card (Gsm/Gprs Models Only)
ERMINAL ETUP Installing/Replacing SIM Card (GSM/GPRS Models Only) Installing/ The VX 680 terminal supports the installation of a SIM (Subscriber Identity Replacing SIM Module) card. Use the following procedure to replace or install a SIM card. Card (GSM/ Place the terminal upside down on a soft, clean surface to protect the lens GPRS Models from scratches. -
Page 26: Installing/Replacing Sd Card
Install the battery (see Figure 20). Installing/ The VX 680 terminal supports the installation of an SD card. Use the following Replacing SD procedure to replace or install an SD card. Card Place the terminal upside down on a soft, clean surface to protect the lens from scratches. -
Page 27: Using The Smart Battery
Using the Smart Battery Figure 19 Installing SD Card Install the battery (see Figure 20). The VX 680 terminal uses a Li-ion smart battery (see Using the Smart Accessories and Battery Documentation for ordering information). The internal logic of the smart battery... - Page 28 • Conserve battery power by turning the VX 680 terminal off when not in use. If the terminal is not to be used for an extended period of time, keep the Lithium- ion battery inserted in the terminal, and power up the terminal periodically to check the battery charge.
-
Page 29: Battery Behavior (No Power Cable)
ERMINAL ETUP Battery Behavior (No Power Cable) Battery Behavior If you connect the VX 680 to a non-battery power source, the terminal shifts to (No Power cabled power mode and starts up automatically, regardless of the battery charge Cable) state. -
Page 30: Installing The Smart Battery
ERMINAL ETUP Installing the Smart Battery Installing the The VX 680 smart battery fits in a slot on the back of the VX 680 terminal, as Smart Battery shown in Figure 20. The locking tab clicks when the battery is in place. The slot is keyed, so that there is only one way to insert the battery. -
Page 31: Connecting The Terminal Power Pack
Obtain the appropriately rated power supply before continuing with troubleshooting. The VX 680 unit comes with a universal input power pack capable of operating from voltages of 100VAC to 240VAC. To Connect the Insert the round barrel connector into the power port in the connector, as... -
Page 32: Charging The Smart Battery
After unpacking your VX 680 terminal, install the battery and connect the power Smart Battery pack to the unit for 6 hours or until fully charged. The VX 680 terminal’s smart battery is also charged when the terminal is in the NOTE Base Station. For more information, see Placing the Terminal Onto the Base Station. -
Page 33: Using The Base Station
There are two types of Base Stations, the standard model and the full-feature model. Standard Base The standard Base Station can charge the VX 680 terminal. However, it does not Station have any external ports and has a single LCD to indicate power status. -
Page 34: Powering Up The Base Station
Attaching the USB Dongles to the Base Station. Powering Up the Use the procedure in this section to connect the VX 680 Base Station to a power Base Station source. Insert the round barrel connector of the power pack into the power port at the back of the Base Station. -
Page 35: Placing The Terminal Onto The Base Station
Placing the Terminal Onto the Base Station Placing the The VX 680 terminal can be placed on the Base Station when not in use for Terminal Onto continuous charging of its battery. External peripherals can also be attached to the... -
Page 36: Charging The Spare Battery On The Base Station
Insert the USB dongle into the USB port located at the back of the Base Station. Figure 27 Inserting External Dongle Into USB Port After inserting the external dongle into the USB port, place the VX 680 terminal onto the Base Station (see Powering Up the Base Station). -
Page 37: Conducting Wireless Transactions
ERMINAL ETUP Conducting Wireless Transactions Place the VX 680 terminal onto the Base Station to charge both the spare and installed battery packs at the same time. Figure 29 Charging the Spare and Installed Battery Simultaneously Conducting To conduct a wireless transaction: Wireless •... -
Page 38: Using The Magnetic Card Reader
CAUTION Leave the smart card in the card reader until the transaction is complete. Premature card removal will invalidate the transaction. Using the The VX 680 terminal supports credit/debit card transactions. Magnetic Card Reader To Conduct a Credit/ Position a magnetic card with the stripe in the card reader and facing inward, Debit Card toward the keypad. -
Page 39: Using The Stylus
ETUP Using the Stylus Using the Stylus The VX 680 terminal has a touchscreen capability which allows the use of a stylus on a transaction. To Use the Stylus Remove the stylus from the top portion of the terminal, as shown in... - Page 40 ERMINAL ETUP Using the Stylus VX 680 I NSTALLATION UIDE...
-
Page 41: Hapter
HAPTER Specifications This chapter discusses power requirements, dimensions, and other specifications of the VX 680 terminal. Power 12V DC 2.0 A DC Power Pack UL, ITE listed, LPS power supply: Input rated: 100 - 240V AC, 50/60 Hz Output rated: 12V DC 2.0 A Barrel connector polarity: °... - Page 42 PECIFICATIONS External Dimensions VX 680 I NSTALLATION UIDE...
-
Page 43: Hapter
Contacts important that the exposed contacts of the VX 680 battery stay clean and unbent. Avoid touching the contacts of the VX 680 battery and the recessed area on the CAUTION terminal. Finger oils tarnish contacts, causing bad connections. When operating on battery power and experiencing a high occurrence of bad or incomplete data transfers, clean the contacts. - Page 44 AINTENANCE Smart Card Reader VX 680 I NSTALLATION UIDE...
-
Page 45: Hapter
Monday - Friday, 8 A.M. - 8 P.M., Eastern time • International – Contact your VeriFone representative Returning a Before returning a VX 680 terminal, smart battery, or base station to VeriFone, you Terminal or must obtain an MRA number. The following procedure describes how to return Smart Battery... -
Page 46: Accessories And Documentation
• Reference the model and part number in the Note box. NOTE One MRA number must be issued for each VX 680 terminal you return to VeriFone, even if you are returning several of the same model. Describe the problem(s). -
Page 47: Usb Host Cable
VPN DOC268-001-EN-A VX 680 Quick Installation Guide VPN DOC268-002-EN-A VX 680 Reference Manual VPN DOC268-004-EN-A VX 680 Full-Featured Base and Dongle Quick VPN DOC268-006-EN-A Installation Guide VX 680 Standard Base Quick Installation Guide VPN DOC268-005-EN-A Verix eVo Volume I: Operating System Programmers... - Page 48 ERVICE AND UPPORT Accessories and Documentation VX 680 I NSTALLATION UIDE...
-
Page 49: Hapter
Readable Info • If the problem persists, contact your local VeriFone representative for assistance. Smart Battery The VX 680 smart battery must initially receive a full charge to ensure proper Will Not Charge operation. VX 680 I NSTALLATION UIDE... -
Page 50: Spare Battery In Base Station Will Not Charge
ROUBLESHOOTING UIDELINES Spare Battery in Base Station Will Not Charge • Allow the VX 680 terminal to remain connected to the power pack for 6 hours NOTE to ensure the battery receives a full charge. • Lithium-ion batteries are not affected by shallow charging. Furthermore, when the terminal has no external power source or battery the coin cell battery provides power to the security circuit. -
Page 51: Printer Does Not Print
• Verify that the printer door is properly latched. • If the problem persists, contact your VeriFone distributor or service provider. Printer Paper If paper jams inside the printer: • Press the button at the bottom of the terminal to unlatch the paper roll cover, then open the cover. - Page 52 • Ensure that you are swiping cards properly. With the VX 680 card reader, the black magnetic stripe on the card should face down and inward, toward the keypad and must be inserted from the top of the terminal (see Figure 31).
-
Page 53: Index
AC version electrostatic discharges connecting prevention DC version environmental factors ordering printer paper VX 680 I NSTALLATION UIDE... - Page 54 VX 680 terminal features starting on battery power general VX 680 startup terminals battery mode accessories benefits wireless transactions cleaning VX 680 I NSTALLATION UIDE...
- Page 55 NDEX VX 680 I NSTALLATION UIDE...
-
Page 56: Gateway Place, Suite
VeriFone, Inc. 2099 Gateway Place, Suite 600 San Jose, CA, 95110 USA 1-800-VERIFONE www.verifone.com VX 680 www.creditcardmachine-direct.com VeriFone Part Number DOC268-003-EN-A, Revision A...
Need help?
Do you have a question about the VX 680 and is the answer not in the manual?
Questions and answers
what is the system id