Table of Contents
Advertisement
Advertisement
Table of Contents

Related Manuals for Sole Fitness ST600


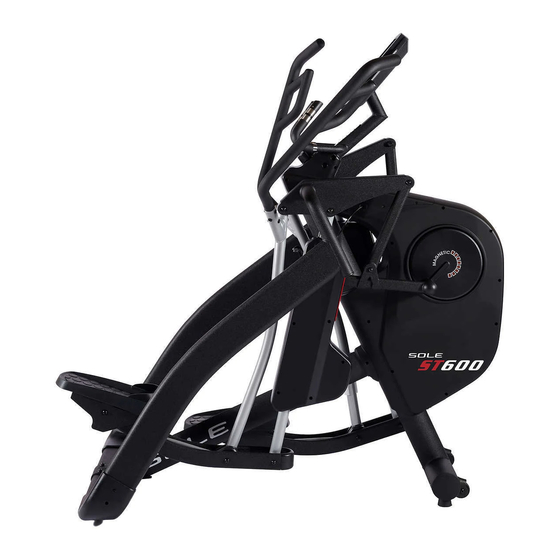
Summary of Contents for Sole Fitness ST600
-
Page 2: Table Of Contents
TABLE OF CONTENTS Product Registration Important Safety Instructions Important Operation Instructions Assembly Instructions Operation of Your New Strider Exploded View Diagram Parts List Training Guidelines Using Heart Rate Monitor Manufacturer’s Limited Warranty ATTENTION THIS STRIDER IS INTENDED FOR RESIDENTIAL USE ONLY AND IS WARRANTED FOR THE APPLICATION. -
Page 3: Product Registration
CONGRATULATIONS ON YOUR NEW STRIDER AND WELCOME TO THE SOLE FAMILY! CONGRATULATIONS ON YOUR NEW ROWER AND WELCOME TO THE SOLE FAMILY! Thank you for your purchase of this quality Sole Strider from Dyaco Canada Inc. Your new strider has been manufactured by one of the leading fitness manufacturers in the world and is backed by one of the most comprehensive warranties available. -
Page 4: Important Safety Instructions
IMPORTANT SAFETY INSTRUCTIONS Thank you for purchasing our product. Even though we go to great efforts to ensure the quality of each product we produce, occasional errors and /or omissions do occur. In any event should you find this product to have either a defective or a missing part please contact us for a replacement. -
Page 5: Important Operation Instructions
19. Care must be taken when lifting or moving the equipment, so as not to injure your back. Always use proper lifting techniques 20. A decal like the example shown below has been placed on the strider. If the decal is missing or illegible, please call our Customer Service Department toll-free at 1-888-707-1880 to order a replacement decal. -
Page 6: Assembly Instructions
If you have any questions or problems with the parts included with your Sole ST600 Strider please do not return the product. Contact us FIRST! If a part is missing or defective call us toll free at 1-888-707-1880. - Page 7 Warning: Unpacking Caution: A. Lay the box down flat so that the lid can be lifted. Unpack the handle bars, side supporting tubes, pedal supporting tube and owners manual. Remove the top polyfoam pieces #1 & #2 and finish unpacking the console, console supporting tube, central supporting tube, pedal supporting tube and hardware bag.
- Page 8 2#465 .+56 Console supporting Main frame tube E2 Handle bar (R) E1 Handle bar (L) C1 Side connecting tube (L) B1 Pedal supporting C2 Side connecting tube (R) tube (L) Side tube cover set B2 Pedal supporting tube (R) Side tube cover set Console F1 Central supporting tube...
- Page 9 2#465 .+56 (J2) Screw M4X16 (J3) Screw M4X6 (J4) Screw M8X55 (J5) Washer M8 (J6) Screw M8X20 (J8) Washer M12 (J9) Nut M12 (J10) Screw M12X109 (J7) Screw M12X73 (J13) Screw M8X16 (J14) Screw M5 6mm*2 - 8 -...
- Page 10 CENTRAL SUPPORTING TUBE (F1) ASSEMBLY Step 1. Remove the two pre-assembled screws (J1) from the main frame (A) and two screws (J1) from the central supporting tube (F1). Step 2. Assemble the central supporting tube (F1) onto the main frame (A) use the previously removed screws (J1) to join them.
- Page 11 RIGHT SIDE CONNECTING TUBE ASSEMBLY Step 1. As shown in diagrams(A & B) attach the right side connecting tube (C2) assembly to the machine. Step 2. As shown in (A) attach the tube (C2) assembly onto the upper main frame. Use one screw (J6) to join the tube to the frame. Step 3.
- Page 12 PEDAL SUPPORTING TUBE ASSEMBLY Step 1. As shown in (C) connect the right pedal supporting tube (B2) to the main frame (A). Use the tools provided to tighten screw (J7), washer (J8) and nut (J9). Step 2. As shown in (D) connect and align the right lower pedal supporting tube (B5) to the front pedal supporting tube on the main frame (A).
- Page 13 CONSOLE SUPPORTING TUBE AND BOTTLE HOLDER ASSEMBLY Step 1. Connect wires (D1 & D2) from the console supporting tube (D) to wires (A1 & A2) from the main frame (A). Step 2. Slide the console supporting tube (D) onto the main frame (A).
-
Page 14: Pedal Locking Feature
POWER CORD ASSEMBLY Insert the power cord into the power socket on the main frame before plugging the power cord into the wall outlet. Turn the AC power switch on. Flip the ON/OFF switch to the ON position. "0" sign is for OFF; "I" sign is for ON. Note: The Overload switch is to ensure the device does not short out and provides protection. - Page 15 HOW TO TRANSPORT THE MACHINE Before the machine is transported to a different location, make sure that the pedal lock knob is in the “LOCK” position. Lift up both sides of the rear supporting tubes until the front transportation wheels are touching the ground.
- Page 16 HOW TO ADJUST STRIDE BY INCLINE MOTORIZED Depending on personal preference the user is able to change the stride to varying distances (18”, 20”, 22”, 24” and 26”) as shown on the LED display. There are 5 stride control quick keys, press one to adjust to desired stride length.
-
Page 17: Operation Of Your New Strider
BUTTON FUNCTIONS To make upward adjustments to each function data or increase the training resistance. DOWN To make downward adjustments to each function data or decrease the training resistance. ENTER To confirm all settings. To start or stop the workout. START Turn the START/ STOP toggle wheel while in standby / STOP... - Page 18 Calculates total calories burned during training from 0 to a maximum CALORIES of 990 calories. Each unit increase or decrease is 10 KCL. (This data is a rough guide for comparison of different exercise sessions which can not be used in medical treatment.) PULSE User may set up target pulse to 230 WATTS...
- Page 19 2. Use the UP/DOWN toggle wheel to select the program you want and press ENTER to confirm. Or press START/STOP button to start MANUAL mode immediately. FIGURE 8 FIGURE 9 FIGURE 10 FIGURE 11 FIGURE 12 QUICK START IN MANUAL 1.
-
Page 20: Manual Mode
MANUAL MODE 1. After selecting MANUAL mode (FIGURE 13), use the UP/DOWN toggle wheel to increase or decrease the level (from 1 to 16) then press ENTER to confirm. 2. Preset exercise data (TIME, DISTANCE, CALORIES, PULSE), and press START/ STOP to start exercise. -
Page 21: Program Mode
PROGRAM MODE 1. After selecting PROGRAM mode, turn the UP/DOWN toggle wheel to select a program profile from P1 to P12. Press ENTER to confirm. 2. User can preset the TIME data then press START/STOP to start training. 3. After start training, TIME will be counted down. When the TIME reaches 0, the screen will flash and the alarm will sound. - Page 22 USER PROGRAM 1. After selecting USER PROGRAM mode, the first column of the profile will blink (FIGURE 25). User may turn the toggle wheel to adjust the resistance level (FIGURE 26) to create his /her own profile. 2. After set up (from column 1 to column 20), hold down the MODE button for 2 seconds to quit profile setting and enter the TIME setting.
-
Page 23: Heart Rate Control
HEART RATE CONTROL 1. After entering HEART RATE CONTROL mode, the screen will show heart rate percentage 55%, 75%, 90% and TARGET. User may select heart rate percentage by turning UP/ DOWN toggle wheel. 2. Preset the TIME then press START/ STOP to start the workout. 3. - Page 24 WATT CONSTANT 1. In standby mode, select WATT and press ENTER. 2. The preset watt value 120 will flashing on screen, use UP/ DOWN toggle wheel to set target value from 10 to 350. Press START button to begin. 3. Preset the TIME data then press START/STOP to begin. 4.
- Page 25 FIGURE 39 FIGURE 40 NOTE: 1. When user stops pedaling for 4 minutes, computer will enter into power save mode, all settings and exercise data will be stored until the user resumes their workout. 2. This computer requires 9V, 1A adaptor. 3.
-
Page 26: Exploded View Diagram
J12*6 D15*4 D11*2 J11*6 A4*2 J11*6 D12*2 J12*6 B32*4 J7*6 B32*4 B33*2 J7*6 B32*4 B33*2 C3*2 B3*16 B35*2 B34*2 B36*4 J10*4 A78*12 J10*4 B4*22 B4*22 C4*2 C5*2 J4*4 C4*2 C5*2 J5*4 B15*8 B14*6 B37*4 B38*8 B22*2 B3*16 B21*8 B26*4 B25*4 B27*4 B30*2 B31*2... - Page 27 A101*4 A110*2 A78*12 A102 A113*4 B21*8 A97*2 A76*4 A107*8 A103 A101*4 A109*2 A113 A69*10 A88*4 A98*2 A100*10 A47-2 J10*4 A86*2 A87*4 A5*2 A77*2 A47-1 A56*2 B3*16 A45*2 A57*2 A66*2 A15-2 A46*2 A15-1 A101*4 A99*2 J7*6 B21*8 A44*4 A113 A76*4 A12*2 B4*22 A57*2 A96*2...
-
Page 28: Parts List
KNOB - 27 -... - Page 29 - 28 -...
- Page 30 - 29 -...
-
Page 31: Training Guidelines
Training Guidelines Exercise Exercise is one of the most important factors in the overall health of an individual. Listed among its benefits are: Increased capacity for physical work (strength endurance) Increased cardiovascular (heart and arteries/veins) and respiratory efficiency ... - Page 32 Specificity Different forms of exercise produce different results. The type of exercise that is carried out is specific both to the muscle groups being used and to the energy source involved. There is little transfer of the effects of exercise, i.e. from strength training to cardiovascular fitness.
- Page 33 Two final comments:(1) don’t be concerned with day to day variations in your pulse rate, being under pressure or not enough sleep can affect it;(2) your pulse rate is a guide, don’t become a slave to it. Endurance Circuit Training Cardiovascular endurance, muscle, strength, flexibility and coordination are all necessary for maximum fitness.
- Page 34 STRETCHING Stretching should be included in both your warm up and cool down, and should be performed after 3-5 minutes of low intensity aerobic activity or callisthenic type exercise. Movements should be performed slowly and smoothly, with no bouncing or jerking. Move into the stretch until slight tension, not pain, is felt in the muscle and hold for 20-30 seconds.
- Page 35 INNER THIGH STRETCH TOE TOUCHES Sit with the soles of your feet together with your Slowly bend forward from your waist, letting knees pointing outward. Pull your feet as close your back and shoulders relax as you stretch Into your groin as possible. Gently push your toward your toes.
-
Page 36: Using Heart Rate Monitor
USING HEART RATE TRANSMITTER How to wear your wireless chest strap transmitter: 1. Attach the transmitter to the elastic strap using the locking parts. 2. Adjust the strap as tightly as possible as long as the strap is not too tight to remain comfortable. -
Page 37: Manufacturer's Limited Warranty
MANUFACTURER’S LIMITED WARRANTY Dyaco Canada Inc. warrants all its strider parts for a period of time listed below from the date of retail sale, as determined by sale receipt. Dyaco Canada Inc.’s responsibilities include providing new or remanufactured parts, at Dyaco Canada Inc.’s option, and technical support to our independent dealers and servicing organizations.
Need help?
Do you have a question about the ST600 and is the answer not in the manual?
Questions and answers