Emerson Rosemount 2140 Reference Manual
Level detector,vibrating fork
Hide thumbs
Also See for Rosemount 2140:
- Reference manual (112 pages) ,
- Quick start manual (24 pages) ,
- Quick start manual (24 pages)

Related Manuals for Emerson Rosemount 2140


Summary of Contents for Emerson Rosemount 2140
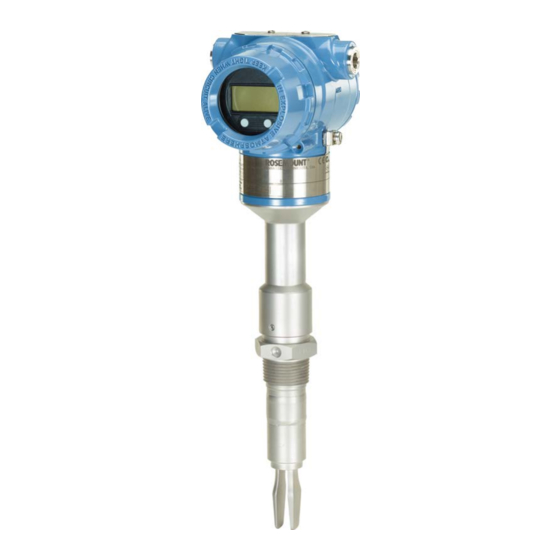
- Page 1 Reference Manual 00809-0100-4140, Rev AA January 2017 ™ Rosemount 2140 Level Detector Vibrating Fork...
-
Page 3: Table Of Contents
Reference Manual Contents 00809-0100-4140, Rev AA January 2017 Contents 1Section 1: Introduction Models covered ............1 Point level detector overview. - Page 4 Correct fork alignment......... . 58 3.3.3 Tightening the threaded Rosemount 2140 ......60 3.3.4 Insulation .
- Page 5 Reference Manual Contents 00809-0100-4140, Rev AA January 2017 4Section 4: Electrical Installation Safety messages ............61 Cable selection .
- Page 6 Ordering information ..........115 A.3.1 Rosemount 2140 Spares and Accessories ......119 BAppendix B: Product Certifications Overview .
- Page 7 Reference Manual Contents 00809-0100-4140, Rev AA January 2017 DAppendix D: Local Operator Interface LOI menu trees ........... . . 129 Number entry .
- Page 8 Reference Manual Contents 00809-0100-4140, Rev AA January 2017 Contents...
- Page 9 For information on nuclear-qualified products, contact your local Emerson representative. Replacement equipment or spare parts not approved by Emerson for use as spare parts could reduce the capabilities of the Rosemount 2140 and 2140:SIS Level Detectors (“level detectors”), and may render the instrument dangerous.
- Page 10 January 2017 Failure to follow these installation guidelines could result in death or serious injury. The Rosemount 2140 and 2140:SIS Level Detectors (“level detectors”) must be installed, connected, commissioned, operated, and maintained by suitably qualified personnel only, observing any national and local requirements that may apply.
-
Page 11: Models Covered
Manual. Point level detector overview The Rosemount 2140 and Rosemount 2140:SIS are point level detectors, and are designed to use the principle of a tuning fork. A piezo-electric crystal oscillates the forks at their natural frequency, and changes to this frequency are continuously monitored by electronics. -
Page 12: Using This Manual
Figure 1-2. Local Operator Interface (LOI) Display Using this manual The sections in this manual provide information on installing, operating, and maintaining the Rosemount 2140 and Rosemount 2140:SIS Level Detectors (“level detectors”). The sections are organized as follows: Section 2: Configuration provides instruction on basic and advanced configuration tasks when commissioning and operating the level detectors. -
Page 13: Product Recycling/Disposal
Reference Manual Introduction 00809-0100-4140, Rev AA January 2017 Product recycling/disposal Recycling of equipment and packaging should be taken into consideration and disposed of in accordance with local and national legislation/regulations. Introduction... - Page 14 Reference Manual Introduction 00809-0100-4140, Rev AA January 2017 Introduction...
-
Page 15: Safety Messages
Overview This section provides instructions for using a Field Communicator, AMS Device Manager, or Local Operator Interface (LOI) to configure the Rosemount 2140 or Rosemount 2140:SIS Level Detectors. For convenience, Field Communicator fast key sequences are labeled “Fast keys”. Full Field Communicator menu trees are in Appendix C: Field Communicator Menu Tree. -
Page 16: Get Started With Your Preferred Configuration Tool
00809-0100-4140, Rev AA January 2017 Get started with your preferred configuration tool The Rosemount 2140 Level Detector and Rosemount 2140:SIS Level Detector can easily be configured by using: Device Description (DD) based systems e.g. AMS Device Manager and the 475 Field Communicator Local Operator Interface (LOI) ... -
Page 17: Field Communicator
D. Backlight key Get the latest Device Description (DD) If the Rosemount 2140 DD is not included in your 475, then use the Easy Upgrade Utility to update the Field Communicator with the latest DD. For more information on how to update the DD and all the capabilities, see the 475 Field Communicator User’s... -
Page 18: Switching Hart Revision
Reference Manual Configuration 00809-0100-4140, Rev AA January 2017 LOI menu trees are available in Appendix D: Local Operator Interface. Figure 2-2. LOI Configuration Buttons A. Internal configuration buttons B. External configuration buttons Table 2-1. LOI Button Operation Button (SCROLL Left ... -
Page 19: Switching Hart Revision With Field Communicator
Reference Manual Configuration 00809-0100-4140, Rev AA January 2017 2.4.2 Switching HART revision with Field Communicator Fast keys 2, 2, 5 [or 6], 2, 4 From the Home screen, select 2: Configure. Select 2: Manual Setup > 5: HART (or 6: HART if Scaled Variable is available). Select 2: Communication Settings >... -
Page 20: Configuration Basics
00809-0100-4140, Rev AA January 2017 Configuration basics The Rosemount 2140 and 2140:SIS Level Detectors (“level detectors”) can be configured before or after installation. Configuring the point level detector before installation ensures all level detector components are in working order before installation. -
Page 21: Guided Setup On The Loi
Reference Manual Configuration 00809-0100-4140, Rev AA January 2017 2.6.3 Guided setup on the LOI The Guided Setup wizard is not available on the LOI. Turn to “Basic setup” on page 14 for the LOI instructions to configure basic parameters, and then return here to verify configuration. Verify the configuration before installation It is recommended that various configuration parameters are verified prior to installation into the process. -
Page 22: Verifying Configuration (Loi)
Reference Manual Configuration 00809-0100-4140, Rev AA January 2017 2.7.2 Verifying configuration (LOI) Press any configuration button to activate the LOI. Select VIEW CONFIG (). Scroll down ( ) to review the following parameters prior to installation: MODEL – e.g. “2140”. T Range –... -
Page 23: Dynamic Variables Configuration
Reference Manual Configuration 00809-0100-4140, Rev AA January 2017 2.7.3 Dynamic variables configuration This section describes how to verify that the four dynamic variables are mapped correctly. If incorrectly mapped, see “HART (re-mapping dynamic variables)” on page Default mapped dynamic variables By default, the four mapped dynamic variables are: Primary Variable (“PV”) ... -
Page 24: Basic Setup
PV to: Sensor Frequency Scaled Variable Optional re-mapping of SV, TV, or QV The Rosemount 2140 and Rosemount 2140:SIS can re-map the SV, TV, or QV to: Output State Sensor State Sensor Frequency ... - Page 25 Reference Manual Configuration 00809-0100-4140, Rev AA January 2017 To change or view the mode (Field Communicator) From the Home screen, select 2: Configure. Select 2: Manual Setup > 1: Operation > 1: Application. Select 1: Sensor Operation Mode. If changing the mode setting: Select a mode: “Normal”, “Enhanced (Fault=Wet)”, or “Enhanced (Fault=Dry)”.
-
Page 26: Sensor Output Delay
Reference Manual Configuration 00809-0100-4140, Rev AA January 2017 Note When messages about the loop appear, take appropriate safe action and select “”. “Configuration basics” on page 10 for further information. 2.8.2 Sensor output delay Fast keys 2, 2, 1, 1, 2 When there is a detected change in process conditions, from wet-to-dry or dry-to-wet, the Sensor Output Delay variable can action a delay of up to 3600 seconds before the new state change is indicated. -
Page 27: Media Density
(Figure 2-3 on page 18). To overcome this, accurate switching points can be calculated by the Rosemount 2140 and Rosemount 2140:SIS after a suitable density band is selected for the process medium. Media Density options the Rosemount 2140 and Rosemount 2140:SIS are: 0.4 –... - Page 28 Reference Manual Configuration 00809-0100-4140, Rev AA January 2017 Figure 2-3. Example of Calculated Switching Points for a Process Media Liquid Density (SG) A. Top limit boundary (allowing for variations in fork manufacture). B. Nominal switching point frequencies for this process medium. C.
-
Page 29: Media Learn
2.8.4 Media learn Fast keys 2, 2, 1, 1, 5 Versions of the Rosemount 2140 and Rosemount 2140:SIS with the Extended Features Package (EFP) can use the Media Learn function. Media Learn makes configuring the Media Density variable (page 17) even easier. - Page 30 Reference Manual Configuration 00809-0100-4140, Rev AA January 2017 To use Media Learn (Field Communicator) From the Home screen, select 2: Configure. Select 2: Manual Setup > 1: Operation > 1: Application. Select 5: Media Learn. Follow on-screen instructions until the learning procedure is completed. Note When messages about the loop appear, take appropriate safe action and select “OK”.
-
Page 31: Allowable Change In Dry Fork Frequency
Reference Manual Configuration 00809-0100-4140, Rev AA January 2017 2.8.5 Allowable change in dry fork frequency Fast keys 2, 2, 1, 3, 1 When the level detector is re-calibrated in the field, a comparison is made between the new dry fork frequency and original factory-set Dry Fork Frequency value. If the difference is greater than the allowable change value, the re-calibration is rejected. -
Page 32: Sensor Fault Delay
The default setting is 5 seconds. It can be set to a value in the range 0 to 3600 seconds. Note When the Rosemount 2140 is operating in Normal mode, a fork sensor fault is not detected and Sensor State continues to indicate a valid state. -
Page 33: Analog Output Type And Operating Modes
Reference Manual Configuration 00809-0100-4140, Rev AA January 2017 Scroll down ( ) and then select FAULT DELAY (). d. Follow on-screen instructions and edit a new delay setting in the range 0 to 3600. Entering a delay outside this range results in ERROR being displayed. If viewing the mode setting: Select VIEW CONFIG (). - Page 34 Reference Manual Configuration 00809-0100-4140, Rev AA January 2017 Current output operating mode Fast keys 2, 2, 2, 1, 2 This selects the fork sensor state associated with the Output State device variable indicating ‘on’. Options to select are: Dry on ...
- Page 35 Reference Manual Configuration 00809-0100-4140, Rev AA January 2017 Note When messages about the loop appear, take appropriate safe action and select “OK”. “Configuration basics” on page 10 for further information. To change the current output type and operating mode (AMS Device Manager) Right click on the device and select Configure.
-
Page 36: Analog Output Range Points
Reference Manual Configuration 00809-0100-4140, Rev AA January 2017 Note When messages about the loop appear, take appropriate safe action and select “”. “Configuration basics” on page 10 for further information. 2.8.8 Analog output range points The analog output is driven by a device variable mapped to the Primary Variable (“PV”). Carefully read displayed warnings that appear before applying changes. - Page 37 Reference Manual Configuration 00809-0100-4140, Rev AA January 2017 Entering range points (AMS Device Manager) Right click on the device and select Configure. Select Manual Setup, and then select the Analog Output tab. Enter the PV at 4 mA in the Lower Range Value field. Enter the PV at 20 mA in the Upper Range Value field.
-
Page 38: Scaled Variable Damping
Carefully read displayed warnings that appear before applying changes. Note Versions of the Rosemount 2140 with the Extended Features Package (EFP) can re-map the PV to Scaled Variable. Damping with a Field Communicator Fast keys 2, 2, 2, 2, 4 From the Home screen, select 2: Configure. -
Page 39: Local Operator Interface (Loi) Display
(page This is selectable only if the Rosemount 2140 has the Extended Features Package enabled. Note The LOI can also be configured to display configuration information during the device startup. Select Review Parameters at Startup to enable this functionality. -
Page 40: Electronics Temperature Units
Reference Manual Configuration 00809-0100-4140, Rev AA January 2017 Configuring LOI display (using Field Communicator) From the Home screen, select 2: Configure. Select 2: Manual Setup > 5: Display. For items 1 to 8, select or de-select the parameters to show on the LOI display. Optionally, select 9: Review Parameters at Startup. -
Page 41: Detailed Setup
Reference Manual Configuration 00809-0100-4140, Rev AA January 2017 Changing temperature units (AMS Device Manager) Right click on the device and select Configure. Select Manual Setup, and then select the Device Temperature tab. Select the measurement units at the Setup Unit box, and click Send. Note When messages about the loop appear, take appropriate safe action. - Page 42 Reference Manual Configuration 00809-0100-4140, Rev AA January 2017 Re-mapping process variables (Field Communicator) Fast keys 2, 1, 5 (or 6), 1 From the Home screen, select 2: Configure. Select 2: Manual Setup > 5: (or 6:) HART. Select 1: Variable Mapping. Assign Primary Variable, Secondary Variable, Tertiary Variable and Quaternary Variable to supported process variables.
-
Page 43: Configuring Alarm And Saturation Levels
This function is available only when the Primary Variable (”PV”) is mapped to the Sensor Frequency or Scaled Variable device variables. The Rosemount 2140 continuously performs self-diagnostic routines. When there is a device malfunction that is an alarm condition, the Analog Output current is driven to a configured alarm level (see tables) based on the HI or LO alarm switch position (see “Setting... - Page 44 Reference Manual Configuration 00809-0100-4140, Rev AA January 2017 To change or view alarm and saturation levels (Field Communicator) Fast keys 2, 2, 2, 5, 7 From the Home screen, select 2: Configure. Select 2: Manual Setup > 2: Analog Output > 5: Alarm/Saturation Levels. Select 7: Config Alarm/Sat Levels.
-
Page 45: Configuring Process Alerts
2.10.3 Configuring process alerts Note This function is available only a Rosemount 2140 and Rosemount 2140:SIS with the Extended Features Package enabled. Process alerts allow the level detector to indicate when a pre-set data point is exceeded. Alerts can be set for the following device variables: Output State ... -
Page 46: Configuring Scaled Variable
2.10.4 Configuring Scaled Variable Note The Scaled Variable function is available if the Rosemount 2140 has the Extended Features Package (EFP) enabled. The Scaled Variable function allows custom units to be displayed on the LOI display and drive the 4-20 mA output. - Page 47 Reference Manual Configuration 00809-0100-4140, Rev AA January 2017 Frequency value position 2 – Enter the upper known value point. Scaled Variable value position 2 – Enter the custom unit (equivalent to the upper known value point). Linear offset ...
-
Page 48: Configuring Burst Mode (Optional)
Reference Manual Configuration 00809-0100-4140, Rev AA January 2017 2.11 Configuring burst mode (optional) Fast keys 2, 2, 5 or 6, 3 Burst mode is compatible with the analog output signal. Due to the way that HART protocol features simultaneous digital and analog data transmission, the analog value can drive other equipment in the loop while the control system is receiving the digital information. - Page 49 Reference Manual Configuration 00809-0100-4140, Rev AA January 2017 Note Consult your host system manufacturer for burst mode requirements. Configuring burst mode (Field Communicator) From the Home screen, select 2: Configure. Select 2: Manual Setup > (5: or 6:) HART. > 3: Burst Mode Configuration. Configure Burst Message 1.
-
Page 50: System Readiness
Download the latest DD from Emerson.com (or www.hartcomm.org). In the Browse by Member drop-down menu, select Rosemount business unit of Emerson Process Management. Select Rosemount 2140. 2.13 Establishing multi-drop communications (optional) Multi-dropping refers to the connection of several devices to a single communications transmission line. -
Page 51: Communicating With A Multi-Dropped Level Detector
Figure 2-5. Typical Multi-drop Network A. HART modem B. Power supply The Rosemount 2140 and Rosemount 2140:SIS are set to address zero (0) at the factory, which allows operation in the standard point-to-point manner with a 4–20 mA output signal. -
Page 52: Changing A Level Detector Polling Address
Click the Change Polling Address button. Carefully read the warning and click Yes if it is safe to apply the changes. 2.14 Configuring level detector security There are four security methods with the Rosemount 2140 and Rosemount 2140:SIS. Security switch HART Lock ... -
Page 53: Setting The Security Switch
Reference Manual Configuration 00809-0100-4140, Rev AA January 2017 Figure 2-6. Alarm and Security Switches Without LOI display With LOI display A. Alarm switch B. Security switch 2.14.1 Setting the security switch The security switch is used to prevent changes to the configuration data. Figure 2-6 indicates the security switch location. -
Page 54: Hart Lock
Reference Manual Configuration 00809-0100-4140, Rev AA January 2017 Viewing the security switch status (LOI) Press any configuration button to activate the LOI. (See Table 2-1 on page 8 for assistance with using the LOI buttons). Select VIEW CONFIG (). Scroll down ( ) until SECURE and the status is displayed. -
Page 55: Local Operator Interface (Loi) Password
Reference Manual Configuration 00809-0100-4140, Rev AA January 2017 Configuring the configuration button lock (Field Communicator) From the Home screen, select 2: Configure. Select 2: Manual Setup > 6: Security (or 7: Security if Scaled Variable is available). Select 3: Configuration Buttons. Select the Disable option to lock, or the Enabled option to unlock. -
Page 56: Setting The Alarm Switch
Reference Manual Configuration 00809-0100-4140, Rev AA January 2017 Configuring LOI password (AMS Device Manager) Right click on the device and select Configure. Select Manual Setup, and then select the Security tab. Within the Local Operator Interface box, click the Configure Password button. Follow the screen prompts: Enable the LOI password protection. -
Page 57: Safety Messages
Failure to follow these installation guidelines could result in death or serious injury. The Rosemount 2140 Level Detector and Rosemount 2140:SIS Level Detector (“level detectors”) must be installed, connected, commissioned, operated, and maintained by suitably qualified personnel only, observing any national and local requirements that may apply. -
Page 58: Considerations Before Installation
Use only spare parts supplied or sold by Emerson. Considerations before installation Important Emerson is not in a position to evaluate or guarantee the compatibility of the process fluid or other process parameters with the product, options, configuration or materials of construction selected. 3.2.1... -
Page 59: Application Considerations
The Rosemount 2140 and 2140:SIS Level Detectors (“level detectors”) are available as Intrinsically Safe (IS) or explosion-proof/flameproof versions for hazardous area installations. There are also ordinary location versions for unclassified, safe areas. - Page 60 Figure 3-2 on page 50). The Rosemount 2140 and 2140:SIS are normally insensitive to foams (i.e. they do not see the foam). However, on rare occasions, some very dense foams may be seen as liquid; known examples of this are found in ice-cream and orange juice manufacturing.
-
Page 61: Installation Considerations
“Dimensional drawings” on page 106. Device identification To identify the Rosemount 2140 version, see the labels on the housing. Electronics housing clearances Mount the level detector in a position to allow easy access to the terminals. Provide 0.75 in. (19 mm) of clearance for a standard cover to be removed. If an LCD display is installed, provide 3 in. - Page 62 Torque 30 in-lb (3 Nm) How to handle the Rosemount 2140 The weight of the level detector with a heavy flange and extended fork length may exceed 37 lb. (18 kg). A risk assessment is required before carrying, lifting, and installing the Rosemount 2140.
- Page 63 Reference Manual Hardware Installation 00809-0100-4140, Rev AA January 2017 Figure 3-5. Handling the Rosemount 2140 Do not change the Rosemount 2140 in any way Figure 3-6. Do Not Change the Rosemount 2140 Hardware Installation...
- Page 64 This can happen with high-viscosity and high-density liquids. Extra consideration is needed if the plant vibration is close to the 1400 Hz. operating frequency of the Rosemount 2140. Supporting the fork extension tube avoids long fork length vibration ...
- Page 65 Reference Manual Hardware Installation 00809-0100-4140, Rev AA January 2017 Figure 3-7. Required Supports for Extended Fork Maximum 3.28 ft. 3.28 ft. (1.0 m) (1.0 m) 3.28 ft. (1.0 m) Maximum 3.28 ft. (1.0 m) 3.28 ft. (1.0 m) 3.28 ft. (1.0 m) Hardware Installation...
-
Page 66: Installation Examples
Reference Manual Hardware Installation 00809-0100-4140, Rev AA January 2017 3.2.5 Installation examples Figure 3-8. High and Low Level Alarms A. Dry B. Wet Figure 3-9. Pump Control or Overfill Protection A. Dry B. Wet Figure 3-10. Pump or Empty Pipe Protection A. -
Page 67: Installation Procedures
Reference Manual Hardware Installation 00809-0100-4140, Rev AA January 2017 Installation procedures For dimensional drawings, see Appendix A: Specifications and Reference Data page 106. 3.3.1 Process connection seals Figure 3-11. Process Connection Seals A. PTFE B. NPT or BSPT (R) thread C. -
Page 68: Correct Fork Alignment
Ensure the fork is correctly aligned by using the notches and grooves as indicated in Figure 3-12. Figure 3-12. Correct Fork Alignment A. Alignment groove on standard length Rosemount 2140 B. Alignment notch on flanged Rosemount 2140 C. Alignment notch on extended length Rosemount 2140 Pipe installation Figure 3-13. - Page 69 Reference Manual Hardware Installation 00809-0100-4140, Rev AA January 2017 Tank installation Figure 3-14. Tank Installation Hardware Installation...
-
Page 70: Tightening The Threaded Rosemount 2140
Reference Manual Hardware Installation 00809-0100-4140, Rev AA January 2017 3.3.3 Tightening the threaded Rosemount 2140 Figure 3-15. Tightening the Threaded Rosemount 2140 3.3.4 Insulation Figure 3-16. Insulation A. 3.9 in. (100 mm) clearance all around ® B. ROCKWOOL Hardware Installation... -
Page 71: Safety Messages
For explosion-proof and ordinary locations installations in accordance with the National Electrical Code, ANSI/NFPA 70 or the Canadian Electrical Code, C22.1., the Rosemount 2140 is to be supplied by a Class 2 or Limited Energy Source. Electrical Installation... -
Page 72: Cable Selection
Power supply Terminals in the housing provide connections for signal wiring. Rosemount 2140 and Rosemount 2140:SIS Level Detectors (“level detectors”) operate with the following power supplies: 10.5 to 42.4 Vdc (10.5 to 30 Vdc in Intrinsically Safe installations). -
Page 73: Hazardous Areas
Reference Manual Electrical Installation 00809-0100-4140, Rev AA January 2017 Hazardous areas When the level detector is installed in hazardous areas, local regulations and specifications in applicable certificates must be observed. Wiring diagram Do not connect the power signal wiring to the test terminals. ... -
Page 74: Level Switch Grounding
Reference Manual Electrical Installation 00809-0100-4140, Rev AA January 2017 4.7.1 Level switch grounding The most effective grounding method is a direct connection to earth ground with minimal impedance (< 1). Figure 4-3 on page 64 shows the two grounding screw connections provided on the level detector. -
Page 75: Transient Protection Terminal Block Grounding
Reference Manual Electrical Installation 00809-0100-4140, Rev AA January 2017 4.7.3 Transient protection terminal block grounding The level detector can withstand electrical transients of the energy level usually encountered in static discharges or induced switching transients. However, high-energy transients, such as those induced in wiring from nearby lightning strikes, can damage the level detector. - Page 76 Reference Manual Electrical Installation 00809-0100-4140, Rev AA January 2017 Pull the cable through the cable gland/conduit. Identification of thread size and type M20 x 1.5 ½-14 NPT (No marking) Connect the cable wires (see also Figure 4-2 on page Torque 7 in-lb (0.8 Nm) Ensure proper grounding (see “Grounding”...
- Page 77 Reference Manual Electrical Installation 00809-0100-4140, Rev AA January 2017 Arrange the wiring with a drip loop. Plug and seal the unused conduit connection to avoid moisture and dust accumulation inside the housing. Apply PTFE tape or other sealant to the thread. Re-fit the field terminals housing cover.
- Page 78 Reference Manual Electrical Installation 00809-0100-4140, Rev AA January 2017 Attach and tighten the covers. Make sure the covers are fully engaged. Required for explosion-proof/flameproof installations only: The cover must be fully engaged to comply with explosion-proof requirements. Turn the cover jam screw counterclockwise until it contacts the cover. b.
-
Page 79: Overview
January 2017 Section 5 Operation and Maintenance Overview This section contains information on calibrating and testing the Rosemount 2140 and Rosemount 2140:SIS. Field Communicator, AMS, and Local Operator Interface (LOI) instructions are given to perform configuration functions. Safety messages Procedures and instructions in this section may require special precautions to ensure the safety of the personnel performing the operations. -
Page 80: Analog Output Calibration
Reference Manual Operation and Maintenance 00809-0100-4140, Rev AA January 2017 Analog output calibration The analog output can be calibrated to match the user's measurement system. The Analog Output Trim (4-20mA Output Trim) will calibrate the loop at the 4 mA and 20 mA points. 5.3.1 Trimming the analog output The Analog Output Trim commands allow you to adjust the level detector’s current output at... - Page 81 Reference Manual Operation and Maintenance 00809-0100-4140, Rev AA January 2017 To start the on-site calibration (Field Communicator) From the Home screen, select 3: Service Tools. Select 4: Maintenance > 4: Calibrate Analog. Select 2: Calibrate. Follow on-screen instructions to perform the calibration of 4 mA and 20 mA. Note In the Calibrate Analog menu, the 4: Analog Output option indicates the live output current output and the 5: Percent Range option indicates the percentage of that output...
-
Page 82: Restoring Factory Calibration Of The Analog Output
Reference Manual Operation and Maintenance 00809-0100-4140, Rev AA January 2017 To start the on-site calibration (using LOI) Press any LOI button to activate the menu. (See Table 2-1 on page 8 for assistance with using the LOI buttons). Scroll down ( ) and then select EXTENDED MENU (). -
Page 83: Performing Tests And Simulations
When messages about the loop appear, take appropriate safe action and select “”. “Configuration basics” on page 10 for further information. Performing tests and simulations 5.4.1 Device tests (partial proof test) The Rosemount 2140 Level Detector (“level detector”) has device-testing functionality. Checks include: Critical RAM Program ROM ... - Page 84 Reference Manual Operation and Maintenance 00809-0100-4140, Rev AA January 2017 The level detector can be configured to exercise the analog output to produce the currents representing the lower and upper range values (page 26) and alarm current (page 33). If the level detector has the Extended Features Package (EFP) and the Scaled Variable or Sensor Frequency is assigned to the PV, the analogue output is also exercised from the low saturation level to the high saturation level (page...
-
Page 85: Proof Tests
5.4.2 Proof tests The Rosemount 2140:SIS must be tested at regular intervals to detect any failures not automatically detected by the device self-test at start-up and the continuous fork sensor diagnostics when operating in Enhanced mode (page 14). -
Page 86: Analog Loop Test (Optional)
Reference Manual Operation and Maintenance 00809-0100-4140, Rev AA January 2017 5.4.4 Analog loop test (optional) This test verifies the analog output of the level detector, the integrity of the loop, and the operations of any recorders or similar devices installed in the loop. It is recommended that the 4-20 mA points, in addition to alarm levels, are verified when installing, repairing, or replacing a level detector. -
Page 87: Simulate Device Variables
Reference Manual Operation and Maintenance 00809-0100-4140, Rev AA January 2017 Note When messages about the loop appear, take appropriate safe action. “Configuration basics” on page 10 for further information. To start the output state simulation (LOI) Press any LOI button to activate the menu. (See Table 2-1 on page 8 for assistance with using the LOI buttons). - Page 88 Reference Manual Operation and Maintenance 00809-0100-4140, Rev AA January 2017 Simulate Scaled Variable (if supported) Fast Keys 3, 5, 5 The Scaled Variable device variable can be temporarily overridden with an entered value. Simulate Electronics Temperature Fast Keys 3, 5, 6 [or 5] The Electronics Temperature device variable can be temporarily overridden with an entered temperature value.
-
Page 89: Diagnostics And Service
Reference Manual Operation and Maintenance 00809-0100-4140, Rev AA January 2017 Terminal Voltage. Follow on-screen instructions to start the simulation. To start a device variable simulation (LOI) Press any LOI button to activate the menu. (See Table 2-1 on page 8 for assistance with using the LOI buttons). -
Page 90: Load User Defaults
Reference Manual Operation and Maintenance 00809-0100-4140, Rev AA January 2017 To perform a device restart (AMS Device Manager) Right click on the device and select Service Tools. Select Maintenance, and then click on the Reset/Restore tab. Click on Restart Device, and follow on-screen instructions to perform the restart. To perform a device restart (LOI) This function is not available on the Local Operator Interface. -
Page 91: Sensor Compensation
Reference Manual Operation and Maintenance 00809-0100-4140, Rev AA January 2017 Sensor Frequency is mapped to the HART dynamic variable SV (Secondary Variable). It is indicated on the LOI (see “Local Operator Interface (LOI) display” on page 29). To view the fork frequency (Field Communicator) From the Home screen, select 3: Service Tools. -
Page 92: Sensor State
Reference Manual Operation and Maintenance 00809-0100-4140, Rev AA January 2017 To change the compensation (AMS Device Manager) Right click on the device and select Service Tools. Select Maintenance, and then select the Calibrate Sensor tab. Process Temperature is displayed in the Sensor Calibration box. Enter the known process temperature, and select Send. -
Page 93: Sensor Status
Reference Manual Operation and Maintenance 00809-0100-4140, Rev AA January 2017 5.5.6 Sensor status Fast Keys 3, 4, 1, 1, 5 Sensor Status indicates if the point level device is operating in a valid or fault state. The sensor status is dependent on the Sensor State diagnostic (page 82) and the Sensor Operation Mode configuration... - Page 94 Reference Manual Operation and Maintenance 00809-0100-4140, Rev AA January 2017 Table 5-1. Sensor Status Logic (Normal Mode) Current Output Sensor Status Sensor State Operating Mode PV (Output State) Valid Wet on Off (0.0) Valid Dry on On (1.0) Valid Wet on On (1.0) Valid Dry on...
-
Page 95: Dry Fork Frequency And Switching Points
Reference Manual Operation and Maintenance 00809-0100-4140, Rev AA January 2017 5.5.7 Dry fork frequency and switching points Fast Keys 3, 4, 1, 3 The Dry Fork Frequency and switching points for Sensor Status transitions, can be viewed as values on a Field Communicator or graphically on the AMS Device Manager. Dry Fork Frequency (DFF) ... -
Page 96: Counters And Timers
Reset/Preset Wet Count. Calibration Count The Rosemount 2140 and Rosemount 2140:SIS are calibrated under reference conditions at the factory. In special circumstances, it may be re-calibrated in the field and this increments the count. -
Page 97: Dry Fork Calibration
Reference Manual Operation and Maintenance 00809-0100-4140, Rev AA January 2017 Select individual items to see the counters and timers. To view the counters/timers menu (AMS Device Manager) Right click on the device and select Service Tools. Select Maintenance, and then select the Counts/Times tab. To view the counters or timers menu (LOI) These device variables are not available to view on the Local Operator Interface. -
Page 98: Restoring Factory Calibration Of Dry Fork Sensor
Reference Manual Operation and Maintenance 00809-0100-4140, Rev AA January 2017 To start the on-site calibration (AMS Device Manager) Right click on the device and select Service Tools. Select Maintenance, and then select the Calibrate Sensor tab. Click on the Calibrate Dry Fork button in the Sensor Calibration box. Follow on-screen instructions to perform the calibration. - Page 99 Reference Manual Operation and Maintenance 00809-0100-4140, Rev AA January 2017 Note A Restore Site Calibration command becomes available afterwards. For a Field Communicator, use fast key sequence 3, 4, 3, 2, 2. To restore the factory calibration (AMS Device Manager) Right click on the device and select Service Tools.
-
Page 100: Sensor Calibration Status And Calibration Count
This technology is based on the premise that, after a Rosemount 2140 or 2140:SIS (“level detector”) is installed and powered up, the electrical loop has a baseline characteristic that reflects the proper installation. - Page 101 It is not possible to predict and detect all types of electrical failures on the 4-20 mA analog output. Therefore, Emerson cannot absolutely warrant or guarantee that Power Advisory will accurately detect failures under all circumstances.
- Page 102 Severe changes in the electrical loop may inhibit HART communication or the ability to reach alarm values. Therefore, Emerson cannot absolutely warrant or guarantee that the correct failure alarm level (high or low) can be read by the host system at the time of annunciation.
- Page 103 Reference Manual Operation and Maintenance 00809-0100-4140, Rev AA January 2017 Characterize loop Loop characterization must be initiated when the level detector is first installed or when electrical loop characteristics have been intentionally altered. Examples include a modified power supply level or loop resistance of the system, changing the terminal block on the level detector, or adding a Smart Wireless THUM to the level detector.
-
Page 104: Frequency Profiling Functions
Reference Manual Operation and Maintenance 00809-0100-4140, Rev AA January 2017 Configuring Power Advisory (LOI) This function is not available on the Local Operator Interface. Frequency profiling functions Fast Keys 2, 2, 8 There are two frequency profiling functions supported on a level detector with the Extended Features Package (EFP) enabled: Minimum deviation ... -
Page 105: Upgrading To Extended Features Package (Efp)
Scaled Variable (Rosemount 2140 only) Smart Diagnostic Suite Note The method for upgrading requires you to enter two start codes (available from Emerson) using the Field Communicator or AMS Device Manager. The LOI does not have the upgrade function. Operation and Maintenance... - Page 106 Reference Manual Operation and Maintenance 00809-0100-4140, Rev AA January 2017 To upgrade to Extended Features Package (Field Communicator) From the Home screen, select 1: Overview. Select 8: Device Information > 5: Device Upgrade If proceeding with upgrade: Select 5: Upgrade. b.
-
Page 107: Overview
Explosions could result in death or serious injury. Installation of this Rosemount 2140 and 2140:SIS Level Detector (“level detector”) in an explosive environment must be in accordance with the appropriate local, national, and international standards, codes, and practices. -
Page 108: Troubleshooting For 4-20 Ma Output
Reference Manual Troubleshooting 00809-0100-4140, Rev AA January 2017 Troubleshooting for 4-20 mA Output Table 6-1. Rosemount 2140 Troubleshooting for 4-20 mA Output Symptom Corrective actions Level detector milliamp reading Verify terminal voltage is 10.5 to 42.4 Vdc at signal terminals... -
Page 109: Diagnostic Message: Failed - Fix Now
Diagnostic message: failed - fix now Table 6-2. Status: Failed – Fix Now Alert name LOI screen Problem Recommended action 1.Contact your local Emerson representative for Electronics FAIL A failure has been detected in Board Failure the electronics circuit board advice. -
Page 110: Diagnostic Message: Advisory
Update Failure receiving updates from board. is not the fork sensor. updating] 2.Contact your local Emerson representative for advice. 1.Verify that the configuration change of the device was Configuration [none] A recent change has Changed been made the device by intended and expected. -
Page 111: Service Support
Authorization (RMA) number. The center will also ask for the process material to which the product was last exposed. For inquiries outside of the United States, contact the nearest Emerson representative for RMA instructions. To expedite the return process outside of the United States, contact the nearest Emerson representative. - Page 112 Reference Manual Troubleshooting 00809-0100-4140, Rev AA January 2017 Troubleshooting...
-
Page 113: Specifications
Rosemount 2140 and Rosemount 2140:SIS Level Detectors. Device-test button Measuring technology The Rosemount 2140 can have an single external button for Vibrating fork. device testing by selecting the DP option code. (This is not selectable if the LCD with LOI option is selected). -
Page 114: Performance Specifications
1–in. threaded 3.7 in. (94 mm) Grounding Flanged 3.5 in. (89 mm) The Rosemount 2140 and Rosemount 2140:SIS must always be Tri Clamp 4.1 in. (105 mm) grounded through the provided external ground connection. Terminal connections (wire diameter) A.1.3 Performance specifications Minimum 24 AWG and maximum 14 AWG (0.2 to 2.5 mm... - Page 115 Specifications and Reference Data Reference Manual January 2017 00809-0100-4140, Rev AA Figure A-1. Operating Temperatures Figure A-2. Operating Pressures 176 (80) 1450 (100) 149 (65) 1073 (74) 2140****M 2140****M 32 (0) 0 (0) -40 (-40) -14.5 (-1.0) (180) (180) (20) (-40) (-40) (80)
-
Page 116: Dimensional Drawings
Reference Manual Specifications and Reference Data January 2017 00809-0100-4140, Rev AA A.2 Dimensional drawings Figure A-3. - and 1-in. Threaded Process Connection (Mid Temperature Range, Standard Length Fork) 4.3 (109) 4.1 (104) No LCD display 9.1 (232) 5.1 (130) C, D 1.6 (40) A/F hexagon - or 1-in. - Page 117 D. External button(s) under movable plate E. LCD display cover Dimensions are in inches (mm). Table A-3. Fork Length for - and 1-in. Threaded Rosemount 2140 Process Standard length Minimum length Maximum length...
- Page 118 Reference Manual Specifications and Reference Data January 2017 00809-0100-4140, Rev AA Figure A-5. - and 1-in. Threaded Process Connection (High Temperature Range, All Fork Lengths) 4.1 (104) 4.1 (104) 16.9 (428) 17.7 (449) 1.6 (40) A/F hexagon 1.6 (40) A/F hexagon - or 1-in.
- Page 119 Specifications and Reference Data Reference Manual January 2017 00809-0100-4140, Rev AA Figure A-6. Tri Clamp Process Connection (Mid Temperature Range, Standard Length Fork) 4.3 (109) 4.1 (104) No LCD display 9.3 (235) 5.1 (130) C, D Ø0.9 (23) LCD display 2.5 (64) 0.5 (13) switching point 1.7 (44)
- Page 120 4.13 in. (105 mm) 157.5 in. (4000 mm) O-ring seal (1-in. BSPP) 1.7 in. (44 mm) 4.13 in. (105 mm) 38.4 in. (1000 mm) For these dimension drawings, refer to the Rosemount 2140 Type 1 drawings at Emerson.com/Rosemount. Specifications and Reference Data...
- Page 121 Specifications and Reference Data Reference Manual January 2017 00809-0100-4140, Rev AA Figure A-8. Tri Clamp Process Connection (High Temperature Range, All Fork Lengths) 4.1 (104) 4.1 (104) 17.0 (433) 17.3 (440) Ø1.6 (39) 2.5 (64) 0.5 (13) switching point 1.7 (44) when mounted vertically E (M) customer specified...
- Page 122 Reference Manual Specifications and Reference Data January 2017 00809-0100-4140, Rev AA Figure A-9. Flanged Process Connection (Mid Temperature Range, Standard Length Fork) 4.3 (109) 4.1 (104) No LCD display 9.3 (235) 5.1 (130) C, D 4 (102) 0.5 (13) switching point 1.7 (44) when mounted vertically LCD display...
- Page 123 D. External button(s) under movable plate E. LCD display cover Dimensions are in inches (mm). Table A-5. Fork Length for Flanged Rosemount 2140 Process connection Standard length Minimum length...
- Page 124 Reference Manual Specifications and Reference Data January 2017 00809-0100-4140, Rev AA Figure A-11. Flanged Process Connection (High Temperature Range, All Fork Lengths) 4.1 (104) 4.1 (104) 16.1 (410) 16.1 (410) 4 (102) E (M) customer 0.5 (13) switching point 1.7 (44) specified when mounted vertically length...
-
Page 125: Ordering Information
103 for more information on material selection. Table A-6. Rosemount 2140 and Rosemount 2140:SIS Ordering Information The starred options (★) represent the most common options and should be selected for best delivery. The non-starred offerings are subject to additional delivery lead time. - Page 126 Reference Manual Specifications and Reference Data January 2017 00809-0100-4140, Rev AA Process connection rating ★ ASME B16.5 Class 150 flange ★ ASME B16.5 Class 300 flange ★ ASME B16.5 Class 600 flange ★ EN1092-1 PN 10/16 flange ★ EN1092-1 PN 25/40 flange ★...
- Page 127 Ready for upgrade to a Rosemount 2140 with enhanced features ★ Ready for upgrade to a Rosemount 2140:SIS with enhanced features ★ Rosemount 2140:SIS safety certified to IEC 61508 with remote proof testing, plus enhanced features enabled ★ Rosemount 2140 with enhanced features already enabled Specifications and Reference Data...
- Page 128 10. Available only for a Rosemount 2140:SIS (i.e. Profile code F selected). 11. The Rosemount 2140:SIS has been independently certified to IEC 61508 as required by IEC 61511. Certification was conducted by Exida. If documentation is required, add “QT” to the end of the model number.
-
Page 129: Rosemount 2140 Spares And Accessories
103 for more information on Material Selection. Table A-7. Rosemount 2140 Spares and Accessories The starred options (★) represent the most common options and should be selected for best delivery. The non-starred offerings are subject to additional delivery lead time. - Page 130 Reference Manual Specifications and Reference Data January 2017 00809-0100-4140, Rev AA Specifications and Reference Data...
-
Page 131: Overview
B.2 European directive information Rosemount 2140 Product Certifications Manual. A copy of the EU Declaration of Conformity can be found at the end USA Explosion-proof (XP) of the Rosemount 2140 Product Certifications Manual and at Certificate: CSA 16CA70098990X Emerson.com/Rosemount. Standards:... -
Page 132: Europe
Certificate: CSA 16CA70098990X Note Standards: For full product approvals information, refer to the FM Class 3600 - 2011, FM Class 3610 - 2015, and Rosemount 2140 Product Certifications Manual. FM Class 3611 - 2004 ATEX Flameproof Markings: Class I Groups A, B, C and D, T5…T2, Type 4X Certificate: Dekra 16ATEX0082X Class I, Zone 0, AEx ia IIC T5…T2 Ga... -
Page 133: International
Note way to prevent any damage due to impact or ignition source For full product approvals information, refer to the due to friction. Rosemount 2140 Product Certifications Manual. 2. Non-standard paint options may cause risk from electrostatic discharge. Avoid installations that could cause electrostatic... - Page 134 Reference Manual Product Certifications January 2017 00809-0100-4140, Rev AA Special conditions for use (X) (I7) 1. The equipment, when fitted with the transient suppression terminal block, is not capable of withstanding the 500 volt insulation test. This must be taken into account when installing the equipment.
-
Page 135: Field Communicator Menu Trees
January 2017 00809-0100-4140, Rev AA Appendix C Field Communicator Menu Tree Field Communicator menu trees Figure C-1. Rosemount 2140 Field Communicator Menu Tree (Overview) (*1) Available only when operating as a HART7 device. 1. Overview 1. Device Status 2. Comm Status 1. - Page 136 Reference Manual Field Communicator Menu Tree January 2017 00809-0100-4140, Rev AA Figure C-2. Rosemount 2140 Field Communicator Menu Tree (Configure Part One) 1. Configure Alert 2. Alert Mode 3. Output State 4. High Alert Value 1. Output State 1. Overview 5.
- Page 137 Field Communicator Menu Tree Reference Manual January 2017 00809-0100-4140, Rev AA Figure C-3. Rosemount 2140 Field Communicator Menu Tree (Configure Part Two) 1. Primary Variable 2. Secondary Variable 3. Tertiary Variable 4. Quaternary Variable 1. Poll Address 2. Change Polling Address 3.
- Page 138 Reference Manual Field Communicator Menu Tree January 2017 00809-0100-4140, Rev AA Figure C-4. Rosemount 2140 Field Communicator Menu Tree (Service Tools) 1. Output State 2. Status (*5) 1. Sensor State 2. Status (*5) 1. Primary Variable 1. Sensor Frequency (Gauge) 2.
-
Page 139: D.1 Loi Menu Trees
(*3) Available for Rosemount 2140:SIS. (*4) Available for Rosemount 2140 with extended features package. (*5) Not available for Rosemount 2140 with extended features package. (*6) Displayed only when the PV is mapped to the Output State device variable. (*7) Displayed only when the Current Output Operating Mode device variable is set to Custom and the PV is mapped to the Output State device variable. - Page 140 SIMULATE TEMP EXIT MENU SIMULATE VOLTAG END SIMUL (*1) Available only for a Rosemount 2140 with the extended features package. BACK TO MENU EXIT MENU (*2) Not available for a Rosemount 2140 with the extended features package. (*3) Available only with the extended features package.
-
Page 141: D.2 Number Entry
Local Operator Interface Reference Manual January 2017 00809-0100-4140, Rev AA Number entry Floating-point numbers can be entered with the LOI. All eight number locations on the top line can be used for number entry. Refer to Table 2-1 on page 8 for LOI button operation. -
Page 142: D.3 Text Entry
Reference Manual Local Operator Interface January 2017 00809-0100-4140, Rev AA Text entry Text can be entered using the LOI. Depending on the edited item, up to eight locations on the top line can be used for text entry. Text entry follows the same rules as the number entry rules in “Number entry”... - Page 144 Standard Terms and Conditions of Sale can be found at: Emerson Automation Solutions www.Emerson.com/en-us/Terms-of-Use The Emerson logo is a trademark and service mark of Emerson Electric Co. Emerson FZE P.O. Box 17033 AMS, Rosemount and Rosemount logotype are trademarks of Emerson.
Need help?
Do you have a question about the Rosemount 2140 and is the answer not in the manual?
Questions and answers