Godex EZ2000 Plus User Manual
Hide thumbs
Also See for EZ2000 Plus:
- User manual (56 pages) ,
- Programmer's manual (44 pages) ,
- User manual (78 pages)
Table of Contents
Advertisement
Quick Links
Download this manual
See also:
User Manual
Advertisement
Table of Contents

Related Manuals for Godex EZ2000 Plus


Summary of Contents for Godex EZ2000 Plus
- Page 1 User Manual EZ2000 Plus/ EZ6000 Plus P/N. 920-011911-05 Rev. B, 05.2010...
-
Page 2: Fcc Compliance Statement
Danger of explosion if battery is incorrectly replaced. Replace only with the equivalent type recommended by the manufacturer. Dispose of used batteries according to the manufacturer’s instructions. Specifications are subject to change without notice. EZ2000 Plus / EZ6000 Plus User Manual... -
Page 3: Safety Instructions
Be careful not to get liquid on the equipment to avoid electrical shock. For safety and warranty reasons, ONLY qualified service personnel should open the equipment. Do not repair or adjust energized equipment under any circumstances. EZ2000 Plus / EZ6000 Plus User Manual... -
Page 4: Table Of Contents
3-9. Instructions for using the CF card ................. 33 4. ACCESSORIES ................34 4-1. Internal rewinder (EZ2000 Plus) ................... 34 4-2. Installing the rewinder guide (EZ2000 Plus) ..............36 4-3. Label dispenser (EZ2000 Plus) ..................37 4-4. Internal rewinder for EZ6000 Plus ................39 4-5. -
Page 5: Barcode Printer
Length: 1471’ (450 m) Width: 1.18” Min - 4.33” (30 mm - 110 mm) Max Ribbon Ribbon roll diameter.: 2.99“ (76 mm) Core diameter: 1” (25.4 mm) Auto ink inside and ink outside EZ2000 Plus / EZ6000 Plus User Manual... - Page 6 ** Minimum print height specification compliance can be dependent on non-standard material variables such as label type, thickness, spacing, liner construction, etc. Godex is pleased to test non-standard materials for minimum height printing capability.
- Page 7 Bitmap fonts 90°, 180°, 270° rotatable, single characters 90°, 180°, 270° rotatable Download Fonts Asian fonts 90°, 180°, 270° rotatable and 8 times expandable in horizontal and vertical directions Scalable fonts 90°, 180°, 270° rotatable EZ2000 Plus / EZ6000 Plus User Manual...
- Page 8 ** Minimum print height specification compliance can be dependent on non-standard material variables such as label type, thickness, spacing, liner construction, etc. Godex is pleased to test non-standard materials for minimum height printing capability.
-
Page 9: Interfaces
RTS/CTS RS232 housing (9-pin to 9-pin) DB9 socket DB9 plug +5V, max 500mA Computer Printer 【 】 Note The total current to the parallel and serial ports may not exceed 500 mA. EZ2000 Plus / EZ6000 Plus User Manual... -
Page 10: Usb Port
Function VBUS PS/2 port Pin No. Function DATA CLOCK PS/2 computer-to-printer interface Printer Keyboard DATA DATA CLOCK 5 CLOCK Internal interface UART1 wafer Ethernet module E_MD E_MD E_RST E_RST UART2 wafer Add-on module EZ2000 Plus / EZ6000 Plus User Manual... - Page 11 Applicator wafer Applicator module +24V +24V Printing (out) Printing Print error (out) Print error Printed (out) Printed Print (in) Print EZ2000 Plus / EZ6000 Plus User Manual...
-
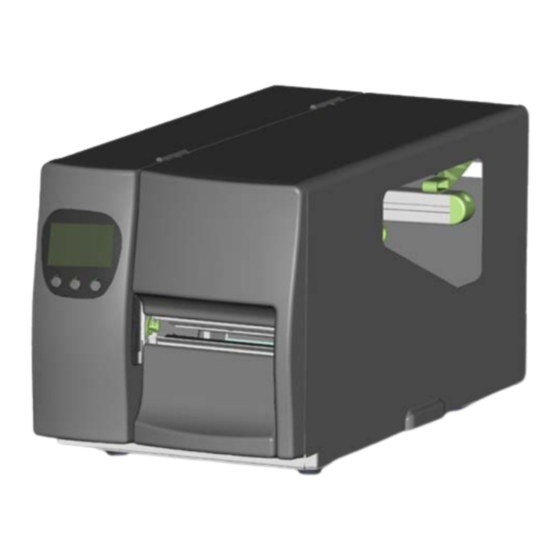
Page 12: Getting To Know Your Printer
Feed slot for continuous labels CF card slot Parallel port (optional) WLAN antenna interface (optional) Ethernet port Serial port (DB-9) PS/2 port (optional) Applicator interface (optional) USB port On/Off switch Power jack Feed slot for continuous labels EZ2000 Plus / EZ6000 Plus User Manual... - Page 13 Ribbon supply hub Print mechanism Platen roller Tear-off plate Release lever for print head Adjustment wheel for sensor Paper guide Label tension guide Label supply hub Label roll guide Release catch Movable sensor EZ2000 Plus / EZ6000 Plus User Manual...
-
Page 14: Printer Setup
1. Now slide the label roll guide forward and fold it up as shown by the blue arrow 2. EZ2000 Plus / EZ6000 Plus User Manual... - Page 15 【 】 Note Remember to set the movable sensor to gap, black mark, or tag hole by changing the position of the sensor with the adjustment wheel. EZ2000 Plus / EZ6000 Plus User Manual...
- Page 16 【 】 Note Pass the labels through the printer as shown in the illustration. 10. Return the print head release lever to its original position. 11. Then close the printer cover. EZ2000 Plus / EZ6000 Plus User Manual...
-
Page 17: Loading The Ribbon
5. Pass the ribbon under the print head and back up on the other side. Attach it to the empty ribbon core. 【 】 Note Do not pass the ribbon under the sensor. EZ2000 Plus / EZ6000 Plus User Manual... -
Page 18: Connecting The Printer To The Host Computer
Connect the power cord to the AC adapter and connect the adapter to the printer. Connect the USB cable to the printer and host computer. Switch on the printer. The operator panel should now light up. EZ2000 Plus / EZ6000 Plus User Manual... -
Page 19: Installing The Driver
Select the icon for the driver file and click it to start the installation. Follow the instructions on the screen. The Driver Wizard guides you through the installation procedure. Select "Install printer drivers". Specify your printer model. EZ2000 Plus / EZ6000 Plus User Manual... - Page 20 "Finish" to start copying the driver files. 10. Wait until copying is complete, then finish the installation. 11. Once the driver installation is complete, the new printer should be visible in the "Printers and Faxes" folder. EZ2000 Plus / EZ6000 Plus User Manual...
-
Page 21: Operator Panel
LCD display. The current print job is cancelled. Example: While a 10-label print job is running, you press the CANCEL button. Two of the labels have been printed. The print job is cancelled and the remaining eight labels are not printed. EZ2000 Plus / EZ6000 Plus User Manual... - Page 22 This mode is for download of the firmware only. Switch on the printer and keep Settings button pressed for about 3 beeps Setting mode mode 3-4 seconds, until you hear 3 beeps. EZ2000 Plus / EZ6000 Plus User Manual...
-
Page 23: Settings Mode
Plus: The button increases the value. Minus: The button reduces the value. Next: The button switches to the next settings option. EZ2000 Plus / EZ6000 Plus User Manual... - Page 24 Sensor type Gap mode: For die-cut labels on label liner or labels with tag holes Reflective mode: For labels or normal paper with black marks on the reverse side. EZ2000 Plus / EZ6000 Plus User Manual...
- Page 25 ON: This function requires a dispenser or cutter. Default: OFF ON: When password protection is enabled, you need a Password password to access the settings. Default: ON ON: Always starts printing at the top of the page. Top of form EZ2000 Plus / EZ6000 Plus User Manual...
- Page 26 【 】 Note 2 The printer will store your changes even after it is switched off. You can change the settings again in settings mode. EZ2000 Plus / EZ6000 Plus User Manual...
- Page 27 Settings mode diagram Items marked "*" are the default settings. EZ2000 Plus / EZ6000 Plus User Manual...
-
Page 28: Self Test
Switch on the printer, keeping the FEED button pressed until you hear 3 beeps and the message "Self test" is shown on the display. After about one second, the printer will automatically print out the list below. That means the printer is functioning normally. EZ2000 Plus / EZ6000 Plus User Manual... -
Page 29: Dump Mode
The label height in mm is shown on the display. After displaying the label height, the printer switches back to standby mode. EZ2000 Plus / EZ6000 Plus User Manual... -
Page 30: Keyboard Mode
3-7. Keyboard mode The printers of the EZ2000 Plus and EZ6000 Plus series support keyboards with a PS/2 interface, provided the parallel/PS/2 adapter is installed. Here is how you connect a PS/2 keyboard: Switch off the printer and plug the PS/2 connector into the appropriate printer port. - Page 31 11. Specify a random value (example: 199). 12. The input form for the print quantity is now shown on the display. 13. Specify a quantity (example: 3). EZ2000 Plus / EZ6000 Plus User Manual...
- Page 32 14. The printer will print three labels with the values for the two variables and the serial number specified. EZ2000 Plus / EZ6000 Plus User Manual...
-
Page 33: Error Alerts
Possible reason: Paper jam. paper feed problem. Please follow the CF card The CF card Both instructions in is not flashing beeps Section 4-4 to formatted formatted. format the CF card. EZ2000 Plus / EZ6000 Plus User Manual... -
Page 34: Instructions For Using The Cf Card
3-9. Instructions for using the CF card All EZ2000 Plus and EZ6000 Plus series printers will recognise the CF card. If the printer's internal memory is not sufficient to store label formats, graphics or fonts, you can use the CF card as an external memory to increase the storage capacity. -
Page 35: Accessories
Place the printer on a flat surface and open the printer cover. 【 】 Note Remember to switch off the printer before starting the installation. Remove the cover for the rewinder module. EZ2000 Plus / EZ6000 Plus User Manual... - Page 36 Remove the retention clip from the rewinder. Secure the rewinder on the printer housing using the four screws supplied. Now connect the rewinder cable to the printer housing. Installation of the rewinder module is now complete. EZ2000 Plus / EZ6000 Plus User Manual...
-
Page 37: Installing The Rewinder Guide (Ez2000 Plus)
4-2. Installing the rewinder guide (EZ2000 Plus) Unscrew the screw marked in the illustration on the front of the printer, which secures the lower cover plate. Remove the lower cover plate. 【 】 Note Switch off the printer before starting the installation. -
Page 38: Label Dispenser (Ez2000 Plus)
12 mm. Strip a few labels off the label liner (approx. 400 mm). Then pass the label liner through the print mechanism and from the bottom up onto the rewinder. EZ2000 Plus / EZ6000 Plus User Manual... - Page 39 11. Press the lower part of the stripper sensor to fold it out. 12. The sensor locks in a horizontal position. 13. Close the printer cover to complete installation of the dispenser. EZ2000 Plus / EZ6000 Plus User Manual...
-
Page 40: Internal Rewinder For Ez6000 Plus
Remove the two screws that secure the power supply unit on the bottom of the printer housing. Remove the power supply unit. Remove the cable connecting the motherboard and the connector bracket. EZ2000 Plus / EZ6000 Plus User Manual... - Page 41 Please make sure that all rewinder cable connectors are arranged on the side of the motherboard before you tighten the screws that secure the rewinder. 13. Connect the "Rewinder full" switch to the jack on the rewinder connector bracket. EZ2000 Plus / EZ6000 Plus User Manual...
- Page 42 16. If required, adjust the position of the motor during installation of the belt. 17. Now tighten the screws securing the motor. 18. Gently pull the rewinder connection cables so they are fully inside the printer housing. EZ2000 Plus / EZ6000 Plus User Manual...
- Page 43 25. Remove the lower cover plate. 26. Mount the rewinder guide on the print mechanism and secure it with screws. EZ2000 Plus / EZ6000 Plus User Manual...
- Page 44 Then send the command "^XSET,REWINDER,1" to the printer to enable the rewind function. 【 】 Note 2 To use the label dispenser, you have to remove the rewinder guide again. EZ2000 Plus / EZ6000 Plus User Manual...
-
Page 45: Installing The Label Dispenser (Ez6000 Plus With Rewinder)
】 Note Switch off the printer before starting the installation. Remove the two screws securing the tear-off plate, then remove the tear-off plate. Secure the dispenser module on the printer using two screws. EZ2000 Plus / EZ6000 Plus User Manual... - Page 46 (2). Strip a few labels off the label liner (approx. 400 mm) and pass the label liner through the dispenser module. 10. Close the dispenser module again. EZ2000 Plus / EZ6000 Plus User Manual...
- Page 47 25 mm. 13. Close the printer cover to complete installation of the dispenser. 【 】 Note Before you start using the rewinder, send the command "^XSET,REWINDER,1" to the printer to enable the rewind function. EZ2000 Plus / EZ6000 Plus User Manual...
-
Page 48: Installing The Cutter
Remove the lower cover plate. 【 】 Note Switch off the printer before starting the installation. Remove the two screws securing the tear-off plate, then remove the tear-off plate. EZ2000 Plus / EZ6000 Plus User Manual... - Page 49 Labels or paper should be at least 30 mm high. 【 】 Suggestion After installation of the cutter module, set the stop position to 26 mm (EZ2000 Plus) or 30 mm (EZ6000 Plus). EZ2000 Plus / EZ6000 Plus User Manual...
-
Page 50: Installing The Parallel / Ps/2 Adapter
Unscrew the two screws marked in the illustration on the right and remove the left-hand side of the printer housing. Unscrew the screws on the parallel port cover and remove the cover. EZ2000 Plus / EZ6000 Plus User Manual... - Page 51 Connect the 30-pin connection cable to the motherboard. Replace the left-hand part of the printer housing and secure it with the screws you removed earlier. Installation of the parallel/PS/2 adapter is now complete. EZ2000 Plus / EZ6000 Plus User Manual...
-
Page 52: Installing The Applicator Interface
Unscrew the two screws marked in the illustration on the right and remove the left-hand side of the printer housing. Unscrew the screws on the applicator interface cover and remove the cover. EZ2000 Plus / EZ6000 Plus User Manual... - Page 53 "APP" on the motherboard. Secure the applicator interface using two screws. Replace the left-hand part of the printer housing and secure it with the screws you removed earlier to complete the installation. EZ2000 Plus / EZ6000 Plus User Manual...
- Page 54 4-9. Installing the WLAN module – EZ2000 Plus / EZ6000 Plus Ethernet cable, 1.8 m Fastening screws (set of 2) Screws for Ethernet module (set of Bracket WLAN module Connection cable (module to motherboard) WLAN antenna Washer Antenna bracket Make sure that the printer is switched off and the power cord disconnected from the printer.
- Page 55 Secure the module bracket on the inside of the printer housing at the back. Push the antenna connector through the antenna bracket. Attach the antenna bracket to the back of the printer. EZ2000 Plus / EZ6000 Plus User Manual...
- Page 56 Ethernet module is enabled, the USB port is disabled. To enable it again, send the command "^XSET,USBETHERNET,0" to the printer. 【 】 Note 2 The wireless network must be configured via a network cable. EZ2000 Plus / EZ6000 Plus User Manual...
-
Page 57: Maintenance And Adjustment
Hold the module at the front and slide it into the printer along the guide rails. Firmly press the module in so the contacts are fully connected. EZ2000 Plus / EZ6000 Plus User Manual... -
Page 58: Adjusting The Print Line
¼ turn at a time. If no improvement is visible, gently turn the screws clockwise as far as possible, then restart the adjustment process from there. EZ2000 Plus / EZ6000 Plus User Manual... -
Page 59: Adjusting The Ribbon Tension
In that case, reduce the tension of the ribbon supply hub and the ribbon rewind hub by turning the knobs anticlockwise. EZ2000 Plus / EZ6000 Plus User Manual... -
Page 60: Cleaning The Thermal Print Head
The print head should be cleaned once a week. 【 】 Note 2 Please make sure that there are no metal fragments or other hard particles on the soft cloth used to clean the print head. EZ2000 Plus / EZ6000 Plus User Manual... -
Page 61: Adjusting The Balance And Print Head Tension
If there is no quality improvement, you need to change the pressure on the TPH spring boxes. Turning the screw clockwise increases the pressure, while turning it anticlockwise reduces the pressure. EZ2000 Plus / EZ6000 Plus User Manual... -
Page 62: Ribbon Shield Settings
If you adjust the screw by more than two full turns, the paper feed may no longer function correctly. In that case, unscrew the ribbon shield screws fully and restart the adjustment process. EZ2000 Plus / EZ6000 Plus User Manual... -
Page 63: Cutter Settings
The cutter will automatically reset. 【 】 Note The label medium should be at least 30 mm long to ensure correct functioning of the cutter. EZ2000 Plus / EZ6000 Plus User Manual... -
Page 64: Troubleshooting
Check whether there is dust on the label dispenser. ♦ functioning normally. Check whether the label stock is positioned correctly. 【 】 Note If any problems occur that are not described here, please contact your dealer. EZ2000 Plus / EZ6000 Plus User Manual...
Need help?
Do you have a question about the EZ2000 Plus and is the answer not in the manual?
Questions and answers