Table of Contents
Advertisement
Advertisement
Table of Contents

Related Manuals for Godex EZ-1105


Summary of Contents for Godex EZ-1105
- Page 1 User’s Manual EZ-1105 / EZ-1305 P/N. 920-013611-00 Rev. D, 06.2009...
- Page 2 Only use with power supply adapter model: WDS060240 (7A). Changes or modifications not expressly approved by the party responsible for compliance could void the user's authority to operate the equipment. Specifications are subject to change without notice. EZ-1105 / EZ-1305 User’s Manual...
-
Page 3: Safety Instructions
Don’t repair or adjust energized equipment alone under any circumstances. Someone capable of providing first aid must always be present for your safety Always obtain first aid or medical attention immediately after an injury. Never neglect an injury, no matter how slight it seems. EZ-1105 / EZ-1305 User’s Manual... - Page 4 Bei Wartungs- und Reparaturarbeiten müssen die Sicherheitsvorschriften der zuständigen Berufsverbände und Behörden unbedingt eingehalten werden. Bei Verletzungen unbedingt den Arzt aufsuchen und die gegebenenfalls die zuständigen Stellen benachrichtigen. Unterlassung kann zum Verlust der Versicherungsleistungen führen. EZ-1105 / EZ-1305 User’s Manual...
-
Page 5: Table Of Contents
4-2. Ethernet Module Installation ..................23 5. MAINTENANCE AND ADJUSTMENT ........26 5-1. Thermal Print Head Cleaning ..................26 5-2. Thermal Print Head Balance Adjustment..............26 5-3. Print Line Adjustment....................27 5-4. Troubleshooting ......................28 EZ-1105 / EZ-1305 User’s Manual... -
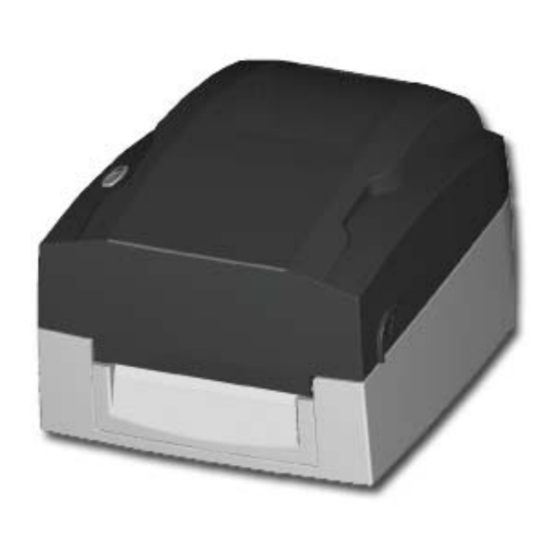
Page 6: Barcode Printer
Bars, EAN 8 / 13 (add on 2 & 5), Codabar, Post NET, EAN 128, DUN 14, HIBC, Barcodes MSI (1 Mod 10), Random Weight, Telepen, FIM, China Postal Code, RPS 128 and GS1 DataBar 2-D Bar codes: PDF417, Datamatrix code, MaxiCode, QR code and Micro QR code EZ-1105 / EZ-1305 User’s Manual... - Page 7 External label roll holder for 10” (250 mm) O.D. label rolls External label rewinder Specifications are subject to change without notice. All company and/or product names are trademarks and/or registered trademarks of their respective owners. EZ-1105 / EZ-1305 User’s Manual...
-
Page 8: Communication Interface
9600 baud rate、no parity、8 data bits、1 stop bit、XON/XOFF protocol and Serial Default Setting RTS/CTS。 RS232 HOUSING (9-pin to 9-pin) DB9 SOCKET DB9 PLUG +5V,max 500mA PRINTER 【 】 Note The total current output from parallel port and serial port altogether can not exceed 500mA. EZ-1105 / EZ-1305 User’s Manual... -
Page 9: Printer Parts
1-4. Printer Parts Cover Open Button Top Cover Label Roll Core Ribbon Rewind Wheel Print Mechanism Ribbon Core Holder (rewind) LED Light FEED Key Locking Tenon (left/right) Ribbon Observing Window Print Head Pressure Adjustment Screw (left/right) EZ-1105 / EZ-1305 User’s Manual... - Page 10 Print Line Adjustment Gear Ribbon Core Holder (supply) Label Sensor Fan-Fold Label Insert Power Switch Power Socket USB Port Ethernet Socket (Optional) Serial Port / RS-232 (Optional) * The communication ports may vary depending on product types. EZ-1105 / EZ-1305 User’s Manual...
-
Page 11: Printer Installation
Please align the Ribbon Supply Wheel with the fillister of ribbon roll core when installing the ribbon roll. You can rotate the black gear as figure showed to help to align the ribbon roll core. EZ-1105 / EZ-1305 User’s Manual... - Page 12 Wrap the ribbon around the Printing Mechanism and stick the ribbon onto the rewind ribbon roll. Rotate the Ribbon Rewind Wheel to make the ribbon tight and smooth. Firmly close the Printing Mechanism to complete the installation. EZ-1105 / EZ-1305 User’s Manual...
-
Page 13: Label Installation
Align the Label Guides to the edge of label. 【 】 Note When adjusting the Label Guides, please move both Label Guides together at the same time. Close the Printing Mechanism to complete the label installation. EZ-1105 / EZ-1305 User’s Manual... -
Page 14: Label Roll Core Installation Instruction
2-3. Label Roll Core Installation Instruction (A) 1” roll core installation (B) 1.5” roll core installation EZ-1105 / EZ-1305 User’s Manual... -
Page 15: Pc Connection
Connect the cable to the USB port on the printer and on the PC. Turn on the PC and the printer, and then the printer’s LED light will shine. 【 】 Note Please make sure the power switch is off before plugging the power cable into the printer. EZ-1105 / EZ-1305 User’s Manual... -
Page 16: Driver Installation
Select the icon of driver file and click it to start the installation. Follow the instruction on screen to keep the installation going. Then the Driver Wizard utility should run automatically. Select "Install printer drivers". Select printer model. EZ-1105 / EZ-1305 User’s Manual... - Page 17 Finish to start copying driver files. 10. Wait for file copying finished and complete the installation. 11. After the driver installation is complete, there should be a new printer model on Windows "Printer and Faxes" setting. EZ-1105 / EZ-1305 User’s Manual...
-
Page 18: Printer Setting
LED light turn to flash red and then release the FEED key. Printer will automatically detect the label and record it. A Self-Test page will be printed out after Auto Sensing is completed and the printer goes back to standby mode. EZ-1105 / EZ-1305 User’s Manual... -
Page 19: Self-Test Page
When printer is on Thermal Transfer Mode, it is necessary to install the ribbon in printer. Otherwise the error message "Print Mode Error" will be triggered and the printer will not be able to print. EZ-1105 / EZ-1305 User’s Manual... -
Page 20: Sensor Switch
To get out from the Dump Mode, please press the FEED key, and then the printer will automatically print out “OUT OF DUMP MODE”. This indicates that the printer is back to standby mode. You can also power off the printer to exit from the Dump Mode. EZ-1105 / EZ-1305 User’s Manual... -
Page 21: Error Messages
Wait for the print head temperature drops to the normal temperature range, Print head The temperature of print and then printer will go back to the Error head is too high. standby mode and the LED light will stop flashing. EZ-1105 / EZ-1305 User’s Manual... -
Page 22: Accessory
Connection Port Panel. Align the RS-232 Back Panel to connection ports and fix it with Ground Wire Screw and Mainboard Screw. Plug one end of the Module Connection Wire on into the socket on RS-232 module. EZ-1105 / EZ-1305 User’s Manual... - Page 23 Push the mainboard downward slightly to fix the mainboard with the hooks. 13. Align the Bottom Cover to the hooks and reassemble it. 14. Tighten bottom case screws to complete the installation. EZ-1105 / EZ-1305 User’s Manual...
-
Page 24: Ethernet Module Installation
Unscrew the Ground Wire Screw and Mainboard Screw to remove the Connection Port Panel. Align the Ethernet Back Panel to connection ports and fix it with Ground Wire Screw and Mainboard Screw. EZ-1105 / EZ-1305 User’s Manual... - Page 25 Ethernet module. 11. Align the hole of Ethernet module to the pillar and then turn the mainboard back to original position. Push the mainboard downward slightly to fix the mainboard with the hooks. EZ-1105 / EZ-1305 User’s Manual...
- Page 26 After the Ethernet module installation is completed, please send the "^XSET,USBETHERNET,1" printer command to printer for activating the Ethernet connection function. Please mind that USB port will be deactivated once the Ethernet connection function is activated. EZ-1105 / EZ-1305 User’s Manual...
-
Page 27: Maintenance And Adjustment
(turn to "+") or decrease (turn to "-") print head pressure. 【 】 Note Please turn the adjustment screws carefully since it may cause worse printing quality or damage on printer. EZ-1105 / EZ-1305 User’s Manual... -
Page 28: Print Line Adjustment
(as arrow 1 shows), print line would move in the direction where arrow A shows. When turning print head adjusting gear clockwise (as arrow 2 shows), print line would move in the direction where arrow B shows. EZ-1105 / EZ-1305 User’s Manual... -
Page 29: Troubleshooting
Check if Thermal Print Head is covered with glue or stain 【 】 Note Your dealer is knowledgeable about printers, printing software, and your unique system. Please contact your local dealer for further technical support. EZ-1105 / EZ-1305 User’s Manual...
Need help?
Do you have a question about the EZ-1105 and is the answer not in the manual?
Questions and answers