Godex EZ1000 PLUS User Manual
Hide thumbs
Also See for EZ1000 PLUS:
- User manual (35 pages) ,
- Programmer's manual (43 pages) ,
- User manual (43 pages)

Related Manuals for Godex EZ1000 PLUS


Summary of Contents for Godex EZ1000 PLUS
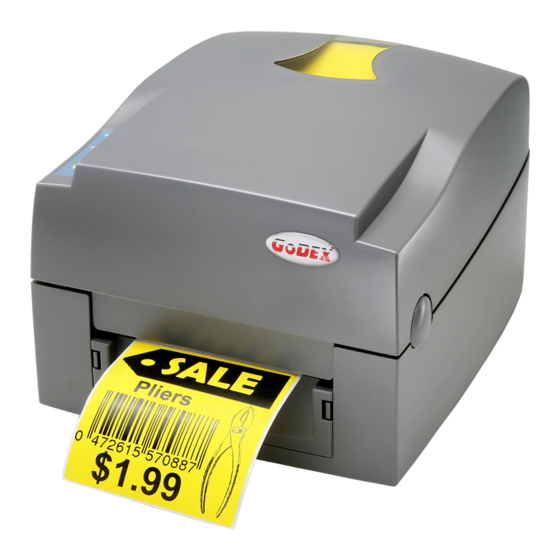
- Page 1 EZ1000 PLUS BARCODE PRINTER USER MANUAL USER MANUAL : EZ1000 Plus VERSION : Rev. C ISSUE DATE : 2013.07.24 : 920-012411-04...
- Page 2 60950-1, 1st Edition, 2007-10-31, CSA C22.2 No. 60950-1-03, 1st Edition, 2006-07, CFR 47, Part 15 WARNING This is a Class A product. In a domestic environment this product may cause radio interference in which case the user may be required to take adequate measures. 此为Class A产品,在生活环境中,该产品可能造成无线电干扰,在这种情况下,可能需要用户对 其干扰采取切实可行的措施。 EZ1000 Plus User Manual...
-
Page 3: Safety Instructions
Only use with power supply adapter model: WDS060240P (9A). Changes or modifications not expressly approved by the party responsible for compliance could void the user's authority to operate the equipment. SPECIFICATIONS ARE SUBJECT TO CHANGE WITHOUT NOTICE. EZ1000 Plus User Manual... -
Page 4: Table Of Contents
1. BARCODE PRINTER ..............1 1-1. Box content ..................... 1 1-2. Specifications ..................1 1-3. Interfaces ....................3 1-4. Getting to know your printer ..............5 2. PRINTER SETUP ................7 2-1. Loading the ribbon ................7 2-2. Loading the label roll ................9 2-3. -
Page 5: Barcode Printer
Width: 1.18” Min - 4.33” (30 mm - 110 mm) Max Ribbon roll diameter.: 2.67“ (68 mm) Core diameter: 1” (25.4 mm) EZPL, GEPL (Godex Eltron® Printer Language), GZPL (Godex Zebra® Printer Language Printer Language) Label design software: QLabel-IV (for EZPL only) Software Driver &... - Page 6 ** Minimum print height specification compliance can be dependent on non-standard material variables such as label type, thickness, spacing, liner construction, etc. Godex is pleased to test non-standard materials for minimum height printing capability.
-
Page 7: Interfaces
Baud rate 9600, no parity, 8 data bits, 1 stop bit, XON/XOFF protocol settings and RTS/CTS RS232 housing (9-pin to 9-pin) DB9 socket DB9 plug +5V, max 500mA Computer Printer Note The total current to the parallel and serial ports may not exceed 500 mA. 【 】 EZ1000 Plus User Manual... - Page 8 USB port Connector type : Type B Pin No. Function VBUS Internal interface UART1 wafer Ethernet module E_MD E_MD E_RST E_RST UART2 wafer Add-on module EZ1000 Plus User Manual...
-
Page 9: Getting To Know Your Printer
Ribbon feed mechanism Print mechanism Ribbon rewind hub and empty ribbon core Release catches (left/right) Front cover LED indicator (READY) LED indicator (STATUS) FEED button CF card slot cover Screws for adjusting the print head pressure (left/right) EZ1000 Plus User Manual... - Page 10 Label guides Platen roller Print line adjustment Label sensor Feed slot for continuous labels On/off switch Ethernet port (optional) USB port Parallel port Serial port (RS-232) Power jack * Ports and interfaces vary depending on the model. EZ1000 Plus User Manual...
-
Page 11: Printer Setup
Release and lift the print mechanism. Remove the ribbon at the back. Place the ribbon on the hub at the back and replace the ribbon hub. EZ1000 Plus User Manual... - Page 12 Wind the ribbon onto the rewind core, attaching it with the adhesive strip at the end of the ribbon. Wind the ribbon 2–3 times around the core. Close the print mechanism. Ensure the release catches click into place. EZ1000 Plus User Manual...
-
Page 13: Loading The Label Roll
Press the release catches and lift the print mechanism. Pass the labels through the paper guides up to the tear-off plate. Adjust the paper guides to the label width. Close the print mechanism. EZ1000 Plus User Manual... -
Page 14: Installing The Label Supply Hub
2-3. Installing the label supply hub (A) Installing the label supply hub for 1" cores (B) Installing the label supply hub for 1.5" cores (C) Installing the label supply hub for 3" cores EZ1000 Plus User Manual... -
Page 15: Preparing For Tag Printing
During adjustment, the sensor must therefore be positioned directly below the tag hole as shown in the illustration. The tag hole should be at least 3 mm in diameter to ensure correct functioning. Tag hole position Sensor Sensor position EZ1000 Plus User Manual... -
Page 16: Connecting The Printer To The Host Computer
2. Connect the power cord to the power supply and to the AC adapter, then connect the adapter to the printer. 3. Connect the printer with the host computer via the USB port or serial port. 4. Switch on the printer. The LED indicator should light up. EZ1000 Plus User Manual... -
Page 17: Installing The Driver
Select the icon for the driver file and click it to start the installation. Follow the instructions on the screen. The Driver Wizard guides you through the installation procedure. Select "Install printer drivers". Specify your printer model. EZ1000 Plus User Manual... - Page 18 "Finish" to start copying the driver files. 10. Wait until copying is complete, then finish the installation. 11. Once the driver installation is complete, the new printer should appear in the "Printers and Faxes" folder. EZ1000 Plus User Manual...
-
Page 19: Operator Panel
STATUS LED lights up orange, release the FEED button. The printer will now measure the label stock and store the label height. 4. Once the printer has successfully measured the label stock, it will print a self-test label. EZ1000 Plus User Manual... -
Page 20: Self Test
3-4. Self test The self-test function lets you check whether the printer is functioning normally. The contents of a self-test printout are listed below. EZ1000 Plus User Manual... -
Page 21: Error Alerts
A file of the same name 2 x 2 already exists. The printer Change the name of the beeps prints the message file and try storing it again. "Filename is repeated". EZ1000 Plus User Manual... -
Page 22: Accessories
Press release catches on both sides of the print mechanism to open and lift the print mechanism. remove front cover, press in the two plastic release tabs. Remove the front cover shown illustration. EZ1000 Plus User Manual... - Page 23 Pass the paper through the guides. Note Labels should be at 【 】 least 25 mm high. Remove the first labels from the liner, so you can pull the liner through the guides. EZ1000 Plus User Manual...
- Page 24 10. Pass the label stock through the printer as shown in the illustration on the right. 11. Close print mechanism label dispenser. 12. Press the FEED button to set the label position complete installation. EZ1000 Plus User Manual...
-
Page 25: Installing The Cutter
Important The printer must 【 】 be switched off, or the motherboard may be destroyed! There are 2 jacks: the lower jack is for the dispenser, the upper jack for the cutter. EZ1000 Plus User Manual... - Page 26 12. To finish, press the FEED button to set the label position. Note 【 】 Labels should be at least 20 mm high. When using the printer with the cutter, you should set the stop position (^E) to 30. EZ1000 Plus User Manual...
-
Page 27: Installing The Ethernet Module
To remove the top part of the printer housing, gently pull the open printer cover upwards. Remove the cover from the Ethernet interface at the back of the printer housing. Secure the Ethernet module on the bracket. EZ1000 Plus User Manual... - Page 28 Once you have finished installing the Ethernet module, the command "^XSET,USBETHERNET,1" must be sent to the printer to enable the Ethernet module. While the Ethernet module is enabled, the USB port is disabled. To enable it again, send the command "^XSET,USBETHERNET,0" to the printer. EZ1000 Plus User Manual...
-
Page 29: Installing The Wlan Module
Place the printer the right way up again and lift the printer cover. To remove the top part of the printer housing, gently pull the open printer cover upwards. Remove the cover from the Ethernet interface at the back of the printer housing. EZ1000 Plus User Manual... - Page 30 Be careful when removing the cable tie to avoid damage to the connection cable. 【 】 Secure the module on the printer housing and plug the other end of the connection cable into the socket on the motherboard. EZ1000 Plus User Manual...
- Page 31 10. Put the antenna connector through the antenna bracket and then through the opening for the antenna jack as shown. 11. Put first the fixing plate and then the washer on the antenna connector. Now secure them with the nut. EZ1000 Plus User Manual...
- Page 32 Ethernet module. While the Ethernet module is enabled, the USB port is disabled. To enable it again, send the command "^XSET,USBETHERNET,0" to the printer. Note 2 【 】 The wireless network must be configured via a network cable. EZ1000 Plus User Manual...
-
Page 33: Installing The Cf Card Adapter
CF card adapter carefully with those on the motherboard before connecting the adapter. Note 【 】 Please make sure that the connections are aligned correctly, to prevent damage to the pins. Replace the plastic cover. EZ1000 Plus User Manual... -
Page 34: Instructions For Using The Cf Card
4-6. Instructions for using the CF card Once the CF card adapter is installed, all EZ1000 Plus series printers will recognise the CF card. If the printer's internal memory is not sufficient to store label formats, graphics or fonts, you can use the CF card as an external memory to increase the storage capacity. -
Page 35: Maintenance And Adjustment
Open the printer cover. Remove the ribbon. Use a screw driver and slowly turn the adjustment screws for the print head to increase or reduce the print head pressure. EZ1000 Plus User Manual... -
Page 36: Adjusting The Print Line
When you have cleared the paper jam, switch on the printer again. The cutter will automatically reset. Note 【 】 Labels should be at least 30 mm high to ensure correct functioning of the cutter. EZ1000 Plus User Manual... -
Page 37: Troubleshooting
Check whether there is dust on the label dispenser. ♦ functioning normally. Check whether the label stock is positioned correctly. ♦ Note 【 】 If any problems occur that are not described here, please contact your dealer. EZ1000 Plus User Manual...
Need help?
Do you have a question about the EZ1000 PLUS and is the answer not in the manual?
Questions and answers