
Related Manuals for Elite Models 8mm EPP Acrocub


Summary of Contents for Elite Models 8mm EPP Acrocub
-
Page 1: Instruction Manual
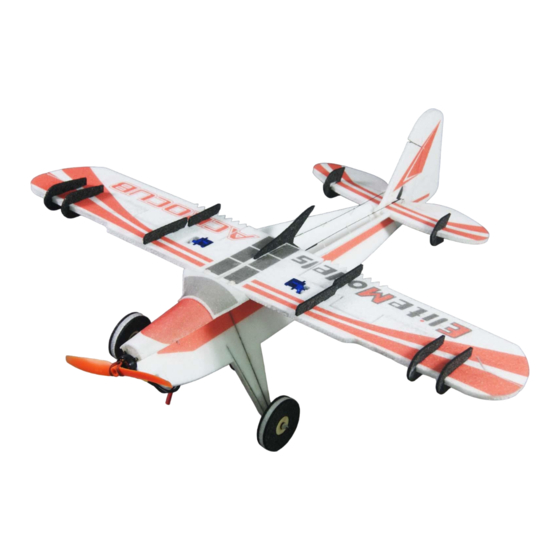
8mm EPP Acrocub Instruction Manual Specifications Wingspan: 34.6 in (880mm) Length: 31.5 in (800mm) Wing Area: 213.9 sq in (13.8sq dm) Flying Weight: Approx. 9oz (270g) -
Page 2: Dear Customer
Dear Customer, Congratulations on your purchase of Elite Models Acrocub 8mm EPP Airplane ARF from Value Hobby. We thank you for your generous support, and hope you enjoy your new airplane. At Value Hobby, we hope to offer competitive prices, good performance, and products that you can setup and use with ease. -
Page 3: Safety In Flying
www.valuehobby.com/8mm-epp-acrocub.html Safety in Flying This is NOT a toy! It is a very high-performance RC airplane capable of high speeds and extreme maneuvers. It should only be operated by a competent pilot in a safe area with proper supervision. ONLY fly your aircraft in a safe, open area, away from spectators and vehicles–and where it is legal to fly. NEVER fly over an unsafe area, such as a road or street. - Page 4 www.valuehobby.com/8mm-epp-acrocub.html 133 x 8 x 1mm carbon fiber sheet 2pcs 240 x 8 x 1mm carbon fiber sheet 2pcs 23 x 1mm Z bend wire 8pcs 185 x 8 x 1mm carbon fiber sheet 2pcs Hook and loop strap 150mm 1pcs M3 x 8mm screw for mounting the motor 4pcs 200 x 2mm heat shrink tubing 1pcs 790 x 3 x 3 carbon fiber square tubing 1pcs...
-
Page 5: Recommended Radio Equipment
www.valuehobby.com/8mm-epp-acrocub.html RECOMMENDED RADIO EQUIPMENT Product Quantity Radio Flysky FS-i6 Transmitter and Receiver Set FLY-RC-4572 Servo Towerpro SG90 9g servo TWP-SV -0352 Y Harness Universal Servo Y-Harness 26AWG 6in (15cm) AMS-AC-2397 2S POWER SETUP Product Motor GForce 2206-1900KV Brushless Outrunner Motor VHB-MT-5009 Hobbywing Flyfun 12A ESC HWG-SC-0236... -
Page 6: Section1 Airframe Assembly
www.valuehobby.com/8mm-epp-acrocub.html Note: 1. Allowing the foam glue to set for a few minutes before assembly will shorten tack up time. This will help you secure the bond more quickly, as the glue usually take longer to cure than needed. Any joints that you feel are going to require adjustment, it is best to assemble the pieces while the glue is wet so you will have time to make adjustments. - Page 7 www.valuehobby.com/8mm-epp-acrocub.html Step7. Locate another fuselage half and cut it into Step10. Glue the lower fuselage onto the other two parts. fuselage half. Make sure the lower fuselage is vertical and straight. Step8. Use foam glue to install the CF strip (133 x 8 x 1mm) into the slot in the lower fuselage.
- Page 8 www.valuehobby.com/8mm-epp-acrocub.html Step13. Locate the white triangle foam block. Step16. Glue the horizontal tail onto the fuselage. Make sure the tab slot on the tail is aligned with the centerline of the fuselage, and the tail is parallel with the work surface. Step14.
-
Page 9: Section2 Wheels Installation
Section2 Wheels Installation Step1. Locate the foam parts and wood hubs for Step3. Locate two axles (60 x 2mm). the wheel assembly. Step4. Use hot glue to install the axle to the Step2. Glue them together as shown. plywood gear leg tip. Make sure the holes on the wood hubs and solid Make sure the axle is parallel with the work surface EPP foam are aligned with each other. - Page 10 www.valuehobby.com/8mm-epp-acrocub.html Step6. Wrap the axle area with the thread as Step8. Locate the hexagon shaped wheel collar. shown. Step9. Use thin CA to glue the hexagon shaped wheel collar to the axle. Step7. Saturate the thread using the thin CA. Step10.
- Page 11 www.valuehobby.com/8mm-epp-acrocub.html Step11. Install the smaller hexagon shaped Step14. Use foam glue to install the triangle plywood wheel collar and use the low temperature plywood block between the wheel collar and gear hot glue to hold it in place. leg. (Make sure the wheel can move freely.) Step15.
-
Page 12: Section 3 Wing And Servos Installation
www.valuehobby.com/8mm-epp-acrocub.html Section 3 Wing and Servos Installation Step1. Locate the two wing halves and the square Step4. Apply some foam glue into the slot. CF spars. Step5. Push the square CF spar into the slot and Step2. Apply foam glue evenly onto one edge of wipe off any glue that squeezes out, weight it down the wing halves. - Page 13 www.valuehobby.com/8mm-epp-acrocub.html Step7. Glue the foam part with two little tabs to Step9. Prepare four 9g servos with servo arms the wing. installed. (Fiberglass servo arm extensions are provided if you want more control throw.) Step8. Glue the remaining three foam parts to the fuselage.
- Page 14 www.valuehobby.com/8mm-epp-acrocub.html Step12. Use low temperature hot glue to glue two Step14. Attach the Z bend wire (23 x 1mm) to the aileron servos onto the wing. servo arm and control horn. Step15. Connect two pushrods together using the Step13. Use the servo arm as a guide to cut a slot heat shrink tubing, then use the lighter to shrink for control horn.
- Page 15 www.valuehobby.com/8mm-epp-acrocub.html Step17. Use hook and loop strap to stick the esc to Step20. Apply the low temp hot glue to the the bottom fuselage. meeting lines between the fuselage and wing. (You also can put the esc onto the top of the fuselage.) Step18.
- Page 16 www.valuehobby.com/8mm-epp-acrocub.html Step23. Start to install elevator servo linkage. Step26. Use a lighter to shrink the tubing to Install the elevator control horn. connect the z bend wire to the pushrod. Step27. With the elevator centered, cut off the Step24. Attach the pushrods to the control horn excessive pushrod and use a lighter to shrink the and elevator servo arm.
-
Page 17: Section4 Motor Installation
Section4 Motor Installation Step1. Prepare a 2206 motor, 8 x 4 prop and two Step4. Install the motor to the motor mount using pieces of O-ring. the screws provided with the motor. Step2. Use O ring to install the prop to the motor. Step5. -
Page 18: Section5 Recommended Cg And Control Throw
Section5 Recommended CG and Control Throw Center of Gravity Control throws The recommended CG is 42mm (1.65in) from the Extreme & 3D leading edge of the wing. Ailerons: approx. +/-40 degree Rudder: approx. +/- 40 degree Elevator: approx. +/-40 degree Beginner &... - Page 19 www.valuehobby.com/8mm-epp-acrocub.html...
- Page 20 www.valuehobby.com/8mm-epp-acrocub.html 2015-11-12...
Need help?
Do you have a question about the 8mm EPP Acrocub and is the answer not in the manual?
Questions and answers