Table of Contents
Advertisement
Quick Links
Advertisement
Table of Contents

Subscribe to Our Youtube Channel
Related Manuals for Winmate M133W


Summary of Contents for Winmate M133W
- Page 1 Winmate M133W Ultra Rugged Tablet PC Microsoft Windows 10 IoT Enterprise. ® ® Microsoft Windows Embedded 8.1 Industry Pro. ® ® Microsoft Windows Embedded Standard 7. ® ® Microsoft Windows 7 Ultimate/Professional for Embedded Systems. ® ® Product Reference Guide...
-
Page 2: Revision History
M133W User Guide Revision History Revision Arthor Date Description Henry Lee Sept. 11, 2015 Initial Release Henry Lee Sept. 25, 2015 Update First Time Setup Section Henry Lee Oct. 13, 2015 Add MotoSettings Instruction Henry Lee Oct. 20, 2015 Update First Time Setup Section Henry Lee Jan. - Page 3 Warranty Winmate Communication Inc. warrants that each of its products is free from material and workmanship defect for a period of one year starting from the invoice date. If the customer discovers a defect, Winmate Communication Inc.
-
Page 4: Table Of Contents
M133W User Guide CONTENTS Chapter 1: Read Me First .................. 1-1 1.1 Safety Information ....................... 1-1 1.1.1 Precaution on Battery Pack ......................1-1 1.1.2 General Product Safety .........................1-1 1.2 Handling and Maintenance ..................1-2 1.2.1 General Guideline .........................1-2 1.2.2 Cleaning Guideline ........................1-2 1.2.3 Touchscreen Guideline ........................1-2... - Page 5 M133W User Guide Chapter 4: Using the Tablet ................4-1 4.1 HotTab Introduction ..................... 4-1 4.2 Using the physical function keys (Hotkeys) ..............4-2 4.3 Changing the Touchscreen modes ................4-3 4.4 Using the Wireless LAN (Wi-Fi) feature ..............4-7 4.5 Using the Wireless WAN feature .................
-
Page 6: Chapter 1: Read Me First
Chapter 1 - Read Me First 1.1 Safety Information Follow and adhere to all warnings and instructions in this manual. For your safety, please read all safety and operating instructions before using the product. Keep this manual for future reference. 1.1.1 Precaution on Battery Pack 1. -
Page 7: Handling And Maintenance
M133W User Guide 1.2 Handling and Maintenance Follow and adhere to all warnings and instructions in this manual. For you’re the longevity of the product usage, please read all operating instructions before using the product. Keep this manual for future reference. -
Page 8: Chapter 2: Getting Started
Getting Started When there is a noticeable discrepancy in the operation of the touchscreen function (your touch does not correlate to the proper location on the screen), recalibrate the touchscreen display. Congratulations on purchasing this rugged Tablet Computer. The rugged design allows you to use it in harsh outdoor environments. -
Page 9: Description Of Parts
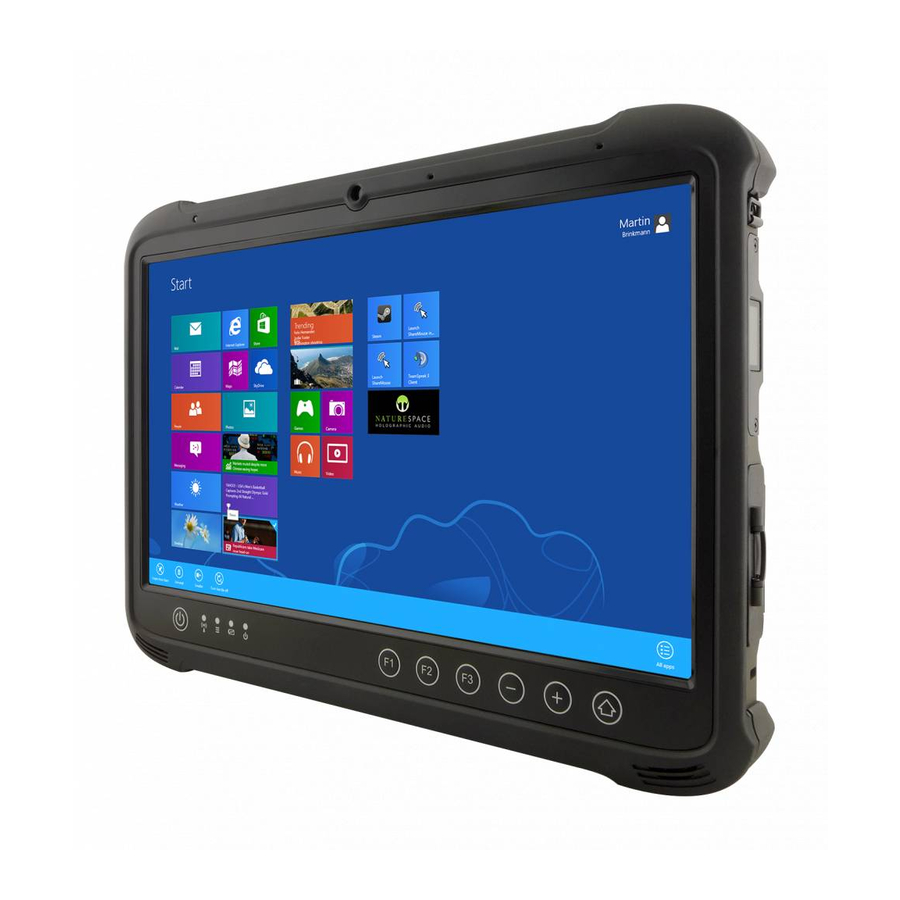
M133W User Guide 2.2 Description of Parts Front Rear Item Description Front Camera 2 Megapixel Webcam Microphone Digital Microphones Menu Button HotTab Quick Access +/- Buttons Change be used to control volume Fn Buttons Programmable Function Buttons LED Indicators: Show the current status of the Tablet Computer... -
Page 10: Front Led Indicators Detail
M133W User Guide 2.2.1 Front LED Indicators Detail: Front Button Details: Left Right Item Description Shoulder Strap D-Ring Provides loop to mount shoulder strap I/O Cover Protects I/O Ports HDMI HDMI output to external display SD Card Memory card reader port for SD Card... -
Page 11: Combination Keys (Keyboard Key Emulation)
M133W User Guide 2.3 Combination Keys (Keyboard Key Emulation) For the physical buttons on the tablet computer, in addition to their dedicated functions detailed in the previous section, they can also be used to emulate commonly used keyboard key strokes. Under different scenario, a single... -
Page 12: First-Time Operation
M133W User Guide 2.4 First-time Operation 2.4.1 Insert SIM Card (for optional 3G/LTE equipped device) Please make sure the tablet is powered off, before opening up the service window to Caution insert the SIM card. The Tablet Computer supports data connection using 3G/LTE SIM cards and fits Micro-SIM card. (Note: 3G/LTE feature is optional). -
Page 13: Insert Battery Pack
M133W User Guide 2.4.2 Insert Battery Pack To insert the included standard battery pack into the Tablet Computer: 1. Disconect any cords connected to the tablet computer 2. Turn the tablet computer over, back facing up. 3. Locate the Battery Lock Latch and push it to the “Unlocked” position. -
Page 14: Connecting To Power Supply
M133W User Guide 2.6 Connecting to Power Supply The Tablet Computer operates either on external AC power or internal battery power. It is recommended to use AC power when you start up the Tablet Computer for the first time. Use only the AC adapter included with your Tablet Computer. Using other AC Caution adapters may damage the Tablet Computer and the Battery. -
Page 15: Turning On / Off
M133W User Guide 2.8 Turning On / Off 2.8.1 Turning On Press and hold the power switch for 3 seconds until the blue LED power indicator light lid up. • Do not press the power switch repeatedly. Note 2.8.2 Turning Off (By Windows) Perform the following procedure to shutdown the Tablet Computer: Make sure you have closed any programs that are open on the Desktop. -
Page 16: Chapter 3: Setting Up Windows For The First Time
Chapter 3 - Setting up Windows for the First Time This section details how to setup different version of the Windows that may be installed on the tablet for the first time. 3.1 Setting up Windows 10 IoT Enterprise Follow the steps below to complete the setup process. 1. - Page 17 M133W User Guide 4. Windows will then try to connect to network. Tap Skip this step to continue without a wireless connection as you can then set up the network later. 5. On the Get going fast screen, click Use Express settings for the fastest setup. If you would like more information, tap Learn more, or if you would like to select your own options, click Customize settings.
-
Page 18: Setting Up Windows Embedded 8.1 Industry Pro
M133W User Guidee 3.2 Setting up Windows Embedded 8.1 Industry Pro • The Windows Product Key for this version of Windows has been pre-installed with the system, so the user will not need to enter the Product Key when using the tablet for the first time. - Page 19 M133W User Guide 4. In thePC namefield, type a name for your computer, and then click or tapNext. On theSettings pagescreen, choose Use express settings for the fastest setup.
- Page 20 M133W User Guidee 6. Windows will then try to connect to network. Ignore attempt to connect to internet as you do not need internet connection to finish setup your pc. 7. On Your account screen, type your username and password to create a local account,...
- Page 21 M133W User Guide 8. Windows may take some time to finalize your settings. 9. On theWindows Sign-inscreen, enter the user name and password that you set up earlier, and then pressEnter.
- Page 22 M133W User Guidee 10. Once Windows finishes login, you are now ready to use the PC...
-
Page 23: Setting Up Windows 7 Ultimate/Professional
M133W User Guide 3.3 Setting up Windows 7 Ultimate/Professional Follow the steps below to complete the setup process. 1. Press the power button to turn on the computer. 2. First select your region and language information, and then tap Next... - Page 24 M133W User Guidee 4. Type in a password for your account and tap Next 5. Now enter the product key that came with the computer and tap Next. For this version of the Windows, a product key entry is required when setting up the computer for the first time.
- Page 25 M133W User Guide 6. On the license terms screen, click on the I accept the license terms and tap Next 7. For the update option, choose Use recommended settings for Windows to install updates. If you do not wish Windows to do so, choose the other options accordingly.
- Page 26 M133W User Guidee 8. Next, review the date and time settings on the computer 9. Select the computer current location for network privacy setting. Choose the location below to your actual usage accordingly. 3-11...
- Page 27 M133W User Guide 10. Allow time for windows to setup your desktop for the first time. 11. Now the computer is ready to be used. 3-12...
-
Page 28: Chapter 4: Using The Tablet
Using the Tablet 4.1 HotTab Introduction HotTab provides quick access to the tablet’s functions and features, such as turning on/off Wifi, Bluetooth, GPS, programming function key, and changing power management. As Windows starts up, HotTab starts and runs in the background. To display the HotTab control utility, press the (Menu) Button located on the front panel, OR lau nching the HotTab Utility application. -
Page 29: Using The Physical Function Keys (Hotkeys)
M133W User Guide 4.2 Using the physical function keys (Hotkeys) The function key mapping menu option allows user to change the physical function buttons, F1, F2 and F3. Users can change what application will be launched with short press or long press of keys. -
Page 30: Changing The Touchscreen Modes
M133W User Guide 4.3 Changing the Touchscreen modes The tablet’s advanced capacitive touchscreen has 3 built-in operating modes, for users to choose under different usage scenarios: Mode Usage Scenario The Hand/Rain mode is the default operating mode of the touchscreen. Under this mode, the touchscreen is set to have the ability to reject false touch inputs while liquid is present on the touchscreen. - Page 31 M133W User Guide 3. The Touch Mode Select utility will be shown as below: 4. Under the “Touch Mode”, select the desired touch modes by tapping on the radio button 5. Now the touchscreen mode would behave as configured.
- Page 32 M133W User Guide here’s also additional Touch related setting to switch the touchscreen input between mouse mode with cursor, or with multi-touch mode: Item Description Mouse Mode Single touch point supported, with mouse cursor shown. Multi-touch Mode The default setting of the touch screen supports multi-touch mode (up to 10 points).
- Page 33 M133W User Guide Switch touchscreen modes via the programmable function buttons: To switch between the different touchscreen modes via the programmable function buttons, make sure the touchscreen mode switching is set to the programmable function buttons first. 1. Open HotTab utility by pressing (Menu) Button located on the front panel, OR launching HotTab Utility application.
-
Page 34: Using The Wireless Lan (Wi-Fi) Feature
M133W User Guide 4.4 Using the Wireless LAN (Wi-Fi) feature To use the wireless LAN(Wi-Fi) feature to connect to the network, perform the following procedure: 1. Open the HotTab utility by press the (Menu) Button located on the front panel, OR launching the HotTab Utility application. -
Page 35: Using The Gps Feature
M133W User Guide 4.6 Using the GPS feature To enable the wireless GPS feature, perform the following procedure: 1. Open the HotTab utility by press the (Menu) Button located on the front panel, OR launching the HotTab Utility application. 2. 2. Tap on the Device button. -
Page 36: Turn On/Off The Led Indicators
M133W User Guide 4.8 Turn on/off the LED Indicators The LED Indicators for Power Status, Battery Status, and RF Communication can be turned on/off from Hottab menu. Toenable/disable the LED indicators, perform the following procedure: 1. Open the Hottab utility by press the (Menu) Button located on the front panel, OR launching the Hottab Utility application. -
Page 37: Using The Front And Rear Camera Feature
M133W User Guide 4.9 Using the Front and Rear Camera feature This HotTab menu option allows users take a picture or record a video. Before use, make sure the Camera is turned on under Devices menu option following the following procedure: 1. -
Page 38: Description Of Camera User Interface Buttons
M133W User Guide 4.9.1 Description of Camera User Interface Buttons: Item Description Camera Switch Switch between front camera or rear camera. Settings Brings up Camera settings page. Available Settings: Picture Save: modify/inspect saved location for pictures. Video Save Folder: modify/inspect saved location for video ecordings. -
Page 39: Using The Barcode Reader Feature
M133W User Guide 4.10 Using the Barcode Reader Feature To enable the Barcode Reader feature, perform the following procedure: 1. Open HotTab utility by pressing (Menu) Button located on the front panel, OR launching HotTab Utility application. 2. Choose “Device ON/OFF” and click on “Barcode”, and the setting utility will show up as below: 3. -
Page 40: Trigger Setting
M133W User Guide 4.10.1 Trigger Setting Item Description Trigger mode options User can define the barcode scanner trigger mode from Trigger mode options drop-down menu shown as below. Level Under Level mode, the barcode scanner follows trigger button behavior. The scanning light will be on when the Fn2 button is triggered, and off when the barcode is successfully read or the Fn2 button is released. -
Page 41: Settings
M133W User Guide 4.10.2 Settings Item Description Sound The Sound check box defines whether a beep sound will come with the data scanning. Identifier Code The Identifier Code check box defines whether to filter Application Identifiers from the scanned data. Some barcode types, such as EAN-128, use Application Identifiers to include additional data. - Page 42 M133W User Guide User can also tap on the Settings button for further details settings. Item Description Prefix User can type in this field to define the characters BEFORE the data scanned. Suffix User can type in this field to define the characters AFTER the data scanned.
- Page 43 M133W User Guide Disconnect User can tap on the Disconnect button to stop the connection with Barcode. To recover the connection, please turn off the module from setting UI and then turn on the module again. Before user uses other software, should press Disconnect button, or there will be connection issue.
-
Page 44: Using The Hf Rfid Reader Feature
M133W User Guide 4.11 Using the HF RFID Reader feature The HF RFID Reader is optional for Tablet PC and is not re-workable by the end Caution user. To use this feature, please make sure the tablet PC is built-in HF RFID reader before use, or contact our sales contact window for more details. -
Page 45: Trigger Setting
M133W User Guide 4.11.1 Trigger Setting Item Description Auto Scan The default setting for RFID trigger is Auto Scan. Under this setting, the RFID Reader will always be ready to scan tags. 1. When the RFID tag is detected from RFID antenna, the data will be read automatically. -
Page 46: Settings
M133W User Guide 4.11.2 Settings Item Description Sound The Sound check box defines whether a beep sound will come with the data scanning. Output to This setting defines the output type of the scanned data. Two options are available: Keyboard Wedge Under this setting, the data scanned is sent like keyboard data. - Page 47 M133W User Guide User can also tap on the Settings button for further details settings. Item Description Prefix User can type in this field to define the characters BEFORE the data scanned. Suffix User can type in this field to define the characters AFTER the data scanned.
-
Page 48: Rfid Output Setting
M133W User Guide 4.11.3 RFID Output Setting Item Description Select RFID The default setting for built-in HF RFID Reader is to Read UID. For some applications, user Output Type might need to read or write further block data; the drop-down menu under this section can do this change. -
Page 49: Turn On/Off The Gps Ext. Antenna
M133W User Guide 4.12 Turn on/off the GPS Ext. Antenna The vehicle dock of Tablet PC supports external GPS antenna through standard SMA connector. To work with external GPS antenna, pleasemake sure the tablet PC Caution is well installed tovehicle dock, and the vehicle dock has connected with external GPS antenna. -
Page 50: Turn On/Off Light Sensor
M133W User Guide 4.13 Turn on/off Light Sensor The Light Sensor can be turned on/off from Hottab menu. To enable/disable the Light Sensor, perform the following procedure: 1. Open the Hottab utility by press the (Menu) Button located on the front panel, OR launching the Hottab Utility application. -
Page 51: Setting The 2D Barcode Scanner Symbologies
M133W User Guide 4.14 Setting the 2D Barcode Scanner Symbologies The barcode scanner is shipped with default settings shown below. If the default setting suits the usage requirement, setting symbologies is not necessary. 4.14.1 Symbologies Default Settings: Parameter Parameter Default... - Page 52 M133W User Guide Trioptic Code 39 Disable Convert Code 39 to Code 32 (Italian Pharmacy Code) Disable Code 32 Prefix Disable Set Length(s) for Code 39 12h, 13h Length Within Range: 2 to 55 Code 39 Check Digit Verification Disable...
- Page 53 M133W User Guide Chinese 2 of 5 Chinese 2 of 5 F0h 98h Disable Matrix 2 of 5 Matrix 2 of 5 F1h 6Ah Disable Matrix 2 of 5 Lengths F1h 6Bh F1h 6Ch Length; Length = 14 Matrix 2 of 5 Check Digit...
- Page 54 M133W User Guide Data Matrix Inverse F1h 4Ch Regular Decode Mirror Images (Data Matrix Only) F1h 19h Auto Maxicode F0h 26h Disable QR Code F0h 25h Enable QR Inverse F1h 4Bh Regular MicroQR F1h 3Dh Enable Aztec F1h 3Eh Enable...
-
Page 55: Using The Motosetting Application To Set The Symbologies
M133W User Guide 4.15 Using the MotoSetting Application to set the Symbologies To set the Symbologies settings, the user can utilize the MotoSetting application that is installed on the tablet. Please follow the instructions below: To utilize the MotoSetting application, the user has to first turn on the Barcode Scanner, and then disconnect the Barcode Scanner from the HotTab utility. - Page 56 M133W User Guide 6. Once the HotTab utility disconnects from the Barcode Scanner successfully, it will be as shown below: 7. Start the MotoSetting application 4-29...
- Page 57 M133W User Guide 8. MotoSetting application will be shown as below. The left panel shows the symbologies settings, with check marks indicating the symbologies that are enabled. On the right side, is the console information indicating any status for the application.
- Page 58 M133W User Guide 10. The right panel shows any status change in the symbologies settings, as shown below: 11. On the left panel, scroll to the top, scroll to the top, the user can also change the symbologies settings to default setting: 12.
- Page 59 M133W User Guide 15. Barcode utility will show up as below: 16. Turn off the Barcode Scanner by tapping on the OFF button 17. And then tap on the ON button again 18. The user can now continue to use the Barcode Scanner with the new Symbologies settings.
-
Page 60: Configuring High Resolution Screen Scaling And Setting
4.16 Configuring High Resolution Screen Scaling and Setting The M133W’s 1920 x 1080 high resolution display is perfect for viewing image, video, or other applications, however, Windows user interface (icons, buttons, and other user interface elements) may be too small to read and operate at the default Windows settings. -
Page 61: Changing Display Scaling Setting (Recommended)
M133W User Guide 4.17 Changing display scaling setting (Recommended) Perform the following to change display scaling setting: 1. Tap and hold anywhere on the desktop for 3 seconds and release to bring up the context menu, and select “Screen resolution” option as shown below: 2. - Page 62 M133W User Guide 3. A“Display” window will show up. Under “Change the size of all items” section, change the scaling option to “Larger – 150%” or any other desired display scaling and hit “Apply” to save changes, as shown below 4.
-
Page 63: Changing Screen Resolution Setting
M133W User Guide 4.18 Changing screen resolution setting Alternatively, instead of changing the display scaling setting, user may choose to change the overall resolution setting to make screen elements bigger. 1. Tap and hold anywhere on the desktop for 3 seconds and release to bring up the context menu, and select “Screen resolution”... -
Page 64: Using The Hottab Shortcuts (On-Screen Software Shortcut)
M133W User Guide 4.19 Using the HotTab Shortcuts (On-screen Software Shortcut) The HotTab shortcuts are user configurableon-screensoftware short cuts via HotTabto allow users to have to quickly access programs with a few tabs. The Shortcuts menu offers 8 empty slots to store user’s desired quick access. -
Page 65: Accessing The Device Information (Hottab Setting)
M133W User Guide 4.20 Accessing the Device Information (HotTab Setting) This HotTab menu option provides users information such as PC Information, Battery status,and also device settings such as power management setting, and function key mappings. Perform the following procedure to access the HotTab Setting menu: 1. -
Page 66: Using Recovery Wizard To Restore Computer
M133W User Guide 4.21 Using Recovery Wizard to Restore Computer The tablet computer has a dedicate recovery partition stored on the hard drive of the tablet to enable quick one- key recovery process. This partition occupies about 11GB of the storage space, and comes built-in to each tablet computer. -
Page 67: Chapter 5: Troubleshooting
Troubleshooting 5.1 Troubleshooting (Basic) Problem Solution The removable battery is not charging. Make sure the AC adapter is properly connected, and that the removable battery is properly inserted. Nothing appears on the screen. The tablet computer may be in sleep mode. Press the power button to wake up the display. - Page 68 M133W User Guide No sound is produced. Adjust volume of the tablet computer by pressing on the volume rocker. If using an external audio device, make sure that the cable is properly connected. I cannot project the tablet computer display to another Make sure the graphic driver is installed.
- Page 69 M133W User Guide Winmate Communication INC. 9F, No.111-6, Shing-De Rd., San-Chung District, New Taipei City 241, Taiwan, R.O.C Web Site: http://www.winmate.com.tw...
Need help?
Do you have a question about the M133W and is the answer not in the manual?
Questions and answers