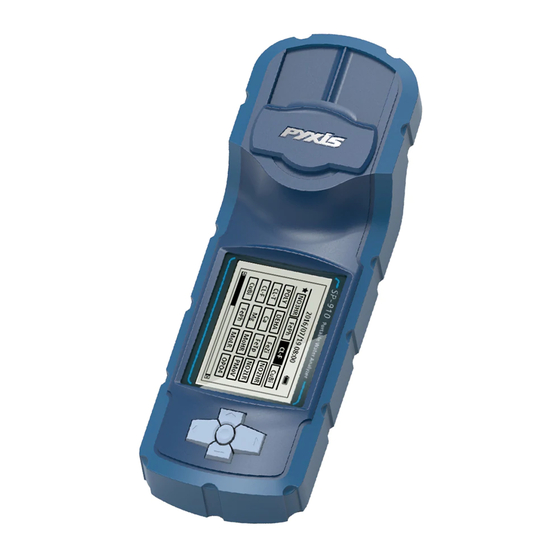
Pyxis SP-910 Operation Manual
Portable water analyzer
Hide thumbs
Also See for SP-910:
- Procedures manual (190 pages) ,
- Operation manual (35 pages) ,
- Operation manual (38 pages)

Related Manuals for Pyxis SP-910


Summary of Contents for Pyxis SP-910
- Page 1 SP-910 Portable Water Analyzer Operation Manual Rev.C Pyxis Lab, Inc 2017 All Rights Reserved...
- Page 2 Pyxis Lab, Inc 120 Jeffrey Ave. Holliston, MA 01746 www.pyxis-lab.com service@pyxis-lab.com...
-
Page 3: Table Of Contents
Light Shield Cover ....................8 Start The SP-910..................10 Battery Installation ....................10 Description of the Navigational Control Pad ............10 Turning on the SP-910 ..................11 Main Page ......................11 Turning Off The SP-910 ..................11 The SP-910 Auto Power Off.................. 12 Auto LCD Power Saving .................. - Page 4 Operation ......................27 Turbidity Calibration ..................... 27 Absorbance Measurement ..................30 Update SP-910 firmware via Bluetooth Interface ..........31 Download and Install the Latest Nebula Software ..........31 Turn on SP-910 ..................... 32 Connect Nebula to the SP-910 ................32 Upgrade the ChemTreat Product List ............
- Page 5 Figure 28 Scan Inline Device ....................34 Figure 28 Pair Inline Device ....................34 Figure 29 Read Inline Device ....................35 Figure 30 SP-910 Measure Sample Water ................35 Figure 31 Calibration Success ....................35 Figure 32 Inline Device Diagnosis Data ................36 Figure 33 Cleanliness Check ....................
- Page 6 Tables Table 1 Feature Groups on Main Menu ............... 11 Table 2 List of Supported Colorimetric Methods ..........18 Table 3 Wavelength of each channel ..............30 Table 4 Contact Information ................38...
- Page 7 A Repair Authorization Number (RA) must be obtained from the Technical Support (service@pyxis- lab.com) before any product can be returned to the factory. Pyxis will pay freight charges to ship replacement or repaired products to the customer. The customer shall pay freight charges for returning products to Pyxis.
-
Page 8: General Description
1. Specifications are subject to change without notice for continuous development. 2. The fluorescein range in earlier versions of the SP-910 may be only up to 20 ppb. To extend the upper limit to 600 ppb, please contact Pyxis customer support at... -
Page 9: Pyxis Major Features
The SP-910 is pre-calibrated for measuring fluorescein in the range of 0 to 600 ppb. The SP-910 is pre-calibrated for measuring turbidity in the range of 0 to 200 NTU. Automatically select the primary wavelength according to the method selected and switches to the secondary wavelength to extend the primary measurement range. -
Page 10: Standard Accessories
The light shield cover should be in the closed position during storage, transportation, and measurements, especially during the turbidity and fluorescence measurements. When turned on, The SP-910 carries out self-diagnosis including checking the performance of a variety of optical devices. The light shield door shall be at the closed position to shield interference from ambient light during self-diagnosis. -
Page 11: Figure 2 Open And Close The Light Shield Cover
Figure 2 Open and Close the Light Shield Cover Warning Magnetic sensitive devices, including but not limited to, credit cards, watches, hard disks, should be keep at a distance of at least 2 inches from the Light Shield Door to avoid possible damage and/or loss of information recorded. -
Page 12: Start The Sp-910
LOW BATTERY warning. Replace all four batteries to resume operation of the SP-910 after the battery warning. The SP-910 battery compartment, shown in Figure 3, is on the back side of the instrument. Insert a small pad underneath the screen area to make the back surface level when the instrument is turned upside down. -
Page 13: Turning On The Sp-910
After new batteries installation, the SP-910 will not be automatically turned on. To turn on SP-910, press the OK key, and release the OK key when the LCD is lit. You can navigate the main page menu and launch an operation by pressing on an icon. -
Page 14: The Sp-910 Auto Power Off
Turn the SP-910 off by navigating to Power icon and press the OK key. Alternatively, you can turn off the SP-910 by pressing OK key for 5 seconds in any menu. 2.6 The SP-910 Auto Power Off The SP-910 automatically turns itself off with no-key activity for a given period, except for during a measurement. -
Page 15: Ptsa Measurement
2. Place the sample vial into the sample vial compartment and slide the light shield cover to the closed position. 3. Press the M-P icon on the main page. The SP-910 will start to measure the PTSA concentration. 4. The SP-910 will display the ppm concentration of the last selected ChemTreat cooling product. -
Page 16: Ptsa Calibration
During the fluorescence measurement to determine the PTSA concentration, the SP- 910 checks the sample turbidity. If the sample turbidity value detected is greater than 40 NTU, The SP-910 will display a warning. For best results, the sample should be filtered if turbidity exceeds 40 NTU. -
Page 17: Fluorescein Measurement
2. Place the sample vial into the sample vial compartment and slide the light shield cover to the closed position. 3. Press the M-F on the main page, then press the OK button, the SP-910 will start to measure the fluorescein concentration in the sample. -
Page 18: Fluorescein Calibration (Firmware Version V1.0R295 And After)
1. Press the CAL on the main page, then choose Fluorescein and press the OK key to launch the fluorescein calibration page. 2. Follow the message prompts, insert the DI blank into the sample vial compartment and press the OK key. 3. -
Page 19: Figure 10 Low Range Fluorescein Calibration
The middle range and high range calibrations from steps 4 to 8 are optional if only low range fluorescein measurement is intended. Figure 10 Low Range Fluorescein Calibration Figure 11 Middle Range Fluorescein Calibration Figure 12 High Range Fluorescein Calibration The standard solutions shall be stored in a brown or black opaque bottle. -
Page 20: Colorimetric Measurement
5 Colorimetric Measurement 5.1 Supported Methods A wide range of colorimetric methods is supported by the SP-910 analyzer and the number of them keeps increasing with continuous development of Pyxis. See corresponding Hach® methods in Appendix A. Table 2 List of Supported Colorimetric Methods... - Page 21 Abbreviated Method Name Description Range Method Name OrgP Phosphonate UV digestion and ascorbic acid 7.1 ppm as reduction molybdenum blue PBTC method PAmi OPO4-Amino Reactive phosphate, amino 30.0 ppm acid reduction method ClO2 ClO2-DPD DPD method, USEPA accepted 5.00 ppm for reporting drinking water analysis ClO2D...
-
Page 22: Select A Method
23 methods. Note: Methods shown in the method selection pages include Hach© equivalent methods and Pyxis specific advanced methods. The table in Appendix A provides a brief description of Pyxis method names and their corresponding Hach® program number. -
Page 23: Single-Vial Procedure
Figure 14 Single Timer Method 5.4 Single-Vial Procedure 1. Place the sample vial filled with the water sample in the SP-910 sample vial compartment and press the ZERO button. The SP-910 will display the page shown in Figure 14. -
Page 24: Two-Vial Methods
The following procedure is typical for two-vial methods: 1. Place the prepared blank into the SP-910 sample vial compartment and press the ZERO button to zero the instrument. -
Page 25: Advanced Methods
The SP-910 must be zeroed using the prepared blank before the last timing step. Thus, the last timer button will not be selectable until the SP-910 has been zeroed using the prepared blank. Multi-timing step Hach® methods require zeroing the colorimeter using the prepared blank after the last timing step is completed. - Page 26 Direct Reading Bleach Percent Method, 0 to 15% The SP-910 has a 365nm UV LED and other deep blue LEDs that can be used to directly measure bleach concentration in the range of 0 to 15%. No reagent is required for the method and the displayed result is the sodium hypochlorite concentration in percentage.
-
Page 27: Method Setup And Calibration
7. Gently shake the sample vial for 30 seconds. 8. Place the sample vial back to the sample compartment. Product concentration will be updated and plotted on the screen every 3 seconds. When the 3 minute timer is reached, the final concentration will be shown on the screen. -
Page 28: Figure 18 Method Unit Selection
The following steps are used to calibration a method: 1. Use a calibration standard of known concentration. Follow the steps required by the method and note the value reported by the SP-910. 2. If the measured value differs from the known standard value, Press the CONFG button to launch the method configuration page. -
Page 29: Turbidity Measurement
2. Insert the sample vial to the sample vial compartment. 3. Slide the light shield cover to the closed position. 4. Press the Turb on the main page, then press the OK key, The SP-910 will start to measure the turbidity in the sample. -
Page 30: Figure 20 Turbidity Calibration-1
3. Slide the light shield cover to the closed position. 4. Press the CAL on the main page, then choose the Turbidity calibration and press the OK button to launch the Turbidity calibration page. (Figure 20) 5. Press the OK key to measure the deionized water 6. -
Page 31: Figure 22 High Range Calibration
Figure 22 High Range Calibration... -
Page 32: Absorbance Measurement
Wavelength (nm) not used Note that the absorbance values measured with the SP-910 is generally smaller than those measured with a spectrophotometer equipped with a monochromatic light source or detector. The SP-910 absorbance values should, however, linearly correlate with the... -
Page 33: Update Sp-910 Firmware Via Bluetooth Interface
Thus, for any colorimetric system, The SP-910 absorbance follows Lambert-Beer law. 8 Update SP-910 firmware via Bluetooth Interface 8.1 Download and Install the Latest Nebula Software http://www.pyxis-lab.com/support.html#Software 1) Unzip the downloaded file and double click Nebula.exe to launch installation... -
Page 34: Turn On Sp-910
8.2 Turn on SP-910 Long press OK button for 5 seconds to turn off the SP-910 Press LEFT button, then click OK button while holding down LEFT button SP-910 displays below menu Figure 26 Bootloader Menu Click RIGHT button,SP-910 enters upgrading mode,SP-910 displays below menu to... -
Page 35: Upgrade The Chemtreat Product List
Nebula PC software if no device was found. 3) Once the device is connected, click the Load File button to select SP-910 firmware file, and click update button to start upgrading SP-910. It takes about 160 seconds to complete the procedure. -
Page 36: Calibrate A St-500 With Sp-910
10 Calibrate a ST-500 with SP-910 The SP-910 can be used to verify the result of inline Pyxis ST-500 and other probes by measuring the sample water took from the inline probe sample line. The SP-910 can then be used to calibrate the inline probes over the Bluetooth connection. -
Page 37: Figure 29 Read Inline Device
Figure 29 Read Inline Device Use the SP-910 to measure the sample water by clicking Up key, as shown in Figure 30 Figure 30 SP-910 Measure Sample Water Click OK key to send the calibration instruction to the ST-500 via Bluetooth connection. -
Page 38: Figure 32 Inline Device Diagnosis Data
Figure 32 Inline Device Diagnosis Data In the cleanliness check page, please put the ST-500 probe into DI water and then click the OK button again to conduct cleanliness check. Figure 33 Cleanliness Check Figure 30 shows a probe may be fouled according to its diagnosis operational parameters. -
Page 39: Maintenance
Use a soft cloth or lint free paper tissue to clean the sample vial compartment periodically. Remove debris, scale, and deposit promptly. Although The SP-910 is protected from water damage, it is a good practice to avoid water entering the sample vial compartment and becoming trapping underneath the navigational control pad. -
Page 40: Troubleshooting
If an unspecific error occurs or the SP-910 cannot be turned on, reboot the instrument by taking a battery out of the battery holder and re-install the battery. If the SP-910 has been idle for more than two months and cannot be turned on, replace all four batteries with four new AA alkaline batteries. -
Page 41: Appendix A
13 Appendix A. Pyxis Method and Hach® Method Number (PRMP) Cross Reference Abbreviated Method Name Corresponding Hach © method Hach Method Method Number Name 8021 CL-F F-Chlorine Chlorine, Free, DPD, PRMP 9 8167 CL-T T-Chlorine Chlorine, Totoal, DPD, PRMP 9... - Page 42 8051 Sulfate. PRMP 91 POLY Polymer Turbidimetric method for anionic polymers 8365 FeMo FeMo Iron, for cooling water with molybdenum-based treatment, PRMP 38 8023 Hexavalent chromium, 1,5- Diphenylcarbohydrzaide Method, PRMP 13 8024 CrTot ChromiumtotalAlkaline Hypobromite Oxidation Method, PRMP15 8155 NH3S NH3Sal Ammonia Salicylate Method, PRMP 64...
Need help?
Do you have a question about the SP-910 and is the answer not in the manual?
Questions and answers