Table of Contents
Advertisement
Advertisement
Table of Contents

Subscribe to Our Youtube Channel
Related Manuals for Pyxis SP-710


Summary of Contents for Pyxis SP-710
- Page 2 SP-710 Water Multimeter User Manual August 7, 2020 Rev. 3.01 Pyxis Lab, Inc. 1729 Majestic Dr. Suite 5 Lafayette, CO 80026 USA www.pyxis-lab.com © 2017 Pyxis Lab, Inc. Pyxis Lab Proprietary and Confidential...
-
Page 3: Table Of Contents
Table of Contents 1 Introduction 1.1 Main Features ......... 2 Specifications 3 Unpacking Instrument 3.1 Standard Accessories . - Page 4 11.1 Maintenance Best Practices ........11.2 Methods to Cleaning the SP-710 .......
- Page 5 Pyxis Lab, Inc. Standard Limited Warranty Pyxis Lab warrants its products for defects in materials and workmanship. Pyxis Lab will, at its option, repair or replace instrument components that prove to be defective with new or remanufactured components (i.e., equivalent to new).
-
Page 6: Introduction
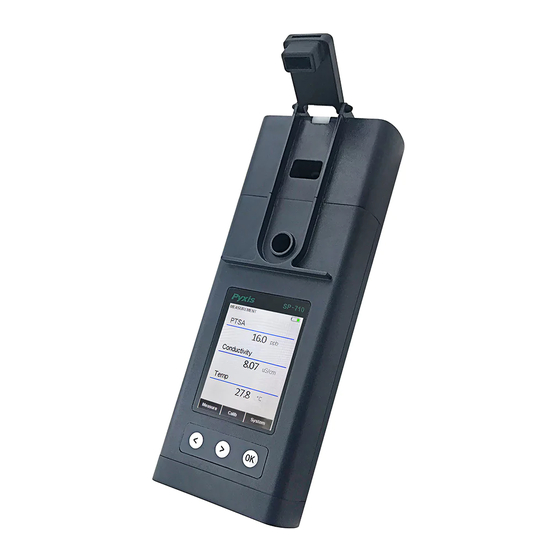
1 Introduction The Pyxis SP-710 is a handheld multimeter that measures five key parameters as well as colorimetric Free and Total Chlorine. It is a cuvette-less device. Less than 5 mL water sample is needed to fill the two sample cells for the measurement. -
Page 7: Specifications
Simply wipe down the device with wet cloth and towel dry. Verify that all items listed on the packing slip are included. If any items are missing or damaged, please contact Pyxis Customer Service at service@pyxis-lab.com. During shipping and storage after production, a sponge wetted with the pH/ORP Storage Solution is placed in the pH/ORP cell seal. -
Page 8: Standard Accessories
4.1 Main Module Battery Installation The main module of the SP-710 is powered by four AA alkaline batteries. Typical battery life is 10,000 mea- surements or 6 months. When the battery capacity is critically low, the SP-710 displays a ”LOW BATTERY”... -
Page 9: Ph/Orp Module Battery Installation
5. Fasten the two screws. NOTE Failure to properly seat the O-ring may result in water damage to the SP-710. 4.2 pH/ORP Module Battery Installation The new pH/ORP module has a lithium thionyl chloride battery (3.7V-ER14250) installed. When the bat- tery capacity is critically low and the main module displays a LOW BATTERY warning, replace the ER14250 battery. -
Page 10: Instrument Overview
Figure 2. Proper orientation of the ER14250 battery 5 Instrument Overview Figure 3. SP-710 User Manual service@pyxis-lab.com | +1 (866) 203-8397... -
Page 11: Ph/Orp Cell Dual-Function Seal
Storage Solution must be maintained in the unit cell at all times during non-use. Please fill the pH/ORP cell with 1 mL of Pyxis pH/ORP Storage Solution (P/N: 63900) at all times when not using the pH/ORP cell. -
Page 12: Ph/Orp Module On/Off
6.1 PTSA and Conductivity Measurement 6.1.1 Measurement Procedure When powered on, the SP-710 will default to the PTSA and conductivity measurement mode. The water sample can be transferred to the main module sample cell using a pipette or filled directly from a faucet, sample bottle, or sample valve. -
Page 13: Tmb Free And Total Chlorine Measurement
See the Optional Accessories section for ordering details. When three drops of these liquid reagents are administered into the sample cell of the SP-710, the TMB reagent rapidly reacts with free or total chlorine present to develop a stable, yellow-colored solution. - Page 14 7. Press Timer ( ). A 2-minute timer will begin. 8. The SP-710 will continuously display the free or total chlorine concentration as the timer counts down (Figure 10). If the real-time readings remain steady, press Stop ( ) to stop measurement timer early or wait for the 2-minute timer to end.
-
Page 15: Temperature Measurement
5. Rinse the pH/ORP sample cell three times with the sample to be tested. Fill the sample cell with the sample. 6. The pH and ORP values will be updated every two seconds on the SP-710 main module display. The values will be displayed in white with a blue background once a stable value is reached (Figure 11). - Page 16 Solution is not available, please use the sample water to hydrate the electrode for at least 30 minutes. 6.4.3 pH Measurement Principle The SP-710 pH/ORP module uses the standard electrochemical cell for the pH measurement. The cell con- sists of a glass electrode and an Ag/AgCl reference electrode. Potassium chloride (KCl) electrolyte filling gel is sealed in the Ag/AgCl electrode.
- Page 17 Reporting an ORP value without specifying the reference scale has no meaning. The value displayed by the SP-710 depends on the ORP value of the ORP standard used in the calibration. If the ORP value of the standard is referenced to the Standard Hydrogen Electrode (SHE), the ORP value reported by the SP-710 is SHE-based, i.e., in the unit of Eh.
-
Page 18: Calibration
DI water for the zero step as soon as it is available. 2. Power on the SP-710 by pressing . Allow 5–10 seconds for the SP-710 to stabilize. 3. The unit is actively reading and displaying both PTSA and Conductivity. The values will be very low if DI water is used;... -
Page 19: Combined Ptsa And Conductivity Calibration
7.2 Combined PTSA and Conductivity Calibration The following steps will calibrate both conductivity at 1000 µS/cm and PTSA at 100 ppb using Pyxis 100 ppb PTSA + 1000 µS/cm (KCl) Combined Standard (P/N: 21004): 1. Rinse the main module sample cell three times with the Combined Standard. Fill the sample cell with the Combined Standard. -
Page 20: Conductivity Calibration
) to return to the CONDUCTIVITY CALIBRATION screen, or (c) Press Exit ( ) to abandon calibration entirely. 9. Once calibration begins, the SP-710 reads the sample and displays the value in the Measured section. A slight variance from the target is acceptable. 10. The message “Calibration... - Page 21 ) to return to the USER DEFINED CALIBRATION screen, or (c) Press Exit ( ) to abandon calibration entirely. 10. Once calibration begins, the SP-710 reads the sample and displays the value in the Measured section. A slight variance from the target is acceptable. 11. The message “Calibration...
-
Page 22: Tmb Free And Total Chlorine Calibration
) and record the value. 10. If the measured chlorine value is outside the range of 1.0 0.01, either: (a) Follow the procedure in the Slope Calibration using Pyxis TMB Chlorine Secondary Standard section, or (b) Follow the procedure in the Slope Calibration using User-Defined TMB Chlorine Standard sec-... - Page 23 7. Press Timer ( ). A 2-minute timer will begin. 8. The SP-710 will continuously display the free or total chlorine concentration as the timer counts down (Figure 30). If the real-time readings remain steady, press Stop ( ) to stop measurement timer early or wait for the 2-minute timer to end.
- Page 24 Figure 27. Figure 28. Figure 29. Figure 30. Figure 31. Figure 32. SP-710 User Manual service@pyxis-lab.com | +1 (866) 203-8397...
- Page 25 5. Press Zero ( ). ZERO will appear on the top-left corner of the display (Figure 34). 6. Rinse the sample cell three times with Pyxis TMB Chlorine Secondary Standard. Fill the sample cell with the standard. 7. Press Read ( 8.
- Page 26 7. Press Timer ( ). A 2-minute timer will begin. 8. The SP-710 will continuously display the free or total chlorine concentration as the timer counts down (Figure 40). If the real-time readings remain steady, press Stop ( ) to stop measurement timer early or wait for the 2-minute timer to end.
- Page 27 This button action is to restore the working calibration parameters to the original, factory-loaded calibration parameters for both free and total chlorine. SP-710 User Manual service@pyxis-lab.com | +1 (866) 203-8397...
-
Page 28: Ph Calibration
7.5 pH Calibration The SP-710 is designed to provide a flexible calibration procedure. The user can start with the one-point pH7 calibration and progressively add a two- and three-point calibration with the pH4 and pH10 buffers. This allows the user to choose a procedure based on the need of measurement accuracy and the target pH range. - Page 29 ”Completed!” message will appear (Figure 46). Otherwise, a warning mes- sage is displayed. 22. After a successful three-point calibration, press Exit ( , or ) to return to measurement mode. Figure 44. Figure 45. Figure 46. SP-710 User Manual service@pyxis-lab.com | +1 (866) 203-8397...
-
Page 30: Orp Calibration
7.6 ORP Calibration The ORP scale of the SP-710 depends on the ORP scale of the calibration standard. For example, if the value of 220 mV for the common Zobell’s standard at 25 °C is entered in the above calibration, the ORP value reported by the SP-710 after calibration is referenced to the Ag/AgCl(3M KCl) scale. -
Page 31: Device Information And Diagnosis
(Figure 50). The information has no use for normal operation, but instead is used for device troubleshooting. Provide an image of both the DEVICE INFORMATION screen and the SYSTEM DIAGNOSIS screen when you contact Pyxis (service@pyxis-lab.com) for troubleshooting your device or call +1 (866) 203-8397. Figure 49. -
Page 32: Main Module Sample Cell Cleanliness Check
8.1 Main Module Sample Cell Cleanliness Check The SP-710 is designed to provide reliable and accurate measurement on PTSA and TMB Free and Total Chlorine. Heavy fouling will prevent the light from reaching the sensor, resulting in inaccurate readings. It is suggested that the SP-710 be checked for fouling and cleaned on a monthly basis. - Page 33 8.2.1 Calibrate an ST-500 Series Probe with the SP-710 via Bluetooth The SP-710 can be used to verify the result of an inline Pyxis ST-500 Series probe by measuring the sample water taken from the inline probe sample line. The SP-710 can then be used to calibrate the inline probes over the Bluetooth connection.
- Page 34 14. If the calibration is successful, a ”Verify calibration - OK” message will appear on the top of the display (Figure 59). 15. Calibration is now complete. Long press Calib ( ) to return to measurement mode. Figure 54. Figure 55. Figure 56. Figure 57. Figure 58. Figure 59. SP-710 User Manual service@pyxis-lab.com | +1 (866) 203-8397...
-
Page 35: Factory Reset
8.3 Factory Reset Use the following steps to restore all device parameters to factory default: 1. Power on the SP-710 by pressing 2. Press System ( ) to launch the DEVICE INFORMATION screen. 3. Press Diagnosis ( ) to launch the SYSTEM DIAGNOSIS screen. -
Page 36: Use With Upyxis® Mobile App
Mobile App. Ensure that the SP-710 is discoverable by following the steps in the Bluetooth Connection to Devices section. Once the app is open, the app will start to search for the SP-710. When the uPyxis® Mobile App connects to the SP-710, then press on the SP-710. -
Page 37: System Screen
The firmware update process takes some time and will require the SP-710 to stay within range (approximately 10 ft without obstructions) for the entire duration of the up- date. Once the update is complete, the SP-710 will reboot which will disconnect the SP-710 from the uPyxis® Mobile App. Figure 64. -
Page 38: Setting Screen
Power off time and Screen off time in seconds. Figure 65. 9.5 Datalog Screen From the Datalog screen, the user can view and export the internal log files of the SP-710 by pressing Read Datalogs and selecting the desired datalog (these are separated by month). The SP-710 will then populate... -
Page 39: Use With Upyxis® Desktop App
10.2 Connecting to uPyxis® Desktop App Ensure that the SP-710 is discoverable by following the steps in the Bluetooth Connection to Devices sec- tion. Once the app is open, to find your device, click on Device, then Connect via Bluetooth.. -
Page 40: System Screen
The firmware update process takes some time and will require the SP-710 to stay within range (approximately 10 ft without obstructions) for the entire duration of the up- date. Once the update is complete, the SP-710 will reboot which will disconnect the SP-710 from the uPyxis® Mobile App. Figure 69. -
Page 41: Setting Screen
Figure 70. 10.5 Datalog Screen From the Datalog screen, the user can view, delete, and export the internal log files of the SP-710 by clicking Read Datalog List and selecting the desired datalog (these are separated by month). The SP-710 will then... -
Page 42: Device Maintenance And Precaution
• Rinse the SP-710 with tap water or DI water after measurement and remove residual water using a paper towel. • Maintain 1 mL of pH/ORP Storage Solution in the pH/ORP cell at all times when the SP-710 is not being used. -
Page 43: Methods To Cleaning The Sp-710
11.3 Storage When the pH/ORP cell is not in use, fill the cell with 1 mL of Pyxis pH/ORP Storage Solution (P/N: 63900) and ensure the pH/ORP cell seal is closed completely. The pH/ORP cell seal maintains a moist environment for the electrodes. -
Page 44: Ph/Orp Module Replacement
11.4 pH/ORP Module Replacement Figure 73. pH/ORP Module The pH/ORP module in the SP-710 can be replaced when the original module reaches the end of its working life. Pyxis offers a 6-month warranty on the pH/ORP module. Pyxis recommends replacing the module at a frequency of every 9–12 months as a best practice. - Page 45 Figure 74. 11.4.2 Bluetooth Pairing 1. Power on the SP-710 by pressing 2. Press System ( ) to launch the DEVICE INFORMATION screen. 3. Press Comm ( ) to launch the COMMUNICATION screen (Figure 75). 4. Press Scan ( ) to begin scanning for Bluetooth devices.
-
Page 46: Regulatory Approval
12 Regulatory Approval United States The SP-710 sensor has been tested and found to comply with the limits for a Class B digital device, pursuant to part 15 of the FCC Rules. These limits are designed to provide reasonable protection against harmful interference in a residential installation.
Need help?
Do you have a question about the SP-710 and is the answer not in the manual?
Questions and answers