Table of Contents
Advertisement
Quick Links
Advertisement
Table of Contents

Related Manuals for PCE Instruments PCE-MSM 4


Summary of Contents for PCE Instruments PCE-MSM 4
- Page 1 Bedienungsanleitung User Manual PCE-MSM 4 Schallpegelmessgerät / sound level meter User manuals in various languages (français, italiano, español, português, nederlands, türk, polski, русский, 中文) can be downloaded here: www.pce-instruments.com Letzte Änderung / last change: 16 February 2017 v1.0...
-
Page 2: Safety Notes
We expressly point to our general guarantee terms which can be found in our general terms of business. If you have any questions please contact PCE Instruments. The contact details can be found at the end of this manual. © PCE Instruments... -
Page 3: Specifications
Dimensions 278 x 76 x 50 mm Weight 350 g Delivery contents 1 x sound level meter PCE-MSM 4 1 x microphone wind screen 1 x screw driver 1 x USB cable 1 x Software 1 x 9 V battery 1 x instruction manual ©... -
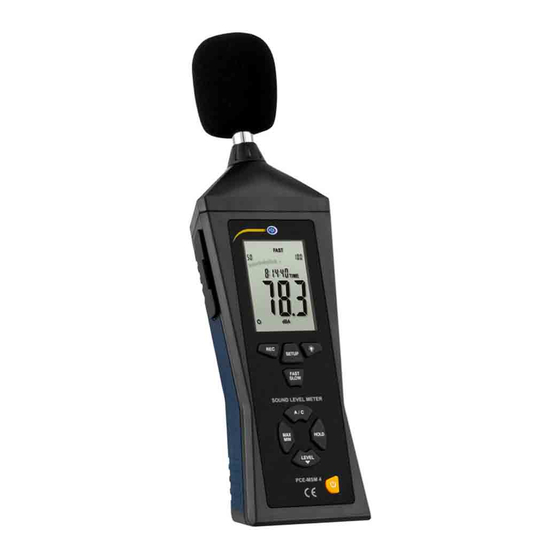
Page 4: System Description
System description Device Microphone wind screen Display “REC”-key “SETUP”-key “FAST/SLOW”-key “MAX/MIN”-key “LEVEL”-key “A/C”-key “HOLD”-key “On/Off”-key © PCE Instruments... - Page 5 Connector for mains adaptor USB interface Analogue output Calibration screw © PCE Instruments...
-
Page 6: Analogue Output
1 V RMS (corresponding to maximum value of the selected measuring range) Resistance: 100 Ω output voltage: 10 mV/dB Resistance: 1 kΩ Potentiometer (15) The potentiometer is used for calibrating the sound level meter in combination with a sound calibrator. © PCE Instruments... - Page 7 Display of the selected measuring range Automatic power-off function is active Battery voltage is low Data transmission enabled FULL Internal memory is full A weighing active C weighing active AUTO Automatic measuring range selection HOLD Hold function is active © PCE Instruments...
-
Page 8: Getting Started
If you want to use a mains adaptor, connect it to the power connector on the side of the device (12). Make sure that the output voltage of the mains adaptor is 9 V DC. The jack of the mains adaptor has to have the following dimensions: Outer Ø: 3.5 mm Inner Ø: 1.35 mm © PCE Instruments... -
Page 9: Operation
Press the “MAX/MIN” key again to deactivate the function and to return to normal measuring mode. 5.2.2 Hold function You can freeze the current reading on the display at any time by pressing the “HOLD” key. To unfreeze it, press the “HOLD” key again. © PCE Instruments... - Page 10 If you do not know which Windows you are using go to the desktop, right-click on “My Computer” and select “Properties”. A new window appears where you can see your Windows version. Click on “Install” in the software installer to start the installation. © PCE Instruments...
- Page 11 The software installer appears. Follow the instructions on the screen and install the software. 5.4.3 Software operation Start the software. Now you get to the main screen: Menu bar Real-time measurement information Real-time display of the device Marker display Real-time graph © PCE Instruments...
- Page 12 COM port. Click on “COM Port(C)” in the menu bar and select “Manual(M)”. Now you can type in the COM port number. Press the “REC” button on the device to enable data transmission. The real-time display becomes active. © PCE Instruments...
- Page 13 (2), such as MIN/MAX values and average value. Click on “Real Time(R)” in the menu bar and select “Stop(S)” or click on the stop symbol below the menu bar to stop the real-time measurement. © PCE Instruments...
-
Page 14: Set Markers
Click on “File(F)” in the menu bar and select “Print Graph(G)” to print out the graph or select “Print Data(D)” to print out the measured data as table. A new window appears where you can adjust the printing settings. Click on “OK” to print out the data. © PCE Instruments... - Page 15 Here you can view the saved real-time graph. The file appears in the table on the left side of the window. You can export the data to Excel, save the data and print it by using the menu bar of the window. You can also set markers as described before. © PCE Instruments...
- Page 16 Turn on the calibrator and use the potentiometer on the side of the sound level meter to adjust the displayed value to the output signal of the calibrator (for example 94.0 dB). The sound level meter comes with a factory calibration. We recommend calibrating it once a year. © PCE Instruments...
-
Page 17: Warranty
For countries outside the EU, batteries and devices should be disposed of in accordance with your local waste regulations. If you have any questions, please contact PCE Instruments. © PCE Instruments... - Page 18 PCE Instruments contact information Germany France Spain PCE Deutschland GmbH PCE Instruments France EURL PCE Ibérica S.L. Im Langel 4 76, Rue de la Plaine des Bouchers Calle Mayor, 53 D-59872 Meschede 67100 Strasbourg 02500 Tobarra (Albacete) Deutschland France España Tel.: +49 (0) 2903 976 99 0...
- Page 19 User manuals in various languages (français, italiano, español, português, nederlands, türk, polski, русский, 中文) can be downloaded here: www.pce-instruments.com Specifications are subject to change without notice. © PCE Instruments...
Need help?
Do you have a question about the PCE-MSM 4 and is the answer not in the manual?
Questions and answers