
Related Manuals for Perfect Aire 5SAC10000


Summary of Contents for Perfect Aire 5SAC10000
-
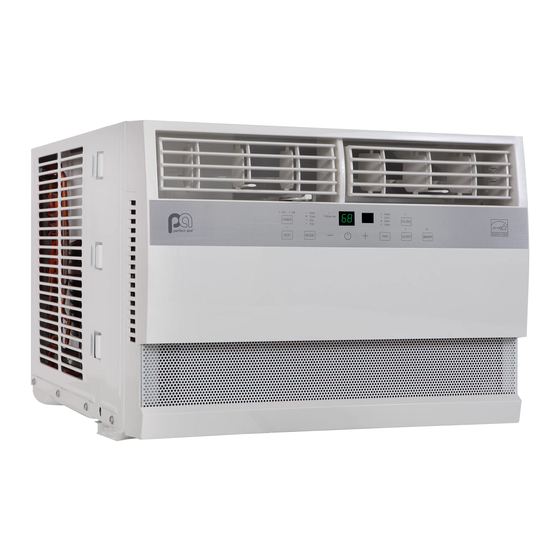
Page 1: Air Conditioner
COMFORT...BUILT TO LAST 10,000 & 12,000 BTU WINDOW AIR CONDITIONER SMARTPHONE COMPATIBLE USER MANUAL FOR MODELS:... - Page 2 5SAC10000 5SAC12000 Before using your window air conditioner, please read this manual carefully and keep it for future reference, along with your receipt.
-
Page 3: Table Of Contents
CONTENTS CONTENTS SAFETY PRECAUTIONS ................. 2–3 IMPORTANT SAFETY INSTRUCTIONS ...............4 INSTALLATION INSTRUCTIONS ..............5–9 NORMAL SOUNDS .................... 10 AIR CONDITIONER FEATURES..............10–12 CARE AND CLEANING..................13 TROUBLESHOOTING TIPS ................14 This manual provides the information needed for proper use and maintenance of this air conditioner. - Page 4 The air conditioner is not intended for use by children without supervision. hildren should be supervised to ensure that they do not play with the air conditioner. personnel only. NOTE: All the illustrations in this manual are for explanation purposes only. Unit purchased may be slightly different.
-
Page 5: Safety Precautions
SAFETY PRECAUTIONS must be followed. Incorrect operation due to ignoring of instructions may cause harm or damage. WARNING This symbol indicates the possibility of serious injury This symbol indicates the possibility of injury or damage to property. CAUTION Meanings of symbols used in this manual are as shown below. Never do this. - Page 6 Do not modify power cord Do not operate with wet hands Do not direct airflow directly at length or share the outlet with or in damp environment. room occupants. other appliances. This could cause health issues. generation. Always ensure effective Always install circuit breaker grounding.
-
Page 7: Safety Precautions
SAFETY PRECAUTIONS (CONTINUED) ! CAUTION When removing air filter, do Ensure proper ventilation not touch metal parts of the especially in rooms with a stove unit. or other appliances. Water may enter the unit and Failure to do so may result in an degrade the insulation causing an oxygen shortage. - Page 8 once every two weeks. Operation without secured filters Obstacles may cause appliance Prolonged exposure to outdoor may cause failure. A dirty filter failure or accident. elements may cause damage to can cause the unit to not run efficiently. fall. a soft cloth to clean Use caution when unpacking NEVER drink water drained...
-
Page 9: Important Safety Instructions
IMPORTANT SAFETY INSTRUCTIONS NOTE: WARNING For Your Safety: The power supply cord with this air conditioner contains a current detection device designed to WARNING to the section “Operation of Prevent Accidents In the event that the power supply . It must be replaced by an side of the cabinet and behind the grille. -
Page 10: Operation Of Current Device
Your air conditioner must be used in a properly grounded wall receptacle. electrician install the proper receptacle. Ensure the receptacle is accessible after the unit i Power supply cord with 3-prong grounding plug result in mechanical damage within the air conditioner. and current detection device Do not use an extension cord or an adaptor plug. -
Page 11: Installation Instructions
INSTALLATION INSTRUCTIONS BEFORE YOU BEGIN CAUTION Read these instructions completely and carefully. power cord. IMPORTANT- Save these instructions. IMPORTANT- Observe all of the air conditioner. governing codes and ordinances. Note to Installer- Be sure to leave these Aluminum house wiring may present special instructions with the Consumer. - Page 12 conditioner. WINDOW REQUIREMENTS TOOLS YOU MAY USE Your air conditioner is designed to install in Screwdriver standard double hung windows with opening Pencil OFFSET EXTERIOR WALL Ruler or tape measure INNER INNER Scissors or knife SILL INTERIOR WALL Wooden Windows NOTE: Save carton and these Installation NOTE: H = vertical opening.
-
Page 13: Installation Instructions
INSTALLATION INSTRUCTIONS (CONTINUED) PREPARE THE WINDOW top of the unit as shown in Fig.B Lower sash must open sufficiently to allow a clear Fig.B the AC must have clear air space to allow enough airflow through the condenser for heat removal. building or garage. - Page 14 10,000 BTU/h, the top rail must be assembled. Remove top rail and R1 hardware from the rear INSTALL THE ACCORDION PANELS Top Rail Hardware NOTE: Top rail and sliding panels on each side are offset to provide the proper pitch of 5/16" to the rear.
- Page 15 INSTALLATION INSTRUCTIONS (CONTINUED) B. Slide the free end " " section of the panel SECURE THE ACCORDION PANELS directly into the cabinet as shown in Fig. 2. Slide the panel down. Be sure to leave enough space to slip the top and bottom of carefully place the unit into the window opening so the frame into the rails on the cabinet.
- Page 16 Fig. 2 Fig. 3 window frame Bottom Rail INSTALL SUPPORT BRACKET extensions and the window sill as shown in Fig. 7. on the other side. " Fig. 4 Top Rail Top right Top left NOTE Bottom Rail NOTE: Fig. 7 Fig.
- Page 17 INSTALLATION INSTRUCTIONS (CONTINUED) Fig.11 Fig. 8 Measure the inner width of one of the /2" accordion panels. Step 2: Fig. 9 width in step 1; Cut the R1 insulation panel Fig.12 window sash seal foam and insert it in the...
- Page 18 space between the upper and lower sashes FOAM SEAL Fig. 10 Step 3: Slide the R1 insulation panel you just of the insulation panel with the pattern on it should face indoors. Fig.13 INSTALL R1 HARDWARE Note: This step applies to Energy Star rated units only. Step 1: Step 4: Repeat on other side with the second measure the inner width of one of the accordion...
- Page 19 INSTALLATION INSTRUCTIONS (CONTINUED) If AC is Blocked by Storm Window INSTALL WEATHER STRIPPING Note: This step applies to Energy Star rated units only. window before air conditioner is installed. weather stripping into any gaps as you see shut. Accumulated rain water or condensation necessary by trimming the weather stripping to must be allowed to drain out.
- Page 20 Storm window 1-1/2 min frame or other obstruction. for proper along entire sill. Fasten with nails or screws.
-
Page 21: Normal Sounds
NORMAL SOUNDS High Pitched Chatter Vibration High efficiency compressors may have a high pitched chatter because of poor wall or window during the cooling cycle. construction or incorrect installation. defective unit. Sound of Rushing Air rushing air being moved by the fan may be heard. - Page 22 TO TURN UNIT ON OR OFF: TO CHANGE TEMPERATURE SETTING: Press + / – UP/DOWN button to change the Press ON/OFF button to turn the unit on or off. temperature setting. NOTE: The unit will automatically initiate the Energy Saver function under NOTE: –...
- Page 23 AIR CONDITIONER FEATURES (CONTINUED) SLEEP FEATURE: Press Sleep button to initiate the sleep mode. In this mode the selected temperature will increase by F/ 1 C 30 minutes after the mode is selected. The temperature will then increase or decrease s with heating only by another 2 C after an additional 30 minutes.
- Page 24 then cycles on for 2 minutes at 10 minute intervals mode is selected. The unit will automatically initiate the until the room temperature is above the set Energy Saver function under Cool, Dry, and Auto temperature at which time the compressor turns (only Auto-Cooling and Auto-Fan) modes.
- Page 25 AIR CONDITIONER FEATURES (CONTINUED) TIMER: AUTO START/STOP FEATURE: AIR DIRECTIONAL LOUVERS: The louvers will allow you to direct the air flow up or own (on some models) and left or right throughout The TIMER ON indicator light illuminates. It indicates the Auto Start program is initiated. the room as needed.
- Page 26 “LO” (loose connection) or “HI” (Vent Closed - Fig. A) (short circuit). 2. Draw fresh air into the Perfect Aire Consumer Services: room (Vent Open - Fig. B) 3. Exchange air from the room and draw fresh air into the room (Vent and Fig.
-
Page 27: Care And Cleaning
CARE AND CLEANING CAUTION Be sure to unplug the unit before cleaning to prevent shock or fire hazards. Air Filter Cleaning The air filter should be cleaned necessary. Trapped particles in the filter can build up and cause an accumulation of frost on the cooling coils. out to remove the panel as shown in figures to the right. - Page 28 Be sure to wring excess water from the cloth before wiping the controls. Excess water in or around the controls may cause damage to the air conditioner. Plug in air conditioner after unit has dried completely. Winter Storage carefully from the window according to the installation instructions.
-
Page 29: Troubleshooting Tips
TROUBLESHOOTING TIPS Before calling for service, please review the chart below. Issue Possible Solutions • Be sure unit is not too large or too small for the area of the room. • Verify that all doors, windows, curtains and any other openings are closed off. Verify nothing is obstructing the front grille of unit, such as curtains, etc. - Page 30 same breaker. • Check plug connection. UNIT WILL NOT TURN ON • If plug is operating on an on/off switch, be sure that the switch is ‘on’. • Try plugging unit into another outlet. • Unplug unit for at least 5 minutes. Follow Reset instructions on plug. •...
- Page 31 COMFORT...BUILT TO LAST Distributed by: Perfect Aire, LLC 5151 Belt Line Rd. Suite 878...
- Page 32 Dallas, TX 75254 www.perfectaire.us Specification and performance data is subject to change without notice. Printed in China...
Need help?
Do you have a question about the 5SAC10000 and is the answer not in the manual?
Questions and answers