
Related Manuals for Huvema Hu 30 K


Summary of Contents for Huvema Hu 30 K
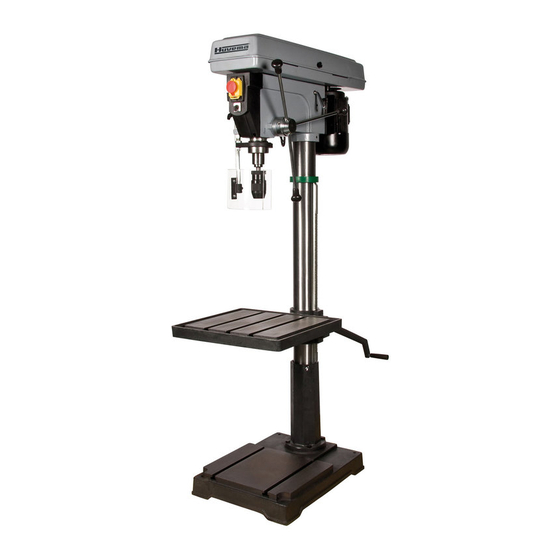
- Page 1 Metalworking - coluMn drilling Machines c o l u M n d r i l l i n g M a c h i n e s hu 30 k...
- Page 2 changes and t yping errors reser ved changes and t yping errors reser ved...
- Page 3 changes and t yping errors reser ved...
- Page 4 changes and t yping errors reser ved changes and t yping errors reser ved...
- Page 5 changes and t yping errors reser ved...
- Page 6 20 K 30 K changes and t yping errors reser ved changes and t yping errors reser ved...
- Page 7 changes and t yping errors reser ved...
- Page 8 changes and t yping errors reser ved changes and t yping errors reser ved...
- Page 9 changes and t yping errors reser ved...
- Page 10 ontents general safety rules for all machines additional safety instructions for drill presses technical specifications connecting to the power source preparations 5.1 Loose items in box and bag assembly 6.1 assembly of column and table hardware 6.2 installing the table 6.3 installing the head 6.4 installing the pulley center 6.5 installing belts...
-
Page 11: G Eneral Safety Rules For All Machines
30 K olumn drilling maChine 1. g eneral safety rules for all maChines N.B.: Read the instructions carefully in order to avoid any problems. As with all machinery there are certain hazards involved with operation and use of this machine. Using the machine with respect and caution will considerably lessen the possibility op personal injury. -
Page 12: Additional Safety Rules
dditional safety rules Always keep in mind that: • the machine must be switched off and disconnected from the power supply during maintenance and repairs, • clamped workpieces may only be measured when the machine is switched off. Never lean over the machine, mind loose clothing, ties, jewellery etc. and wear a cap. Do not remove safety devices or guards. -
Page 13: Technical Specifications
Never climb on the drill press table, it could break or pull the entire drill press down on you. Turn the motor switch off and put away the switch key when leaving the drill press. To avoid injury from thrown work or tool contact, do not perform lay-out, assembly or setup work on the table, while the cutting tool is rotating. - Page 14 Check the parts against the above list and refer to the pictures. Should there be any deficiencies or damage, please contact your Huvema dealer immediately. The following loose items are to be found in the packing case: a.
- Page 15 5.1 l oose items in box and bag Picture B – Loose items 01. hex head screw M12 x 40 (4x) 08. Knob 02. allen key, 3/4/5/6 mm 09. pan head screw M5 x 12 03. crank (with set screw) 10.
-
Page 16: I Nstalling The Table
6.2 i nstalling the table Picture G - Table 1. Loosen support lock (1) and raise table support by turning table crank (2) clockwise until support is at a working height level. Tighten support lock. table support (3), column (4), rack (5) Picture H - Table 2. -
Page 17: I Nstalling Feed Handles
6.7 i nstalling feed handles Picture N – Feed handles 1. Locate three feed handles among loose parts. 2. Screw the feed handles (1) into the threaded holes in the hub (2) and tighten. 6.8 i nstalling the ChuCK Picture O - Chuck 1. -
Page 18: G Etting To Know Your Drill Press
9. g etting to Know your drill press Picture T – Main parts Please familiarize yourself with this outline before you operate the machine. 1. Belt guard assembly 17. Depth scale lock 2. Drilling speed chart 18. Chuck 3. Belt tension lock handles 19. -
Page 19: Troubleshooting
• Support lock. Tightening locks table support to column. Always have it locked in place while operating the drill press. • Bevel scale. Shows degree table is tilted for bevel operations. Scale is mounted on side of arm • Table lock pin. Table can be rotated to various positions and locked. •... -
Page 20: Maintenance
11. m aintenanCe warning For your own safety, turn switch “off” and disconnect from power source before maintaining or lubricating your drill press. Frequently blow out any dust that may accumulate inside the motor. A coat of furniture-type paste wax applied to the table and column will help to keep the surfaces clean. warning to avoid shock or fire hazard, if the power cord is worn or cut, or damaged in any way, have it replaced. - Page 21 description art. no. description art. no. Motor bracket support power cable Belt tension lock knob roll pin 2.5 – 10 Belt tension lever head with pointer and trim set screw M10 x 12 connector wire depth screw lock screw M6 x 12 scale guide Bulb socket Knob...
- Page 22 © huberts bv, Kennedylaan 14, veghel, the netherlands. internet: www.huvema.nl changes and t yping errors reser ved changes and t yping errors reser ved...
-
Page 23: Ce Declaration Of Conformity
(in accordance with supplement II A of the Machinery Directive) industrie & handelsonderneming huberts bv, Kennedylaan 14, 5466 aa veghel, the netherlands, in the capacity of importer, is to be held responsible for declaring that the huvema machine: column drilling machine hu 30 k...
Need help?
Do you have a question about the Hu 30 K and is the answer not in the manual?
Questions and answers