Table of Contents
Advertisement
Advertisement
Table of Contents

Subscribe to Our Youtube Channel
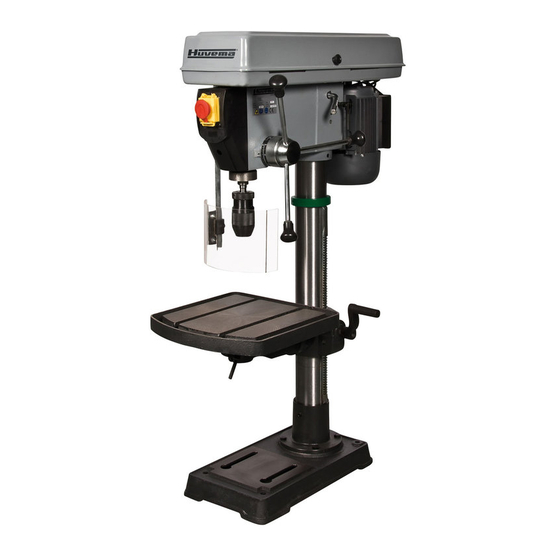
Summary of Contents for Huvema HU 16 T
- Page 1 16 T...
- Page 2 changes and t yping errors reser ved changes and t yping errors reser ved...
- Page 3 changes and t yping errors reser ved...
- Page 4 changes and t yping errors reser ved changes and t yping errors reser ved...
- Page 5 changes and t yping errors reser ved...
- Page 6 changes and t yping errors reser ved changes and t yping errors reser ved...
- Page 7 changes and t yping errors reser ved...
-
Page 8: Table Of Contents
able of conTenTs general safety rules for all machines additional safety rules additional safety instructions for drill presses connecting to the power source check the grounding of the machine. preparations Loose items in box and bag assembly assembly of column and table hardware installing the table installing the head installing the idler pulley... -
Page 9: General Safety Rules For All Machines
16 T ench drilling machine 1. g eneral safeTy rUles for all machines n.B.: read the instructions carefully in order to avoid any problems. as with all machinery there are certain hazards involved with operation and use of this machine. Using the machine with respect and caution will considerably lessen the possibility op personal injury. -
Page 10: Additional Safety Rules
ddiTional safeTy rUles always keep in mind that: • the machine must be switched off and disconnected from the power supply during maintenance and repairs, • clamped workpieces may only be measured when the machine is switched off. never lean over the machine, mind loose clothing, ties, jewellery etc. and wear a cap. do not remove safety devices or guards. -
Page 11: Connecting To The Power Source
• accessories. Use only accessories designed for this drill press to avoid serious injury from thrown broken parts or work pieces. • When cutting large diameter holes, clamp the workpiece firmly to the table. Use only one-piece, cup-type, hole cutters. Keep speed below 1500 rpm when drilling large holes. •... -
Page 12: Preparations
Base check the parts against the above list and refer to the pictures. should there be any deficiencies or damage, please contact your huvema dealer immediately. oose iTems in box and bag Picture B – Loose items allen key, 3/4/5 mm... -
Page 13: Installing The Table
Picture E – Column and table support Locate table crank (1) and support lock (2) in loose parts bag. install support lock from left side into table support (3) and tighten by hand. install table crank assembly and tighten set screw with a 3 mm hex “L” wrench. do not overtighten. set screw should be tightened against the flat section of the shaft (4). -
Page 14: Installing Belt Guard Knob
5.6 i nsTalling belT gUard knob Picture M – Belt guard knob to attach belt guard knob, locate knob (1) and Ø5 mm x 12 mm screw (2) in loose parts bag. install screw in hole located in guard (3) and attach knob, turning till it is tight. Warning! to avoid possible injury, keep guard in place and in proper working order while operating. -
Page 15: Getting To Know Your Drill Press
8. g eTTing To know yoUr drill press Picture T – Machine description please familiarize yourself with this outline before you operate the machine. Belt guard Spring cap Belt tension lock handle Chuck Belt tension handle Head locks Table bevel lock (under table) Feed handle Table lock Column collar... -
Page 16: Troubleshooting
9. T roUbleshooTing Pull the plug! For your own safety, turn switch “off” and always remove plug from power source outlet before troubleshooting. Trouble Probable cause remedy noisy operation 1. incorrect belt tension 1. adjust tension 2. dry spindle 2. Lubricate spindle 3. -
Page 17: Lubrication
UbricaTion all of the ball bearings are packed with grease at the factory. they require no further lubrication. periodically lubricate the gear and rack table elevation mechanism, the splines (grooves) in the spindle and the rack (teeth of the quill). 11. - Page 18 no. description art.no. description art.no. support of chuck guard pulley insert screw M6x6 gB80-85 spindle pulley 500833 screw M5x12 gB818-85 pulley nut 501029 Lock mat v-bet screw M8x12 gB80-85 Wire connector adjustable pole Lead screw M6x10 gB70-85 Lock washer gB862.1-87 pan head screw gB845-85 screw gB818-85 Main switch (emergency stop)
- Page 19 changes and t yping errors reser ved...
- Page 20 © huberts bv, Kennedylaan 14, veghel, the netherlands. internet: www.huvema.nl changes and t yping errors reser ved changes and t yping errors reser ved...
-
Page 21: Ce Declaration Of Conformity
(in accordance with supplement II A of the Machinery Directive) industrie & handelsonderneming huberts bv, Kennedylaan 14, 5466 aa veghel, the netherlands, in the capacity of importer, is to be held responsible for declaring that the huvema machine: bench drilling machine hu 16 T... - Page 22 changes and t yping errors reser ved changes and t yping errors reser ved...
- Page 23 changes and t yping errors reser ved...


Need help?
Do you have a question about the HU 16 T and is the answer not in the manual?
Questions and answers