
Related Manuals for Crestron Mercury CCS-UC-1-T


Summary of Contents for Crestron Mercury CCS-UC-1-T
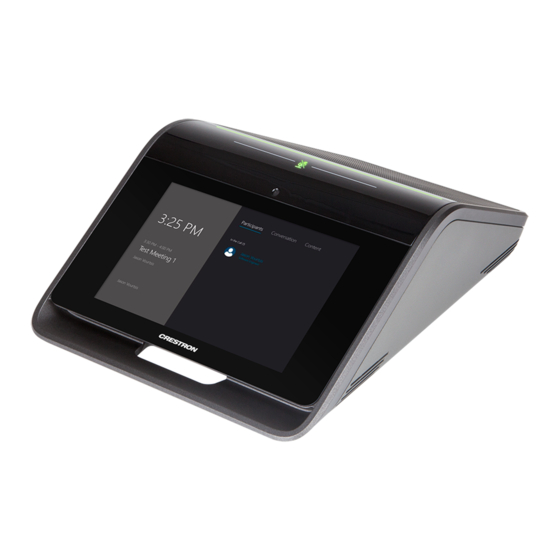
- Page 1 CCS-UC-1-T Crestron Mercury® Tabletop UC Audio Conference Console for Microsoft Teams™ Supplemental Guide Crestron Electronics, Inc.
- Page 2 Other trademarks, registered trademarks, and trade names may be used in this document to refer to either the entities claiming the marks and names or their products. Crestron disclaims any proprietary interest in the marks and names of others. Crestron is not responsible for errors in typography or photography.
-
Page 3: Table Of Contents
Log Out from the Device ........................13 NETWORK ................................14 DEVICE.................................. 20 Enterprise Deployment Options ................27 Crestron XiO Cloud Service ........................27 Crestron Deployment Tool for PowerShell® Software ..........30 Operation Troubleshooting Supplemental Guide – DOC. 8401A Contents • i... -
Page 5: Introduction
Conference Console for Microsoft Teams Introduction The CCS-UC-1-T Crestron Mercury® Tabletop UC Audio Conference Console for Microsoft Teams™ provides an audio conferencing solution specifically engineered for use with the Microsoft Teams intelligent communications platform. The tabletop touch screen console features full-duplex wideband audio conferencing and speakerphone capabilities that deliver a consistent user experience in every meeting space from the familiar and intuitive Microsoft Teams UI. -
Page 6: Operating Environment
Accessories for CCS-UC-1-T PRODUCT PART NUMBER WEBSITE Microphone Pod CCS-UCA-MIC http://www.crestron.com/products/model/CCS-UCA- Surface Mount Kit CCS-UCA-SMK http://www.crestron.com/products/model/CCS-UCA- Startup & Sign In After making all connections, the device displays the language selection screen. Select a Language 2 •... - Page 7 Tap the name of the language to use. The device will ask for confirmation. Confirm Language Selection 2. Tap OK to confirm the selection or Cancel to choose another language. The device will continue with configuration, and then display the Microsoft Teams start screen.
- Page 8 3. Tap Sign in to display the Sign in screen. NOTE: You can also tap on the top left to set the partner settings. For details, refer to “Partner Settings” on page 6. Microsoft Teams Sign In Screen 4. Enter the email address of the Microsoft Teams account, and tap Next. The Company Portal Sign In screen is displayed.
- Page 9 5. Enter the password associated with the Microsoft Teams account, and tap Sign in. The device will ask you to select the type of login account. Select Account Type The device can be set up with a personal account or a shared account. Use the Personal setting if the device is to be placed on a user’s desk.
-
Page 10: Configuration
Configuration The CCS-UC-1-T can be configured from the front panel (partner settings) or a computer with web browser software (device settings). If using a computer, the CCS-UC-1-T and computer must be connected to a commonly accessible network. Partner Settings You can use the device’s partner settings to view information about the device, adjust the volume, set the language of the device, view the privacy policy, and configure the device. -
Page 11: Privacy Policy
3. Tap a language to select it. Privacy Policy The privacy statement and the Crestron® Unified Communications software license agreement are available for viewing. To view the view the privacy statement or the Crestron® Unified Communications software license agreement Tap Privacy Policy. Privacy Policy 2. -
Page 12: Admin Settings
Admin Settings options will display. NOTE: After entering the Admin Settings password the first time, the device will prompt you to enter a new password. Crestron strongly recommends changing the password from the factory default. 8 • CCS-UC-1-T: UC Audio Console for Microsoft Teams... - Page 13 Admin Settings Options 3. To exit the Admin settings and return to the previous screen, tap ←. Display The display can be set to stay on all the time or only turn on based on room occupancy. To specify how the display functions: Tap Display.
-
Page 14: Network Configuration
Time Options The local time zone can be set from the front panel. To set the time zone: − Tap the displayed time zone. A list of time zones is displayed. ii. Press and drag up or down to view the complete list of time zones. iii. - Page 15 To configure the network connection: Tap Network Configuration on the left side of the screen. The settings are displayed on the right side of the screen. Network Configuration 2. Touch and drag up or down to scroll through the available settings. 3.
-
Page 16: Device Settings
Device Settings You can use web browser software on a computer to view web pages to configure the device. Connect to the Device To connect to the device, follow this procedure: Obtain the device’s IP address from the partner settings. For details, refer to “Partner Settings”... -
Page 17: Log Out From The Device
DEVICE is used to upload firmware, reboot the device, view the system log, • enable connection to Crestron XiO Cloud service, set display operation, allow automatic updates, set the date and time, authentication management, and setting the device to work with Crestron Fusion® software. -
Page 18: Network
NETWORK Click NETWORK to configure the device for operating in a network environment. The screen displays controls for configuring the network settings and 802.1x authentication. Network Setting To configure the network settings follow this procedure: NETWORK Screen - Network Setting Enter a host name in the Host Name field and a domain name (optional) in the Domain Name field. - Page 19 5. Click Save Changes when done or Revert to return to the previous setting. NOTE: Any changes made to the network settings will require the device to reboot. 802.1x Configuration Some networks require devices to use 802.1x port-based network access control for access to the network.
- Page 20 3. Upload a machine certificate. a. Click Manage Certificates to manage certificates for 802.1x authentication. A list of certificates is displayed. Manage Certificates Dialog Box b. Click the Machine tab. The current machine certificate is displayed. c. Click to delete the certificate from the list of certificates. d.
- Page 21 4. If authentication server validation is not used, set Enable Server Validation to Disabled and continue to step 6. Otherwise, set Enable Server Validation to Enabled and select the trusted certificate authorities to use. To select all of the authorities, click the check box next to the search box. ...
- Page 22 e. Click OK to close the Add Certificate dialog box. 6. Click Save Changes when done or Revert to return to the previous setting. Password Authentication • In the Authentication Method field, select EAP-MSCHAP V2-password. 2. Enter the domain name of the authentication server, the user name, and the password in their respective fields.
- Page 23 Add Certificate Dialog Box c. Click + Browse, select the certificate file, and click Open. d. Click Load to upload the certificate to the CCS-UC-1-T. A message confirming the upload is displayed. e. Click OK to close the Add Certificate dialog box. 5.
-
Page 24: Device
Click DEVICE to upload firmware, restore factory settings, download system logs, manage cloud settings, manage display settings, manage auto update settings, configure the date and time, authentication management, and configure the device for use with Crestron Fusion software. Device Management DEVICE Screen - Device Management... - Page 25 By default, the Cloud Configuration Service Connection is set to Enabled. To disable the connection, set Cloud Configuration Service Connection to Disabled. For more information, refer to “Crestron XiO Cloud Service” on page 27. Display Options Display Options selects when the display will be on.
- Page 26 The device’s internal clock can be synchronized with a time server or set manually. NOTE: When connected to Crestron Fusion software, the time is automatically set from Crestron Fusion. Any settings made here do not apply. To synchronize the clock with a time server: •...
- Page 27 Authentication Management DEVICE Screen - Authentication Management This section is used to set the password for the current user, and manage authorized users and user groups. By default, Enable Authentication is set to On. Current User • a. Click the Current User tab to set the current user’s password. b.
- Page 28 Click to view details about a user. − Click to update a user’s information. − Click to delete the user from the list of authorized users. − Click Create User to add a user. The Create User dialog box is displayed. −...
- Page 29 DEVICE Screen - Authentication Management: Groups Tab Click to view details about a group. − Click to delete the group from the list of groups. − Click Create Group to add a group to the list of user groups. The Create −...
- Page 30 Enabled. To disable operability with Crestron Fusion software, set Fusion to Disabled. 2. In the IPID field, enter the IP ID number to be used by the Crestron Fusion server. 3. In the Room Name field, enter the name to be used by the Crestron Fusion server.
-
Page 31: Enterprise Deployment Options
These tools can assist in deploying any number of CCS-UC-1-T devices that an organization may need to deploy. For more information, refer to Answer ID 5719 in the Online Help on the Crestron website (www.crestron.com/onlinehelp). Crestron XiO Cloud Service The Crestron XiO Cloud™... - Page 32 The device can now be managed or assigned to a group. For information on creating environments, managing devices, and managing users with the Crestron XiO Cloud service, refer to the Crestron XiO Cloud Service User Guide Guide (Doc. 8214) at www.crestron.com/manuals.
- Page 33 2. Open a web browser, and log in to the Crestron XiO Cloud service at https://portal.crestron.io. 3. Click the ENVIRONMENT menu icon ( ) to display the Environment menu. Environment Menu 4. Click Claim Multiple Devices from the drop-down menu. The Claim Multiple Devices dialog box is displayed.
-
Page 34: Crestron Deployment Tool For Powershell® Software
Crestron Deployment Tool for PowerShell® Software Crestron has developed a tool for customers without Crestron XiO Cloud service to allow deployment of multiple devices without the need to configure each device individually. With this tool, an administrator may input all the configuration settings in a single data file, and then use PowerShell®... -
Page 35: Operation
Operation For operational details and support on Microsoft Teams software, visit https://docs.microsoft.com/en-us/MicrosoftTeams/Microsoft- Teams#pivot=home&panel=home-all. Supplemental Guide – DOC. 8401A CCS-UC-1-T: UC Audio Console for Microsoft Teams • 31... -
Page 36: Troubleshooting
Troubleshooting The following table provides troubleshooting information. If further assistance is required, contact a Crestron customer service representative. CCS-UC-1-T Troubleshooting TROUBLE CAUSE CORRECTIVE ACTION The microphone mute LED on top of The CCS-UC-1-T is not Connect a PoE+ source or the CCS-UC-1-T is lit blue. - Page 37 This page is intentionally left blank. Supplemental Guide – DOC. 8401A CCS-UC-1-T: Mercury Tabletop Conference System • 33...
- Page 38 Crestron Electronics, Inc. Supplemental Guide – DOC. 8401A 15 Volvo Drive, Rockleigh, NJ 07647 (2052763) Tel: 888.CRESTRON 12.18 Fax: 201.767.7576 Specifications subject to www.crestron.com change without notice.
Need help?
Do you have a question about the Mercury CCS-UC-1-T and is the answer not in the manual?
Questions and answers