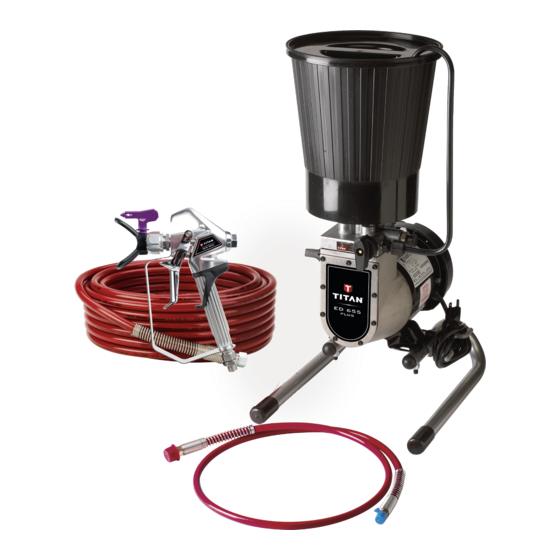
Titan ED655 Owner's Manual
Airless diaphragm pump
Hide thumbs
Also See for ED655:
- Owner's manual (40 pages) ,
- Operating manual (132 pages) ,
- Operating manual (44 pages)
Table of Contents
Advertisement
Advertisement
Table of Contents

Related Manuals for Titan ED655


Summary of Contents for Titan ED655
- Page 1 Do not use this equipment before reading this manual! ED655 Airless Diaphragm Pump Model Number: NOTE: This manual contains important warnings and instructions. Please ED655 0508090 read and retain for reference. © Titan Tool Inc. All Rights Reserved. Form No. 0528937B 0711 •...
-
Page 2: Safety Precautions
All parts of the spray system, including the pump, hose assembly, spray gun and objects in and around the spray area shall be properly grounded to protect against static © Titan Tool Inc. All rights reserved. - Page 3 Never repair a paint hose. Replace with a conductive high-pressure hose. 13. Do not spray outdoors on windy days. 14. Always unplug cord from outlet before working on equipment (electric models only). © Titan Tool Inc. All rights reserved.
-
Page 4: Table Of Contents
Knob 1. Firmly press the optional pusher valve button on the side of the pump housing to make sure the outlet ball valve moves freely. PRIME/SPRAY Knob Pusher Valve Button Power Cord (optional) © Titan Tool Inc. All rights reserved. -
Page 5: Attaching The Paint Hose
NEvER trigger the gun unless the tip is completely turned to either the spray or the Trigger locked unclog position. aLwaYS (gun will not spray) engage the gun trigger lock before removing, replacing or cleaning tip. © Titan Tool Inc. All rights reserved. -
Page 6: Mounting The Paint Hopper
4. Thread the nut on the return tube onto the return tube fitting and tighten until the return tube is secure. 5. Place the hook end of the return tube into the hole in the paint hopper cover. Return Tube Paint Hopper Cover © Titan Tool Inc. All rights reserved. -
Page 7: Spraying
If the pressure is set too low, tailing will appear or the paint will spatter out in gobs rather than in a fine spray. © Titan Tool Inc. All rights reserved. -
Page 8: Cleanup
6. Test the sprayer on a practice piece and begin spraying. 5 minutes to thoroughly clean the hose, pump and spray gun. © Titan Tool Inc. All rights reserved. - Page 9 13. Trigger the gun to remove any pressure which may still be in the hose. 14. Lock the gun trigger by rotating the trigger lock forward until it stops. 15. Turn the motor switch to OFF. © Titan Tool Inc. All rights reserved.
-
Page 10: Maintenance
1. Remove the outlet valve body with a wrench. 2. Remove and clean the ball stop and small spring inside the valve using a wire hook or tweezers. Replace the spring if it is broken or worn. © Titan Tool Inc. All rights reserved. -
Page 11: Troubleshooting
Allow the motor to cool and move the sprayer to a tripped. cooler spot. There is a problem with the motor. Take the sprayer to a Titan Authorized Service Center. The sprayer starts up but The unit will not prime properly or has lost Try to prime the unit again. - Page 12 La pression n’est pas objets dans et autour de la zone de pulvérisation doivent Français © Titan Tool Inc. Tous droits réservés.
- Page 13 Appuyez-vous bien sur les deux pieds pour toujours conserver l’équilibre. 4. Soyez attentif et regardez ce que vous faites. 5. N’utilisez pas l’appareil quand vous êtes fatigué ou sous l’influence de drogues ou d’alcool. © Titan Tool Inc. Tous droits réservés. Français...
- Page 14 La presión no se libera apagando el motor. Para liberar la presión hay Español © Titan Tool Inc. Todos los derechos reservados.
- Page 15 7. No exponga la manguera a temperaturas o presiones que superen las especificadas por el fabricante. 8. No utilice la manguera como elemento de fuerza para tirar del equipo o levantarlo. © Titan Tool Inc. Todos los derechos reservados. Español...
-
Page 16: Parts Listings
Pump head assembly 9820206 Washer 0555124 Diaphragm pump 0508660 Screw 0508271 Left leg 0508270 Right leg 0551525 Plug 0508377 Cord wrap 0555513 Tube cap 0508267 Mounting plate 0508259 Handle assembly 9811122 Lock nut © Titan Tool Inc. All rights reserved. -
Page 17: Diaphragm Pump
Ball bearing 0005311 Piston spring 0278237 Hydraulic housing assembly 0270548 Piston washer (includes items 23 – 25) 0089456 Retainer 0270462 Fan (not shown) 0278359 Gasket 0270612 Fan cover (not shown) 0278341 Hydraulic cover © Titan Tool Inc. All rights reserved. -
Page 18: Pump Head Assembly
Outlet spring 0279971 Hopper complete (includes items 1 – 6) 0278361 Ball guide 9871114 O-ring 0278335 Outlet fitting 0278337 Pusher body 0278250 Pusher stem assembly 0278368 Pusher spring 0156646 Seal 0278340 Pusher washer © Titan Tool Inc. All rights reserved. - Page 19 Notes © Titan Tool Inc. All rights reserved.
-
Page 20: Limited Warranty
Titan Tool, Inc., (“Titan”) warrants that at the time of delivery to the original purchaser for use (“End User”), the equipment covered by this warranty is free from defects in material and workmanship. With the exception of any special, limited, or extended warranty published by Titan, Titan’s obligation under this warranty is limited to replacing or repairing without charge those parts which, to Titan’s...
Need help?
Do you have a question about the ED655 and is the answer not in the manual?
Questions and answers