Table of Contents
Advertisement
Available languages
Available languages
CAPSPrAy Maxum Elite
Model Number:
U.S. Patent No.
5,655,714
D616,527
Other patents pending
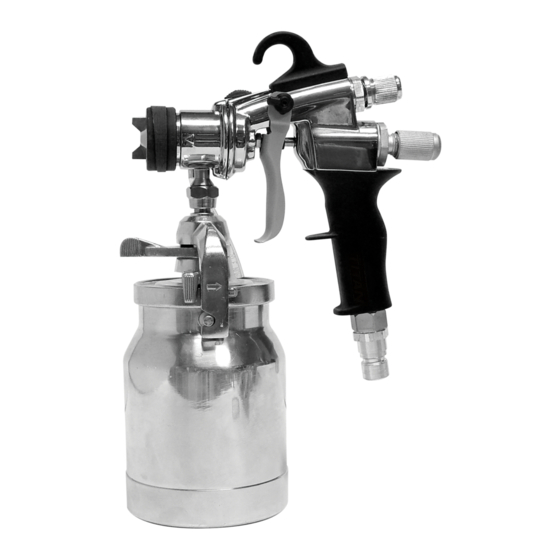
HVLP Spray Gun
Model 0524027
0524027
0524052
Owner's Manual
Notice d'utilisation
Manual del Propietario
Do not use this equipment before
reading this manual!
Model 0524052
NOTE: This manual contains important
warnings and instructions. Please
read and retain for reference.
© Titan Tool Inc. All Rights Reserved. Form No. 0524838E
0712
•
Advertisement
Chapters
Table of Contents

Related Manuals for Titan 524027


Summary of Contents for Titan 524027
- Page 1 Model 0524052 Model Number: 0524027 NOTE: This manual contains important 0524052 warnings and instructions. Please read and retain for reference. U.S. Patent No. 5,655,714 © Titan Tool Inc. All Rights Reserved. Form No. 0524838E 0712 • D616,527 Other patents pending...
-
Page 2: Table Of Contents
Español..................22 hot during use. Avoid skin contact with quick disconnect fittings Warranty .................. 36 when they are hot. Allow quick disconnect fittings to cool before disconnecting the spray gun from the hose. English © Titan Tool Inc. All rights reserved. -
Page 3: Service
Slide the hook toward the rear of the gun to remove it. 3. Swivel the trigger releases on both sides of the spray gun so that they are pointing toward the gun head. © Titan Tool Inc. All rights reserved. English... -
Page 4: Using An Hvlp Spray Gun
Set the mark on the knob to the left for maximum airflow. Remember to test the spray on a piece of scrap wood or cardboard before using. Diagonal Round tip position pattern Air flow adjustment knob Horizontal Vertical tip position pattern Maximum Minimum English © Titan Tool Inc. All rights reserved. -
Page 5: Spraying
If you are holding the spray gun angled up, turn the swivel tube lever fully counterclockwise. IMPORTaNT: Do not use any lubricants containing silicone. Silicone can cause problems when used with some paints. © Titan Tool Inc. All rights reserved. English... -
Page 6: Maintenance
9. Reassemble the gun head into the gun body. 10. Pull the trigger to make certain the needle moves freely. If the needle sticks, loosen the packing nut. If the packing leaks, tighten the packing nut. English © Titan Tool Inc. All rights reserved. -
Page 7: Replacing The Gun Head Seal And Gun Body O-Ring
Replace with a new tube. 8. Reassemble the spray gun head onto the gun body (see page 3). Gun body insert Screws Gun head seal body head Gun body O-ring © Titan Tool Inc. All rights reserved. English... -
Page 8: Replacing The Air Flow Valve O-Ring
7. Turn the spray gun opposite the direction indicated by the arrows on the bridge until the pegs on the cup are in the notches of the bridge. 8. Tighten the cup locking lever. English © Titan Tool Inc. All rights reserved. -
Page 9: Converting To Top Feed
NOTE: In bleeder setup, the removal of the air flow adjustment knob causes the air supply to be on at all times when the air hose is attached to the gun. Air tube Air tube fitting Fluid inlet © Titan Tool Inc. All rights reserved. English... -
Page 10: Choosing A Projector Set
5. Install the new projector set in reverse order. Phone: 1-800-526-5362 Phone: 1-800-565-8665 Fax: 1-800-528-4826 Fax: 1-800-856-8496 1770 Fernbrook Lane 200 Trowers Road, Unit 7B Minneapolis, MN 55447 Woodbridge, Ontario L4L 5Z8 www.titantool.com English © Titan Tool Inc. All rights reserved. -
Page 11: Material Reduction/Projector Set Chart
Adjust the air cap properly so that paint flows freely through the cap Too much overspray Air pressure too high Reduce air pressure Material too thin Add unthinned paint Spray gun too far from surface Move closer © Titan Tool Inc. All rights reserved. English... -
Page 12: Français
Garantie limitée..................36 l’électricité statique. Ne jamais utiliser une couverture en plastique pour fermer une zone d’épandage ni utiliser des toiles de protection en plastique lors de la pulvérisation de matières inflammables. Français © Titan Tool Inc. Tous droits réservés. -
Page 13: Entretien Et Réparations
Dans le cadre de son engagement perpétuel envers l’amélioration de la qualité, Titan se réserve le droit de modifier les composants ou la conception de ses produits si elle le juge nécessaire. -
Page 14: Utilisation D'un Pistolet De Vaporisation Hvlp
Rappel : il faut toujours effectuer des essais sur des retailles de bois ou de carton avant de procéder à la pulvérisation. Bouton de réglage Position Forme du débit d'air diagonale circulaire Position Forme horizontale verticale Maximal Minimal Français © Titan Tool Inc. Tous droits réservés. -
Page 15: Pulvérisation
IMPORTaNT : Ne pas utiliser de lubrifiants à base de Si le pistolet est orienté vers le haut, il faut pousser le levier silicone; cette substance peut engendrer des problèmes si d’orientation à l’extrême gauche. elle est combinée à certaines peintures. © Titan Tool Inc. Tous droits réservés. Français... -
Page 16: Maintenance
5. Placer une nouvelle garniture dans le trou de garniture. Joint avant de soupape 6. Faire tourner la garniture d’un tour à l’intérieur du trou. Ne de régulation d'air Face conique pas serrer. Français © Titan Tool Inc. Tous droits réservés. -
Page 17: Remplacement Du Joint De La Tête Du Pistolet Et Du Joint Torique De La Tête Du Pistolet
Le remplacer par un nouveau tube. Corps du pistolet Écrou du corps du pistolet Joint de la tête du pistolet Tête du pistolet Joint torique du corps du pistolet © Titan Tool Inc. Tous droits réservés. Français... -
Page 18: Remplacement Du Joint Torique De La Soupape De Régulation D'air
7. Tourner le pistolet dans la direction opposée à celle indiquée par les flèches de la couronne jusqu’à ce que les tenons du godet soient dans les encoches de la couronne. 8. Serrer le levier de blocage du godet. Français © Titan Tool Inc. Tous droits réservés. -
Page 19: Convertissement À L'alimentation Par Le Haut
Tube d’air Raccord de tube d’air Entrée du fluide © Titan Tool Inc. Tous droits réservés. Français... -
Page 20: Choix D'un Projecteur
1-800-526-5362 Phone: 1-800-565-8665 5. Monter le nouveau projecteur en respectant l’ordre Fax: 1-800-528-4826 Fax: 1-800-856-8496 inverse. 1770 Fernbrook Lane 200 Trowers Road, Unit 7B Minneapolis, MN 55447 Woodbridge, Ontario L4L 5Z8 www.titantool.com Français © Titan Tool Inc. Tous droits réservés. -
Page 21: Réduction Du Produit/Tableau Des Projecteurs
Trop de pulvérisation hors La pression d’air est trop élevée Réduire la pression cible Le produit est trop dilué Ajouter du produit non dilué Le pistolet est trop loin de la surface S’en rapprocher © Titan Tool Inc. Tous droits réservés. Français... -
Page 22: Español
Conjunto del depósito de alimentación superior ......35 de desconexión rápida cuando se calienten. Deje que las Garantia limitada ................. 36 conexiones de desconexión rápida se enfríen antes de desconectar la pistola de atomización de la manguera. Español © Titan Tool Inc. Todos los derechos reservados. -
Page 23: Servicio
3. Gire los seguros del gatillo que se encuentran a ambos lados de la pistola de pulverización de manera que estén orientados hacia el cabezal de la pistola. © Titan Tool Inc. Todos los derechos reservados. Español... -
Page 24: Cómo Utilizar Una Pistola Atomizadora Hvlp
Perilla de ajuste del flujo de aire Posición diagonal Patrón de la boquilla redondo Posición horizontal Patrón de la boquilla vertical Máximo Mínimo Español © Titan Tool Inc. Todos los derechos reservados. -
Page 25: Para Atomizar
IMPORTaNTE: No use ningún lubricante que contenga arriba, gire la palanca giratoria en dirección opuesta a las silicón. El silicón puede causar problemas cuando se usen manecillas del reloj por completo. algunas pinturas. © Titan Tool Inc. Todos los derechos reservados. Español... -
Page 26: Mantenimiento
6. Gire la tuerca de empaque una vuelta hacia el interior de Sello delantero de la la ranura del empaque. No la apriete. válvula de aire Lado cónico 7. Reemplace la aguja en la tuerca del prensaestopas. Español © Titan Tool Inc. Todos los derechos reservados. -
Page 27: Reemplazo De La Junta Del Cabezal De La Pistola Y La Junta Tórica Del Cuerpo De La Pistola
Reemplácelo por un nuevo tubo de aire. Cuerpo de la pistola Inserto del cuerpo de la pistola Tornillos Junta del cabezal de la pistola Cabezal de la pistola Junta tórica del cuerpo de la pistola © Titan Tool Inc. Todos los derechos reservados. Español... -
Page 28: Reemplazo De La Junta Tórica De La Válvula De Flujo De Aire
7. Gire la pistola atomizadora en dirección opuesta a la indicada por las flechas ubicadas en el puente hasta que las espigas del depósito estén en las ranuras del puente. 8. Apriete la manija trabadora del depósito. Español © Titan Tool Inc. Todos los derechos reservados. -
Page 29: Conversión A Alimentación Por La Parte Superior
Tubo de aire Conector de tubo de aire Entrada de fluido © Titan Tool Inc. Todos los derechos reservados. Español... -
Page 30: Para Escoger Un Equipo Alargador
1-800-565-8665 5. Instale el nuevo juego de proyector en orden inverso. Fax: 1-800-528-4826 Fax: 1-800-856-8496 1770 Fernbrook Lane 200 Trowers Road, Unit 7B Minneapolis, MN 55447 Woodbridge, Ontario L4L 5Z8 www.titantool.com Español © Titan Tool Inc. Todos los derechos reservados. -
Page 31: Tabla De Reducción De Material Y De Juego De Proyector
Se atomiza demasiado Presión de aire demasiado alta Reduzca la presión de aire Material demasiado delgado Añada pintura sin diluir La pistola de atomización está demasiado Acérquela retirada de la superficie © Titan Tool Inc. Todos los derechos reservados. Español... -
Page 32: Parts List
Parts List • Liste de pièces • Lista de piezas Gun Assembly • Ensemble de pistolet • Ensamblaje de pistola (for bleeder conversion) (Pour transformer le pistolet en dispositif purgeur) (para conversión con purgador) English Français Español © Titan Tool Inc. All rights reserved. - Page 33 Obturador del aire #3 0524484 Air cap ring Bague de fixation du bouchon d’air Anillo del obturador del aire 0277974 Plug (shipped loose) Obturateur (pièce fournie non installée) Tapón (empacado suelto) © Titan Tool Inc. All rights reserved. Español Français English...
-
Page 34: Cup Assembly
Empaque del depósito 0275573 Godet Depósito 0295600 Filter Filtre Filtro 0524271 Cup assembly (includes items 1-14) Ensemble godet (articles nos 1 à 14) Conjunto del depósito (incluye los artículos 1 - 14) English Français Español © Titan Tool Inc. All rights reserved. -
Page 35: Top Feed Cup Assembly
Stand Support Soporte 0524045 Top feed cup assembly (includes Ensemble godet à alimentation par le Conjunto del depósito de alimentación items 1-9) haut (articles nos 1 à 9) superior (incluye los artículos 1-9) © Titan Tool Inc. All rights reserved. -
Page 36: Warranty
Lo que está cubierto por esta garantía: Este producto, fabricado por Titan, está garantizado por un (1) año a partir de la fecha de compra, contra los defectos de material y mano de obra que haya cuando se utilice de acuerdo con las recomendaciones e instrucciones impresas de Titan.
Need help?
Do you have a question about the 524027 and is the answer not in the manual?
Questions and answers