Titan ED655 Owner's Manual
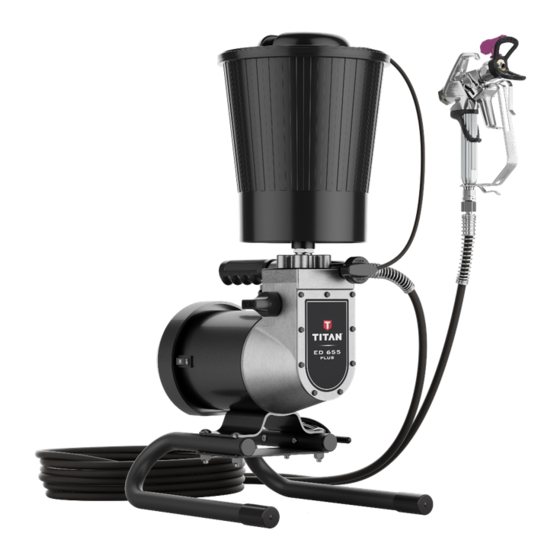
Airless diaphragm pump
Hide thumbs
Also See for ED655:
- Operating manual (132 pages) ,
- Owner's manual (20 pages) ,
- Operating manual (44 pages)
Table of Contents
Advertisement
Available languages
Available languages
Quick Links
Airless Diaphragm Pump
Model
0508090
Register your product online at:
www.titantool.com
_ _ _ _ _ _ _ _ _ _
Serial Number*
* See page 33 for location
ED655
Owner's Manual
Notice d'utilisation
Manual del Propietario
Do not use this equipment before
reading this manual!
NOTE: This manual contains important
warnings and instructions. Please read
and retain for reference.
© Titan Tool Inc. All Rights Reserved. Form No. 0528937G
0216
•
Advertisement
Chapters
Table of Contents

Related Manuals for Titan ED655


Summary of Contents for Titan ED655
- Page 1 Please read and retain for reference. _ _ _ _ _ _ _ _ _ _ Serial Number* * See page 33 for location © Titan Tool Inc. All Rights Reserved. Form No. 0528937G 0216 •...
-
Page 2: Safety Precautions
When the unit is not in use, turn off the unit and spray gun and objects in and around the spray area shall be relieve the pressure in accordance with the manufacturer’s properly grounded to protect against static discharge and instructions. English © Titan Tool. All rights reserved. - Page 3 Inspect hose before each use. Replace • Use lowest possible pressure to flush equipment. any damaged hoses or parts. Only use TITAN original-high- • Follow all appropriate local, state and national codes pressure hoses in order to ensure functionality, safety and governing ventilation, fire prevention and operation.
-
Page 4: Table Of Contents
Knob 1. Firmly press the optional pusher valve button on the side of the pump housing to make sure the outlet ball valve moves freely. PRIME/SPRAY Pusher Valve Button Knob Power Cord (optional) English © Titan Tool. All rights reserved. -
Page 5: Attaching The Paint Hose
NEVEr trigger the gun unless the tip is completely turned to either the spray or the unclog position. aLwayS engage the gun trigger Trigger locked lock before removing, replacing or (gun will not spray) cleaning tip. English © Titan Tool. All rights reserved. -
Page 6: Mounting The Paint Hopper
4. Thread the nut on the return tube onto the return tube fitting and tighten until the return tube is secure. 5. Place the hook end of the return tube into the hole in the paint hopper cover. Return Tube Paint Hopper Cover English © Titan Tool. All rights reserved. -
Page 7: Spraying
If the pressure is set too low, tailing will appear or the paint will spatter out in gobs rather than in a fine spray. English © Titan Tool. All rights reserved. -
Page 8: Cleanup
5 minutes to thoroughly clean the hose, pump and spray gun. 6. Test the sprayer on a practice piece and begin spraying. 6. Turn the pressure control knob counterclockwise to its lowest setting. English © Titan Tool. All rights reserved. - Page 9 12. Trigger the gun to remove any pressure which may still be in the hose. 13. Lock the gun trigger by rotating the trigger lock forward until it stops. 14. Turn the motor switch to OFF. English © Titan Tool. All rights reserved.
-
Page 10: Maintenance
1. Remove the outlet valve body with a wrench. 2. Remove and clean the ball stop and small spring inside the valve using a wire hook or tweezers. Replace the spring if it is broken or worn. English © Titan Tool. All rights reserved. -
Page 11: Troubleshooting
Take the sprayer to a Titan Authorized Service Center. the ball and the seat. Foreign matter or paint has built up in PRIME/ Replace PRIME/SPRAY valve or take the sprayer to a Titan SPRAY valve Authorized Service Center. The spray gun leaks. -
Page 12: Consignes De Sécurité
à la terre pour protéger contre les décharges PRIME pour libérer la pression. Consultez la PROCÉDURE DE d’électricité statique et les étincelles. N’utilisez que des DÉCOMPRESSION décrite dans le manuel de la pompe. Français © Titan Tool Inc. Tous droits réservés. - Page 13 à haute pression d‘origine de TITAN. fonctionnement. • Ce système peut produire une pression de 2 800 PSI / 193 •...
-
Page 14: Description Générale
à bille de sortie bouge sans problème. Robinet Bouton du clapet de poussée PRIME/SPRAY Cordon (en option) d'alimentation Français © Titan Tool Inc. Tous droits réservés. -
Page 15: Assemblage Du Flexible De Peinture
8. Placez l’interrupteur ON/OFF du moteur sur OFF. Pistolet verrouillé vaporisation ou débouché. Engagez (le pistolet ne peut toujours le verrouillage de la gâchette du pistolet avant de démonter, de pas pulvériser) remplacer ou de nettoyer l’embout. Français English © Titan Tool Inc. Tous droits réservés. -
Page 16: Assemblage De La Trémie De Peinture
5. Placez l’extrémité en forme de crochet du tube de retour dans le trou du couvercle de la trémie de peinture. Tube de retour Couvercle de la trémie Français © Titan Tool Inc. Tous droits réservés. -
Page 17: Pulvérisation
Si la pression est trop élevée, la pulvérisation sera trop fine. Si la pression est trop basse, des traînées apparaîtront ou alors la peinture s’étalera en faisant des taches au lieu d’une fine pulvérisation. Français English © Titan Tool Inc. Tous droits réservés. -
Page 18: Nettoyage
2. Tournez le bouton de commande de pression dans le montre pour faire monter la pression. sens contraire des aiguilles d’une montre jusqu’au réglage 6. Testez le pulvérisateur sur une chute et commencez à minimum de pression. pulvériser. Français © Titan Tool Inc. Tous droits réservés. - Page 19 Continuez à actionner 20. Essuyez toute l’unité, le tuyau et le pistolet avec un chiffon le pistolet pendant environ 30 secondes. humide pour enlever les dépôts de peinture. Français English © Titan Tool Inc. Tous droits réservés.
-
Page 20: Maintenance
2. Retirez et nettoyez la butée de la bille et le petit ressort à l’intérieur du robinet en vous servant d’un crochet métallique ou d’une pince. Remplacez le ressort s’il est cassé ou usé. Français © Titan Tool Inc. Tous droits réservés. -
Page 21: Dépannage
Des corps étrangers ou de la peinture se sont Remplacez le robinet de PRIME/SPRAY ou emmenez le accumulés entre la robinet de PRIME/SPRAY. pulvérisateur à un Centre technique agréé Titan. Le pistolet de pulvérisation fuit. Des pièces internes du pistolet sont usées ou Emmenez le pulvérisateur à... -
Page 22: Precauciones De Seguridad
Todas las piezas del de Presión que se describe en el manual de la bomba. sistema pulverizador, incluyendo la bomba, el conjunto de mangueras, la pistola pulverizadora y los objetos dentro y Español © Titan Tool Inc. Todos los derechos reservados. - Page 23 • No se distraiga y tenga cuidado con lo que hace. imprimadores y tintes. • No utilice el aparato si está fatigado o se encuentra bajo la influencia del alcohol o de las drogas. Español © Titan Tool Inc. Todos los derechos reservados.
-
Page 24: Descripción General
Válvula PRIME/SPRAY Cable de Botón de la válvula de empuje alimentación (opciónal) Español © Titan Tool Inc. Todos los derechos reservados. -
Page 25: Acople De La Manguera De Pintura
8. Gire el interruptor ON/OFF de la bomba a la posición OFF. en aquella destrabada. SIEMPrE enganche el bloqueo del gatillo de la pistola antes de retirar, de reemplazar o de limpiar la punta. Español © Titan Tool Inc. Todos los derechos reservados. -
Page 26: Montaje De La Tolva De Pintura
5. Coloque el extremo del gancho del tubo de retorno en el orificio de la tapa de la tolva de pintura. Tubo de retorno Tapa de la tolva de pintura Español © Titan Tool Inc. Todos los derechos reservados. -
Page 27: Pulverización
Si se ajusta una presión demasiado alta, el patrón de pulverización será demasiado fino. Si la presión es demasiado baja, la pintura formará regueros o burbujas en lugar de lograr una pulverización adecuada. Español © Titan Tool Inc. Todos los derechos reservados. -
Page 28: Limpieza
6. Pruebe el pulverizador sobre una pieza de prueba y empiece a 4. Gire el mando de control de presión lentamente hasta que pulverizar. empiece a circular material hasta el cubo. Tan pronto como Español © Titan Tool Inc. Todos los derechos reservados. - Page 29 20. Limpie toda la unidad, la manguera y la pistola con un paño 10. Gire el mando de control de presión en el sentido contrario a húmedo para eliminar el material acumulado. las agujas del reloj hasta la posición mínima. Español © Titan Tool Inc. Todos los derechos reservados.
-
Page 30: Mantenimiento
2. Retire y limpie el tope esférico y el pequeño resorte en el interior de la válvula por medio de un gancho metálico o pinzas. Reemplace el resorte si está roto o desgastado. Español © Titan Tool Inc. Todos los derechos reservados. -
Page 31: Solución De Problemas
Se ha acumulado pintura o algún material Sustituya la válvula PRIME/SPRAY o lleve el pulverizador extraño entre la válvula PRIME/SPRAY. a un centro de servicio autorizado de Titan. La pistola pulverizadora tiene Las piezas internas de la pistola están Lleve el pulverizador a un centro de servicio autorizado fugas. -
Page 32: Parts Listings
Parts List • Liste de pièces • Lista de piezas Main Assembly • Montage principal • Conjunto principal © Titan Tool Inc. All rights reserved. -
Page 33: Product Registration
Enregistrement du produit Enregistrer votre appareil en ligne à www.titantool.com. registro del producto Registre su producto en línea en www.titantool.com. Serial Number Location • Emplacement du numéro de série • Ubicación del número de serie © Titan Tool Inc. All rights reserved. -
Page 34: Diaphragm Pump
Diaphragm Pump • Pompe à diaphragme • Bomba de diafragma © Titan Tool Inc. All rights reserved. - Page 35 Not pictured / Non illustré / Sin imagen: 0270462 Fan (not shown) Ventilateur (non illustré) Ventilador (no se muestra) 0270612 Fan cover (not shown) Couvercle du ventilateur (non illustré) Cubierta del ventilador (no se muestra) © Titan Tool Inc. All rights reserved.
-
Page 36: Pump Head Assembly
Pusher stem assembly Ensemble tige de poussée Conjunto del vástago del empujador 0278368 Pusher spring Ressort de poussée Resorte del empujador 0278340 Pusher washer Rondelle de poussée Arandela del empujador 0156646 Seal Joint Sello © Titan Tool Inc. All rights reserved. -
Page 37: Hopper Assembly
Ensemble de tube de retour (comprend Conjunto de tubo de retorno (incluye el (includes items 4-5) l’articles 4-5) articulos 4-5) 0288144 Hopper complete (includes Trémie, complet (comprend l’articles 1-6) Tolva, completo (incluye el articulos 1-6) items 1-6) © Titan Tool Inc. All rights reserved. -
Page 38: Garantie Limitée
Les responsabilités de Titan en vertu de cette garantie se limitent au remplacement ou à la réparation sans frais des pièces dont on aura, à la satisfaction raisonnable de Titan, démontré la défectuosité dans un délai de 12 mois après la date d’achat par l’Utilisateur. -
Page 39: Garantía Limitada
RECLAMOS EN CASO DE INCUMPLIMIENTO DE ESTAS GARANTÍAS. Las Hojas de Datos de Seguridad (Material Safety Data Sheets - MSDS) se encuentran disponibles en el sitio web de Titan o llamando al Servicio al Cliente. United States Sales & Service International international@titantool.com... -
Page 40: Limited Warranty
Titan Tool, Inc., (“Titan”) warrants that at the time of delivery to the original purchaser for use (“End User”), the equipment covered by this warranty is free from defects in material and workmanship. With the exception of any special, limited, or extended warranty published by Titan, Titan’s obligation under this warranty is limited to replacing or repairing without charge those parts which, to Titan’s reasonable satisfaction, are...
Need help?
Do you have a question about the ED655 and is the answer not in the manual?
Questions and answers