
Subscribe to Our Youtube Channel
Related Manuals for Whirlpool WTW9500E SERIES


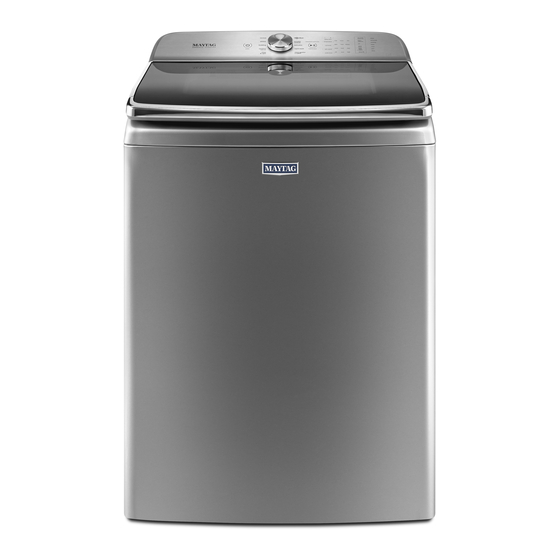
Summary of Contents for Whirlpool WTW9500E SERIES
-
Page 1: Service Manual
L-89 Multimedia Enhanced SERVICE MANUAL WHIRLPOOL & MAYTAG 6.2 CU FT DIRECT DRIVE TOP LOAD WASHER WTW9500E* MVWB955F* *All Colors and Versions W10864849... -
Page 2: Whirlpool & Maytag Direct Drive Top Load Washer
This Whirlpool Service Manual, (Part No. W10864849), provides the In-Home Service Professional with service information for the “WHIRLPOOL & MAYTAG 6.2 CU. FT. DIRECT DRIVE TOP LOAD WASHER.” The Wiring Diagram used in this Service Manual is typical and should be used for training purposes only. -
Page 3: Table Of Contents
TABLE OF CONTENTS WHIRLPOOL & MAYTAG DIRECT DRIVE TOP LOAD WASHER SECTION 1 — GENERAL INFORMATION WASHER SAFETY ..........................1-2 GENERAL THEORY OF OPERATION .....................1-3 MODEL & SERIAL NUMBER LABEL LOCATION..................1-5 TECH SHEET LOCATION ........................1-5 MODEL AND SERIAL NUMBER NOMENCLATURE ................1-6 PRODUCT SPECIFICATIONS ........................1-7... - Page 4 REMOVING THE HEATER* .........................4-17 REMOVING THE LID LOCK* ......................4-18 REMOVING THE BASKET LIGHT* ......................4-19 NOTES ...............................4-20 * Video Available Look for this ICON throughout Section 4 PRODUCT SPECIFICATIONS & WARRANTY INFORMATION SOURCES (inside back cover) Whirlpool & Maytag Direct Drive Top Load Washer...
-
Page 5: Section 1 - General Information
GENERAL INFORMATION Section 1: General Information This section provides general safety, parts, and information for the “Whirlpool & Maytag Direct Drive Top Load Washer.” n Washer Safety n General Theory of Operation n Model/Serial Number Location n Tech Sheet Location n Model &... -
Page 6: Washer Safety
All safety messages will tell you what the potential hazard is, tell you how to reduce the chance of injury, and tell you what can happen if the instructions are not followed. Whirlpool & Maytag Direct Drive Top Load Washer... -
Page 7: General Theory Of Operation
NEW COMPONENTS Sleek Under Glass User Interface — the Whirlpool washer features a new sleek under glass capacitive touch user interface that asks “what’s being washed” followed by “how you want to wash.” First select a cycle from the “What to Wash” (Mixed, Whites, Casuals, Jeans, Towels, Delicates, ActiveWear, and Bulky Sheets) and then select the “How to Wash”... - Page 8 Dispenser Oxi & Bleach Load & Go Cartridge Bulk Dispense Pump Single Dose Fabric Detergent Softener Detergent Valve Figure 6 - Viewed from Top Figure 7 - Viewed from under top panel Whirlpool & Maytag Direct Drive Top Load Washer...
-
Page 9: Model & Serial Number Label Location
Model & Serial Number Label Location Model # WTW9500EC1 Serial # C42510000 Figure 8 - Model / Serial Number Location Tech Sheet Location (Access Under Cabinet Top) Figure 9 - Tech Sheet Location Whirlpool & Maytag Direct Drive Top Load Washer... -
Page 10: Model And Serial Number Nomenclature
0 = Basic Release; 1 = First Revision; 2 = Second Revision SERIAL NUMBER 10000 PRODUCTION SITE C = CLYDE, OH YEAR OF PRODUCTION 4 = 2014 WEEK OF PRODUCTION PRODUCT SEQUENCE NUMBER Whirlpool & Maytag Direct Drive Top Load Washer... -
Page 11: Product Specifications
Gross Weight : 201 lbs. (91.17 kg) * Do not place single-dose laundry packets or powder detergent into the dispenser. Add single-dose laundry packets or powder detergent directly to the washer basket. Whirlpool & Maytag Direct Drive Top Load Washer... -
Page 12: Notes
GENERAL INFORMATION Notes Whirlpool & Maytag Direct Drive Top Load Washer... -
Page 13: Section 2 - Diagnostics & Troubleshooting
Service Test Mode n Load & Test Cycle Functions Numbers Chart n Service Diagnostics Verification Cycle n Software Version Display n Fault/Error Codes n Exiting Service Diagnostic Mode n Troubleshooting Guide Whirlpool & Maytag Direct Drive Top Load Washer... -
Page 14: Diagnostic Guide
You may want to do a quick and overall checkup of the washer with these tests before going to specific troubleshooting tests. LOCATION Figure 1 - Diagnostic LED Whirlpool & Maytag Direct Drive Top Load Washer... -
Page 15: Key Activation & Encoder Test
NOTE: There is a limit of four functions ‘on’ at used to activate the Service Diagnostic mode. a time. The chart on the following page indicates function and test cycle function numbers: Whirlpool & Maytag Direct Drive Top Load Washer... -
Page 16: Load And Test Cycle Function Numbers Chart
Note: For factory test only. If life test mode is accidentally activated, Life Test can be exited by removing power from the washer and waiting for the control to power down as indicated by the diagnostic LED ceasing to flash (5-3). Whirlpool & Maytag Direct Drive Top Load Washer... -
Page 17: Service Diagnostics Verification Cycle
Service Diagnostics Verification Cycle will start and the step number within the Service Diagnostics Verification Cycle sequence will be shown on the display. NOTE: The basket must be empty during this test. Service Diagnostics Verification Cycle Chart (Whirlpool Models) * Display... - Page 18 DIAGNOSTICS & TROUBLESHOOTING For Service Technician Use Only Service Diagnostics Verification Cycle Chart (Whirlpool Models)* continued Display Washer Recommended Est. Time Function Procedure in Seconds Drain pump on for 15 If water is not draining, use Service Test seconds Mode to test the drain pump.
-
Page 19: Software Version Display
F# and an E#. The F# indicates the suspect the Service Diagnostic mode for 5 seconds. System/Category. The E# indicates the suspect Component system. Pressing the POWER button once or twice, depending • on diagnostic procedure. Whirlpool & Maytag Direct Drive Top Load Washer... - Page 20 Parameter File F2E5 UI Software Error: Indicates that a parameter file in the UI is corrupt. Parameter Memory • Replace the user interface. Invalid ‡This fault will stop the washer during Service Diagnostics. Whirlpool & Maytag Direct Drive Top Load Washer...
- Page 21 Fault is displayed when power is lost during spin. This fault forces the washer to pause Spin for 5 minutes to allow the basket to stop before continuing the cycle. • See F7E0 recommendations above. ‡This fault will stop the washer during Service Diagnostics. Whirlpool & Maytag Direct Drive Top Load Washer...
- Page 22 • May signify problem with water inlet valves. • Pressure transducer fault on main control. • See TEST #2: Valves, page 3-6 and TEST #6: Water Level, page 3-12. ‡This fault will stop the washer during Service Diagnostics. 2-10 Whirlpool & Maytag Direct Drive Top Load Washer...
- Page 23 • Too much detergent. • Is the pump running? If not, see TEST #7: Drain Pump, page 3-13. ‡This fault will stop the washer during Service Diagnostics. Whirlpool & Maytag Direct Drive Top Load Washer 2-11...
-
Page 24: Troubleshooting Guide
See TEST #6: Water Level, page 3-12. Valve problem. See TEST #2: Valves, page 3-6. Washer requires calibration. Perform Service Calibration, page 2-4. Pressure transducer on main control. See Test #1: Main Control (ACU), page 3-4. 2-12 Whirlpool & Maytag Direct Drive Top Load Washer... - Page 25 Standpipe position. Ensure drain height is between 39” (991 mm) and 8’ (2.4 m) above the floor. (continued next page) Plugged drain hose. Check drain hose for obstructions. Whirlpool & Maytag Direct Drive Top Load Washer 2-13...
- Page 26 5. See TEST #3b: Drive System - Motor, page 3-9. Fabric damage. 1. Washer overloaded. 2. Bleach added incorrectly. 3. Sharp items in tub. Wrong option or cycle selection. Refer customer to “Use & Care Guide”. 2-14 Whirlpool & Maytag Direct Drive Top Load Washer...
-
Page 27: Section 3 - Component Testing
Section 3: Component Testing This section provides a wiring diagram, control board specifications, testing procedures and strip circuits for the “Whirlpool & Maytag Direct Drive Top Load Washer.” n Testing: Safety Information n Wiring Diagram n Component Testing n TEST #1: Main Control (ACU) - Page 28 Any attempt to repair a major appliance may result in personal injury and property damage. The manufacturer or seller cannot be responsible, nor assume any liability for injury or damage of any kind arising from the use of this data sheet. Whirlpool & Maytag Direct Drive Top Load Washer...
- Page 29 IMPORTANT: Electrostatic discharge may cause damage to machine control electronics. See page 1 for ESD information. COMPONENT TESTING NOTE: Schematic shows lock switch open. For Service Technician Use Only WIRING DIAGRAM Line 1 Neutral Ground Whirlpool & Maytag Direct Drive Top Load Washer Figure 11 - Wiring Diagram...
-
Page 30: Test #1: Main Control (Acu)
Reassemble all parts and panels. drawer. d. Plug in washer or reconnect power. Perform Service Diagnostics to verify repair. Continue to next page for Main Control Board diagram and Main Control Board connectors & pinouts Whirlpool & Maytag Direct Drive Top Load Washer... -
Page 31: Main Control Board / Connectors & Pinouts
J4 Pumps J2-4 Wht Neutral Interface & Shifter J2-3 Open J2-2 Blk Thermistor J2-1 Blk Rtn (VSS) J6 Lid Lock J18 User J4 Pumps Interface & Shifter Whirlpool & Maytag Direct Drive Top Load Washer J19 Basket Light J6 Lid... -
Page 32: Test #2 Valves
MAIN BOARD SOFTENER J2-7 BLEACH/OXI J2-8 MAIN HOT J2-9 J12-1 J2-4 J12-3 MAIN COLD J2-10 DETERGENT J2-11 FRESH FILL J2-12 WATER INLET VALVES 790 - 840 Figure 2 - Water Valves Strip Circuit Whirlpool & Maytag Direct Drive Top Load Washer... -
Page 33: Test #3 Drive System
Figure 3b - Motor Cover Removed wash lo 10. Visually check the electrical connections baske 10. Visually check the electrical connections Whirlpool & Maytag Direct Drive Top Load Washer to the shifter. and, 1. See to the shifter. page 2, If visual check passes, go to step 11. -
Page 34: Test #3B: Drive System - Motor
Reassemble all parts and panels. d. Plug in washer or reconnect power. Continue to next page for TEST #3b: Drive System - Motor Perform Service Diagnostics to verify repair. Whirlpool & Maytag Direct Drive Top Load Washer TEST #3b: Drive System – Motor... -
Page 35: Test #4: Keys And Encoders
Diagnostics to verify repair. Perform Service Diagnostics to verify 9. With an ohmmeter, check for continuity on Whirlpool & Maytag Direct Drive Top Load Washer repair. the motor harness between all pins on the J1 machine/motor control connector and the drive TEST #4: Keys and Encoders motor connector. - Page 36 3. Turn on the washer and enable audio feedback in normal mode: Keys and Encoders Test: ¾ Whirlpool: Press “Audio Level” to change the button This test is performed when any of the following situations sounds level (Off, Low, Med, High). Each press occurs during “Key Activation &...
-
Page 37: Test #5: Temperature Thermistor
TEMPERATURE THERMISTOR THERMISTOR MAIN BOARD MAIN BOARD 77°F (25°C) = 10kW 77°F (25°C) = 50k J2-2 VALVE THERMISTOR J2-1 RTN (VSS) TEMPERATURE THERMISTOR Figure 1 - Thermistor Strip Circuit Whirlpool & Maytag Direct Drive Top Load Washer 3-11... -
Page 38: Test #6: Water Level
5. Check hose connections between the pressure transducer on the main control (Figure 1) and the pressure dome on the tub (Figure 2). Pressure Hose to Pressure Transducer Figure 1 - Hose Connection at Main Control 3-12 Whirlpool & Maytag Direct Drive Top Load Washer... -
Page 39: Test #7: Drain & Recirculation Pump
DRAIN & RECIRCULATION PUMPS Figure 1 - Pumps Strip Circuits MAIN BOARD MAIN BOARD DRAIN PUMP 18-24 W 12-15 Ω J4-3 PUMP J4-1 J12-1 J12-3 RELAYS 26-32 Ω J4-5 RECIRCULATION PUMP Whirlpool & Maytag Direct Drive Top Load Washer 3-13... -
Page 40: Test #8: Lid Lock
DC LOCK LOCK LOCK SW LID SW HOME HOME SW LOCK MOTOR LOCK MOTOR 12 VDC MOTOR SW OUT GRAY JACKET Figure 1 - Lid Lock Schematic Figure 2 - Lid Lock 3-14 Whirlpool & Maytag Direct Drive Top Load Washer... -
Page 41: Test #9: Heater
7. If connections are correct, replace the main control. HEATER ELEMENT MAIN BOARD MAIN BOARD J12-1 J5-1 J5-2 J12-3 L1 - HEATER RELAY HEATER ELEMENT N - HEATER RELAY Figure 3 - Heater Element Strip Circuit Whirlpool & Maytag Direct Drive Top Load Washer 3-15... -
Page 42: Test #10: Service Leds
(May need to remove speaker to see this LED) Figure 1 - Service LEDs on back of UI The underside of the user interface has 3 LEDs to help diagnose common problems with the 3-16 Whirlpool & Maytag Direct Drive Top Load Washer... -
Page 43: Test #11: Basket Light
3. Unplug washer or disconnect power. 4. Whirlpool: Remove rear tray to access the main control. Maytag: Remove console to access the main control. 5. Verify that the basket light connector J19 is securely connected to the main control (see Figure 1, page 3-5). -
Page 44: Test#12: Bulk Dispense Pump And Relay Expansion Board
¾ If not, repair or replace as needed, check the other J2-2 Neutral_Out_2 J3-2 Neutral_Out_2 J2-1 Neutral_Out_1 connections per step 6, and go to step 10. J3-1 Neutral_Out_1 J1 Power 3-18 Whirlpool & Maytag Direct Drive Top Load Washer J3 Main Cord Control Board... - Page 45 Oxi Valve Valve Valve Valve Bulk Dispense Pump Relay Expansion Board Main Control Board Rex Board Main Control Board Whirlpool & Maytag Direct Drive Top Load Washer 3-19 Component Locations, Bottom View – Drive System & Drain Pump (Figure 10)
-
Page 46: Notes
TESTING COMPONENT Notes 3-20 Whirlpool & Maytag Direct Drive Top Load Washer... -
Page 47: Section 4 - Component Access
COMPONENT ACCESS Section 4: Component Access Multimedia Enhanced This section provides service parts access, removal, and installation instructions for the “2016 Cabrio & Bravos Top Load, Direct Drive Washer.” IMPORTANT: Whenever the washer is tilted for service or troubleshooting, drain water from the basket, remove any load items in the basket, and, if equipped, remove bulk dispense drawer. - Page 48 COMPONENT ACCESS FOR SERVICE TECHNICIAN’S USE ONLY Component Locations FOR SERVICE TECHNICIAN’S USE ONLY CONSOLE ELECTRONICS & VALVES (FIGURE 1) Component Locations – Console Electronics & Valves (Figure 9) Component Locations – Console Electronics & Valves (Figure 9) Fabric Fresh Detergent Hot Water Cold Water...
-
Page 49: Component Locations
FOR SERVICE TECHNICIAN’S USE ONLY FOR SERVICE TECHNICIAN’S USE ONLY COMPONENT ACCESS Component Locations – Dispensers (Figure 7) Component Locations Component Locations – Dispensers (Figure 7) DISPENSERS (FIGURE 3) Bleach/Oxi Fresh Fill Bleach/Oxi Fresh Fill Dispenser Nozzle Dispenser Bulk Dispense Nozzle Bulk Dispense Detergent Drawer... -
Page 50: Removing The Access Panel
COMPONENT ACCESS Removing the Access Panel 5. Once the panel is removed, you have access to the main WARNING control, relay expansion board (if equipped), water valve assembly, and lid hinges (see Figure 2). Electrical Shock Hazard Disconnect power before servicing. Replace all parts and panels before operating. -
Page 51: Lifting The Top Panel
COMPONENT ACCESS Lifting the Top Panel 8. Raise the top about 1/4”. Then, while still keeping it lifted, WARNING push the top back about 1/4 “ (see Figure 3). ¼ ” Electrical Shock Hazard Disconnect power before servicing. ¼ ” Replace all parts and panels before operating. -
Page 52: Removing The Main Control
to and from main control. This test assumes that proceed to step 7. proper voltage is present at the outlet. 7. Check if console UI is affecting the main 1. Unplug washer or disconnect power. control DC supply. COMPONENT ACCESS 2. -
Page 53: Removing The Relay Expansion Board
COMPONENT ACCESS Removing the Relay Expansion Board (REX) Relay Expansion Board (Figure 2) WARNING J3 - To Main Control Board J1 - AC In Electrical Shock Hazard Disconnect power before servicing. Replace all parts and panels before operating. Failure to do so can result in death or = pin 1 electrical shock. -
Page 54: Removing The Lid Assembly
COMPONENT ACCESS Removing the Lid Assembly WARNING Electrical Shock Hazard Disconnect power before servicing. Replace all parts and panels before operating. Failure to do so can result in death or electrical shock. Figure 2 Removing the Lid Assembly 1. Unplug washer or disconnect power. 2. -
Page 55: Removing The User Interface
COMPONENT ACCESS Removing the User Interface 8. Figure 2 shows the Lid and User Interface Assembly with WARNING lower frame removed. The service replacement does not include the UI Harness, and Hinges. These parts must be moved over to the new service replacement part. 9. -
Page 56: Removing The Water Valve Assembly
COMPONENT ACCESS Removing the Water Valve Assembly WARNING FOR SERVICE TECHNICIAN’S USE ONLY Electrical Shock Hazard Disconnect power before servicing. Replace all parts and panels before operating. Component Locations – Console Electronics & Valves (Figure 6) Failure to do so can result in death or Figure 1 electrical shock. -
Page 57: Removing The Bulk Dispense Pump
COMPONENT ACCESS Removing the Bulk Dispense Pump 7. Loosen the hose clamps and pull the inlet and outlet drain WARNING hoses off the pump. Note that there may be liquid laundry detergent in the hoses. Outlet Hose Bulk Dispense Pump Electrical Shock Hazard Disconnect power before servicing. -
Page 58: Removing The Tub Ring, Impeller, And Basket
COMPONENT ACCESS Removing the Tub Ring, Impeller, and Basket Removing the Impeller WARNING 1. Insert the blade from a small screwdriver into the slot in the impeller cap, then pry the cap up and remove it (see Figure 2). Electrical Shock Hazard Disconnect power before servicing. - Page 59 COMPONENT ACCESS Removing the Tub Ring, Impeller, and Basket (continued) Removing the Basket REASSEMBLY NOTE: When re-installing the basket, screw on spanner nut until it is finger tight. Then, using a mallet or hammer, tighten up to an additional ¾ turn (see Figure 6). Do 1.
-
Page 60: Removing The Motor And Drive Assembly
COMPONENT ACCESS Removing the Motor and Drive Assembly 2. Remove Rotor - Use a T-30 TORX driver to remove the WARNING center rotor bolt (see Figure 2). Rock the rotor back and forth until the rotor has been pulled away from the stator. Drive Assembly Rotor Electrical Shock Hazard... - Page 61 COMPONENT ACCESS Removing the Motor and Drive Assembly (continued) Removing the Clutch (Slider) Assembly Drive Assembly 1. Remove Slider - Figure 1 shows the three parts of the Screws clutch assembly; the spiral retaining ring, the clutch spring, and the clutch (slider). The first step in removing the clutch assembly is to remove the spiral retaining ring.
-
Page 62: Removing The Pumps
COMPONENT ACCESS Removing the Pumps Removing the Drain Pump (Figure 2) WARNING 1. Disconnect pump connector from drain pump. Unclip harnesses as shown in Figure 2. 2. Loosen the two (2) hose clamps and pull the inlet and outlet drain hoses off the pump. Note that there is a tab on the outlet that fits into a slot in the hose. -
Page 63: Removing The Heater
COMPONENT ACCESS Removing the Heater Removing the Heater WARNING 1. Disconnect harness (2 terminals) from the Heater Assembly (see Figure 2). 2. Remove the 8mm hex-head screw securing the heater cover to the tub. Remove heater cover from washer (see Figure 2). -
Page 64: Removing The Lid Lock
COMPONENT ACCESS Removing the Lid Lock 7. Perform the procedures on page 4-5, “Lifting the Top WARNING Panel” prior to performing the following steps. NOTE: If equipped, remove the bulk dispense drawer. 8. Remove the Lid Lock harness from the clips on right side and front of top panel. -
Page 65: Removing The Basket Light
a. Unplug washer or disconnect power, and 3. Verify that ALL connectors are inserted wait for the diagnostic LED to turn off. all the way into the main control. b. Remove connector J18 from main control. 4. Plug in washer or reconnect power. c. -
Page 66: Notes
COMPONENT ACCESS Notes 4-20 2016 Cabrio & Bravos Top Load, Direct Drive Washer... - Page 67 WARRANTY INFORMATION SOURCES IN THE UNITED STATES: FOR PRODUCT SPECIFICATIONS AND WARRANTY INFORMATION CALL: FOR WHIRLPOOL PRODUCTS: 1-800-253-1301 FOR TECHNICAL ASSISTANCE WHILE AT THE CUSTOMER’S HOME CALL: THE TECHNICAL ASSISTANCE LINE: 1-800-832-7174 HAVE YOUR STORE NUMBER READY TO IDENTIFY YOU AS AN...
- Page 68 Whirlpool & Maytag 6.2 Cu. Ft. Direct Drive Top Load Washer W10864849...
Need help?
Do you have a question about the WTW9500E SERIES and is the answer not in the manual?
Questions and answers