Sign In
Upload
Download
Table of Contents
Contents
Add to my manuals
Delete from my manuals
Share
URL of this page:
HTML Link:
Bookmark this page
Add
Manual will be automatically added to "My Manuals"
Print this page
×
Bookmark added
×
Added to my manuals
Manuals
Brands
Okofen Manuals
Heating System
PE 08
Operating manual
Okofen PE 08 Operating Manual
Initial start up pellet heating system with auger delivery system or vacuum suction system for professionals
Hide thumbs
1
2
Table Of Contents
3
4
5
6
7
8
9
10
11
12
13
14
15
16
17
18
19
20
21
22
23
24
25
26
27
28
29
30
31
32
33
34
35
36
37
38
39
40
41
42
43
44
45
46
47
48
49
50
51
52
53
54
55
56
57
58
59
60
61
62
63
64
65
66
67
68
69
70
71
72
73
74
75
76
77
78
79
80
81
82
83
84
85
86
87
88
89
90
91
92
93
94
95
96
97
98
99
100
101
102
103
104
105
106
107
108
109
110
111
112
113
114
115
116
117
118
119
120
121
122
123
124
125
126
127
128
129
130
131
132
133
134
135
136
137
138
139
140
141
142
143
144
145
146
147
148
149
150
151
152
153
154
155
156
157
158
159
160
161
162
163
164
165
166
167
168
169
170
page
of
170
Go
/
170
Contents
Table of Contents
Bookmarks
Table of Contents
6 P P a a R R a a M M E E T T E E R R a a D D J J U U S S T T M M E E N N T T S
9 T T H H E E T T O O U U C C H H O O P P E E R R a a T T I I N N G G D D E E V V I I C C E
7 T T H H E E B B O O I I L L E E R R C C O O N N T T R R O O L L L L E E R
Table of Contents
1 1 1 D D E E F F a a U U L L T T V V a a L L U U E E S S a a N N D D S S E E T T T T I I N N G G S
1 4 4 a a P P P P E E N N D D I I X
1 D D E E a a R R C C U U S S T T O O M M E E R
2 U U S S E E O O N N L L y y F F O O R R T T H H E E P P U U R R P P O O S S E E I I N N T T E E N N D D E E D
3 T T y y P P E E S S O O F F S S a a F F E E T T y y W W a a R R N N I I N N G G S S I I G G N
1 2 2 O O N N L L I I N N E E T T O O U U C C H
4 S S y y S S T T E E M M O O V V E E R R V V I I E E W
System Overview
1 0 0 D D E E F F a a U U L L T T V V a a L L U U E E S S a a N N D D S S E E T T T T I I N N G G S
1 3 3 S S T T a a R R T T I I N N G G U U P P F F O O R R T T H H E E F F I I R R S S T T T T I I M M E
Control System
Plugs on the Boiler Control Unit
Wiring Diagrams
LED Status Boiler Controller
Cable Routing
LED Status Heating Controller
Connection Plan
Jumper X34 for Analog Voltage Outputs X11 (OUT1) and X21 (OUT2)
Rules of Wiring for Micronetwork with 1,2 or more Heating Controllers
Wiring Diagrams
Assembly and Disassembly of the Heating Controller Circuit Board
Cable Specification Pelletronic Touch
Sensor Values
Hydraulic Connecting Diagrams
Hydraulic Connecting Diagrams Pelletronic Touch
User Controls and Their Function
Main Menu
Replacing a Touch Operating Device
Backside of the Touch Operating Device
Calibration
Product Description
Installation Requirements
System Description
Settings on the Touch Operating Device
Opening the Password-Protected Remote Maintenance Website
Description of the Pelletronic Online Website
Making Settings
Adjustment of the Power Rating
Error Messages by E-Mail
Quit Malfunction
Code Input
Performance Adjustment
Setting the Adresses of the Bus-Participants
Setting the Address at the Burner Controller
Setting the Address at the Heating Controller
Setting the Adress for the Remote Control
Settings before Starting up
Setting the Adress for Remote Control Touch
Setting the Adress for Remote Control
Code Input
Periphery Learning
Flowtronic
Mode
Operation Mode
Operation Mode HC 1
Operation Mode HC 2-6
Operation Mode DHW
Operation Mode Solar
Operation Mode Pellematic
Measuring Values
Weather
Eco Mode
Heating Circuit
Screed Programme
Solar Heating
Menu Solar Heating
DHW Settings
DHW Return Pump Settings
Solar Settings
Accumulator Settings
System Regulation
Cascade Settings
Existing Boiler
Pellematic Settings
Outertemperature Control
External Power Ventilator
Permanent Operation
Ignition Settings
Full Power Settings
Run down Time Settings
De-Ashing System Settings
Boiler Cleaning
Negative Draft
FRT Controller
Level Detection System
Boiler Controlled Pump
Suction Turbine
Output Settings
Output Test
Maintenance
Calibrate
Magnet Valve
Settings
Heating Main Pump
General Settings
Chimney
Datalog
Delete Log
Modbus
E-Mail
IP Config
Usb
Software Settings
Configuration
Function Room Sensor
Update Heating Controller, Touch Operating Device and Remote Control
Software Update
Malfunctions
Malfunctions - What to Do
Fault Texts
Malfunction Report
Advertisement
Quick Links
1
Malfunctions - What to Do
Download this manual
Operating
Manual
+ Initial start up Pellet
heating system with auger
delivery system or vacuum
suction system for
professionals
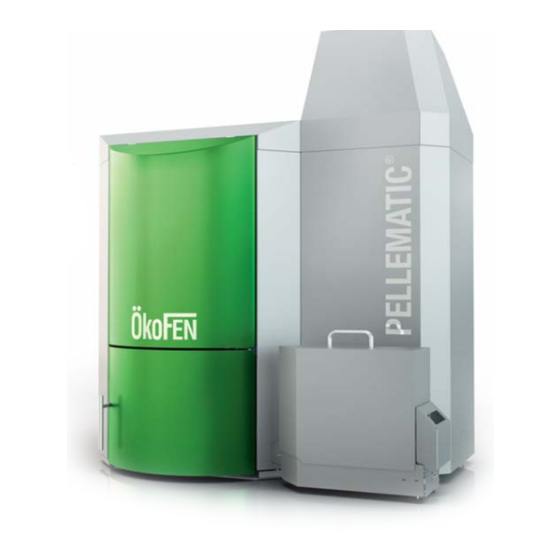
PELLEMATIC®
PE(S)(K)(B) 10 — 56
FA_V2.03
Pelletronic TOUCH
ENGLISH
PE 567 EN 1.1
·
www.oekofen.com
Table of
Contents
Previous
Page
Next
Page
1
2
3
4
5
Advertisement
Table of Contents
Need help?
Do you have a question about the PE 08 and is the answer not in the manual?
Ask a question
Questions and answers
Related Manuals for Okofen PE 08
Heating System OkoFEN PES 20 Operating Manual
Initial start up pellet heating system with auger delivery system or vacuum suction system for professionals (170 pages)
Heating System OkoFEN PES 25 Operating Manual
Initial start up pellet heating system with auger delivery system or vacuum suction system for professionals (170 pages)
Heating System OkoFEN PES 32 Operating Manual
Initial start up pellet heating system with auger delivery system or vacuum suction system for professionals (170 pages)
Heating System OkoFEN PES 48 Operating Manual
Initial start up pellet heating system with auger delivery system or vacuum suction system for professionals (170 pages)
Heating System OkoFEN PES 56 Operating Manual
Initial start up pellet heating system with auger delivery system or vacuum suction system for professionals (170 pages)
This manual is also suitable for:
Pe 12
Pe 10
Pe 25
Pe 32
Pe 15
Pe 36
...
Show all
Pe 48
Pe 56
Pes 10
Pes 08
Pes 12
Pes 15
Pes 20
Pes 25
Pes 36
Pes 32
Pes 48
Pes 56
Peb 08
Peb 10
Peb 12
Peb 15
Peb 20
Peb 32
Peb 25
Peb 36
Peb 56
Peb 48
Pesk 10
Pesk 12
Pesk 15
Pesk 20
Pesk 25
Pesk 32
Pe 20
Table of Contents
Save PDF
Print
Rename the bookmark
Delete bookmark?
Delete from my manuals?
Login
Sign In
OR
Sign in with Facebook
Sign in with Google
Upload manual
Upload from disk
Upload from URL


Need help?
Do you have a question about the PE 08 and is the answer not in the manual?
Questions and answers