Table of Contents
Advertisement
Available languages
Available languages
Quick Links
INSTRUCTION MANUAL
Color Camera
MODEL
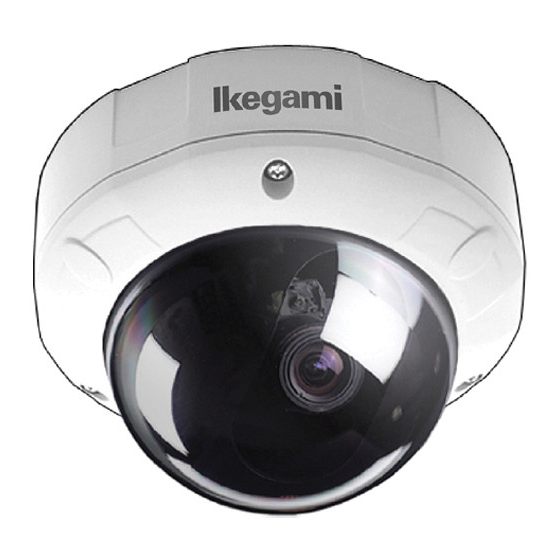
ISD-A35
OUTDOOR USE WARNING
WARNING – TO PREVENT FIRE OR
ELECTRIC SHOCK, DO NOT EXPOSE
THIS APPLIANCE TO RAIN OR
MOISTURE.
The apparatus shall not be exposed to
dripping or splashing and that no
objects filled with liquids, such as
vases, shall be placed on the
apparatus.
Ikegami Tsushinki Co., Ltd.
Advertisement
Chapters
Table of Contents

Related Manuals for Ikegami ISD-A35


Summary of Contents for Ikegami ISD-A35
-
Page 1: Instruction Manual
ELECTRIC SHOCK, DO NOT EXPOSE THIS APPLIANCE TO RAIN OR MOISTURE. The apparatus shall not be exposed to dripping or splashing and that no objects filled with liquids, such as vases, shall be placed on the apparatus. Ikegami Tsushinki Co., Ltd. -
Page 2: Table Of Contents
Thank you for choosing this Ikegami Hyper Wide Dynamic DPS Dome Camera. Please read this Instruction Manual carefully to keep your Ikegami camera at peak performance for longer service period. This DPS camera is equipped with 1/3” PIXIM’s DPS CMOS sensor, which has... - Page 3 The exclamation point within an equilateral triangle is intended to alert the user to the presence of important operating and maintenance (servicing) instructions in the literature accompanying the appliance. NOTE: This equipment has been tested and found to comply with the limits for a Class A digital device, pursuant to part 15 of the FCC Rules.
-
Page 4: Important Safety Instructions
IMPORTANT SAFETY INSTRUCTIONS 1) Read these instructions. 2) Keep these instructions. 3) Heed all warnings. 4) Follow all instructions. 5) Do not use this apparatus near water. 6) Clean only with a dry cloth. 7) Do not block any of the ventilation openings. Install in accordance with the manufacturer's instructions. - Page 5 14) Refer all servicing to qualified service personnel. Servicing is required when the apparatus has been damaged in any way, such as power supply cord or plug is damaged, liquid has been spilled or objects have fallen into the apparatus, the apparatus has been exposed to rain or moisture, does not operate normally, or has been dropped.
-
Page 6: Handling Precautions
1. Handling Precautions 2. General... -
Page 7: Features
3. Features... -
Page 9: Camera Installation
4. Camera Installation 4-1. Pre-work before installation 83.5 Size of hole for cables on the ceiling ø50 - ø60 Holes for camera Front side fixing Rubber sealing gasket 4-2. Mounting the camera (Ceiling) Camera Attaching screws to secure camera (four) Dome cover L-form wrench 4-3. -
Page 10: Name Of Each Section And Function
5. Name of each section and its function ⑤ ③ ① ② ④ ⑦ ⑨ ⑥ ⑧ ⑩... - Page 11 ① ② ③ ④ ⑤ ⑥ ⑦ ⑧ ⑨ ⑩...
-
Page 12: Connections
6. Connections Be sure not to apply power before making connections. 6-1. Power cable Use DC12V (10.5V to 15V), or AC24V (± 10%) in both 60Hz and 50Hz. * This installation should be made by a qualified service person and should conform to all local codes. -
Page 13: Angle And Lens Adjustment
7. Angle and Lens adjustment 7-1. Angle adjustment ● Note: 7-2. Vari-focal lens adjustment Zoom knob Focus knob... -
Page 14: Operating Procedure
8. Operating Procedure 8-1. User Setup 8-2. Names and functions of the setup bottons DOWN RIGHT LEFT * To get into Setup mode, hold SET button LEFT RIGHT UP DOWN more than 2 seconds. 8-3. Setup mode Procedures... - Page 15 8-3-1. SETUP MENU 1/4 * New settings can be saved, if EXIT is selected to quit the menu. SETUP MENU →PAGE SCENE NORMAL DAY/NIGHT AUTO↓ SENS UP LIGHT CONTROL↓ GAIN AGC↓ WHITE BALANCE EXIT CANCEL RESET ① ② ③ ④ ⑤...
- Page 16 ② ③ ① ② LIGHT CONTROL →BACKLIGHT COMP. W.DYNAMIC ① IRIS LEVEL LENS IRIS RET 1SPOT ZONE →ADJUST ZONE↓ RET E-11...
- Page 17 ② ③ ④ ① ② ③ ④ ⑤ ① ② E-12...
- Page 18 ③ ④ WHITE BALANCE →R GAIN B GAIN RET E-13...
- Page 19 8-3-2. SETUP MENU 2/4 * New settings can be saved, if EXIT is selected to quit the menu. SETUP MENU →PAGE CHROMA DETAIL PEDESTAL 7.5 IRE VIDEO LEV. DNR CRR EXIT CANCEL RESET ① ② E-14...
- Page 20 8-3-3. SETUP MENU 3/4 * New settings can be saved, if EXIT is selected to quit the menu. SETUP MENU →PAGE CAMERA ID VIDEO FLIP PRIVACY MASK↓ DIGITAL ZOOM↓ RESOLUTION NORMAL PROGRES. SCAN EXIT CANCEL RESET (1) PAGE Possible to change pages. (2) CAMERA ID Up to 24 characters can be displayed on screen.
- Page 21 ① ② ③ ④ PRIVACY MASK SETUP →PRIVACY MASK PAINT GRAY RET * Note: ENABLE MASKS →MASK 1 ON↓ MASK 2 ON↓ MASK 3 MASK 4 MASK 5 MASK 6 MASK 7 MASK 8 RET ● ① ② E-16...
- Page 22 ③ → → → → → → ④ ① ② ③ ① ② E-17...
- Page 23 8-3-4. SETUP MENU 4/4 * New settings can be saved, if EXIT is selected to quit the menu. SETUP MENU →PAGE MONITOR SYNC VIDEO STANDARD↓ COLOR BAR MENU LOCK EXIT CANCEL RESET ① ② ① ② WARNING!! I f t h e s e t t i n g o f t h e v i d e o s t a n d a r d i s c h a n g e d , a l l t h e s e t t i n g s a r e i n i t i a l i z e d .
- Page 24 ② SELECT VIDEO STANDARD →VIDEO STANDARD NTSC RET *Note: ① ② ③ → → → → → → E-19...
-
Page 25: Focus Ez Function
9. FOCUS EZ function 9-1. Screen Displays FOCUS EZ cannot be started in the setup mode. Focus adjustment screen FOCUS EZ Light-measuring Focus ideal point area Focus indicator Focus condition E-20... -
Page 26: Warranty And After-Sale Service
10. Warranty and after-sale service E-21... - Page 27 (1) Image Sensor: 1/3-inch Pixim DPS CMOS sensor (2) Pixel Number: Approx. 410,000 pixels, 758 (H) x 540 (V) (3) Scanning system: 525 TV lines / 59.94Hz (60 Hz with Line- Lock ON), 2 : 1 interlace (4) Sync system: INT/LINE-LOCK (phase adjustable) (Line- lock not usable where the power frequency and the camera’s vertical frequency are...
- Page 28 E-23...
- Page 30 útiles en una forma de domo elegante que permiten utilizar la cámara de muy diversas formas y con muchas aplicaciones diferentes. Este producto de Ikegami se fabrica con componentes que respetan el medio ambiente, basándose en nuestra política corporativa y de responsabilidad social que contribuye a la solución medioambiental global para la conservación de la energía...
- Page 31 El signo de exclamación dentro de un triángulo equilátero tiene la finalidad de avisar al usuario de la presencia de instrucciones de funcionamiento y mantenimiento (reparaciones) importantes en los manuales que acompañan al aparato. NOTA: Este equipo ha sido probado y ha demostrado cumplir con los límites establecidos para los dispositivos digitales de la clase A, en conformidad con el apartado 15 de los Reglamentos de la FCC.
-
Page 32: Instrucciones Importantes De Seguridad
INSTRUCCIONES IMPORTANTES DE SEGURIDAD 1) Lea estas instrucciones. 2) Conserve estas instrucciones. 3) Preste atención a todas las advertencias. 4) Siga todas las instrucciones. 5) No utilice este aparato cerca de agua. 6) Limpie solamente con un paño seco. 7) No bloquee ninguna de las aberturas de ventilación. Instale de acuerdo con las instrucciones del fabricante. - Page 33 14) Solicite cualquier reparación a personal de ser vicio cualificado. La reparación se requerirá cuando el aparato se haya dañado de alguna forma, por ejemplo, cuando se haya dañado el cable o el enchufe de alimentación, se haya vertido líquido o hayan entrado objetos dentro del aparato, cuando el aparato haya estado expuesto a la lluvia o la humedad, cuando no funcione normalmente, o cuando haya caído.
-
Page 34: Precauciones De Manejo
1. Precauciones de manejo 2. Generalidades... -
Page 35: Características
3. Características... -
Page 37: Instalación De La Cámara
4. Instalación de la cámara 4-1. Trabajo anterior a la instalación 83.5 Tamaño del orificio para cables en el techo ø50 - ø60 Orificios para fijación de la Lado frontal cámara Junta de 4-2. Montaje de la cámara estanqueidad de caucho (Techo) Cámara Tornillos de fijación... -
Page 38: Nombre De Cada Sección Y Su Función
5. Nombre de cada sección y su función ⑤ ③ ① ② ④ ⑦ ⑨ ⑥ ⑧ ⑩... - Page 39 ① ② ③ ④ ⑤ ⑥ ⑦ ⑧ ⑨ ⑩...
-
Page 40: Conexión
6. Conexión Asegúrese de no encender la cámara hasta después de finalizar todas las conexiones. 6-1. Cable de alimentación Utilice 12 V CC (10,5 V a 15 V) o 24 V CA (±10%) con frecuencia de 60 Hz y 50 Hz. * Esta instalación deberá... -
Page 41: Ajuste De Ángulo Y Objetivo
7. Ajuste de ángulo y objetivo 7-1. Ajuste de ángulo ● Nota: 7-2. Ajuste del objetivo de variación focal Zoom knob Focus knob... -
Page 42: Procedimiento De Operación
8. Procedimiento de operación 8-2. DOWN RIGHT LEFT * Para entrar en el modo de configuración, LEFT RIGHT UP DOWN mantenga pulsado el botón SET durante más de 2 segundos. - Page 43 8-3-1. SETUP MENU 1/4 * Las configuraciones nuevas se pueden guardar si se seleccionó EXIT para salir del menú. SETUP MENU →PAGE SCENE NORMAL DAY/NIGHT AUTO↓ SENS UP LIGHT CONTROL↓ GAIN AGC↓ WHITE BALANCE EXIT CANCEL RESET ① ② ③ ④...
- Page 44 ② ③ ① ② LIGHT CONTROL →BACKLIGHT COMP. W.DYNAMIC IRIS LEVEL LENS IRIS ① RET 1SPOT ZONE →ADJUST ZONE↓ RET S-11...
- Page 45 ② ③ ④ ① ② ③ ④ ⑤ S-12...
- Page 46 ① ② ③ ④ WHITE BALANCE →R GAIN B GAIN RET S-13...
- Page 47 8-3-2. SETUP MENU 2/4 * Las configuraciones nuevas se pueden guardar si se seleccionó EXIT para salir del menú. SETUP MENU →PAGE CHROMA DETAIL PEDESTAL 7.5 IRE VIDEO LEV. DNR CRR EXIT CANCEL RESET ① ② S-14...
- Page 48 8-3-3. SETUP MENU 3/4 * Las configuraciones nuevas se pueden guardar si se seleccionó EXIT para salir del menú. SETUP MENU →PAGE CAMERA ID VIDEO FLIP PRIVACY MASK↓ DIGITAL ZOOM↓ RESOLUTION NORMAL PROGRES. SCAN EXIT CANCEL RESET ① ② ● ID EDIT →ID .
- Page 49 ① ② ③ ④ PRIVACY MASK SETUP →PRIVACY MASK PAINT GRAY RET * Nota: ENABLE MASKS →MASK 1 ON↓ MASK 2 ON↓ MASK 3 MASK 4 MASK 5 MASK 6 MASK 7 MASK 8 RET ● ① ② S-16...
- Page 50 ③ → → → → → → ④ ① ② ③ ① ② S-17...
- Page 51 8-3-4. SETUP MENU 4/4 * Las configuraciones nuevas se pueden guardar si se seleccionó EXIT para salir del menú. SETUP MENU →PAGE MONITOR SYNC VIDEO STANDARD↓ COLOR BAR MENU LOCK EXIT CANCEL RESET ① ② ① ② WARNING!! I f t h e s e t t i n g o f t h e v i d e o s t a n d a r d i s c h a n g e d , a l l t h e s e t t i n g s a r e i n i t i a l i z e d .
- Page 52 ② SELECT VIDEO STANDARD →VIDEO STANDARD NTSC RET *Nota: ① ② ③ → → → → → → S-19...
-
Page 53: Función Focus Ez (Enfoque Fácil
9. Función FOCUS EZ (enfoque fácil) 9-1. Visualizaciones en pantalla FOCUS EZ no puede iniciarse en el modo de configuración. FOCUS EZ Área de medición Punto de de luz enfoque ideal Indicador de Condición de enfoque enfoque S-20... -
Page 54: Garantía Y Servicio Postventa
10. Garantía y servicio postventa S-21... - Page 55 (1) Sensor de imagen: Sensor CMOS DPS Pixim de 1/3 de pulgada (2) Número de píxeles: Aproximadamente 410.000 píxeles, 758 (H) x 540 (V) (3) Sistema de exploración: 525 líneas de TV, 59,94 Hz (60 Hz con bloqueo de línea activado), entrelazado 2:1 (4) Sistema de sincronización: INT/LINE-LOCK (ajustable en fase)
- Page 56 S-23...
-
Page 57: External Appearance
12. External Appearance 142.8 83.5... -
Page 58: Setup Flow Chart
13. Setup Flow Chart... - Page 60 37 Brook Avenue, Maywood, N.J. 07607, U.S.A. Phone: (201) 368-9171, FAX (201) 569-1626 www.Ikegami.com Ikegami Electronics (Europe) GmbH Ikegami Strasse 1, D-41460 Neuss, Germany Phone : 02131-123-0, FAX 02131-102820 www.Ikegami.de Ikegami Electronics U.K. Office: Unit E1, Cologne Court, Brooklands Close, Windmill Road, Sunbury-on-Thames, Middlesex, TW16 7EB, U.K.
Need help?
Do you have a question about the ISD-A35 and is the answer not in the manual?
Questions and answers