Table of Contents
Advertisement
Quick Links
Advertisement
Chapters
Table of Contents

Subscribe to Our Youtube Channel
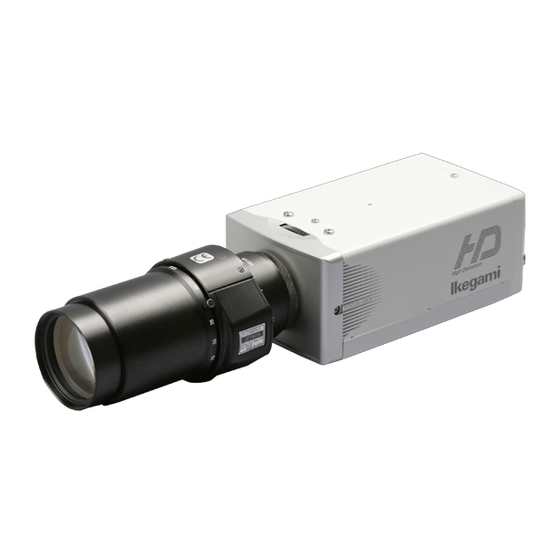
Related Manuals for Ikegami ISD-2500HD


Summary of Contents for Ikegami ISD-2500HD
- Page 1 取 扱 説 明 書 INSTRUCTION MANUAL カ ラ ー カ メ ラ Color Camera MODEL ISD-2500HD...
- Page 3 MODEL ISD-2500HD Color Camera 取 扱 説 明 書 Japanese...
-
Page 4: Table Of Contents
このたびは Ikegami カラービデオカメラをお買い上げいただきありがとうござい ます。 本機の性能を十分生かすため、この 「取扱説明書」をよくお読みいただきま すようお願いいたします。 目 次 ページ 1. 安全上のご注意 ................J-2 2. 取扱上の注意事項 ..............J-8 3. 概要 ...................J-11 4. 特徴 ...................J-11 5. 各部の名称と機能..............J-12 6. 操作 ................... J-14 6-1. ユーザーセッ ト アップ ............J-14 6-2. セッ ト アップボタンの名称と機能 ........J-14 6-3. セッ ト アップモードの構成 ..........J-14 6-4. -
Page 5: 安全上のご注意
安全上のご注意(必ずお守りください。 ) 安全に正しくお使いいただくために ご使用の前にこの「安全に正しくお使いいただくために」と「取扱説明 書」をよくお読みの上、正しくお使いください。 お読みになった後はいつでも見られる所に保管してください。 絵表示について この取扱説明書および製品への表示では、製品を安全に正しくお使いい ただき、あなたや他の人々への危害や財産への損害を未然に防止するた めに、 いろいろな絵表示をしています。 その表示と意味は次のようになっ ています。 内容をよく理解してから本文をお読みください。 • お買い上げになった機器に当てはまらない注意事項もありますが、ご了 承ください。 この表示を無視して、誤った取扱いをすると、人 警告 が死亡または重傷を負う可能性が想定される内容 を示しています。 この表示を無視して、誤った取扱いをすると、人 注意 が傷害を負う可能性が想定される内容および物的 損害のみの発生が想定される内容を示しています。 絵表示の例 △記号は注意(危険・警告を含む)を促す内容があるこ とを告げるものです。 図の中に具体的な注意内容(左図の場合は感電注意) が描かれています。 ○記号は禁止の行為であることを告げるものです。 図の中や近傍に具体的な禁止内容(左図の場合は分 解禁止)が描かれています。 ●記号は行為を強制したり指示する内容を告げるもので す。 図の中に具体的な指示内容(左図の場合は電源プラ グをコンセントから抜け)が描かれています。... - Page 6 安全上のご注意(必ずお守りください。 ) 警告 使用上の注意 ●本機のケース・裏パネル等をはずさない! 内部には高圧の部分があり、感電の原因となります。内部の点 検・整備・修理は販売店または営業所にご依頼ください。 ●本機の上に水などの入った容器を置かない! こぼれて中に入ると、火災・感電の原因になります。 ●本機の上に小さな金属物を置かない! 中に入ると、火災・感電の原因となります。 ●表示された電源電圧以外は使用しない! 火災・感電の原因となります。 ●本機に水が入ったり、ぬらしたりしない! 火災・感電の原因になります。雨天・降雪中・海岸・水辺での 使用は特にご注意ください。 ● 本機の開口部から金属物や燃えやすいものなどの異物を差し込 まない!落とし込まない! 火災・感電の原因となります。 ● 電源コードを傷つけない!加工しない!無理に曲げない!ねじ らない!引っ張らない!加熱しない! コードが破損して火災・感電の原因となります。 ●本機を改造しない! 火災・感電の原因となります。 ●風呂、シャワー室などの水場では使用しない! 火災・感電の原因となります。 ● 雷が鳴り出したら、同軸コネクタ/ケーブルや電源プラグに触 れない! ...
- Page 7 安全上のご注意(必ずお守りください。 ) 警告 使用上の注意 ●不安定な場所に置かない! 落ちたり、倒れたりして、けがの原因になります。 ● 電源コードの上に重いものを置かない!本機の下敷きにしない! コードが傷ついて、火災・感電の原因になります。コードの上 を敷物などで覆うと、それに気付かず、重い物をのせてしまう ことがあります。 ●水場に設置しない! 火災・感電の原因となります。 ●指定された機器以外とは接続しない! 火災・感電の原因となります。 ●本機の固定は工事専門業者に依頼を! 本機を固定する場合は、指定された方法できちんと固定しない と、落ちたり、倒れたりして、火災・感電・けがの原因になり ます。特に、壁や天井に固定する場合は、必ず工事専門業者に ご依頼ください。なお、取付け費用については、販売店または 営業所にご相談ください。 異常時の処理について ● 煙が出ている、変なにおいや音がするなどの異常状態の 場合は、すぐに電源スイッチを切り、電源プラグを抜く! そのまま使用すると、火災・感電の原因となります。煙 が出なくなるのを確認して、販売店または営業所に修理 をご依頼ください。お客様による修理は危険ですから絶 対におやめください。 ● 本機の内部に水などが入った場合は、電源スイッチを切 り、電源プラグを抜く! そのまま使用すると、火災・感電の原因となります。販 売店または営業所にご連絡ください。...
- Page 8 安全上のご注意(必ずお守りください。 ) 警告 異常時の処理について ● 本機が故障した場合は、電源スイッチを切り、電源プラグを抜 く! そのまま使用すると、火災・感電の原因となります。販売店ま たは営業所に修理をご依頼ください。 ● 本機を落としたり、ケースが破損した場合は、電源スイッチを 切り、電源プラグを抜く! そのまま使用すると、火災・感電の原因となります。販売店ま たは営業所にご連絡ください。 ● 電源コードが傷んだ(芯線の露出・断線など)場合は、交換を 依頼する! そのまま使用すると、火災・感電の原因となります。販売店ま たは営業所に交換をご依頼ください。 注意 使用上の注意 ●本機に乗らない! 倒れたり、こわれたりしてけがの原因になることがあります。 ●本機の上に重いものを置かない! バランスがくずれて倒れたり、落下して、けがの原因になるこ とがあります。 ● 移動させる場合は、必ず電源スイッチを切り、プラグを抜き、 機器間の接続ケーブルをはずす! コードが傷つき、火災・感電の原因となることがあります。 ● 長期間使用しないときは、安全のため必ず電源プラグをコンセ ントから抜く! 火災の原因となることがあります。...
- Page 9 安全上のご注意(必ずお守りください。 ) 注意 使用上の注意 ●レンズで太陽・照明などをのぞかない! 強い光が目に当たると視力障害を起こすことがあります。 設置について ●湿気やほこりの多い場所に置かない! 火災・感電の原因となることがあります。 ● 調理台や加湿器のそばなど油煙や湿気が当たる場所に置かない! 火災・感電の原因となることがあります。 ●本機の通風孔をふさがない! 通風孔をふさぐと内部に熱がこもり、火災の原因となることが あります。次のような使い方はしないでください。 本機を仰向けや横倒し、逆さまにする。風通しの悪い狭い所に 押し込む。じゅうたんや布団の上に置く。テーブルクロスなど を掛ける。 ●電源コードを熱器具に近づけない! コードの被ふくが溶けて、火災・感電の原因となることがあり ます。 ●電源プラグを抜くときは、電源コードを引っ張らない! コードが傷つき、火災・感電の原因となることがあります。必 ずプラグを持って抜いてください。 ●濡れた手で電源プラグを抜き差ししない! 感電の原因となることがあります。...
- Page 10 安全上のご注意(必ずお守りください。 ) 注意 お手入れについて ●お手入れの際は安全のため、 スイッチを切り電源プラグを抜く! 感電の原因となることがあります。 ●1年に一度くらいは、 販売店または営業所に内部の掃除の相談を! 本機の内部にほこりがたまったまま使用し続けると、火災・故 障の原因となることがあります。特に、湿気の多くなる梅雨期 の前に行うと、より効果的です。なお、掃除費用については販 売店または営業所にご相談ください。...
-
Page 11: 2. 取扱上の注意事項
2. 取扱上の注意事項 保管及び設置場所 ● 本機は屋内用機器です。屋外での使用はできません。 ● 非常に明るい被写体(照明や太陽など)を長時間に渡って撮影しないで ください。また、次のような場所に置かないようにしてください。誤動 作や故障の原因となります。 ● 許容動作温度(-10℃ ∼ +50℃ ) 範囲外の暑いところや寒いところ ● 許容動作湿度(30% RH ∼ 90%RH)範囲外の湿気の多いところ(結露なきこと) ● 変圧器やモーターなど強い磁気を発生するところ ● トランシーバーや携帯電話など電波を発生する機器の近く ● 強力な電波を発するテレビやラジオの送信所の近く ● 蛍光灯や窓の反射の影響を受ける場所 ● 不安定な照明が使われている場所(フリッカーが発生する) ● レーザー光を映さない ● 高圧線や線路の近く ● ほこりや砂の多いところ ● 車両や船舶などの振動するところ ● 窓ぎわなど水滴の発生しやすいところ ●... - Page 12 ● 本機は、人の生命に直接関わる装置 (*1) や人の安全に関与し公共の機能 維持に重大な影響を及ぼす装置 (*2) などの制御に使用するよう設計・製 造されたものではないため、それらの用途に使用しないでください。 (*1):人の生命に直接関わる装置とは、次のものをさします。 ・生命維持装置や手術室用機器などの医療機器 ・有毒ガスなどの排ガス、排煙装置 ・消防法、建築基準法などの各種法令により設置が義務づけられている装置 ・上記に準ずる装置 (*2):人の安全に関与し公共の機能維持に重大な影響を及ぼす装置とは、次のもの をさします。 ・航空、鉄道、道路、海運などの交通管制装置 ・原子力発電所などの装置 ・上記に準ずる装置 移動について ● 移動するときは、システムの電源を切ってください。 ● 本機に震動や衝撃を与えないようていねいにお取り扱いください。 CMOS 特有の現象について ● 撮影画面に現れる下記のような現象は、本機が採用している COMS 撮像 素子特有の現象であり、故障ではありません。 ・白点 CMOS 撮像素子は、宇宙線などの影響により、希に画面上に小さな白点が発生す ることがあります。 これは CMOS の原理によるもので、 本機の故障ではありません。 また、下記のような条件下では白点が見えやすくなります。 高温の場所での使用 ゲインを上げた時...
- Page 13 免責について ● 本製品の使用または使用不能から生じる付随的な損害 ( 事業利益の損失・ 事業の中断・記憶内容の変化・消失など ) に関して、当社は一切責任を 負いません。 ● VTR、またはハードディスクレコーダーなどを使用中、万一カメラの不 都合により録画されなかった場合、録画内容の補償や機会の損失につい てはご容赦ください。 ● 大切な撮影の場合は必ず、事前に動作確認をしてください。 ● 地震、火災、第三者による行為、その他事故、お客様の故意または過失、 誤用、その他異常な条件下での使用によって生じた損害に関して、当社 は一切責任を負いません。 ● 当社が関与しない接続機器 ( 画像処理ボード、レンズ含む )、ソフトウェ アとの組み合わせによる誤動作等から生じた損害に関して、当社は一切 責任を負いません。 ● 本機のカメラ映像によりプライバシー侵害などが万一発生した場合、侵 害や障害に対する責任は一切負いません。 ● 当社が提供するソフトウェアやお客様自作のアプリケーションソフト ウェアによって生じた、お客様のハードウェアおよびソフトウェアの損 害等について、当社は一切その責任を負いませんのであらかじめご了承 ください。 ● 仕様書や取扱説明書の記載内容を守らないことによって生じた損害に関 して、当社は一切責任を負いません。 ● 仕様書や取扱説明書に記載されている以外の操作方法によって生じた損 害に関して、当社は一切責任を負いません。 ●...
-
Page 14: 3. 概要
3. 概要 本機は 2/3 型高速マルチサンプリング型 CMOS センサーを使用した超高 感度の単板カラーカメラであり、国境、港湾、その他特殊用途での夜間低 照度地域での監視に最適です。 4. 特徴 ・月明かり程度の低照度環境下でも高感度なカラー撮影が可能 ・オリジナル 2D/3D ノイズリダクションにより、ハイゲイン時でも良好な SN 比を実現 ・オリジナル 煙霧除去機能により、煙霧下でも鮮明な画像を撮影可能 ・RS-485 通信機能により、高度な監視システムの構築が可能 J-11... -
Page 15: 5. 各部の名称と機能
5. 各部の名称と機能 FOCUS LOCK J-12... - Page 16 名称と機能 番号 名称 機能 ① レンズマウント (C S マ レンズ取付マウントです。各種 C S マウント ウント) が使用できます。 ② フランジバック調整器 レンズ側のフォーカスリングでピントが合わな い時に、フランジバック ( レンズ取り付け面 から撮像面までの距離 ) を調整して下さい。 ③ フランジバック固 定ネ カメラのフランジバックを調整した後、締め ジ つけて固定して下さい。 ④ オートアイリスコネク オートアイリスレンズを接続するコネクターで ター す。 DC オート アイリスのみに対応しています。 ⑤ 三脚ネジ 三脚等に固定するネジです。...
-
Page 17: 6. 操作
6. 操作 6-1. ユーザーセットアップ セットアップメニューは、OSD 表示にてセットアップ可能です。 6-2. セットアップボタンの名称と機能 カメラ背面にある 5 つのプッシュスイッチ (右図)で操作します。 記号 名称 機能 Up Switch セットアップ項目の選択(上下方向) Down Switch Left Switch セットアップ内容の変更(左右方向) Right Switch Enter Switch セットアップモードへの出入り セットアップの決定及び実行 6-3. セットアップモードの構成 セットアップのメニューは4ページのメインメニュー(MAIN MENU)と、 2 ページのスペシャルメニュー(SPECIAL MENU)によって構成されて います。 J-14... -
Page 18: メインメニューの内容
6-4. メインメニューの内容 E ボタンを 2 秒以上押し続けると、メインメニューが表示されます。カメ ラ動作の各種設定が可能です。点滅している文字部が選択項目です。ペー ジを送る時は、PAGE の項目を 選択し、R ボタンを押します。ページを戻す時は、L ボタンを押します。 MAIN MENU (PAGE 1/4) CAMERA ID SENS UP MOVE ↓ SHUTTER LIGHT CONT. LENS ↓ GAIN HYP-AGC WHITE BAL. ATW1 HIGH MENU LOCK ↓ EXIT CANCEL RESET 6-4-1. CAMERA ID ON にすることで、カメラ... - Page 19 6-4-2. SENS UP (1) OFF、 MANUAL 以外にした場合、 GAIN は自動的に AGC となります。 また、HYP-AGC に切り換えることも可能です。 ① OFF 電子感度アップは機能しません ② S/N S/N 優先モードです。動きの少ない被写体を撮影する時に使用しま す。 GAIN は最大で +15dB、 HYP-AGC で +21dB まで感度アップします。 ③ STD 画面のブレとざらつきの両方を抑えて撮影する時に使用します。 GAIN は最大で +36dB、 HYP-AGC で +42dB まで感度アップします。 ④ MOVE 動き優先のモードです。...
- Page 20 LEVEL 設定 切り換え輝度レベルを設定します。 DARK 切り換え輝度レベルは暗めです。 切り換え輝度レベルは DARK と BRIGHT の中間です。 BRIGHT 切り換え輝度レベルは明るめです。 MANUAL 切り換え輝度レベルをマニュアルで設定 します。 MANUAL 設定 LEVEL を MANUAL にした時は次の設定が可能 です。 COLOR ⇒ B/W 昼から夜へ切り換わる明るさを設 定します。 B/W ⇒ COLOR 夜から昼へ切り換わる明るさを設 定します。 ④ REMOTE 外部操作によって DAY/NIGHT の切り換えができます。 各部の名称と機能 ⑫ RS-485 / 昼夜切り換え端子台 1−2を ショート又はオープンで B/W COLOR の設定が出来ます。 MAIN MENU ...
- Page 21 6-4-3. SHUTTER (1) SENS UP = OFF のとき有効です。 ① L、R ボタンにて高速シャッターの選択が出来ます。 OFF(1/30) 、1/100、1/125、1/250、1/500、1/1,000、1/2,000、 1/4,000、1/10,000、VARIABL ② VALIABL L、R ボタンでシャッタースピードが連続的に可変出来ます。 L、R ボタンを長押しで、シャッター値を大きく可変出来ます。 (2) SENS UP = S/N、STD、MOVE、MANUAL の時 L、R ボタンにて電子感度アップの倍率を設定出来ます。 x1、 x2、 x4、 x6、 x8、 x12、x16、 x24、 x32、 x64 * MENU 表示上の注意 SHUTTER の横に2通りの倍率が表示されます。...
- Page 22 6-4-5. GAIN L、R ボタンで GAIN の選択が出来ます。 (1) LOW 0dB 固定の GAIN です。 (2) MID 18dB 固定の GAIN です。 (3) HIGH 36dB 固定の GAIN です。 (4) AGC シーンの明るさに合せて自動的に感度を調整します。 (5) HYP-AGC AGC よりも更に高感度の自動調整モードです。 AGC に対して、S/N で +6dB、STD で +6dB、MOVE で +18dB 高感度になります。 *...
- Page 23 6-4-7. ノイズリダクションの効果を選択します。 (1) OFF ノイズリダクションは動作しません。 (2) LOW ノイズリダクションは弱めに動作します。 (3) HIGH ノイズリダクションは強く動作します。 * ノイズリダクションの動作量は AGC GAIN 量に比例して動作します。 GAIN が低い時はノイズリダクションの動作量は小さく、GAIN が高い 時はノイズリダクションの動作量は大きくなります。 * HIGH を選択し GAIN が高くなった時、3D ノイズリダクションの影響 で残像が発生する場合があります 6-4-8. MENU LOCK MENU のセットアップ内容を不用意に再設定されないようにメニューロッ ク機能があります。 (1) ロックする場合 E ボタンで ON に設定して下さい。 (2) 動作 ロックされると...
- Page 24 MAIN MENU (PAGE 2/4) DETAIL L****I****H VIDEO LEVEL L****I****H CHROMA L****I****H BLACK LEVEL L****I****H WDR MODE GAMMA 0.45 MATRIX MODE EXIT CANCEL RESET 6-4-10. DETAIL L, R ボタンにてカメラ映像の輪郭を強調するレベルが調整出来ます。 6-4-11. VIDEO LEVEL L, R ボタンにてカメラ映像レベルが調整出来ます。 HD-SDI 出力映像をご使用の場合は、初期値にてご使用ください。 6-4-12. CHROMA L, R ボタンにてカメラ映像のクロマレベルが調整出来ます。 6-4-13. BLACK LEVEL L, R ボタンにてカメラ映像の黒レベルが調整出来ます。...
- Page 25 6-4-15. FOG ON にすることで、煙霧シーンでの撮影に効果があります。 (1) OFF 通常モードです。 (2) ON 映像信号のコントラストが小さくなった時、自動的に伸長し補正します。 6-4-16. GAMMA 使用する DISPLAY(モニター)によって、カメラのガンマ特性を選択出 来ます。 (0.45 / 0.75 / 1.0) 6-4-17. MATRIX MODE (1) A 通常モードです。 (2) B 屋内の蛍光灯下で使用時はこのモードを推奨します。 MAIN MENU (PAGE 3/4) COLOR MATRIX SETUP ↓ FLIP/MIRROR NORMAL ZOOM EXIT CANCEL RESET 6-4-18.
- Page 26 6-4-19. FLIP/MIRROR 映像反転の設定が出来ます。 (1) NORMAL 通常モードです。 (2) FLIP 上下方向を反転します。 (3) MIRROR 左右方向を反転します。 (4) FRIP&MIRROR 上下、左右両方を反転します。 6-4-20. ZOOM 電子ズームの倍率を設定します。 (x1, 2, 3, 4, 5, 6, 7, 8, 9,x10) MAIN MENU (PAGE 4/4) SDI FORMAT 1080I/59.94 SDTV FORMAT NTSC-J SDTV ASPECT SIDE CUT SDTV C.
- Page 27 6-4-23. SDTV ASPECT (1) SIDE CUT アスペクト比を保持したまま、左右をカットし中央のみを表示します。 (2) LETTER BOX アスペクト比を保持したまま、上下に黒帯を付加し全体を表示します。 (3) SQUEEZE 水平方向にリサイズして全体を表示します。 6-4-24. SDTV C.BURST 白黒時のバースト信号の ON/OFF を選択できます。 (1) OFF バースト信号を付加しません。 (2) ON バースト信号を付加します。 ただし、SDI FORMAT が以下の設定の場合、バースト信号は付加され ません。 ・1080P/30.00 ・720P/60.00 ・720P/30.00 6-4-25. IR TRIG POL. MAIN MENU (PAGE 1/4) SENS UP の DAY/NIGHT 設定で REMOTE を選択した時の...
-
Page 28: Special Menu の内容
6-5. SPECIAL MENU の内容 MAIN MENU において1ページ(PAGE 1/4)を開き、EXIT に選択項目 を合せ、L ボタンと R ボタンを同時に押し続けると、SPECIAL MENU が 表示されます。ページを送る時は、PAGE の項目を選択し、R ボタンを押 します。 SPECIAL MENU (PAGE 1/2) RS485 ID P. MASK ↓ VIDEO TEST LIVE RETURN CANCEL EXIT 6-5-1. RS485 ID RS-485 経由で制御する時のカメラ番号を設定します。 6-5-2. P. MASK プライバシーマスクを... - Page 29 MASK1 ∼ 8 は個々に ON/OFF の設定が出来ます。 マスクの色は、 GRAY / WHITE / BLACK より選択出来ます。 MASK1 ∼ 8 のいずれかを ON にして E ボタンを押すと、マ スクの位置とサイズの設定画面になります。 変更したい所にカーソルを移動し E ボタンを押すと,カーソ ル表示が白黒反転し 、 変更ができるようになります。 MOVE: マスク部分の位置を U,D,L,R ボタンで動かす事が 出来ます。 矢印 : マスク部分のサイズを U,D / L,R ボタンで変更す ることが出来ます。...
-
Page 30: 7. Focus Ez 機能
6-5-4. モデル名,VERSION 情報 (1) MODEL NAME (2) MAIN VERSION (3) FIRM VERSION (4) FPGA VERSION 6-5-5. WHITE DEFECT 操作しないで下さい。 7. FOCUS EZ 機能 FOCUS EZ はフォーカス調整をサポートする機能です、画面上に表示され たフォーカスインジケーターによりフォーカス状態が確認出来ます。 オートアイリスレンズの場合、レンズの絞りを強制的に開放し、明るい環 境でも被写界深度を気にすることなくフォーカス調整が行えます。 (カメラの感度は自動補正され、表示される映像への影響はありません) U ボタンを2秒以上押し続けると フォーカス調整画面になります。 起動後、60 秒間機能が継続します。 フォーカス最適点 その後は、U ボタンを押すことで フォーカスの状態 60 秒間時間延長されます。 時間の途中で終了する時は... -
Page 31: 8. メニュー構成
8. メニュー構成 8-1. MAIN MENU PAGE CAMERA ID ABCD…...STV WXYZ….789 SENS UP MANUAL DAY / NIGHT COLOR B / W AUTO MOVE REMOTE FLICKERLESS SWITCH LEVEL DARK SHUTTER OFF, 1/100, 1/125, 1/250, 1/500,1/1,000, BRIGHT 1/2000,1/4000, MANUAL 1/10000 COLOR B/W VARIABL B/W COLOR x1, x2, x4, x6, x8, x12 x16, x24, x32, x64... - Page 32 PAGE WDR MODE AUTO KNEE AUTO B.STR GAMMA 0.45 0.75 1.00 MATRIX MODE PAGE COLOR MATRIX SETUP L****I****H SATURATION L****I****H GREEN L****I****H SATURATION L****I****H BLUE L****I****H SATURATION L****I****H YELLOW L****I****H SATURATION L****I****H CYAN L****I****H SATURATION L****I****H FLIP/MIRROR NORMAL MAGENTA FLIP L****I****H MIRROR SATURATION...
- Page 33 PAGE SDI FORMAT 1080I/59.94 1080P/30.00 1080P/29.97 720P/60.00 720P/59.94 720P/30.00 720P/29.97 1080I/50.00 1080P/25.00 720P/50.00 720P/25.00 SDTV FORMAT NTSC-J NTSC-M SDTV ASPECT SIDE CUT LETTER BOX SQUEEZE IR TRIG POL. BRAKE MAKE J-30...
-
Page 34: 8-2.Special Menu
8-2. SPECIAL MENU PAGE … … P. MASK MASK1 MASK2 MASK3 MASK4 MASK5 MASK6 MASK7 MASK8 PRINT GRAY WHITE BLACK VIDEO TEST LIVE GRAY SCALE COLOR BAR CROSS LINE PAGE MODEL NAME MAIN VERSION FIRM VERSION FPGA VERSION WHITE DEFECT ADJUST START J-31... -
Page 35: 9. 仕様
9. 仕様 ■カメラ部 映像素子 単板 CMOS/ RGB ベイヤー配列 総画素数 1408(H)x1042(V) 有効画素数 1280(H)x720(V) 画素サイズ 7.1 μ m(H)x7.1 μ m(V) 光学サイズ 2/3 型 走査方式 プログレッシブ 感度 F22 2000lx 最低被写体照度 カラー動画時: 0.00016lx/F1.2(最大感度 78dB, 蓄積 OFF, 出力 50%) カラー蓄積時: 0.0000025lx/F1.2(最大感度 78dB,64 倍蓄積 ON, 出力 50%) 白黒動画時... - Page 36 その他 DETAIL / CHROMA / BLACK LEVEL 電子ズーム x1,x2,x3,x4,x5,x6,x7,x8,x9,x10 映像反転 左右反転 / 上下反転 / 上下左右反転 プライバシーマスク 8 マスク GRAY/WHITE/BLACK テストパターン カラーバー、グレイスケール、クロスライン内蔵 フォーカスアシスト FOCUS EZ 機能 (フォーカスインジケーター付き) 操作 OSD 表示による ■インターフェース部 映像出力端子 HD-SDI (BNC) × 1 コンポジットビデオ (VBS) (BNC)×1 シリアルポート RS-485 接点入力 IR cut フィルター切替...
- Page 37 10. 外観図寸法図 78 ±3 J-34...
- Page 38 保 証 書 ISD-2500HD 品番 本書は、本書記載内容で無料修理 をさせていただくことをお約束する 製造番号 ものです。 お客様名 保証期間中に故障が発生した場合は、 様 お買上げの販売店にご依頼いただき、 ご住所 出 張 修 理 に 際 し て 本 書 を ご 提 示 〒 ください。 取扱販売店名・住所・電話番号 お 買 上 げ 年 月日 、 販 売 店 名 など...
- Page 39 MODEL ISD-2500HD Color Camera INSTRUCTION MANUAL English...
- Page 40 Please read this “User’s Manual” thoroughly to keep safety using your Ikegami camera at peak performance for longer service duration , and keep this manual for future use. Contents Page 1. IMPORTANT SAFETY INSTRUCTIONS ......E-3 2. Handling Precautions ............E-5 3.
- Page 41 The exclamation point within an equilateral triangle is intended to alert the user to the presence of important operating and maintenance (servicing) instructions in the literature accompanying the appliance. NOTE: This equipment has been tested and found to comply with the limits for a Class A digital device, pursuant to part 15 of the FCC Rules.
-
Page 42: Important Safety Instructions
1. IMPORTANT SAFETY INSTRUCTIONS 1) Read these instructions. 2) Keep these instructions. 3) Heed all warnings. 4) Follow all instructions. 5) Do not use this apparatus near water. 6) Clean only with a dry cloth. 7) Do not block any of the ventilation openings. Install in accordance with the manufacturer's instructions. - Page 43 14) Refer all servicing to qualifi ed service personnel. Servicing is required when the apparatus has been damaged in any way, such as power supply cord or plug is damaged, liquid has been spilled or objects have fallen into the apparatus, the apparatus has been exposed to rain or moisture, does not operate normally, or has been dropped.
-
Page 44: Handling Precautions
2. Handling Precautions Location of Storage and Installation ● This product is designed for indoor use. Do not use this product in an outdoor environment. ● Do not shoot extremely bright subjects (light sources, the sun, etc.) for a long time. Do not place the camera in the following conditions. It may cause malfunction or failure. - Page 45 2. Using the product in the situation that may have great impact on people or property and particularly in the situation where safety measure is required. ● Since this product can be used in various conditions, the designer of the device or equipment or a person who determines its specifi...
-
Page 46: Overview
Other considerations ● If you do not use the product for a long period of time, be sure to turn off the system. 3. Overview This camera is ultra-high sensitivity single chip color camera equipped with 2/3 inch high-speed multi-sampling CMOS sensor. This camera is suitable for use of monitoring the border, seaport, and other special areas where low light environment are expected during night time. -
Page 47: Names And Functions Of Parts
5. Names and functions of parts FOCUS LOCK... - Page 48 Names and Functions Name Function ① Lens (CS mount) Used to mount the lens. Various types of CS mount lenses can be applied. ② Flange focus adjuster Adjust the fl ange focus (the distance between lens mounting surface and the image surface) if adjusting the focus ring on the lens fails to get the image in focus.
-
Page 49: Operation
6. Operation 6-1. User setup Setup menu can be displayed on screen for camera setting. 6-2. Names and functions of setup button Use fi ve push button switches (see the fi gure on the right) on the rear panel of the camera to operate. Symbol Name Function... -
Page 50: Main Menu Contents
6-4. Main menu contents Press the E button for 2 seconds or more to display the main menu. You can set various settings for camera operation. The highlighted item is now selected. To go to the next page, select “PAGE”, and press the R button. To go back to the previous page, press the L button. - Page 51 Press the E button after selecting ⑤ POSITION, and use the U, D, L and R buttons to change the positionto to display ID on screen. 6-4-2. SENS UP (1) If set to other than OFF or MANUAL, the GAIN will be automatically set to AGC.
- Page 52 After selecting AUTO mode, press the E button to set the SWITCHI LEVEL (switching brightness level). LEVEL setting Set the switching brightness level. DARK The switching brightness level is somewhat dark. The switching brightness level lies between DARK and BRIGHT. BRIGHT The switching brightness level is somewhat bright.
- Page 53 6-4-3. SHUTTER (1) Enabled when SENS UP = OFF. ① Use L and R buttons to select the high-speed shutter. OFF (1/30), 1/100, 1/125, 1/250, 1/500, 1/1,000, 1/2,000, 1/4,000, 1/10,000, VARIABL ② VARIABL Use L and R buttons to continuously change the shutter speed. Long-press the L and R buttons to change the shutter value signifi...
- Page 54 (3) ALC LEVEL Adjust the convergence level of the automatic exposure. Move the marker to the right to make the screen brighter. Adjust it to the proper position while checking the actual scene. 6-4-5. GAIN Use L and R buttons to select GAIN. (1) LOW GAIN is fi...
- Page 55 6-4-7. Selects the noise reduction effect. (1) OFF Noise reduction is not effective. (2) LOW Noise reduction is slightly effective. (3) HIGH Noise reduction is highly effective. * The effectiveness of noise reduction is proportional to the level of AGC GAIN. The effectiveness of noise reduction is low when the level of GAIN is low, and the effectiveness is high when the level is high.
- Page 56 MAIN MENU (PAGE 2/4) DETAIL L****I****H VIDEO LEVEL L****I****H CHROMA L****I****H BLACK LEVEL L****I****H WDR MODE GAMMA 0.45 MATRIX MODE EXIT CANCEL RESET 6-4-10. DETAIL The enhancement level of the outline of video image can be adjusted using L and R buttons. 6-4-11.
- Page 57 6-4-15. FOG Turn on this mode when shooting the scene in a fog. (1) OFF Normal mode (2) ON Automatically expands and corrects the image contrast when the contrast of video signal becomes small caused by a fog and or mist. 6-4-16.
- Page 58 6-4-19. FLIP/MIRROR Sets image inversion. (1) NORMAL Normal mode (2) FLIP Inverts the image top to bottom. (3) MIRROR Inverts the image left to right. (4) FRIP&MIRROR Inverts the image top to bottom and left to right. (rotated image 180 degrees) 6-4-20.
- Page 59 6-4-23. SDTV ASPECT (1) SIDE CUT Cuts the left and right sides of the image while keeping the aspect ratio and only displays the center. (2) LETTER BOX Adds the black frame on top and bottom while keeping the aspect ratio and displays the entire image.
-
Page 60: Special Menu Contents
6-5. SPECIAL MENU contents Open PAGE 1/4 in the MAIN MENU and select EXIT. Press and hold the L and R buttons simultaneously to display the SPECIAL MENU. To go to the next page, select PAGE and press R button. SPECIAL MENU (PAGE 1/2) RS485 ID... - Page 61 Turn ON any of the MASK 1 to 8 and press E button to display the setting screen for the masking position and size. Move the cursor (Blinking point) with U/R/D/L button to any of Arrow mark or MOVE indication where you want to change and press E button.
- Page 62 6-5-3. VIDEO TEST The following video signal can be set for checking the camera system. (1) LIVE Normal status: Live video signal is output (2) GRAY SCALE (3) COLOR BAR (4) CROSS LINE SPECIAL MENU (PAGE 2/2) MODEL NAME ISD − 2500 MAIN VERSION 0.10-G FIRM VERSION...
-
Page 63: Focus Ez Function
7. FOCUS EZ Function FOCUS EZ is a function that supports focus adjustment. A focus indicator displayed on the screen can be used to confi rm the focus condition. In case of auto iris lens, it forces lens aperture to open so that the forcus can be adjusted without considering the depth of fi... -
Page 64: Menu Confi Guration
8. Menu Confi guration 8-1. MAIN MENU PAGE CAMERA ID ABCD…...STV WXYZ….789 SENS UP MANUAL DAY / NIGHT COLOR B / W AUTO MOVE REMOTE FLICKERLESS SWITCH LEVEL DARK SHUTTER OFF, 1/100, 1/125, 1/250, 1/500,1/1,000, BRIGHT 1/2000,1/4000, MANUAL 1/10000 COLOR B/W VARIABL B/W COLOR x1, x2, x4, x6, x8, x12... - Page 65 PAGE WDR MODE AUTO KNEE AUTO B.STR GAMMA 0.45 0.75 1.00 MATRIX MODE PAGE COLOR MATRIX SETUP L****I****H SATURATION L****I****H GREEN L****I****H SATURATION L****I****H BLUE L****I****H SATURATION L****I****H YELLOW L****I****H SATURATION L****I****H CYAN L****I****H SATURATION L****I****H FLIP/MIRROR NORMAL MAGENTA FLIP L****I****H MIRROR SATURATION...
- Page 66 PAGE SDI FORMAT 1080I/59.94 1080P/30.00 1080P/29.97 720P/60.00 720P/59.94 720P/30.00 720P/29.97 1080I/50.00 1080P/25.00 720P/50.00 720P/25.00 SDTV FORMAT NTSC-J NTSC-M SDTV ASPECT SIDE CUT LETTER BOX SQUEEZE IR TRIG POL. BRAKE MAKE E-27...
-
Page 67: Special Menu
8-2. SPECIAL MENU PAGE … … P. MASK MASK1 MASK2 MASK3 MASK4 MASK5 MASK6 MASK7 MASK8 PRINT GRAY WHITE BLACK VIDEO TEST LIVE GRAY SCALE COLOR BAR CROSS LINE PAGE MODEL NAME MAIN VERSION FIRM VERSION FPGA VERSION WHITE DEFECT ADJUST START E-28... -
Page 68: Specifi Cations
9. Specifi cations ■ Camera Image sensor Single-chip CMOS/ RGB Bayer pattern Total pixels 1408 (H) x 1042 (V) Valid pixels 1280 (H) x 720 (V) Pixel size 7.1 µm (H) x 7.1 µm (V) Image size 2/3 inch Scanning system Progressive Sensitivity F22 2000lx... - Page 69 Backlight compensation 9x5 Area select Gamma correction 0.45 / 0.75 / 1 OFF, LOW, HIGH White balance ATW1 / ATW2 / AWC / MANUAL WDR MODE OFF / WDR / AUTO KNEE / AUTO BLACK STRETCH Fog removal OFF / ON COLOR MATRIX 6-band (R/G/B/Ye/Cy/Mg) adjustment...
- Page 70 ■ General Power supply DC+12V (+10.5V - +15V) or AC+24V±10% 50/60Hz Power consumption Operating temperature/ -10°C - +50°C /30% - 90% (no condensation) humidity range Storage temperature/ -20 - +60°C/20% - 95% (in a package) humidity range Dimensions 78.0 (W) x 58.0 (H) x 140.0 (D) mm, excluding projections Weight Less than 650 g...
-
Page 71: External Dimensions
10. External Dimensions 78 ±3 E-32... - Page 72 ISD-2500HD ISD-2500HD MODEL MODEL Color Camera Color Camera INSTRUCTION MANUAL 取 扱 説 明 書 1st Edition Janualy 2014 Published in Ikegami Factory of Ikegami Tsushinki Co., Ltd. Janualy 2014 Ikegami Tsushinki Co., Ltd. NNA008060-00...
Need help?
Do you have a question about the ISD-2500HD and is the answer not in the manual?
Questions and answers