
Related Manuals for Wohler AMP1-16-3G


Summary of Contents for Wohler AMP1-16-3G
-
Page 1: Video Monitor
AMP1-16 Series • AMP1-16-3G • AMP1-E16-3G 1RU, 3Gb/s, 16-Channel, Audio and Video Monitor User Guide (Software Version: 3.00) Part Number 821697, Revision H... -
Page 2: Customer Support
In no event will Wohler Technologies, Inc. be liable for direct, indirect, special, incidental, or consequential damages resulting from any defect in the hardware, software, or its documentation, even if advised of the possibility of such damages. -
Page 3: Table Of Contents
Table of Contents Chapter 1. Quick Start......1 Introduction ..............1 Overview..............1 Topics ..............1 Safety Instructions ........... - Page 4 Chapter 3. Video and Data ......21 Introduction..............21 Overview ..............21 Topics ..............21 Configuration Options ............22 Overview ..............22 Video Menus ............23 Chapter 4.
- Page 5 Chapter 5. Menu List ......39 Introduction ..............39 Overview..............39 Topics ..............39 Menu Navigation Overview ..........
- Page 6 Chapter 7. Features and Specifications ....77 Introduction..............77 Overview ..............77 Topics ..............77 Features ............... 78 Product Benefits ............78 Distinction Between Models ........79 Additional Features ..........79 Compliance .............80 Standards...............80 Specifications..............80 Technical Functional Overview .........83...
- Page 7 Appendix C. Setting Up File Transfers....97 Introduction ..............97 Overview..............97 Topics ..............97 Navigating to the Unit Information Menu ....98 Enabling FTP Access ............99 8 2 1 6 9 7 : A M P 1 - 1 6 S e r i e s U s e r G u i d e ©...
-
Page 9: Chapter 1. Quick Start
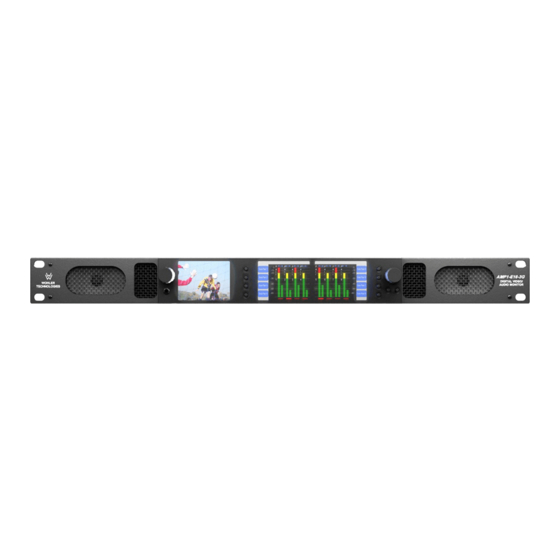
Quick Start Introduction Overview The AMP1-16-3G and AMP1-E16-3G are Wohler’s first 1RU, 16-channel, 3G audio/video monitors. These units come with three 2.4” video screens and an easy-to-use configuration interface that provides flexible audio metering, video monitoring, and other data display. -
Page 10: Safety Instructions
C h a p t e r 1 Q u i c k S t a r t S a f e t y I n s tr u c ti o n s Safety Instructions Read, keep, and follow all of these instructions; heed all warnings. Do not use this equipment near water. -
Page 11: Installation Recommendations
Power The AMP1-16-3G has a standard IEC connector on the rear panel from which it can connect to AC mains power (100 to 240 VAC ± 10%, 50/60 Hz, 65W). -
Page 12: Using The Monitor
C h a p t e r 1 Q u i c k S t a r t U s in g t h e M o n i t o r environment. This equipment generates, uses, and can radiate radio frequency energy and, if not installed and used in accordance with the instruction manual, may cause harmful interference to radio communications. -
Page 13: Back Panel
Hot Keys/Push Buttons: Ten buttons are used for menu navigation and hot key access to solo, mute, and preset functions. Back Panel The AMP1-16-3G and AMP1-E16-3G back panel contains all of the connectors except for the headphone jack as shown in Figure 1–2 below. -
Page 14: Getting Started
Figure 1–3 Video Monitor Display (Left) To begin any procedure on the AMP1-16-3G or the AMP1-E16-3G, powering up the system should display the video input on the left 8 2 1 6 9 7 : A M P 1 - 1 6 S e r i e s U se r G u i d e ©... - Page 15 C h a p t e r 1 Quick Start G e t t in g S t a rt e d screen, and the audio level meters on the Main Screen as shown in Figure 1–4 below. Figure 1–4 Main Screen (Center and Right) Solo Solo...
-
Page 16: Configuring The System
C h a p t e r 1 Q u i c k S t a r t C o n f i g u r i n g t h e S y s t e m To move back up in the menu tree, press either the button (to save) or the button (to cancel) repeatedly until you reach the Main Screen... -
Page 17: Chapter 2. Audio And Metering
CHAPTER 2 Audio and Metering Introduction Overview The AMP1-16 Series monitors are primarily designed to monitor audio and video. Configuration options include specifying channels to monitor, phase indicators, setting audio delay, and individual channel volume controls. Topics Topics Page Introduction Configuration Options Configuring the Audio Outputs Level Metering... -
Page 18: Configuration Options
Configuring the Audio Outputs Overview You can route the digital audio signals at the inputs of the AMP1-16-3G Series monitors to the front panel speakers or to the outputs, depending on your needs. The internal routing paths are controlled by the settings in the setup menus. -
Page 19: Surround Sound
C h a p t e r 2 Audio and Metering C o n f i g u r i n g t h e A u d i o O u t p u t s as presets and recalled later. See Chapter Efficiency Enhancements on page... -
Page 20: Stereo Downmix
C h a p t e r 2 A u d i o a n d M e t e r i n g C o n f i g u r i n g t h e A u d i o O u t p u ts From the Main Screen , press either the ... - Page 21 C h a p t e r 2 Audio and Metering C o n f i g u r i n g t h e A u d i o O u t p u t s analog output pairs are available for this purpose. The front panel , and solo controls will then affect the stereo Volume Balance...
- Page 22 C h a p t e r 2 A u d i o a n d M e t e r i n g C o n f i g u r i n g t h e A u d i o O u t p u ts Next, press the AES Channel Pair button and then rotate the...
-
Page 23: Aes And Analog Outputs
C h a p t e r 2 Audio and Metering C o n f i g u r i n g t h e A u d i o O u t p u t s AES and Analog Outputs Any monitored input can be routed to any AES or analog output pair. - Page 24 C h a p t e r 2 A u d i o a n d M e t e r i n g C o n f i g u r i n g t h e A u d i o O u t p u ts The AES input pairs can be converted into analog audio.
- Page 25 C h a p t e r 2 Audio and Metering C o n f i g u r i n g t h e A u d i o O u t p u t s The pin-out of the balanced analog output connector is listed in Table 2–3 below.
-
Page 26: Level Metering
C h a p t e r 2 A u d i o a n d M e t e r i n g L e v e l M e t e r in g Level Metering Overview The AMP1-16 Series monitors are capable of showing 16 level meters simultaneously along with a loudness indication. -
Page 27: Metering Menus
C h a p t e r 2 Audio and Metering L e v e l M e te r i n g Metering Menus The display of the level meters and related visual indications is determined as follows: The source for each of the 16 level meters is set in the Monitor Mixer Configuration Menu. -
Page 29: Chapter 3. Video And Data
CHAPTER 3 Video and Data Introduction Overview This chapter describes how to configure the AMP1-16-3G and AMP1-E16-3G to display both video and data. Topics Topics Page Introduction Configuration Options 8 2 1 6 9 7 : A M P 1 - 1 6 S e r i e s Us e r G u i d e... -
Page 30: Configuration Options
C o n f i g u r a t i o n O p t i o n s Configuration Options Overview The AMP1-16-3G will display a variety of 3G, HD, and SD video formats. It supports two 3G SDI inputs that can be alternately selected. The selected SDI input is reclocked and output. -
Page 31: Video Menus
C h a p t e r 3 Video and Data C o n f i g u r a t i o n O p t i o n s Video Menus The display of the level meters and related visual indicators is determined as follows: Select the SDI source for video from the Configuration... -
Page 33: Chapter 4. Efficiency Enhancements
CHAPTER 4 Efficiency Enhancements Introduction Overview This chapter describes the processes of creating presets and hot keys. These features allow you to configure the AMP1-16-3G and AMP1-E16-3G and then save those settings for immediate recall. Topics Topics Page Introduction Presets... -
Page 34: Presets
C h a p t e r 4 E f fi c ie n c y E n h a n c e m e n ts P r e s e t s Presets Overview Modifying the menu settings allows you to configure the entire AMP1-16 Series monitor to function exactly the way you want it to for your specific application. -
Page 35: Naming Or Renaming
C h a p t e r 4 Efficiency Enhancements P re s e t s From the Configuration Selection Menu , press the Recall button to recall a preset. Rotate the knob to select Preset Balance the desired preset, and then press the Balance knob. -
Page 36: Clearing A Preset
C h a p t e r 4 E f fi c ie n c y E n h a n c e m e n ts P r e s e t s Press the Select button to initiate the Balance knob for character selection. -
Page 37: Recalling A Preset On Power Up
H o t K e y s Recalling a Preset On Power Up After a power fail or deliberate power shutdown, you can define how the AMP1-16-3G configures itself when power is restored. From the Configuration Selection Menu , press the... -
Page 38: Defining/Modifying A Hot Key
C h a p t e r 4 E f fi c ie n c y E n h a n c e m e n ts H o t K e y s in another. Note that both the mute and the solo functions allow you to select more than one channel. -
Page 39: Creating A Preset Hot Key
C h a p t e r 4 Efficiency Enhancements H o t K e y s When Channel 4 is highlighted, press the Balance knob to select Now rotate the Balance knob again until you highlight Channel 8. When Channel 8 is highlighted, press the Balance knob to select Use this same procedure to unselect any channels that are selected... -
Page 40: Copying Presets To Another Monitor
C h a p t e r 4 E f fi c ie n c y E n h a n c e m e n ts C o p y i n g P r e s e t s t o A n o t h e r M o n i t o r Press the Hot Key Menu button to display the... -
Page 41: Verifying Compatibility
C h a p t e r 4 Efficiency Enhancements C o p y i n g P r e s e t s t o A n o t h e r M o n i t o r Verifying Compatibility Important: If the two AMP1-16 Series monitors are not compatible, you should not... - Page 42 C o p y i n g P r e s e t s t o A n o t h e r M o n i t o r Figure 4–1 Unit Information Menu Unit Information Menu Application: AMP1-16-3G Hardware 1RU Hardware Unit S/W Info Application Version: 03.00...
-
Page 43: Backing Up The Saved Presets
(plural) must appear in the filename. • The file’s extension must be .S19 Important: If the new filename does not meet the requirements listed in Step above, the AMP1-16-3G Series monitor will not accept the file. Examples: Acceptable filenames: Unacceptable filenames: • My Presets.S19 •... -
Page 44: General Purpose Inputs And Outputs (Gpi/Os)
This concludes the entire preset copying procedure. General Purpose Inputs and Outputs (GPI/Os) The AMP1-16-3G contains eight General Purpose Inputs (GPIs) and two General Purpose Outputs (GPOs). The inputs (GPIs) are detected as DC voltages between 12 and 24 VDC. Their action replicates the action of the hot keys on the front panel. -
Page 45: Turning Active Help On Or Off
C h a p t e r 4 Efficiency Enhancements T u r n i n g A c ti v e H e l p O n o r O f f but it is reserved for future functionality. The pin out of the GPI/O (inputs and/or outputs) connector is listed in Table 4–1 below. - Page 46 Press the Active Help button to toggle the help display on the video monitor on or off.
-
Page 47: Chapter 5. Menu List
CHAPTER 5 Menu List Introduction Overview This chapter provides an in-depth description of all the features, specifications, and menus and all their respective options and functions. Note that the menus are listed alphabetically for easy reference. Topics Topics Page Menu Navigation Overview AES Output Configuration Menu Analog Output Configuration Menu Configuration Selection Menu... -
Page 48: Menu Navigation Overview
The configuration menus (shown in Figure 5–1 on page 41) appear on the AMP1-16-3G and AMP1-E16-3G to display information and to allow you to configure the operation of the monitor. 8 2 1 6 9 7 : A M P 1 - 1 6 S e r i e s U se r G u i d e... -
Page 49: Menu Tree
C h a p te r 5 Menu List M e n u N a v i g a t i o n O v e r v i e w Figure 5–1 Menu Tree Main Screen System Configuration Display Hot Key 1 Hot Key 5 Hot Key 2... -
Page 50: Aes Output Configuration Menu
C h a p t e r 5 M e n u L i st A E S O u t p u t C o n f i g u r a t i o n M e n u AES Output Configuration Menu Figure 5–2 AES Output Configuration Menu... - Page 51 C h a p te r 5 Menu List A E S O u t p u t C o n f i g u r a t i o n M e n u affect each channel pair. Pressing this button highlights it. Subsequent presses toggle between for the selected channel pair.
-
Page 52: Analog Output Configuration Menu
C h a p t e r 5 M e n u L i st A n a l o g O u t p u t C o n f i g u r a t i o n M e n u Analog Output Configuration Menu Figure 5–4 Analog Output Configuration Menu... - Page 53 C h a p te r 5 Menu List A n a l o g O u t p u t C o n f i g u r a t i o n M e n u affect each channel pair. Pressing this button highlights it. Subsequent presses toggle between for the selected channel pair.
-
Page 54: Configuration Selection Menu
C h a p t e r 5 M e n u L i st C o n f i g u r a t i o n S e l e c t i o n M e n u Configuration Selection Menu Figure 5–6 Configuration Selection Menu... -
Page 55: Cluster Configuration Menu
C h a p te r 5 Menu List C l u s t e r C o n f i g u r a t i o n M e n u Cluster Configuration Menu Figure 5–7 Cluster Configuration Menu Cluster Configuration Menu Cluster Cluster... -
Page 56: Dolby Setup Menu
C h a p t e r 5 M e n u L i st D o lb y S e t u p M e n u • Default 2-4-8: Pressing this button and then rotating the Balance knob selects two, four, or eight. Pressing the Balance knob reformats the screen to form:... -
Page 57: Hardware Configuration Menu
C h a p te r 5 Menu List H a r d w a r e C o n f i g u r a t i o n M e n u • Automatic : When this option is selected, the Dolby Decoder will automatically detect and decode Dolby E or Dolby Digital signals, and will pass PCM signals. - Page 58 C h a p t e r 5 M e n u L i st H a r d w a r e C o n f i g u r a t i o n M e n u •...
-
Page 59: Label Menu Screen
C h a p te r 5 Menu List L a b e l M e n u S c r e e n Label Menu Screen Figure 5–10 Label Menu Label Menu Mine Mine Annc. Backspace Stm1 Jack7 Label: N_______________________ Three Msc. -
Page 60: Loudness Configuration Menu Screen
C h a p t e r 5 M e n u L i st L o u d n e s s C o n f i g u ra t i o n M e n u S c r e e n Loudness Configuration Menu Screen This screen has two modes, as shown in Figure 5–11... -
Page 61: Main Screen
C h a p te r 5 Menu List M a i n S cr e e n • Loudness Window: This control is active only when Program is selected. Pressing this button and then rotating Loudness Mode Balance knob adjusts the averaging time between values of 1 second and 60 seconds by one second increments. - Page 62 C h a p t e r 5 M e n u L i st M a i n S cr e e n Figure 5–12 Main Screen Dolby Logo Loudness Icon Solo Solo Pair 1 Pair 5 Solo Solo Pair 2 Pair 6 Solo...
-
Page 63: Main Screen Hot Key Button Configuration Menu
C h a p te r 5 Menu List M a i n Sc r e e n H o t K e y B u t t o n C o n f i g u r a ti o n M e n u If a button is configured to be off (non-functional) it will turn gray. -
Page 64: Meter Configuration Menu
C h a p t e r 5 M e n u L i st M e t e r C o n f i g u r a t i o n M e n u • Pressing the Balance knob while the highlight is over the button label displays the... - Page 65 C h a p te r 5 Menu List M e t e r C o n f i g u r a t i o n M e n u Table 5–2 Audio Scale Specification Domains and Defaults Default Color Volume Default Ballistics Bounds...
-
Page 66: Monitor Mixer Configuration Menu
C h a p t e r 5 M e n u L i st M o n it o r M ix e r C o n f ig u ra t io n M e n u • Lower Display Color: Rotating the Balance knob after pressing... - Page 67 C h a p te r 5 Menu List M o n i t o r M i x e r C o n f i g u r a t i o n M e n u • Speaker Assign: This button directs audio from the channel to the left, right, or both speakers.
-
Page 68: Option Configuration Menu
C h a p t e r 5 M e n u L i st O p ti o n C o n f ig u ra t io n M e n u Option Configuration Menu Figure 5–16 Option Configuration Menu Option Configuration Menu Exclusive Active Help... -
Page 69: Preset Management Menu
C h a p te r 5 Menu List P r e s e t M a n a g e m e n t M e n u Preset Management Menu When you enter this menu, all of the controls are set to affect the most recently recalled preset number. -
Page 70: Screen Display Menu
C h a p t e r 5 M e n u L i st S c r e e n D i s p l a y M e n u • Clear Preset: Pressing this button and then rotating the Balance knob allows you to select from any of the presets. -
Page 71: Screen Information Setup Menu
C h a p te r 5 Menu List S c r e e n I n f o r m a t i o n S e t u p M e n u • Screen Information Menu: Displays Screen Information Setup so you can set up and display a variety of parameters for the Menu... - Page 72 C h a p t e r 5 M e n u L i st S c r e e n I n f o r m a t i o n S e t u p M e n u •...
-
Page 73: Screen Display Menu
Dialogue Normalization • Video Mode • Data Rate Unit Information Menu Figure 5–20 Unit Information Menu - Initial Display Unit Information Menu Application: AMP1-16-3G Hardware 1RU Hardware Unit S/W Info Application Version: 03.00 NvRam Table Ver: 00.20 Audio FPGA Ver: 01.00... - Page 74 Software Update Instructions ftp://0.0.0.0/ Unit S/W Info See also the instructions sent with the software update package provided by Wohler . Serial / Ethernet Info Once software updates are enabled , this screen will go blank. Unplug and then re-power the unit ENABLE FTP to halt the FTP server and cause it to restart .
-
Page 75: Chapter 6. System Maintenance
CHAPTER 6 System Maintenance Introduction Overview This procedure details how to establish Ethernet connectivity and then how to upgrade the software and firmware. Note: It may prove useful to reprint this chapter every time you need to perform an upgrade, since several sections provide space to record existing settings. -
Page 76: Upgrade Requirements
U p g r a d e R e q u i r e m e n t s Upgrade Requirements • An AMP1-16-3G or AMP1-E16-3G connected to a Local Area Network (LAN) or connected to a host computer with a direct Ethernet connection. -
Page 77: Establishing Connectivity
C h a p t e r 6 System Maintenance E s t a b l i s h i n g C o n n e c t i v i t y Establishing Connectivity Decision Point: If you need to establish connectivity to your PC, refer to Appendix B on page Otherwise, continue on to... - Page 78 C h a p t e r 6 S y s t e m M a i n t e n a n c e U p g ra d i n g t h e N e t b u rn e r S o f t w a r e Figure 6–2 AutoUpdate IP Address Input Dialog - Incomplete...
-
Page 79: Upgrading The Sub-Processor Firmware
Turn the unit on and navigate to the Unit Information Menu shown in Figure 6–5 below. Figure 6–5 Unit Information Menu Unit Information Menu Application: AMP1-16-3G Hardware 1RU Hardware Unit S/W Info Application Version: 01.00 Build: Sep 18 2009 08:16:42 NvRam Table Ver: 00.15... - Page 80 C h a p t e r 6 S y s t e m M a i n t e n a n c e U p g r a d i n g t h e S u b - P r o c e s s o r F i r m w a r e From the Main Screen press the ...
- Page 81 C h a p t e r 6 System Maintenance U p g ra d i n g t h e S u b - P r o c e s s o r F i r m w a r e Figure 6–6 FTP Location If you see the following dialog similar to the one in...
- Page 82 C h a p t e r 6 S y s t e m M a i n t e n a n c e U p g r a d i n g t h e S u b - P r o c e s s o r F i r m w a r e Figure 6–8 FTP Window Press the...
- Page 83 C h a p t e r 6 System Maintenance U p g ra d i n g t h e S u b - P r o c e s s o r F i r m w a r e Figure 6–9 File Transfer Figure 6–7...
- Page 84 C h a p t e r 6 S y s t e m M a i n t e n a n c e U p g r a d i n g t h e S u b - P r o c e s s o r F i r m w a r e Figure 6–10 Copy Completed Once an sub-processor has been reprogrammed, wait about 15...
-
Page 85: Chapter 7. Features And Specifications
CHAPTER 7 Features and Specifications Introduction Overview This chapter lists the features and specifications of the AMP1-16-3G and AMP1-E16-3G. Topics Topics Page Introduction Features Specifications 8 2 1 6 9 7 : A M P 1 - 1 6 S e r i e s Us e r G u i d e... -
Page 86: Features
C h a p t e r 7 F e a t u r e s a n d S p e c i fi c a ti o n s F e a t u r e s Features Product Benefits •... -
Page 87: Distinction Between Models
F e a t u r e s Distinction Between Models The Dolby CAT552 hardware is included in the AMP1-E16-3G, making it the first 1RU Wohler audio monitor with Dolby E, D, and Dolby Digital Plus built in. By contrast, the AMP1-16-3G must have an additional hardware add-on installed before both the Dolby D and Dolby E protocols are available. -
Page 88: Compliance
C h a p t e r 7 F e a t u r e s a n d S p e c i fi c a ti o n s S p e c if i c a ti o n s Compliance All components comply with UL, CE, and RoHs specifications. - Page 89 C h a p t e r 7 Features and Specifications S p e c if i ca t i o n s Table 7–1 Specifications (Continued) Specification Values/Domains Non-Configurable Outputs: • AES/EBU output 8 unbalanced on high density DB-15 Configurable Outputs: •...
-
Page 90: Video Formats
C h a p t e r 7 F e a t u r e s a n d S p e c i fi c a ti o n s T e c h n i c a l F u n c t i o n a l O v e r v i e w Table 7–1 Specifications (Continued) Specification... -
Page 91: Technical Functional Overview
C h a p te r 7 Features and Specifications T e c h n i c al F u n c ti o n al O v e r v ie w Figure 7–1 AMP1-16 Block Diagram 8 2 1 6 9 7 : AM P 1 - 1 6 S er ie s U s e r G u i d e ©... -
Page 93: Appendix A. Downloading Software
APPENDIX A Downloading Software Introduction Overview This appendix explains how to download the update software for the monitor. Topics Topics Page Introduction Requirements Downloading the File 8 2 1 6 9 7 : A M P 1 - 1 6 S e r i e s Us e r G u i d e ©... -
Page 94: Requirements
AMP1-16 Upgrade Navigate to the wohler web site: www.wohler.com. Decision Point: If you already have a member user ID and password for the Wohler web site, then log in by clicking on the Member Sign In link at the top right hand corner of the home page and sign in. - Page 95 A p p e n d i x A Downloading Software D o w n l o a d i n g th e F il e Figure A–1 Selecting the AMP1-16 When the monitor’s web page displays, click on the Downloads tab in the middle of the page.
-
Page 97: Appendix B. Establishing Connectivity
APPENDIX B Establishing Connectivity Introduction Overview This appendix explains how to download the update software for the monitor. Topics Topics Page Introduction Connectivity Options Connecting to a LAN Connecting Directly 8 2 1 6 9 7 : A M P 1 - 1 6 S e r i e s Us e r G u i d e ©... -
Page 98: Connectivity Options
C o n n e c t i v i t y O p t i o n s Connectivity Options The fastest and simplest way to establish connectivity to your AMP1-16-3G Series monitor is through a LAN (local area network). Decision Point: If you are if you are connected to a LAN, continue with the following procedure. -
Page 99: Setting The Ip Address And Network Mask
A p p e n d i x B Establishing Connectivity C o n n e c t i n g t o a L A N Setting the IP Address and Network Mask An IP address of 0.0.0.0 means the Netburner is using DHCP addressing, and the network will give the module its address (as it has in the example in Figure B–1... -
Page 100: Connecting Directly
A p p e n d i x B E st a b li sh in g C o n n e ct i vi t y C o n n e c t i n g D i r e c t l y Figure B–3 NetBurner IPSetup Dialog - New Address Accepted... - Page 101 A p p e n d i x B Establishing Connectivity C o n n e c t i n g D i r e c t l y Figure B–4 Local Area Connection Status Dialog Click the Properties button. You should see another dialogue box open like the one in Figure B–5 below.
- Page 102 A p p e n d i x B E st a b li sh in g C o n n e ct i vi t y C o n n e c t i n g D i r e c t l y Highlight the Internet Protocol (TCP/IP) check box.
- Page 103 A p p e n d i x B Establishing Connectivity C o n n e c t i n g D i r e c t l y You can leave the DNS server address fields blank. The dialogue box should now look like the one in Figure B–7 below.
- Page 104 A p p e n d i x B E st a b li sh in g C o n n e ct i vi t y C o n n e c t i n g D i r e c t l y 8 2 1 6 9 7 : A M P 1 - 1 6 S e r i e s U se r G u i d e ©...
-
Page 105: Appendix C. Setting Up File Transfers
Setting Up File Transfers Introduction Overview This appendix explains how to set up the AMP1-16-3G Series monitor to transfer files to or from a PC through an Ethernet connection. See Appendix B on page 89 for establishing connectivity to the PC. -
Page 106: Navigating To The Unit Information Menu
Software Update Instructions ftp://0.0.0.0/ Unit S/W Info See also the instructions sent with the software update package provided by Wohler . Serial / Ethernet Info Once software updates are enabled , this screen will go blank. Unplug and then re-power the unit ENABLE FTP to halt the FTP server and cause it to restart . -
Page 107: Enabling Ftp Access
A p p e n d i x C Setting Up File Transfers E n a b l in g F T P A c c e s s Important: If the address comes up as ftp://0.0.0.0/, the unit is using DHCP in a peer-to-peer connection, or no Ethernet connection exists. - Page 108 A p p e n d i x C S e t ti n g U p F il e T r an s f e r s E n ab li n g F T P A c c e s s Figure C–2 FTP Location If you see the following dialog similar to the one in...
- Page 109 A p p e n d i x C Setting Up File Transfers E n a b l in g F T P A c c e s s Figure C–4 FTP Window Press the key to refresh the window. Important: You must refresh the file window after each file transfer since Windows caches the file and folder information.
- Page 110 A p p e n d i x C S e t ti n g U p F il e T r an s f e r s E n ab li n g F T P A c c e s s 8 2 1 6 9 7 : A M P 1 - 1 6 S e r i e s U se r G u i d e ©...
Need help?
Do you have a question about the AMP1-16-3G and is the answer not in the manual?
Questions and answers