
Related Manuals for Xylem hydrovar hv 1.1


Summary of Contents for Xylem hydrovar hv 1.1
-
Page 1: Operating Instructions
Operating Instructions HV 1.1-HV 1.2 Incl. RS 485 - interface V 2012/03A 771079212 MANUAL HV1_1-1_2-EN ENGLISH... -
Page 3: Table Of Contents
Index IMPORTANT SAFETY INSTRUCTIONS ....................5 SYSTEM DESIGN...........................7 PRESSURE TANK ..........................8 TRANSDUCER ..........................9 PA-21 R ..................9 RESSURE RANSMITTER ERIES PD 39 M ..............10 IFFERENTIAL RESSURE RANSMITTER ERIES TECHNICAL DATA - FREQUENCY INVERTER AND GENERAL DATA..........11 ..........................12 IMENSIONS HYDROVAR MOUNTING ......................13 HYDROVAR ..................13 OUNTING THE ON THE PUMP... - Page 4 13.6.3 Fast acceleration time ......................44 13.6.4 Fast deceleration time......................44 13.6.5 Slow acceleration time......................44 13.6.6 Slow deceleration time .......................45 ............................45 INDOW 13.6.7 Compensation Frequency....................45 13.6.8 Lift-Intensity........................46 13.7 S ......................47 UBMENU ULTICONTROLLER 13.7.1 Lift Value ..........................47 13.7.2 Fall Value ..........................48 13.7.3 Release – Follow up pump ....................48 13.7.4 Switch Interval ........................49 13.8 S ...........................49...
-
Page 5: Important Safety Instructions
Important safety instructions Read and follow the operating instructions and safety instructions carefully before starting operations! All modifications must be done by qualified technicians! In addition to the instructions contained in these operating instructions please pay attention to universal safety and accident prevention regulations. The HYDROVAR drive head must be disconnected from the power supply before any work can be carried out in the electrical or mechanical part of the system. - Page 6 The HYDROVAR drive head contains electronic safety devices which switch off the control element in the event of faults, whereby the motor has zero current but remains energised and comes to a halt. The motor can also be halted by mechanical blocking.
-
Page 7: System Design
System Design The following diagrams show typical single pump and multi-pump systems using the Hydrovar control unit. Connection can be made directly to a water supply or water can be drawn from a break tank or well. In the case of break tanks and wells, level switches, should be used to shut down the pumps when water is low. -
Page 8: Pressure Tank
Pressure tank A diaphragm pressure tank is used on the discharge side of the pump or pumps to maintain pressure in the line when there is no demand. This will keep the pumps from continuing to run. With the Hydrovar control unit, it is not necessary to have a large tank for supply purposes. -
Page 9: Transducer
Transducer Pressure Transmitter Series PA-21 R The sensor of this transmitter is a piezoresistive silicon pressure sensor, mounted on a tape (TAP) freely floating in an oil chamber. The pressure is transferred to the sensor by a separate nickel diaphragm in the oil chamber. Specifications Range (FS): 10 bar... -
Page 10: Differential
Series PD 39 M Differential Pressure Transmitter The sensors of this differential pressure transmitter are two piezoresistive silicon pressure sensors, mounted on a tape (TAP) freely floating in an oil chamber. The pressure is transferred to the sensor by a separate steel diaphragm in the oil chamber. Specifications Range(FS): 4 bar... -
Page 11: Technical Data - Frequency Inverter And General Data
Technical Data - Frequency Inverter And General Data HYDROVAR Hydrovar output to Supply Voltage (Uin) Prefuse the Motor min. Type Rated Voltage Max. Mains frequency output current 48-62 Hz HV 1.1 1,1 kW 3x 230 V 4,8 A 1x 220-240 V±15% 10 Ampere HV 1.15 1,5 kW... -
Page 12: Dimensions
Dimensions HV1.1: closing cap Type: Weight [Kg] ∅12 ∅7 cable gland HV 1.1 2,00 HV 1.15 4,70 HV1.15,1.2: HV 1.2 4,70 closing cap cable entries... -
Page 13: Hydrovar Mounting
HYDROVAR mounting Mounting the HYDROVAR on the pump 6.1.1 Included components Variant for HV1.1: thermistor mounting and distance ring screw cable gland washer Variant for HV1.15-1.2: thermistor screw M5x50 cable gland mounting clamp... -
Page 14: Mechanical Mounting
6.1.2 Mechanical mounting Variant for HV1.1 Hydrovar 1. Remove the motor fan cover from your 3-phase motor by removing the mounting screws. 2. Put the mounting and distance ring (1) between the fan cover and the Hydrovar and fix them together with the screw (3) by using the included washer(2). - Page 15 Variant for HV1.15-1.2: Gasket 4 screw M5x50 Center bit 4 mounting clamps Connection Mounting: Motor conduit box u Remove the 3 screws from the Hydrovar cover. u Place the centre bit in the Hydrovar fan cover. Thermistor u Place the Hydrovar fan cover on the motor .
- Page 16 Mountingring If you use a motor with plastic fan cover, you must use a mountingring.
-
Page 17: Mounting The Thermistor (4)
6.1.3 Mounting the thermistor (4) Variant A: motor thermistor terminal block rubber gasket cover of the conduit box Variant B: Thermistor 1. Open the cover of the conduit box and remove also the terminal block inside. 2. Fix the thermistor (Variant A or B) 3. -
Page 18: Mounting Of The Pressure Transducer
6.1.4 Mounting of the pressure transducer In the delivery of the pressure transducer there are included: (1) pressure transducer (2) gasket (3) reducer “ – ¼“ (4) brass gasket 1. The transducer has an mechanical connection of G ¼”. If it is necessary put the reducer (3/8”... -
Page 19: Electric Installation And Wiring
Electric installation and wiring Note: All installations and maintenance MUST be performed by trained and qualified personal with proper tools!! Warning: In case of a failure, disconnect and lockout electrical power and wait five minutes for capacitor discharge before servicing the Hydrovar. Otherwise it can cause shock, burns, or death. - Page 20 6.2.2.1 Main part overview HV1.1: control card (1) main supply connections Motor connections main board (2) Cableintroduction for motor cable (at Cable gland (for least 11,5mm) power supply 5- 10mm) Cableintroduction for control cable (at least 5mm) HV1.15, 1.2: control card (1) main board (2) motor connections main supply connections...
- Page 21 a) motor cable: Locate the motor connections, labeled U, V, W inside the Hydrovar. Connect wires to the terminals and rout the cable through the cable gland. You must take a motor cable at least Ø 11.5mm if you want protection IP55. (only HV1.1) The earth-wire of the cable has to be fixed with the screws with the earth-symbol to the cooling body of the Hydrovar.
-
Page 22: Control
6.2.3 Control By using the HYDROVAR drive head for constant pressure control, together with a pressure or differential pressure transmitter, or, if required, according to external manual control by reference of 0,5-4,5VDC, this external signal has to be connected to the terminals X2/1, X2/2 and X2/3 of the control terminals. terminals of the RS485 interface control terminals... - Page 23 Control-Terminals: Thermistor External release Ri 10kOhm, 5VDC (use gold plated contact) Power supply for external control 5VDC 0,5-4,5 VDC Ground (not earthened)
-
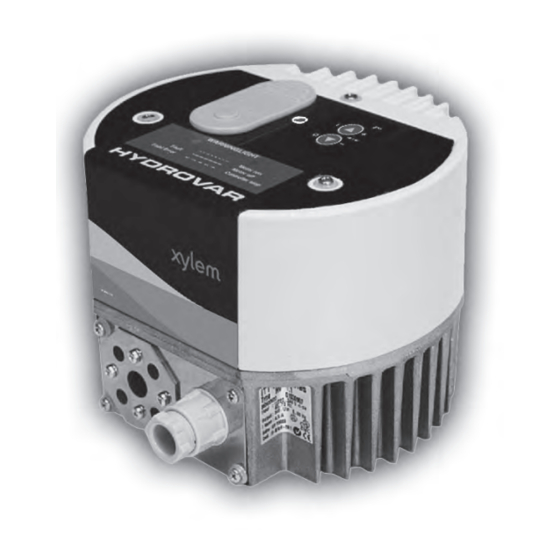
Page 24: Front Plate
Front plate HV 1.1-1.2: push buttons indication LED... -
Page 25: Operation Without External Programming Device
Operation without external programming device Attn: Before you start the system, the pump must be filled and all wiring and piping have to be done! The Hydrovar is delivered with these settings as standard! ♦ Change Pressure: enabled ♦ Auto Start: enabled Other possibilities to use the push buttons of the Hydrovar: The Pump could be... -
Page 26: Possible Indications Of The Led On The Hydrovar
Possible indications of the LED on the HYDROVAR ⇒ Motor stopped .) Green shining (via external stop with terminals X2/4; X2/5 or the unit is stopped with the button on the front plate) ⇒ Inverter is active, but the motor has stopped .) Green slow flashing .) Green fast flashing ⇒... -
Page 27: Operation In The Main Menu
Operation in the main menu Menu overview... -
Page 28: Connecting The External Programming Device To The Hydrovar
General for working with the external programming device: With you can select the different parameters in the menu. To enter a submenu, press the button. To leave the submenu, you have to press the buttons for longer than 3 sec. With you can change the parameters. -
Page 29: Typical Applications
If the actual pump address 01 is not available the display does not change and you will see again Address Then you could change the address with Lost and confirm the selected address with Press on the controller and you enter the INVERTERMENU (see chapter 12) 2. -
Page 30: Single Pump - Pump Protection
11.2 Single Pump - Pump Protection... - Page 31 Note: Low/no suction depends on the installation of a suction line pressure switch, or float switch for a tank. This is connected to the Hydrovar as described earlier in the Electrical Installation section (see chapter 6.2). The cut off setting for this switch should be the maximum NPSH required by the pump. To set run out protection: Note: Run out protection is available for one pump systems and multiple pump systems with a...
-
Page 32: Single Pump - System Curve Compensation
ERROR DELAY: Adjustable between 0...100 sec. Delayed switch-off in the event of low water, terminal X2/6-X2/7) and also for the conveyor limit ( see chapter 13.11.1). By pressing the button, you will be entering the ERROR DELAY amount of time (sec) that the pump will run at the 10 s programmed conveyor limit before it automatically shuts off. -
Page 33: Entering Compensation Values
11.4 Entering Compensation Values... - Page 34 Instructions: From the 1 display, press the button twice, until you SUBMENU reach PARAMETER Then press the button and the display will change to PASSWORD 0000 Password: The Password protection prevents untrained personal from accidentally changing the base setting Press the button until you reach the number 0066 PASSWORD 0066...
-
Page 35: Multiple Pump Constant Pressure And System Compensation
11.5 Multiple pump constant pressure and system compensation... - Page 36 When two, three or four Hydrovar speed controlled pumps are connected together in a system via the RS485-interface, they can be programmed to work together to maintain system pressure up to the maximum flow rate of all the pumps combined. As the first pump reaches its maximum speed and flow, the second pump will automatically turn on (and so on).
- Page 37 Generally a slight pressure drop is allowed on the first pump before the next is started. This allows for brief systems fluctuations without pump cycling. Once the next pump starts, however, you will want the system to resume its normal set pressure.
- Page 38 Enter the required value by pressing the button ACTUAL VALUE INCREASE 0,15 bar After changing of the value, you have to confirm with the button. Then you will get the message “SAVE PARAMETER” for a short time, when the new setting is saved! Press the button to change to...
- Page 39 After changing of the value, you have to confirm with the button. Then you will get the message “SAVE PARAMETER” for a short time, when the new setting is saved! Use the settings of this submenu (lift value, fall value, enable sequence control and switch interval) for each pump in the Hydrovar system Hold the button down for 3 seconds to return to:...
-
Page 40: Settings At The Invertermenu
Example: To change the Hydrovar with address 01 to address 04: press the button to change the * to the left side Address Change 00* --> 00 Select the address of the Hydrovar, you want to change the Address Change address with the button 01* -->... -
Page 41: Settings At The Submenu-Parameter
Settings at the Submenu-Parameter Important: Before entering the secondary menu these instructions must be read carefully to prevent incorrect settings which will cause malfunction. After entering the SUBMENU PARAMETER, the display PASSWORD ... will change to 0000 PASSWORD Set Password 0066 by pressing 0066 Note: The password must be entered at each entry Confirm by pressing... -
Page 42: Mode
13.3 Mode Mode Select with buttons between: Controller Multicontroller ⇒ sequence control for max. 4 pumps Controller ⇒ pressure control for a single pump If only one HYDROVAR-pump is in operation, set Controller. If more than one HYDROVAR-pumps are working together via the RS485-interface, the Multicontroller must be selected. -
Page 43: Minimum Frequency
Press on the controller to change to 13.5.2 Minimum frequency Min. Frequency Here you can set the minimum frequency. 0.0 Hz Attention!: If there is set F>Fmin in the parameter CONFIG FMIN (see chapter 13.5.4) the pump will not stop in the normal mode. It will keep running with the set minimum frequency. -
Page 44: Submenu Controller
13.6 Submenu Controller Submenu To enter this menu you have to press the key, to Controller leave the menu, press the key longer than 3 sec. 13.6.1 Window - % Window This value indicates the max. variation of the outgoing pressure (ref. -
Page 45: Slow Deceleration Time
Accel. Low A too slow running up time during variation of 70 Sec demand the outgoing pressure may break. A too fast running up time may lead to over oscillation and /or overload of the inverter. Press on the controller to change to 13.6.6 Slow deceleration time Decel. -
Page 46: Lift-Intensity
13.6.8 Lift-Intensity LIFT – INTENS. Adjustable from 0 to 100% of the range of the used 0.0 bar pressure transmitter. This value states how much the required value should be continually increased, till the maximum speed (maximum volume) is reached. -
Page 47: Submenu Multicontroller
Lift-Intensity Figure: To leave the submenu press the key longer than 3 sec.! 13.7 Submenu Multicontroller Submenu To enter this menu you have to press the key, to Multicontroller leave the menu, press the key longer than 3 sec. 13.7.1 Lift Value ACTU. -
Page 48: Fall Value
increase of the required value after starting of the following pumps (see attached application example in chapter 13.7.2) Press on the controller to change to 13.7.2 Fall Value For scaling the required value for 1 to 4 pumps Actu. Value Dec. Adjustable between 0 and 2,5 bar. -
Page 49: Switch Interval
pump has reached the programmed release-frequency. (Adjustable from 0.0 Hz to 70 Hz). If you don’t want to start a following pump this value has to be set higher than the MAX. FREQUENCY (see chapter 13.5.1) Press on the controller to change to 13.7.4 Switch Interval Switch Interval For changing the master pump and follow-up... -
Page 50: Submenu Sensor
30.0 Hz controlled HYDROVAR-pump, where the full speed slave pump should stop, if “simple multicontroller” is set in the parameter Relay configuration (see capter 13.8.1). To leave the submenu press the key longer than 3 sec.! 13.9 Submenu Sensor Submenu To enter this menu you have to press the key, to Sensor... -
Page 51: Sequence For Automatic Test Run
Press on the controller to change to 13.10.2 Sequence for automatic test run Time Test Run Adjustable between 1...100 hours. 100 h The test run starts the pump at the set time after the last stop for 20 seconds with the in parameter 13.10.3 set speed. Deactivating test run: Set 0 hours, by using Repeating the test run: Select test run and set the desired hours using the key Press... -
Page 52: Set Password
Error Delay Adjustable between 0...100 sec. 10 Sec. Delayed switch-off in the event of low water, (Terminal X2/6-X2/7) and also for the conveyor limit ( see chapter 13.11.1). To leave the submenu press the key for 3 sec.! 13.12 Set Password Set Password The pre-set password can be changed if necessary 0066... -
Page 53: Software Version
Last Error Shows the last error: ......Error Shows the Error before the last error: ......Error Shows the Error before Error 2 ......Press on the controller to change to 13.14.4 Software Version Software In this parameter, there is shown the used software CP –... -
Page 54: Automatic Connection To The Programming Device
14.1.1 Automatic connection to the programming device Auto Connecting !Only valid for programming device! Enabled Auto connecting enabled: that after plug in of the programming device, it changes automatically to the inverter menu. During this auto connection the programming device is looking for a valid address and “SCAN CONNECTION”... -
Page 55: Possible Error Messages
Possible Error messages 15.1 Low Water Remedy: Error Water Check incoming pressure If incoming pressure is normal the unit restarts itself. If there is no external low water protection (e.g. circulating systems), you have to bridge terminals X2/6 and X2/7. 15.2 Overheating –... -
Page 56: Overheating Of The Heat Sink
15.6 Overheating of the heat sink The thermal sensor, mounted on the cooling Error KK-Temp body of the HYDROVAR indicates over temperature. Possible causes: insufficient cooling, ambient temperature is too high or motor overloaded. After the cause has been remedied, the malfunction has to be reset by cutting off the power supply for >30 seconds. -
Page 57: Maintenance
Maintenance The HV1.1-1.2 control unit does not require special maintenance. However, the cooling fan and the vent should be freed of dust occasionally. Notes: When replacing the control card in a plant with more than one pump ensure, that the same control card version (V/STK/X) is used in all Hydrovar units. - Page 60 Ernst-Vogel Strasse 2 2000 Stockerau Österreich Telefon: +43 (0) 2266 / 604 Telefax: +43 (0) 2266 / 65311 e-mail: info.austria@xyleminc.com web: www.xylemaustria.com Xylem Water Solutions Austria GmbH reserves the right to make modifications without prior notice. © 2012 Xylem, Inc...