Table of Contents
Advertisement
Advertisement
Table of Contents

Related Manuals for Xylem Flygt 3127


Summary of Contents for Xylem Flygt 3127
- Page 1 Installation, Operation, and Maintenance Manual 90016101_2.0 Flygt 3127...
-
Page 3: Table Of Contents
4.8.4 Connect the motor cable to the pump..............28 4.8.5 Connect the motor cable to the starter and monitoring equipment....29 4.8.6 Cable charts.........................30 4.9 T-installation: Bleed air before starting pump............... 38 4.10 Check the impeller rotation................... 38 Flygt 3127 Installation, Operation, and Maintenance Manual... - Page 4 7.4 The pump starts-stops-starts in rapid sequence............73 7.5 The pump runs but the motor protection trips.............. 73 7.6 The pump delivers too little or no water.................74 8 Technical Reference......................... 76 8.1 Application limits....................... 76 8.2 Motor data.......................... 76 Flygt 3127 Installation, Operation, and Maintenance Manual...
-
Page 5: Introduction And Safety
This includes any modification to the equipment or use of parts not provided by Xylem. If there is a question regarding the intended use of the equipment, please contact a Xylem representative before proceeding. -
Page 6: User Safety
These are the personnel requirements for Ex-approved products in potentially explosive atmospheres: • All work on the product must be carried out by certified electricians and Xylem authorized mechanics. Special rules apply to installations in explosive atmospheres. • All users must know about the risks of electric current and the chemical and physical characteristics of the gas, the vapor, or both present in hazardous areas. -
Page 7: Special Hazards
• Do not modify the equipment without approval from an Ex-approved Xylem representative. • Only use original Xylem spare parts that are provided by an Ex-approved Xylem representative. • The thermal contacts that are fitted to the stator windings must be connected correctly to a separate motor control circuit and in use. -
Page 8: Wash The Skin And Eyes
• Clean-up of spills Exceptional sites CAUTION: Radiation Hazard Do NOT send the product to Xylem if it has been exposed to nuclear radiation, unless Xylem has been informed and appropriate actions have been agreed upon. 1.7 End of life product disposal Handle and dispose of all waste in compliance with local laws and regulations. -
Page 9: Warranty
1 Introduction and Safety 1.9 Warranty For information about warranty, see the sales contract. Flygt 3127 Installation, Operation, and Maintenance Manual... -
Page 10: Transportation And Storage
Use suitable lifting equipment and ensure that the product is properly harnessed. Wear personal protective equipment. Stay clear of cables and suspended loads. NOTICE: Never lift the unit by its cables or hose. Flygt 3127 Installation, Operation, and Maintenance Manual... -
Page 11: Temperature Ranges For Transportation, Handling And Storage
• The minimum height between the lifting hook and the floor must be sufficient to lift the unit. Contact a Xylem representative for more information. • The lifting equipment must be able to hoist the unit straight up and down, preferably without the need for resetting the lifting hook. -
Page 12: Storage Guidelines
If the packaging material has an indicated stacking limit, then it is valid for 23°C (73°F) and 50% relative humidity. Depending on the material, other temperature and humidity ranges can reduce the stacking limit. Flygt 3127 Installation, Operation, and Maintenance Manual... -
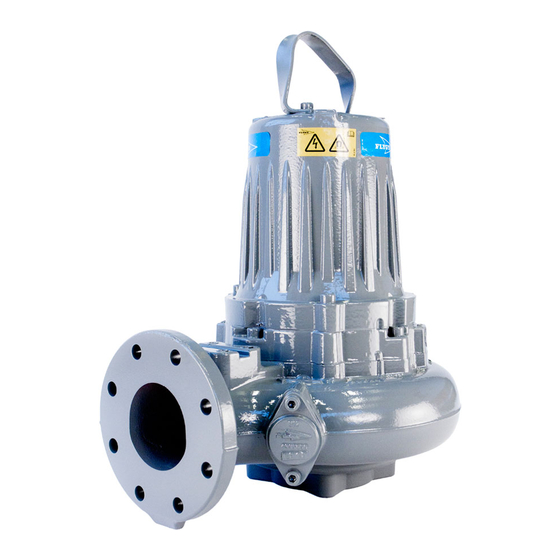
Page 13: Product Description
Technical Reference on page 76. If there is a question regarding the intended use of the equipment, please contact a local sales and service representative before proceeding. Flygt 3127 Installation, Operation, and Maintenance Manual... - Page 14 • Modifications to the unit or installation should only be carried out after consulting with Xylem. • Original spare parts and accessories that are authorized by Xylem are essential for compliance. The use of other parts can invalidate any claims for warranty or compensation.
-
Page 15: Sensors And Monitoring Equipment
• The stator incorporates three thermal contacts connected in series that activate the alarm and stops the pump at overtemperature • The thermal contacts open at 125°C (257°F). • Ex-approved pumps must have thermal contacts connected to the control panel. Flygt 3127 Installation, Operation, and Maintenance Manual... -
Page 16: The Data Plate
11.International standard 12.Degree of protection 13.Rated current 14.Rated speed 15.Maximum submergence 16.Direction of rotation: L=left, R=right 17.Duty class 18.Duty factor 19.Product weight 20.Locked rotor code letter 21.Power factor 22.Maximum ambient temperature 23.Read installation manual Flygt 3127 Installation, Operation, and Maintenance Manual... -
Page 17: Approvals
13.Serial number 14.ATEX marking 15.Country of origin WS003972C IEC approval plate This illustration describes the IEC approval plate and the information that is contained in its fields. International Norm; not for EU member countries. Flygt 3127 Installation, Operation, and Maintenance Manual... -
Page 18: Product Denomination
In this section, code characters are illustrated accordingly: X = letter Y = digit The different types of codes are marked up with a, b and c. Code parameters are marked up with numbers. Flygt 3127 Installation, Operation, and Maintenance Manual... - Page 19 XXYYYY YYY YYY YYYY Type of Callout Number Indication Type of code Sales denomination Product code Serial number Parameter Hydraulic end Type of installation Sales code Version Production year Production cycle Running number Flygt 3127 Installation, Operation, and Maintenance Manual...
-
Page 20: Installation
• If the unit has a permanent magnet motor, then ensure that you have read and understood all safety instructions regarding permanent magnet motors. NOTICE: Do not run the pump dry. Flygt 3127 Installation, Operation, and Maintenance Manual... -
Page 21: Install With P-Installation
• Fasteners for the discharge connection • Anchor bolts 1. Install the access frame: a) Place the access frame in position and align it horizontally. b) Grout the frame in place. 2. Grout the anchor bolts in place. Flygt 3127 Installation, Operation, and Maintenance Manual... -
Page 22: Install With S-Installation
2. Connect the discharge line. 3. Lower the pump into the sump. 4. Place the pump on the base and make sure it cannot fall over or sink. Flygt 3127 Installation, Operation, and Maintenance Manual... -
Page 23: Install With T-Installation
• Shut-off valves that allow you to remove the pump from service 1. Outlet line 2. Inlet line 3. Line to drain 4. Air vent Figure 8: Shutoff and air vent valves (generic pump shown) Flygt 3127 Installation, Operation, and Maintenance Manual... -
Page 24: Install With Z-Installation
1. Outlet line 2. Inlet line 3. Line to drain 4. Air vent Figure 10: Shutoff and air vent valves (generic pump shown) NOTICE: The risk of freezing is particularly high in T- or Z-installations. Flygt 3127 Installation, Operation, and Maintenance Manual... -
Page 25: Install With L-Installation
2. Run a cable between the pump and the starter and monitoring equipment. Make sure that the cable is not sharply bent or pinched. 3. Connect the motor cable and the starter and monitoring equipment according to the separate instructions. Flygt 3127 Installation, Operation, and Maintenance Manual... -
Page 26: Install With X-Installation
Make sure that the impeller rotation is correct. For more information, see . Clean all debris from the column pipe before starting the pump. 4.7 Install with X-installation In the X-installation, the pump has no pre-determined mechanical connection. The flange is drilled. Flygt 3127 Installation, Operation, and Maintenance Manual... -
Page 27: Make The Electrical Connections
WARNING: Electrical Hazard The permanent-magnet motor generates voltage when the shaft rotates, even if power sources are disconnected. Never perform any electrical work if the shaft could rotate. Flygt 3127 Installation, Operation, and Maintenance Manual... - Page 28 Contact a sales or authorized service representative. • The voltage drop in long cables must be taken into account. The drive unit’s rated voltage is the voltage measured at the cable connection point in the pump. Flygt 3127 Installation, Operation, and Maintenance Manual...
-
Page 29: Grounding (Earthing)
9. shrink tube 1. Peel off the outer jacket at the end of the cable. 2. Prepare the control element: a) Peel the insulation jacket or plastic jacket. b) Peel the aluminum and textile layers. Flygt 3127 Installation, Operation, and Maintenance Manual... -
Page 30: Connect The Motor Cable To The Pump
4.8.4 Connect the motor cable to the pump NOTICE: Leakage into the electrical parts can cause damaged equipment or a blown fuse. Keep the end of the motor cable dry at all times. Flygt 3127 Installation, Operation, and Maintenance Manual... -
Page 31: Connect The Motor Cable To The Starter And Monitoring Equipment
If the product is rated explosion-proof or intrinsically-safe, then see the specific explosion-proof information in the safety chapter before taking any further actions. NOTICE: Thermal contacts are incorporated in the pump. Flygt 3127 Installation, Operation, and Maintenance Manual... -
Page 32: Cable Charts
Check that the relays, lamps, fuses, and connections are intact. Replace any defective equipment. 4.8.6 Cable charts Description This topic contains general connection information. It also provides cable charts that show connection alternatives for use with different cables and power supply. Flygt 3127 Installation, Operation, and Maintenance Manual... - Page 33 3. Power cable leads L1 L2 L3 T1 T2 T3 T4 4. Stator (internal connection illustrated) U1 V1 W1 W2 V2 U1 V1 W1 W2 U2 V2 U1 V1 W1 W2 U2 V2 L2 L3 Flygt 3127 Installation, Operation, and Maintenance Manual...
- Page 34 * * Ground Conductor is stranded around cores Screen (WH) Screen (WH) Screen (WH) GC=Ground Check 772 17 00 (REV 7) Figure 15: 3–phase and 1–phase without built-in starter For markings on sensor leads, see Sensors connection on page 36. Flygt 3127 Installation, Operation, and Maintenance Manual...
- Page 35 U1 V1 W1 W2 U2 V2 L1 L2 L3 L3:1 L2:1 L1:1 U1 V1 W1 W2 U2 V2 L3:2 L2:2 L1:2 U1 V1 W1 W2 U2 V2 U1 V1 W1 W2 U2 V2 L1 L2 L1 L2 L3 Flygt 3127 Installation, Operation, and Maintenance Manual...
- Page 36 U1 V1 W1 W2 U2 V2 U1 V1 W1 W2 U2 V2 Y-SER U1 V1 W1 W2 U2 V2 W5 U5 V5 U6 W6 U1 V1 W1 W2 U2 V2 U1 V1 W1 W2 U2 V2 WS004128A Flygt 3127 Installation, Operation, and Maintenance Manual...
- Page 37 4 Leads Starter 4 Leads with level regulator U1 Z1 Starter 12 Leads U1 V1 U6 Starter Figure 16: Without built-in starter For more information, see Colors and markings of leads on page 32. Flygt 3127 Installation, Operation, and Maintenance Manual...
- Page 38 Screenflex screened WH T1 WH T1 WH T2 WH T2 WH T3 WH T4 (Thermal Contacts) Max. 250V Max.5A Max. 1.6A,cos =0.6 Max. 2.5A,cos =1 WH/YE Control leads T1/*OG/4 WH/YE T2/*OG/5 *SUBCAB AWG Flygt 3127 Installation, Operation, and Maintenance Manual...
- Page 39 WH T4 WH/YE T1/*OG/4 T2/*BU/5 WH/YE T2/*OG/5 *SUBCAB AWG Leakage WH T4 *SUBCAB AWG *SUBCAB AWG T2/*BU/5 WH T4 T2/*OG/5 *SUBCAB AWG *SUBCAB AWG *SUBCAB AWG T2/*BU/5 T2/*OG/5 *SUBCAB AWG *SUBCAB AWG *SUBCAB AWG Flygt 3127 Installation, Operation, and Maintenance Manual...
-
Page 40: T-Installation: Bleed Air Before Starting Pump
The starting jerk can be powerful. Make sure nobody is close to the unit when it is started. 1. Start the motor. 2. Stop the motor after a few seconds. 3. Check that the impeller rotates according to this illustration. Flygt 3127 Installation, Operation, and Maintenance Manual... - Page 41 – If the motor has a 1-phase connection, then contact a sales or authorized service representative. – If the motor has a 3-phase connection, then transpose two phase leads and do this procedure again. Flygt 3127 Installation, Operation, and Maintenance Manual...
-
Page 42: Operation
The recommended interval for the selection fraction is 0.25–0.50 (25–50%). 1. Remove, weigh, and reinstall one or more of the exterior zinc anodes before starting up the pump. 2. After two months, remove and weigh the same zinc anode or anodes again. Flygt 3127 Installation, Operation, and Maintenance Manual... -
Page 43: Start The Pump
Never put your hand into the pump housing. 3. Conduct insulation test phase to ground. To pass, the value must exceed 5 megaohms. 4. Check that the monitoring equipment works. 5. Start the pump. Flygt 3127 Installation, Operation, and Maintenance Manual... -
Page 44: Maintenance
• Lubricate all springs, screws, O-rings with grease. During the reassembly, always make sure that existing index markings are in line. The reassembled drive unit must always be insulation-tested and the reassembled pump must always be test-run before normal operation. Flygt 3127 Installation, Operation, and Maintenance Manual... -
Page 45: Torque Values
For hexagon socket head screws with countersunk head, maximum torque for all property classes must be 80% of the values for property class 8.8 above. 6.3 Change the oil This image shows the plugs that are used to change the oil. Flygt 3127 Installation, Operation, and Maintenance Manual... - Page 46 3. Unscrew the other oil plug. If this hole has the markings "oil in", raise the pump upright for a short period of time during drainage in order to drain all the oil. Flygt 3127 Installation, Operation, and Maintenance Manual...
-
Page 47: Service The Pump
6.4 Service the pump Type of Purpose Inspection interval maintenance Initial inspection A Xylem-authorized personnel checks the pump condition. Within the first year of operation. From the results, the personnel recommends the intervals for the periodical inspection and overhaul for the installation. -
Page 48: Inspection
Rotation direction Check the impeller rotation. Oil housing Fill with new oil, if necessary. Terminal block/closed end splice Check that the connections are properly secured. Thermal contacts Normally closed circuit; interval 0–1 ohm. Flygt 3127 Installation, Operation, and Maintenance Manual... -
Page 49: Overhaul
The impeller must not be allowed to make contact with the concrete floor or other hard and rough surfaces. If you fail with the impeller installation, then you must redo the installation procedure from the beginning. Flygt 3127 Installation, Operation, and Maintenance Manual... -
Page 50: Replace The Impeller: D
6.5.1.1 Remove the impeller: D CAUTION: Cutting Hazard Worn parts can have sharp edges. Wear protective clothing. 1. Remove the pump housing or the suction cover. WS001966A 2. Remove the impeller screw. If applicable, use the rod. Flygt 3127 Installation, Operation, and Maintenance Manual... - Page 51 Fit the washer on the lubricated impeller screw. c) Press the impeller onto the shaft with the impeller screw. 3. Tighten the impeller screw. If applicable, use the rod. Tightening torque: 80 Nm (59 ft-lbs) Flygt 3127 Installation, Operation, and Maintenance Manual...
- Page 52 5. Mount the pump housing: a) D-impeller: Fit a new lubricated O-ring to the pump housing. b) Fit the pump housing. c) Fit and tighten the lubricated screws. Tightening torque: 57 Nm (42 ft-lb). WS002018A Flygt 3127 Installation, Operation, and Maintenance Manual...
-
Page 53: Replace The F-Impeller
Use the impeller puller or the crowbars. Use the impeller screw to push the impeller. 6.5.2.2 Install the F-impeller 1. Prepare the shaft: a) Make sure that the end of the shaft is clean and free from burrs. Flygt 3127 Installation, Operation, and Maintenance Manual... - Page 54 Measure the distance between the edge of the impeller and the pump housing cover. The correct distance should be 0.5-1.5 mm (0.02-0.06 in). Add or remove the appropriate number of adjusting washers in order to achieve correct distance. Flygt 3127 Installation, Operation, and Maintenance Manual...
- Page 55 0.3 mm (0.01 in) onto each stud. WS002014A c) Fit the suction cover to the studs. d) Fit the lock nuts onto the studs. e) Tighten the nuts. Tightening torque: 57 Nm (42 ft-lb). Flygt 3127 Installation, Operation, and Maintenance Manual...
- Page 56 WS002105A b) Tighten the nuts. Tightening torque: 57 Nm (42 ft-lb). WS001937A 7. Raise the pump to a vertical position. Check that the impeller can rotate freely. Flygt 3127 Installation, Operation, and Maintenance Manual...
-
Page 57: Replace The M-Impeller
If applicable, use the rod. WS001977A 3. Refit the impeller screw. WS001993A 4. Fit the impeller puller and pull off the impeller and cutting wheel. – If used, remove the washer between the impeller and cutting wheel. Flygt 3127 Installation, Operation, and Maintenance Manual... - Page 58 Surplus grease can cause the impeller to become loose. Remove surplus grease from conical and/or cylindrical surfaces of shafts and/or sleeves. 2. Mount the impeller: a) Fit the conical sleeve onto the shaft. Flygt 3127 Installation, Operation, and Maintenance Manual...
- Page 59 Slide the impeller on to the shaft until you reach the correct distance. 4. Tighten the impeller screw. If applicable, use the rod. Tightening torque: 65 Nm (48 ft-lbs) Tighten a further 1/8 turn, 45° after tightening to the correct torque. Flygt 3127 Installation, Operation, and Maintenance Manual...
-
Page 60: Replacing The N-Impeller
6.5.4 Replacing the N-impeller This section is applicable to chopper hydraulics. ™ This section is not applicable for Adaptive N impellers. To see which pumps are ™ Adaptive N , see Product Description on page 11. Flygt 3127 Installation, Operation, and Maintenance Manual... - Page 61 To see which pumps are ™ Adaptive N , see Product Description on page 11. WARNING: Crush Hazard Beware of the pinch point hazard between the rotating impeller and the guide pin. Flygt 3127 Installation, Operation, and Maintenance Manual...
- Page 62 (1×0.3 mm + 1×0.5 mm + 1×1.5 mm = 2.3 mm). This creates a distance between the impeller and the insert ring that can be measured and adjusted in later steps. 2. Mount the impeller: Flygt 3127 Installation, Operation, and Maintenance Manual...
- Page 63 X = 2.3 mm + (C) - 0.2 mm Imperial units (in): X = 0.091 in + (C) - 0.008 in e) Combine the adjustment washers so the total thickness corresponds to the calculated thickness X. Flygt 3127 Installation, Operation, and Maintenance Manual...
-
Page 64: Replacing The Adaptive N Impeller
6.5.5.1 Prepare the pump for removal: T-, Z-installations The pump must be removed from the installation to change the impeller. 1. Close the valves on the inlet and outlet lines. See the following figures. Flygt 3127 Installation, Operation, and Maintenance Manual... - Page 65 Remove the flush valve cover and its gasket. b) Lock the impeller in place by inserting a rod through the hole. Figure 24: Hole for inserting rod. Generic drive unit shown. c) Remove the impeller screw. Flygt 3127 Installation, Operation, and Maintenance Manual...
- Page 66 Figure 27: Hand-tightening the impeller screw. Generic drive unit shown. f) Remove the rod. 3. Raise the pump. 4. Remove the drive unit from the pump housing: a) Remove the pump housing screws. Flygt 3127 Installation, Operation, and Maintenance Manual...
- Page 67 Remove the drive unit from the pump housing. Figure 29: Removing the drive unit. Generic drive unit shown. 5. Remove the impeller: a) Place the drive unit horizontally. b) Remove the impeller screw. Flygt 3127 Installation, Operation, and Maintenance Manual...
- Page 68 The proper lubrication is grease for bearings, for example Exxon Mobil Unirex N3, Mobil Mobilith SHC 220 or equivalent. NOTICE: Surplus grease can cause the impeller to become loose. Remove surplus grease from conical and/or cylindrical surfaces of shafts and/or sleeves. Flygt 3127 Installation, Operation, and Maintenance Manual...
- Page 69 Fit the sleeve and impeller to the shaft. d) Hand-tighten the impeller screw to prevent it from falling off. Figure 32: Fitting sleeve and impeller to the shaft. Generic drive unit shown. 4. Fit the pump housing: Flygt 3127 Installation, Operation, and Maintenance Manual...
- Page 70 Using a hexagon-bit adapter, turn the adjustment screw clockwise until the impeller makes contact with the pump housing. For tightening torque, see Torque values on page 43. b) Tighten it a further 1/8 turn (45°). Flygt 3127 Installation, Operation, and Maintenance Manual...
- Page 71 WARNING: Crush Hazard Beware of the pinch point hazard between the rotating impeller and the guide pin. g) Check that the clearance between the impeller and the insert ring is 0.1–0.6 mm (0.004–0.024 in). Flygt 3127 Installation, Operation, and Maintenance Manual...
- Page 72 6 Maintenance WS003731A Flygt 3127 Installation, Operation, and Maintenance Manual...
-
Page 73: Troubleshooting
• The start level regulator is functioning. Clean or replace if necessary. manually. • All connections are intact. • The relay and contactor coils are intact. • The control switch (Man/Auto) makes contact in both positions. Check the control circuit and functions. Flygt 3127 Installation, Operation, and Maintenance Manual... -
Page 74: The Pump Does Not Stop When A Level Sensor Is Used
The stop level is set too low. Raise the stop level. If the problem persists, then contact a sales or authorized service representative. Always state the serial number of the product, see Product Description on page 11. Flygt 3127 Installation, Operation, and Maintenance Manual... -
Page 75: The Pump Starts-Stops-Starts In Rapid Sequence
• Check the fuses. Replace fuses that have tripped. voltage on all three phases. • If the fuses are intact, then notify a certified electrician. The phase currents vary, or they are Contact a sales or authorized service representative. too high. Flygt 3127 Installation, Operation, and Maintenance Manual... -
Page 76: The Pump Delivers Too Little Or No Water
• Clean out the sump. • Check that the impeller is properly trimmed. The pipes are obstructed. To ensure a free flow, clean out the pipes. The pipes and joints leak. Find the leaks and seal them. Flygt 3127 Installation, Operation, and Maintenance Manual... - Page 77 • Depending on the installation type, add a means for priming the pump, such as a foot valve. If the problem persists, then contact a sales or authorized service representative. Always state the serial number of the product, see Product Description on page 11. Flygt 3127 Installation, Operation, and Maintenance Manual...
-
Page 78: Technical Reference
IEC 60034-1 Voltage variation without ±10%, if it does not run continuously at full load overheating Voltage imbalance tolerance Stator insulation class H (180°C [356°F]) Motor encapsulation Motor encapsulation is in accordance with IP68. Flygt 3127 Installation, Operation, and Maintenance Manual... - Page 80 For more information on how Xylem can help you, go to www.xylem.com 90016101_2.0_en-US_2020-06_IOM_Flygt 3127/BBE/0820...
Need help?
Do you have a question about the Flygt 3127 and is the answer not in the manual?
Questions and answers