Extron electronics DXP 44 HD 4K User Manual
Dxp hd 4k series
4k hdmi switchers
dxp 88 series
dxp 1616 series
Hide thumbs
Also See for DXP 44 HD 4K:
- Setup manual (60 pages) ,
- User manual (47 pages) ,
- User manual (37 pages)

Related Manuals for Extron electronics DXP 44 HD 4K


Summary of Contents for Extron electronics DXP 44 HD 4K
- Page 1 User Guide Matrix Switchers DXP HD 4K Series 4K HDMI Switchers 68-2759-01 Rev. B 04 17...
-
Page 2: Safety Instructions
Safety Instructions Safety Instructions • English Istruzioni di sicurezza • Italiano WARNING: This symbol, , when used on the product, is intended to AVVERTENZA: Il simbolo, , se usato sul prodotto, serve ad alert the user of the presence of uninsulated dangerous voltage within avvertire l’utente della presenza di tensione non isolata pericolosa the product’s enclosure that may present a risk of electric shock. - Page 3 ついては、 エクス トロンのウェブサイ ト より 『Extron Safety www.extron.com and Regulatory Compliance Guide』 (P/N 68-290-01) をご覧ください。 Copyright © 2017 Extron Electronics. All rights reserved. Trademarks All trademarks mentioned in this guide are the properties of their respective owners. The following registered trademarks( ®...
- Page 4 FCC Class A Notice This equipment has been tested and found to comply with the limits for a Class A digital device, pursuant to part 15 of the FCC rules. The Class A limits provide reasonable protection against harmful interference when the equipment is operated in a commercial environment.
- Page 5 Software Commands Commands are written in the fonts shown here: ^AR Merge Scene,,0p1 scene 1,1 ^B 51 ^W^C.0 [01] R 0004 00300 00400 00800 00600 [02] 35 [17] [03] E X! *X1&* X2)* X2#* X2! NOTE: For commands and examples of computer or device responses used in this guide, the character “0”...
-
Page 7: Table Of Contents
Contents Introduction ............1 Locking and Unlocking the Front Panel About this Guide ..........1 (Executive Modes) ........... 45 Selecting Front Panel Lock Mode 2 or About the DXP HD 4K Series Matrix Switchers ............1 Toggling between Lock Modes 2 and 0 ..45 Selecting Front Panel Lock Mode 2 or Features ............. - Page 8 Command and Response Table ......67 Reference Information ........96 Input and Output Tie Commands....67 Mounting the Switcher ........96 Input Configuration Commands ....68 UL Guidelines for Rack Mounting ....96 EDID Commands .......... 69 Rack Mounting Procedures ......97 Output Configuration Commands ....
-
Page 9: Introduction
The following models are available in fixed matrix sizes: DXP 88 series • DXP 44 HD 4K — 4 inputs by 4 outputs with 2 audio outputs • DXP 84 HD 4K — 8 inputs by 4 outputs with 2 audio outputs •... -
Page 10: Features
Features • Supports computer and video resolutions up to 4K, including 1080p @ 60 Hz Deep Color. • Supports HDMI specification features, including data rates up to 10.2 Gbps, Deep Color up to 12-bit, 3D, and HD lossless audio formats. •... - Page 11 Global presets — Up to 32 frequently used I/O configurations may be saved and • recalled using the front panel buttons, Ethernet, USB, or serial control. This time-saving feature allows I/O configurations to be set up and stored in memory for future use. •...
-
Page 12: Application Diagrams
Application Diagrams Satellite Receivers Blu-ray Players PUSH PUSH POWER GUIDE MENU 480p 720p 1080i 1080p DIRECTV SELECT D I R E C T V STANDBY/ON PQLS HDMI OPEN/CLOSE FL OFF PUSH PUSH DIRECTV POWER GUIDE MENU 480p 720p 1080i 1080p Extron SELECT D I R E C T V... - Page 13 Operations Center Audio Extron FF 220T Ceiling Speakers Videowall HDMI CPUs Extron Quantum Connect Scalable Multi-Graphic HDMI Videowall Processor System DATA Traf c Cam Receivers DBS RECEIVER QUANTUM CONNECT 408 VIDEO WALL PROCESSOR DBS RECEIVER Extron Satellite MPA 401-70V Displays Receivers Power Ampli er HDMI...
-
Page 14: Installation
Installation This section describes the rear panels of the DXP HD 4K switchers and provides instructions for cabling. It covers the following topics: • Rear Panels • Connecting to the LAN Port Connecting to the Remote RS-232 Port • • Connecting to the USB Config Port Rear Panels Most of the connectors are on the rear panels of the DXP HD 4K switchers. -
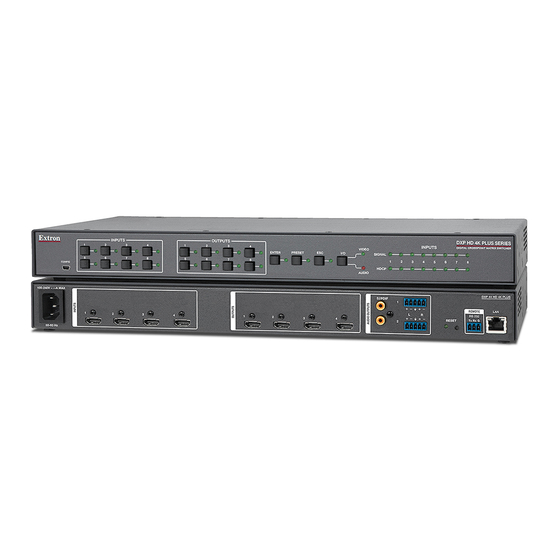
Page 15: Dxp 44, 84, And 88 Hd 4K
NOTE: Figure 3 shows a DXP 88 HD 4K. The rear panels of the DXP 44 and DXP 84 models are identical to this model except for the number of inputs and outputs: • DXP 44 HD 4K — 4 inputs and 4 outputs • DXP 84 HD 4K — 8 inputs and 4 outputs •... - Page 16 Input connectors — Connect HDMI source devices to these female 19-pin type A HDMI input connectors. LockIt cable lacing brackets, one for each HDMI input and output connector, are provided with the DXP HD 4K. These brackets can be used to secure the HDMI cables to the DXP connectors to reduce stress on the HDMI connectors and prevent signal loss due to loose cable connections.
- Page 17 Analog audio outputs — Connect powered speakers, an amplifier, or other audio output device to these 5-pole 3.5 mm captive screw connectors for 2-ch stereo analog audio output. These connectors can de-embed LPCM audio that was routed from any DXP HDMI input and convert it to a stereo analog signal. Figure 5 shows how to wire these connectors.
-
Page 18: Connecting To The Lan Port
Connecting to the LAN Port When connecting a computer to the DXP LAN port, it is essential that you use the correct Ethernet cables, and that they be properly terminated with the correct pinout (see figure 7). Ethernet links use Category (CAT) 3, 5e, or 6 unshielded twisted pair (UTP) or shielded twisted pair (STP) cables, terminated with RJ-45 connectors. -
Page 19: Connecting To The Remote Rs-232 Port
Connecting to the Remote RS-232 Port The DXP HD 4K switchers have a rear panel Remote serial port through which they can be configured via SIS commands (serial commands that control the switcher through this connector). Wire the 3.5 mm captive screw Remote RS-232 connector as shown in figure 8. Tx Rx G DXP HD 4K Rear Panel... -
Page 20: Connecting To The Usb Config Port
Connecting to the USB Config Port The USB mini-B Config port is located on the DXP front panel. It provides an alternative connection for configuring the switcher via SIS commands. Use a USB A to mini-B cable to connect the USB Config port to a USB port on the computer. - Page 21 One of the following screens may open: Windows XP and earlier — If the following screen is displayed, specify whether • you want the computer to connect to Windows Update in order to search the web for the driver that it needs to communicate with the DXP via the USB port (this is not necessary if the USB driver already exists on your computer).
- Page 22 Windows XP and earlier — Click . On the next screen, make sure that the Next radio button is selected, then Install the software automatically (Recommended) click (you do not need to insert a disc). Next Figure 11. Selecting the Radio Button to Install the USB Driver Automatically The computer locates the driver needed for it to communicate with the DXP through the USB port.
-
Page 23: Securing The Hdmi Connectors Using The Lockit Hdmi Cable Lacing Bracket
Securing the HDMI Connectors Using the LockIt HDMI Cable Lacing Bracket 1 1 1 After connecting an input or output device to an HDMI connector, secure the connector in place with the provided LockIt bracket (see the illustration at right): Plug one or both HDMI cables into the panel 2 2 2 connection (... -
Page 24: Operation
Operation This section describes the DXP front panel controls and the procedures for configuring and operating the DXP switchers. Topics include: Definitions • • Front Panel Controls and Indicators Powering On • • Creating or Changing a Configuration • Viewing a Configuration Saving and Recalling Presets •... -
Page 25: Front Panel Controls And Indicators
Room — A subset of outputs that are logically related to each other, as determined by • the operator. The switchers support up to 10 rooms, each of which can consist of 1 to 16 outputs. Each room can have up to 10 presets. •... - Page 26 NOTE: Although the DXP 44 and 84 both have eight input and eight output buttons, not all these buttons are functional for making ties: • DXP 44 — Only input and output buttons 1 through 4 are functional, except for creating and recalling presets (see Saving and Recalling Presets on page 37).
- Page 27 Output buttons — The output buttons have the following functions: Primary: Select outputs. • Identify the selected outputs. • Secondary: Saving and Recalling Presets Save and recall presets (see on page 37). • Mute video and audio output (see Muting and Unmuting Outputs from the •...
- Page 28 Secondary: Select the 38400 baud rate for the Remote RS-232 port. • > With the , and buttons, place the switcher in serial port • Enter Preset configuration mode. Indicate that the Remote RS-232 port is set to 38400 baud in serial port •...
-
Page 29: Button Icons - Dxp 1616 Series Only
Secondary: Set the front panel lock mode (executive mode). • View the video or audio mute status of the selected input or output. • Using the button, select between front panel lock modes (lock mode 2 and • Enter lock mode 0) (see Locking and Unlocking the Front Panel (Executive Modes) on page 45). -
Page 30: Powering On
Powering On Apply power by connecting the provided IEC power cord to the rear panel IEC connector and to an AC source. The switcher performs a self-test as follows: • DXP 1616 series — The front panel buttons blink green, red, and amber, then turn off. An error-free power-up self-test sequence leaves all I/O and control buttons either unlit or showing background illumination. -
Page 31: Creating Ties
Output buttons or LEDs light or blink one of the following colors: • Green — Video only ties • Red — Audio only ties (outputs 1 and 2 on the DXP 88 series, outputs 1 • through 4 on the DXP 1616 series) Amber —... - Page 32 Press and release the button to select video or audio as desired. NOTE: For the DXP 88 Series, you cannot select both audio and video for a tie at the same time. You must repeat the tie process for each type of tie (audio and video) that you want to create for the desired input and output.
- Page 33 To select video and audio for the tie, press and release the buttons as Video Audio necessary until both the buttons light. I / O VIDEO AUDIO Press the Video button to toggle on and off. Press the Audio button to toggle on and off. The button lights green when selected.
-
Page 34: Adding A Tie To A Set Of Ties
Press and release the button. Enter Press the Enter button to confirm the configuration change. All input and output buttons become unlit or return to ENTER background illumination. The Enter button becomes unlit or returns to background illumination. Figure 24. Press Enter to Confirm the Tie In this example, the configuration now is input 4 video and audio tied to output 1, output 2, and output 3. - Page 35 Press and release the desired input button. If only video is selected, its LED lights green to indicate that video outputs can be • tied to or untied from this input. Output button LEDs for any outputs already tied to the selected input light green also (see figure 27).
- Page 36 DXP 1616 series In this example, a new tie is added to an existing configuration. > Press and release the button. Press the Esc button to clear all selections. C O N T R O L VIEW ENTER PRESET The button blinks once. Figure 29.
- Page 37 Press and release the button for the output to be added to the configuration (Output 4 in this example. Press and release the desired Output button. The button blinks green to indicate that the selected video input will be tied to this output. INPUTS 9 10 11 12 14 15 16...
-
Page 38: Removing A Tie From A Set Of Ties
Removing a Tie from a Set of Ties DXP 88 Series To undo an existing I/O tie: > Press and release the button to clear any previous selections. Press the desired I/O button ( ) for the type of tie you want to break. Video Audio VIDEO... - Page 39 DXP 1616 Series To remove a tie from a configuration: > Press and release the button. Press the Esc button to clear all selections. C O N T R O L VIEW ENTER PRESET The button blinks once. Figure 38. Clear All Selections Press and release the button as needed to select the type of tie to be...
- Page 40 Press and release the Output button for the tie to be broken (output 1 in the example in figure 41). Press and release the desired Output button. The button blinks to indicate the pending change: in this example it blinks red because audio input will be untied. 9 10 11 12 14 15 16 OUTPUTS...
-
Page 41: Viewing A Configuration
Viewing a Configuration You can view the current set of video and audio ties using the front panel buttons. The view-only mode prevents inadvertent changes to the current configuration. View-only mode also provides a way to mute outputs (see Muting and Unmuting Outputs from the Front Panel on page 41). - Page 42 DXP 1616 Series To view ties on the DXP 1616 series: > Press and release the button. Press the Esc button to clear all selections. C O N T R O L VIEW ENTER PRESET The button blinks once. Figure 46. Clear All Selections Select the input or outputs whose ties you want to view by pressing the input and output buttons.
- Page 43 < Press and release the button to put the switcher in view-only mode. The View < button lights green. All output buttons that are not tied light as follows: View Amber — No tied video or audio input (outputs 1 through 4 only) •...
- Page 44 To view video ties only — Press and release the button to toggle it to • Video green and the button to toggle it to either unlit or background-illuminated. Audio Press the Audio Press the Video button I / O button to deselect it.
-
Page 45: Saving And Recalling Presets
Saving and Recalling Presets A preset is a complete map of all input and output connections. The current configuration (0) can be saved as a preset in any one of 16 preset memory slots (DXP 88 series) or 32 preset slots (DXP 1616 series). - Page 46 DXP 88 Series — Saving and recalling a preset Press the button to clear any previous selections. The Esc LED blinks green once. To save a preset, press and hold the button until the Preset LED starts blinking. Preset To recall a preset, press and release the button.
- Page 47 Press and hold the button until it blinks (approximately 2 seconds). Preset Press and hold the Preset button until it blinks. PRESET PRESET 2 seconds All buttons with assigned presets light. If you then save the configuration to a lit preset number, the configuration data at that preset Preset Assigned location will be overwritten.
- Page 48 Press and release the button (the example in figures 61 and 62 shows an audio Preset preset). Press and release the Preset button. The Preset button lights. PRESET Preset Assigned All buttons with assigned presets light. INPUTS 9 10 11 12 14 15 16 No Preset Assigned Figure 61.
-
Page 49: Muting And Unmuting Outputs From The Front Panel
Muting and Unmuting Outputs from the Front Panel NOTES: • You can mute video and audio, video-only, or audio-only outputs. Pressing and releasing the button and the button toggles each selection on and off. Video Audio • When the DXP enters view-only mode, the output LEDs light for all outputs without ties. -
Page 50: Dxp 1616 Series - Muting And Unmuting Outputs
DXP 1616 Series — Muting and Unmuting Outputs > Press and release the button. Press the Esc button to clear all selections. C O N T R O L VIEW ENTER PRESET The button blinks once. Figure 66. Clearing All Selections <... - Page 51 One at a time, press and hold the buttons for the outputs to be muted, until each button begins to blink (approximately 2 seconds). The video and audio signals are muted for all the selected outputs (outputs 3 and 4 in the example in figure 69). Mute outputs one at a time.
-
Page 52: Viewing The Mute Status
Viewing the Mute Status To check the mute status of an output: DXP 88 series Press the button to clear any previous selections. Press the button to select the type of signal to view (video or audio). Press the button for the output to be viewed. If the selected output is muted, the button LED blinks red (audio) or green (video), •... -
Page 53: Locking And Unlocking The Front Panel (Executive Modes)
Locking and Unlocking the Front Panel (Executive Modes) The matrix switchers have three levels of front panel security lock that limit the operation of the switcher from the front panel: • Lock mode 0 — The front panel is completely unlocked. All front panel functions are available. -
Page 54: Selecting Front Panel Lock Mode 2 Or Toggling Between Lock Modes 2 And 1
DXP 1616 series — toggling between lock modes 2 and 0 Toggle the front panel lock on and off by pressing and holding the , and Enter Video Audio buttons simultaneously until the following buttons blink twice (approximately 2 seconds). •... -
Page 55: Switching From Lock Mode 1 To Lock Mode 0
DXP 44, 84, and 88 DXP 168 and 1616 Press and hold Press and hold simultaneously. simultaneously. I / O VIDEO AUDIO 2 seconds 3 seconds VIDEO I / O VIDEO AUDIO AUDIO The Esc, Video, and Audio LEDs The Esc, Video, and Audio LEDs blink twice. - Page 56 DXP 88 series — resetting from the front panel To reset the DXP 44, 84, or 88 switcher to the factory default settings: Press and hold the button while you apply AC power to the switcher. Press and hold the I/O button while you apply power to the switcher.
-
Page 57: Resetting Using The Rear Panel Reset Button
Resetting Using the Rear Panel Reset Button figures 3 and The rear panel has a recessed button (see ) that initiates various Reset levels of soft resets, which restore various tiers of switcher settings to their defaults. For different reset levels, press and hold the button while the switcher is running or press and hold the button while you apply power to the switcher. - Page 58 Reset Modes Summary for DXP HD 4K Series Mode Activation Result Purpose/Notes Hold in the recessed button • Restores the factory-installed Use mode 1 Reset while applying power to the switcher. firmware for a single power cycle. to revert to the factory firmware •...
-
Page 59: Selecting The Remote Rs-232 Port Baud Rate
To perform a hardware reset of the switcher: Use a stylus or small Philips screwdriver to press and hold the rear panel button Reset until the front panel buttons blink twice (for a system reset) or three Video Audio times (for an absolute reset). Press and hold Release, then immediately the Reset button. - Page 60 Press the appropriate Control button to select the baud rate: = 9600 • Enter = 19200 • Preset = 38400 (DXP 168 and 1616 only) • View NOTE: On the DXP 88 series, this rate can be selected via SIS commands (see Serial port configuration commands on page 80).
-
Page 61: Setting The Button Background Illumination - Dxp 1616 Series Only
Setting the Button Background Illumination — DXP 1616 Series Only The buttons on the front panel can be set to have amber background illumination at all times or the background illumination can be turned off. To toggle the background illumination on and off, press and hold the Input 1 and Input 2 buttons simultaneously until the button background illumination changes (approximately 2 seconds. -
Page 62: Worksheet Example 1: System Equipment
Worksheet Example 1: System Equipment Figure 80 shows a worksheet for a DXP in a fictional organization with the system hardware annotated. Output 7 has no connection in this organization, so it has been crossed out on the worksheet. Input Sources Editing Media Editing... -
Page 63: Worksheet Example 2: Daily Configuration
Worksheet Example 2: Daily Configuration Figure 81 continues from worksheet example 1 by showing the video ties that make up the configuration of preset 1. A solid ink line shows video ties. Input Sources Editing Media Editing Media Editing Media Editing 400DVI Station... -
Page 64: Worksheet Form
Input Sources Output Destinations Preset # Title: Fill in the preset number and use colors, or dashes, and so on, to make connecting lines. Disregard or cross out the input and output boxes that do not apply to your switcher. DXP HD 4K Configuration Worksheet... -
Page 65: Sis Configuration And Control
The copyright message is displayed upon connecting to a switcher via TCP/IP or Telnet or after a power cycle via RS-232, and depends on the switcher model. (c) Copyright YYYY, Extron Electronics, [model], Vn.nn, 60-nnnn-nn (day, date, and time as in Mon, 18 May 2015 11:27:33) Ddd, DD MMM YYYY HH:MM:SS is the device name. -
Page 66: Device-Initiated Messages
Device-Initiated Messages When a local event such as a front panel selection or adjustment takes place, the matrix switcher responds by sending a message to the host. No response is required from the host. Example switcher-initiated messages are listed here. •... -
Page 67: Error Responses
Error Responses When the switcher receives a valid command, it executes the command and sends a response to the host device. If the unit is unable to execute the command, it returns an error response to the host. Error codes —... -
Page 68: Sis Overview
SIS Overview Using the Command and Response Table Command and Response Table beginning on page 67 lists the commands that the switcher recognizes as valid, the responses that are returned to the host, a description of the command function or the results of executing the command, and examples of commands in ASCII. -
Page 69: Symbol Definitions
Symbol Definitions • = Space = Carriage return with line feed = Carriage return with no line feed = Escape key = Superscripts indicate the error message displayed if the command is entered incorrectly or with invalid parameters (see Error Responses on page 59). - Page 70 = Video mute = unmute = video mute = video and sync mute = Audio mute = unmute = HDMI audio mute = Analog audio mute = HDMI and analog audio mute = S/PDIF mute = HDMI audio and S/PDIF mute = Analog audio and S/PDIF mute = HDMI audio, analog audio, and S/PDIF mute...
- Page 71 = Subnet mask = default) nnn.nnn.nnn.nnn 255.255.0.0 = Gateway address = default) nnn.nnn.nnn.nnn 0.0.0.0 = MAC address 00-05-A6-xx-xx-xx = Open connections 0-<maximum number of open connections> = Port timeout in 10-second intervals ( = default) 65000 = Device name Maximum 63 alphanumeric characters or hyphens.
- Page 72 = EDID reference file for DDC = 720p @ 60 Hz (default) See the EDID tables, starting below. DXP 44 and 84 – = fixed factory rates – = not selectable (outputs) – = user assignable DXP 88 – = fixed factory rates –...
- Page 73 DXP 88 EDID Table — DDC Source Selection Resolution Refresh Refresh or Source/ Resolution Value Value (Hz) (Hz) Destination 2ch Audio **Outputs 1280x800 Output 1 1440x900 Output 2 1600x900 Output 3 1680x1050 Output 4 1920x1200 Output 5 2560x1440 Output 6 2560x1600 Output 7 720p...
- Page 74 DXP 168 and 1616 EDID Table — DDC Source Selection Resolution Refresh Refresh or Source/ Resolution Value Value (Hz) (Hz) Destination 2ch Audio **Outputs — DXP 1616 only 1280x800 Output 9 1440x900 Output 10 1600x900 Output 11 1680x1050 Output 12 1920x1200 Output 13 2560x1440...
-
Page 75: Command And Response Table
Command and Response Table Command ASCII Command Response Additional Description (host to switcher) (switcher to host) Input and Output Tie Commands Individual ties Tie HDMI input to HDMI and X@ • X! • Tie or untie an HDMI input to audio outputs HDMI and audio output. -
Page 76: Input Configuration Commands
Command ASCII Command Response Additional Description (host to switcher) (switcher to host) Input Configuration Commands Input name Set input name E X! Set the name of an input. View input name E X! View name of an input. Input video format View video format View the video format for an input. -
Page 77: Edid Commands
Command ASCII Command Response Additional Description (host to switcher) (switcher to host) EDID Commands Input EDID Assign EDID to an input X4$] Assign an EDID file to an input. EDID EdidA Assign EDID to all inputs X4$] Assign an EDID file to all inputs. EDID EdidA00* View EDID assignment... -
Page 78: Output Configuration Commands
Command ASCII Command Response Additional Description (host to switcher) (switcher to host) Output Configuration Commands Output name Set output name E X@ Set the name of an output. View output name E X@ View the name of an output. Verbose mode 2 and 3 TMDS output format Set TMDS format E X@... -
Page 79: Audio Configuration Commands
Command ASCII Command Response Additional Description (host to switcher) (switcher to host) Video mutes Set video mute Mute an output. X1@] View video mute status View the mute setting of an X1@] output. X1@] Verbose mode 2 and 3 Set video mute to all outputs Mute all outputs. -
Page 80: Preset Commands
Command ASCII Command Response Additional Description (host to switcher) (switcher to host) Audio mute NOTES: DXP 88 series — For outputs 1–2, – . For outputs 3-8, – DXP 1616 series — For outputs 1–4, – . For outputs 5-16, –... - Page 81 Command ASCII Command Response Additional Description (host to switcher) (switcher to host) Rooms Set room outputs Set outputs to a room. E X1* = desired number of outputs within the maximum number. View room outputs View the outputs of a E X1* room.
- Page 82 Command ASCII Command Response Additional Description (host to switcher) (switcher to host) Room presets = maximum number of outputs. NOTE: Save room preset Save the current configuration X1* • X1(] to a room preset. Recall room preset Apply a room preset X1* •...
-
Page 83: Advanced Configuration Commands
Command ASCII Command Response Additional (host to switcher) (switcher to host) Description Advanced Configuration Commands Front Panel Lockout mode (Executive mode) Set Front Panel Lockout mode X2)] Set the accessibility to front panel operation. View Front Panel Lockout X2)] View the accessibility mode level for front panel operation. -
Page 84: Device Commands
Command ASCII Command Response Additional Description (host to switcher) (switcher to host) Device Commands Verbose mode Set verbose mode E X2# X2#] Enable or disable verbose mode and tagged responses, where additional information is provided in response to a query. View verbose mode View the verbose mode. - Page 85 Command ASCII Command Response Additional Description (host to switcher) (switcher to host) Information requests General information X@ • View the number of inputs and outputs for video and audio connectors on the device. X@ • Verbose mode 2 and 3 Info00*V View firmware version View the current firmware version.
-
Page 86: Ip Control Port Commands
Command ASCII Command Response Additional Description (host to switcher) (switcher to host) IP Control Port Commands IP setup Set DHCP mode Enable or disable DHCP. E X# View DHCP mode View the DHCP mode setting. Set IP address Set the IP address. E X2* •... - Page 87 Command ASCII Command Response Additional Description (host to switcher) (switcher to host) Device name Set device name E X3^ • X3^] Set the device name. NOTES: • The first character must be an alpha character. The last character must not be a hyphen. No blank or space characters are permitted.
- Page 88 Command ASCII Command Response Additional Description (host to switcher) (switcher to host) Passwords NOTES: • Passwords are case-sensitive. • The pipe ( ) character is invalid for passwords. • A password cannot be a single space. Set administrator password E X4@ •...
-
Page 89: Configuration Software
Configuration Software The Extron Product Configuration Software (PCS) offers another way to control the switchers via USB or TCP/IP connection. The graphical interface includes many of the same functions as those on the device front panel and through SIS commands. This section describes the software installation and communication. - Page 90 On the Extron website, select the tab (see figure on the previous Download page). From the left sidebar, click the link ( Software If PCS is featured in the left sidebar, click the link to go directly to the PCS TIP: product page (see PCS Product Page...
-
Page 91: Pcs Product Page
PCS Product Page Figure 86. PCS Product Page In the field (see figure 86, ), type . A drop-down menu of selected search Search results appears under the field. Press < > on the keyboard or select from the drop-down menu. Enter Click the button (... -
Page 92: Software Connection
Software Connection Open the Product Configuration Software program from the menu or desktop Start shortcut. The Extron window opens with the Product Configuration Software Device panel open. Connect to the switcher using the panel or the Discovery Device Discovery panel. TCP/IP Figure 87. -
Page 93: Device Discovery Panel
Device Discovery Panel panel displays accessible Extron devices connected directly to Device Discovery the PC or to a LAN or WAN. Devices are identified and sorted by model, IP address, device name, or connection method. Figure 88. Device Discovery Panel To sort the list of available devices: Click the tab (see figure 88,... -
Page 94: Tcp/Ip Panel
TCP/IP Panel panel connects PCS to a specific device through Ethernet. TCP/IP Figure 89. TCP/IP Panel Click the tab (see figure 89, TCP/IP In the field ( ), enter the IP address of the desired device. IP Address If required, enter the device password in the field ( Password NOTE: Select the... -
Page 95: Offline Device Preview
Offline Device Preview Opening a new device tab for an offline device displays the interface and configuration options for the chosen model without connecting to it. However, settings cannot be changed. To open a switcher device tab: In the drop-down menu, select . -
Page 96: Help File Access
Help File Access PCS contains two help files: one for PCS and one for the connected switcher. The Product Configuration Software Help file contains information about PCS and how to use it. To access the help file, click from the menu in the top Extron PCS Help Software... -
Page 97: Internal Web Page
Internal Web Page This section provides procedures for accessing and using the DXP internal Web pages. Topics in this section include: • Web Page Access • Web Page Overview The internal Web page displays information about the device and provides basic configuration options. -
Page 98: Web
Web Page Overview Input Status Panel Communication Settings Panel Date/Time Settings Panel (next page) (page 92) (page 94) Output Status Panel Device Info Panel Passwords Panel (next page) (page 93) (page 95) Figure 94. Internal Web Page (DXP 168 HD 4K) DXP HD 4K Series •... -
Page 99: Input Status Panel
Input Status Panel figure panel (see , on the previous page) displays information Input Status about the connected inputs. The number of inputs displayed depends on the number of inputs available on the DXP HD 4K Series model. Each input is identified by number in the left column. For each input, the following information is displayed: Input name —... -
Page 100: Communication Settings Panel
Communication Settings Panel figure panel (see on page 90) configures TCP/IP Communication Settings settings and displays RS-232 settings. To configure the TCP/IP settings, click the Edit button in the panel. The dialog box Communication Settings Communication Settings opens. Figure 95. Communication Settings Dialog Box NOTE: The hostname is generated from the device name. -
Page 101: Device Info Panel
Device Info Panel panel (see figure on page 90) displays information about the Device Info device with options to edit the device name and update firmware. Device name To edit the device name or hostname, click the button in the panel. -
Page 102: Date/Time Settings Panel
Date/Time Settings Panel figure panel (see , on page 90) displays the date and Date/Time Settings time on the device and provides options to set the device date and time automatically or manually. Automatic date and time update This method sets the device date and time to the same date and time of the PC. To do this, click the button in the panel. -
Page 103: Passwords Panel
Passwords Panel figure panel (see on page 90) provides an option to set Passwords administrator or user passwords. To assign passwords, click the button in the panel. The dialog box opens. Passwords Passwords Figure 99. Passwords Dialog Box To assign an administrator password: In the field, enter the new password. -
Page 104: Reference Information
Reference Information This section provides reference information on the DXP HD 4K Series. The following topics are covered: • Mounting the Switcher • Making Labels Using the Button-Label Generator Program — DXP 1616 Series Only • Network Setup Mounting the Switcher The DXP HD 4K series switchers can be placed on a table top (with the four provided rubber feet attached) or mounted to a standard 19-inch rack. -
Page 105: Rack Mounting Procedures
Rack Mounting Procedures To rack mount the DXP HD 4K: • DXP 88 series — Using a 19-inch rack shelf kit (available at www.extron.com), mount the unit to the rack, following the instructions provided with the mounting kit. DXP 1616 series — These switchers are housed in rack-mountable metal enclosures •... -
Page 106: Making Labels Using The Button-Label Generator Program - Dxp 1616 Series Only
By default, the Windows installation creates a C:\Program Files\Extron\ directory and places the Button Label Generator icon into a group ButtonLabelGenerator or folder named “Extron Electronics.” NOTE: ... for 64-bit Windows OS. Program Files(x86)\ DXP HD 4K Series • Reference Information... -
Page 107: Using The Button Label Generator Software
Start the Button Label Generator program by clicking the desktop icon or as follows: Click > > > > Start All Programs Extron Electronics Button Label Generator . The window opens (see Button Label Generator Button-Label Generator figure 103). Figure 103. -
Page 108: Installing Labels In The Buttons
Installing Labels in the Buttons Install new labels in the front panel buttons as follows: Remove the button from the matrix switcher; use a small, flat bladed screwdriver such as an Extron Tweeker to gently pry a button out from the front panel (see figure 104). Base Diffuser Clear Lens... - Page 109 DXP HD 4K Series • Reference Information...
-
Page 110: Network Setup
Network Setup What is an IP Address? An IP address is a 32-bit binary number that is used to identify each device on an Ethernet network. This number is usually represented by four decimal numbers (called “octets”), each in the range of 0 through 255 and separated by dots; for example, 198.123.34.240. This is called “dotted decimal notation.”... -
Page 111: Subnet Mask
The following is an example of an invalid Class C addressing scheme: Device IP Address Matrix Switcher Control Software computer 168.192.180.41 DXP HD 4K switcher 192.168.180.42 NOTE: The above addresses are invalid because the network identifier for each address is not the same even though each IP address is unique. You can perform a test from your computer to check that a device at a particular address is responding correctly or to determine its address (see Pinging for the IP... -
Page 112: Connecting As A Telnet Client
At the command prompt, enter . The computer returns a display ping IP address similar to figure 105. The line reports the actual numeric IP address, regardless of whether you Pinging ... entered the actual numeric IP address or an alias name. Figure 105. - Page 113 Connecting to the DXP (Open command) Connect to the DXP switcher using the command. After your computer is connected Open to the switcher, you can enter the SIS commands the same as you would if you were using the RS-232 link. Connect to the DXP as follows: At the Telnet prompt, enter open IP address...
-
Page 114: Subnetting, A Primer
Setting carriage return-line feed Unless commanded otherwise, Telnet transmits a line feed character only (no carriage return) to the connected switcher when you press the <Enter> key. This is the correct setting for SIS communication with the switcher. The Telnet command forces set crlf Telnet to transmit carriage return and line feed characters when <Enter>... -
Page 115: Subnet Masks And Octets
Subnet masks and octets The subnet mask (see figure 108) is used to determine whether the local and remote devices are on the same subnet or different subnets. The subnet mask consists of four numeric octets separated by dots. Each octet can be numbered from 000 through 255. Leading zeros, up to three digits total per octet, are optional. - Page 116 Extron Electronics makes no further warranties either expressed or implied with respect to the product and its quality, performance, merchantability, or fitness for any particular use. In no event will Extron Electronics be liable for direct, indirect, or consequential damages resulting from any defect in this product even if Extron Electronics has been advised of such damage.
Need help?
Do you have a question about the DXP 44 HD 4K and is the answer not in the manual?
Questions and answers