
Related Manuals for Gram AH series


Summary of Contents for Gram AH series
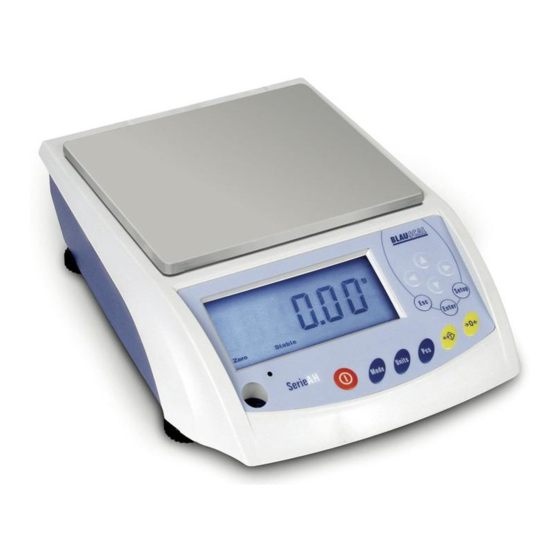
- Page 1 SERIES / SERIE / SÉRIE OPERATION MANUAL MANUAL DE UTILIZACION MANUEL D´UTILISATION...
-
Page 2: Table Of Contents
INDEX English Requirements for an optimal installation Unpacking Installation Description of display Keyboard description Weight unit selection Reset to zero TARE Overload message Pieces counting function Percentages function (%) Parameters setting Calibration Fast calibration Main weight unit selection Second unit weight selection Autopower off configuration Data transmission configuration Baud rate configuration... - Page 3 Conversion table of weight units Capacities table Technical characteristics Guarantee...
- Page 4 ÍNDICE Español Requisitos para una óptima instalación Desembalaje Puesta en marcha Descripción del display Descripción del teclado Selección de las unidades de pesada Puesta a cero Tara Alarma de sobrecarga Función de cuentapiezas Función de porcentajes (%) Parámetros para la configuración Calibración Calibración rápida Selección de la unidad principal de pesada...
- Page 5 Tabla de conversión de las unidades de pesada Tabla de capacidades Características técnicas Garantía...
- Page 6 SOMMAIRE Français Recommandations pour une optimisation maximale Déballage Mise en marche Description de l’écran Description du clavier Selection des unités de pesée Retour a zero Tare Alarme de surcharge Fonction de compte-pieces Fonction de pourcentages (%) Parametres pour la configuration Calibrage Calibrage rapide Sélection de l’unité...
- Page 7 Changement d’unités de pesée Tableau de capacités Caracteristiques techniques Garantie...
-
Page 8: Requirements For An Optimal Installation
ENGLISH REqUIREMENTS fOR AN OPTIMAL INSTALLATION To obtain the maximum performance and the best results, we recommend installing the balance according to the following requirements: • Install it on a firm and stable surface. • Place it on a stable base free of vibrations. •... - Page 9 • A stainless steel pan. • An AC/Adaptor of 12 V / 800 mA; don´t use any other adaptor, it could damage the balance. • A CD-ROM with USB adaptor. • A USB cable. • Five pieces of windshield. VERY IMPORTANT: Keep the original package. It could be useful in the future ...
-
Page 10: Installation
INSTALLATION 1. Remove the package from the carton. 2. Remove the pan from the cardboard. 3. Remove the AC/Adaptor (it is inside a white box). 4. Take out the balance from its protection and place it on its definitive place of use, which should be a flat, non-metallic, most stable and rigid surface. -
Page 11: Description Of Display
Press enter: The display shows it when it is needed to confirm the function. 10. Press Esc: The display shows it when you can return to previous menu or exit. 11. Weight units symbols: Quilate Pound Ounce Grain ozt: Troy ounce dwt: Pennyweight t1.T: Tael pcs: Pieces counting Percentages Kilogram Gram... -
Page 12: Keyboard Description
kEYbOARD DESCRIPTION To turn on or to turn off the scale. To select between weight, pieces-counting or percentage modes. To select the weight unit. There are 8 weight units available. To enter the sample in pieces-counting function. To tare a container or product and then obtain the net weight. To reset the display to zero. -
Page 13: Weight Unit Selection
WEIgHT UNIT SELECTION Press the key to select the weight units, the display will view the options. There are 8 weight units available. RESET TO ZERO If the zero value varies during the weighing, press the key, the display will show zero again. TARE This function allows calculating the net weight of a product. -
Page 14: Pieces Counting Function
PIECES COUNTINg fUNCTION The pieces counting function is used to count the number of pieces deposited on the pan. 1. Place a container on the pan and press the key. 2. Insert a certain number of pieces (10, 20, 50 or 100) into the container. This number of pieces is the initial sample, the higher number grants more accuracy in final counting. -
Page 15: Parameters Setting
From this moment, the balance is ready to use the percentage function. When the sample value is less than 0.2d, the display shows “---or---%”. It means that the sample is too small, therefore, will need to add bigger samples. Note: To exit from pieces-counting or percentages function, press the key to return to normal weighing mode. -
Page 16: Calibration
CALIbRATION When the display shows “CAL”, press the key to access to Auto-Calibration mode. Use the keys and , to enter the calibration weight value, then press the key to confirm. Place the calibration weight on the pan, when the balance is stable, it will return to initial mode of weighing. -
Page 17: Autopower Off Configuration
to choose “ON” or “Off”, then press to confirm. To return to previous menu or to exit, press the key. AUTOPOWER Off CONfIgURATION key until the screen shows the message “A.Off”, then press Press the Use the keys to select the auto power time, example: no, 2, 5, or 8 minutes. -
Page 18: Baud Rate Configuration
bAUD RATE CONfIgURATION key until the screen shows the message “rate”, then press Press the key. Use the keys to select the baud rate (1200, 2400, 4800 and 9600) and press to confirm. Press the key to return to previous menu or to exit. (Default value: 2400) fILTER SELECTION key until the screen shows the message “fI 105“, then press... -
Page 19: Auto - Zero Selection
ZEro2. correction of two divisions. ZEro3. correction of three divisions. ZEro0. without correction. AUTO - ZERO SELECTION key until the screen shows the message “trAC1”, then press Press the key. Use the keys to select the auto-zero tracking. Press the key to confirm. -
Page 20: Backlight Configuration
Use the keys to select the desired mode (Yes - “Y” or Not - “N”). Press the key to confirm. Press the key to return to previous menu or to exit. (Default value: “YES”) A.C Y. automatic auto-sample A.C N. auto-sample disabled. bACkLIgHT CONfIgURATION key until the screen shows the message “b1.1”, then press Press the... -
Page 21: Output Rs-232C
OUTPUT RS-232C Mode: signal EIA-RS-232 C’s UART, or signal USB. format: baud rate: 1200, 2400, 4800 and 9600 bauds Data bits: Parity bit: Stop bit: Code bit: ASCII Input Pin: 2 (RxD) Output Pin: 3 (TxD) Signal Pin: 5 (Masa) CAbLE TO CONNECT THE PC TO THE bALANCE Computer balance... -
Page 22: Data Format
DATA fORMAT Head 1 Head 2 Data Unit CR LF HEAD 1 (2 bYTES) HEAD 2 (2 bYTES) OL – Over Load ST – Stable NT – Net Weight US – Unstable gS – Gross Weight DATA (8 bYTES) 2D (HEX) = “-“ (LESS) 20 (HEX) = ”... -
Page 23: Conversion Table Of Weight Units
CONVERSION TAbLE Of WEIgHT UNITS 1 ct (MET.CARAT) =0.1999694 g 1 lb (AVOIDUPOIS POUND) =453.59237 g 1 oz (AVOIDUPOIS OUNCE) =28.349523125g 1 GN (GRAIN) (U.K) =0.06479891 g 1 ozt (TROY OUNCE) =31.1034768 g 1 dwt (PENNYWEIGHT) =1.55517384 g 1 t1.T (TAEL) (TWN) =37.799375 g CAPACITIES TAbLE 150g×0.005g 300g×0.01g... -
Page 24: Technical Characteristics
TECHNICAL CHARACTERISTICS Model AH-150 AH-300 AH-600 AH-1200 AH-3000 Capacity 150 g 300 g 600 g 1200 g 3000 g Readability 0,005 g 0,01 g 0,01 g 0,02 g 0,1 g Construction Housing in ABS, pan in stainless steel. Tare range Full capacity Zero range <... -
Page 25: Guarantee
This balance is guaranteed for one year from the delivery date. The guarantee covers any fabrication defect of the material. During this period, gRAM PRECISION, SL, covers the manpower and the spare parts costs necessary for the reparation of the scale. -
Page 26: Requisitos Para Una Óptima Instalación
ESPAÑOL REqUISITOS PARA UNA óPTIMA INSTALACIóN Para obtener el máximo rendimiento y los mejores resultados, recomendamos instalar la balanza de acuerdo con los siguientes requisitos: • Instalarla en una superficie plana. • Apoyarla en una base estable y exenta de vibraciones. •... - Page 27 • Esta balanza. • Plato de la balanza. • El Alimentador de corriente estándard. Este alimentador dispone de salida en corriente continua de 12 V / 800 mA; no utilizar ningún otro alimentador, puede dañarse la balanza. • CD-ROM con adaptador USB. •...
-
Page 28: Puesta En Marcha
PUESTA EN MARCHA 1. Retirar el embalaje de la caja. Retirar el plato de su protección de cartón. 2. Retirar el alimentador (está dentro de una caja blanca). 3. Sacar la balanza de la protección y colocarla en su emplazamiento definitivo, que debe ser una superficie plana, no metálica, lo más estable y rígida posible (se recomienda una mesa resistente con un grueso tablero aglomerado, de granito o de mármol, preferiblemente de éstos... -
Page 29: Descripción Del Display
DESCRIPCIóN DEL DISPLAY Zero: Se enciende cuando el display está a cero. Tare: Se enciende al tarar un recipiente o producto. Stable: Aparece siempre que la balanza está estable. Modo: Se enciende al pulsar la tecla “mode”. Setup: Se enciende al pulsar la tecla de funciones “Setup”. Cal: Se enciende cuando la balanza está... -
Page 30: Descripción Del Teclado
DESCRIPCIóN DEL TECLADO Tecla para encender y apagar la balanza. Tecla para seleccionar peso, cuentapiezas y porcentaje. Tecla para seleccionar las unidades de pesada. Hay 8 tipos de unidades. Tecla para introducir la muestra inicial en función cuentapiezas. Tecla para efectuar la tara. Tecla para volver a cero. -
Page 31: Selección De Las Unidades De Pesada
SELECCIóN DE LAS UNIDADES DE PESADA Pulse la tecla para seleccionar las unidades de pesada y el display visualizará las diferentes opciones. Hay 8 unidades de pesada disponibles. PUESTA A CERO Si el valor de cero varía durante el momento de la pesada, pulsar la tecla para que el display quede nuevamente a cero. -
Page 32: Función De Cuentapiezas
fUNCIóN DE CUENTAPIEZAS La función cuentapiezas es utilizada para visualizar el número de piezas depositadas sobre la balanza, después de haber introducido una muestra de las piezas. Depositar un recipiente vacío sobre el plato y pulsar la tecla para que el display vuelva a cero. Introducir o depositar un número determinado de piezas (10, 20, 50 o 100) dentro del recipiente. -
Page 33: Parámetros Para La Configuración
porcentaje, pulse la tecla para volver al modo normal de pesada. Pulse la tecla para volver al modo cuentapiezas o de porcentaje. La balanza memorizará los datos previos automáticamente, de este modo, podrá continuar utilizando el modo cuentapiezas o de porcentaje. La memoria de los datos del modo cuentapiezas y de porcentaje se borrará... -
Page 34: Calibración
CALIbRACIóN Cuando el display muestre “CAL”, pulse la tecla para entrar en la Auto- Calibración. Utilizar las teclas para introducir el valor de la pesa de calibración, después pulse la tecla para confirmar el valor. Cuando el display nos esté mostrando el valor, ponga la masa sobre el plato. Cuando la balanza esté... -
Page 35: Selección De Una Segunda Unidad De Pesada
SELECCIóN DE UNA SEgUNDA UNIDAD DE PESADA (en total: 8 unidades). Pulse la tecla ó para mover las unidades, pulse para seleccionar “ON” u “Off” y pulse para confirmar. Pulse para volver al menú anterior o para salir. SELECCIóN DE LA AUTODESCONExIóN Pulsar hasta visualizar “A.Off”... -
Page 36: Selección Del Baud Rate Para El Puerto Rs-232
SELECCIóN DEL bAUD RATE PARA EL PUERTO RS-232 hasta visualizar “rate” y después Pulsar Utilizar la teclas para seleccionar el baud rate, que necesitará 1200, 2400, 4800, 9600 y pulse para confirmar. Pulse para volver al menú anterior o para salir. (Selección de fábrica: 2400). -
Page 37: Selección Del Auto-Cero
ZEro3. Corrección de tres divisiones. ZEro0. Sin corrección en el retorno a cero. SELECCIóN DEL AUTO-CERO El punto cero en las balanzas tiene un continuo desplazamiento, aunque es poco apreciable. De todas formas, con el paso del tiempo, el display no marcaría cero sin la ayuda de un dispositivo interno que lo corrige automáticamente. -
Page 38: Selección Del Automuestreo En La Función Cuentapiezas
SELECCIóN DEL AUTOMUESTREO EN LA fUNCIóN CUENTAPIEZAS Esta función permite que cuando la balanza está en modo cuentapiezas, realizando un muestreo pequeño, la balanza vuelve a muestrear automáticamente, siempre que la cantidad de pesas depositadas sea inferior o igual al doble de la cantidad inicial. Pulsar hasta visualizar “A.C Y”... -
Page 39: Mensajes De Error
MENSAjES DE ERROR Los mensajes de error son: “E1 . E2 . E5 . 0L”. Estos mensajes pueden aparecer si el plato no está puesto correctamente o el entorno ambiental no es el adecuado. Deberá ponerse en contacto con el fabricante. -
Page 40: Formato De Data
fORMATO DE DATA Head 1 Head 2 Data Unidad CR LF HEAD 1 (2 bYTES) HEAD 2 (2 bYTES) OL – Sobrecarga NT – Peso neto ST – Display estable gS – Peso bruto US – Display inestable DATA (8 bYTES) 2D (HEX) = “-“... -
Page 41: Tabla De Conversión De Las Unidades De Pesada
TAbLA DE CONVERSIóN DE LAS UNIDADES DE PESADA 1 ct (MET.CARAT) =0.1999694 g 1 lb (AVOIDUPOIS POUND) =453.59237 g 1 oz (AVOIDUPOIS OUNCE) =28.349523125g 1 GN (GRAIN) (U.K) =0.06479891 g 1 ozt (TROY OUNCE) =31.1034768 g 1 dwt (PENNYWEIGHT) =1.55517384 g 1 t1.T (TAEL) (TWN) =37.799375 g TAbLA DE CAPACIDADES 150g×0.005g... -
Page 42: Características Técnicas
CARACTERíSTICAS TéCNICAS Modelo AH-150 AH-300 AH-600 AH-1200 AH-3000 Capacidad 150 g 300 g 600 g 1200 g 3000 g Resolución 0,005 g 0,01 g 0,01 g 0,02 g 0,1 g Construcción plástico ABS, plataforma de acero inoxidable Rango de tara toda la capacidad Rango de cero <... -
Page 43: Garantía
Esta balanza está garantizada contra todo defecto de fabricación y de material, por un periodo de 1 año a partir de la fecha de entrega. Durante este periodo, gRAM PRECISION, SL, se hará cargo de la reparación de la balanza. -
Page 44: Recommandations Pour Une Optimisation Maximale
FRANÇAIS RECOMMANDATIONS POUR UNE OPTIMISATION MAxIMALE Pour obtenir le meilleur produit possible et les meilleurs résultats, nous recommandons d’installer la balance selon les instructions suivantes: • Installer la balance sur une surface plane. • La poser sur une base stable et sans vibrations. •... - Page 45 • Le plateau de la balance. • L’alimentateur de courant standard. Cet alimentateur dispose d’une sortie en courant continu de 12 V / 800 mA; ne pas utiliser un autre alimentateur, cela pourrait endommager la balance. • CD-ROM avec adaptateur USB. •...
-
Page 46: Mise En Marche
MISE EN MARCHE 1. Retirer l’emballage du carton. Retirer le plateau de sa protection. 2. Retirer l’alimentateur (dans une boîte blanche). 3. Sortir la balance de sa protection et la poser sur son emplacement définitif, qui doit être une surface plane, non métallique, la plus stable et rigide possible. -
Page 47: Description De L'écran
DESCRIPTION DE L’éCRAN 1. Zéro: S’allume lorsque le display est à zéro. 2. Tare: S’allume lorsqu’un tarage de récipient ou de produit est en cours. 3. Stable: Apparaît chaque fois que la balance est stable. 4. Modo: S’allume lorsque l’on appuie sur “mode”. 5. -
Page 48: Description Du Clavier
DESCRIPTION DU CLAVIER Pour mettre en marche ou éteindre la balance. Sélectionne la modalité de pesée: gramme, compte-pièces ou pourcentages. Change l´unité de pesée entre les 8 unités disponibles Introduction du poids de l´échantillon (en mode compte-pièces ou pourcentages) Réalise la pesée d´un récipient placé sur le plateau (tarage) Met à... -
Page 49: Selection Des Unités De Pesée
SELECTION DES UNITéS DE PESéE Appuyer sur la touche pour seleccioner les unités de pesée. L´écran affichera les 8 unités disponibles. RETOUR A ZERO Pour mettre à zéro la balance, lorsque rien n´est posé sur le plateau, appuyez sur la toche et l´écran affichera zéro. -
Page 50: Fonction De Compte-Pieces
fONCTION DE COMPTE-PIECES Elle est utilisée pour visualiser le nombre de pièces déposées sur le plateau, après avoir introduit un échantillon de pièces à peser. Déposer un récipient vide sur le plateau, et appuyer sur la touche Introduire ou déposer un numbre détermine de pièces (10, 20, 50 ou 100) dans le récipient. -
Page 51: Parametres Pour La Configuration
de suite le symbole “MODO” clignotera quelques instants et se figera pour marquer que la balance est prête pour comparer d´autres échantillons. L´écran calculera la valeur différentielle en pourcentage. Si l´écran affiche “---or---%”, cela signifie que l´echantillon est très petit, alors vous devez déposer des échantillons plus grands. -
Page 52: Calibrage
CALIbRAgE Avant de procéder au calibrage, placer la balance bien équilibrée dans un lieu sans courant d´air, vibrations ou autres éléments perturbateurs. Maintenir la balance branchée pendant 30 minutes ou plus. Ces recommandations sont très importantes pour réaliser un bon calibrage. Quand l´écran affiche le message “CAL”, appuyer sur la touche pour entrer dans la fonction de Auto-calibrage. -
Page 53: Sélection De L'unité Principale
SéLECTION DE L’UNITé PRINCIPALE La balance permet de choisir l´unité principale de pesée parmi ses 8 unités internes. Appuyer sur la touche ou bien sur les touches pour sélectionner l´unité de pesée désirée. Pour confirmer, appuyer la touche et pour sortir la touche SéLECTION D’AUTRES UNITéS DE PESéE Appuyer sur la touche ou sur les touches... -
Page 54: Sélection De La Transmission De Données
La balance ne se déconnecte pas. Yes2. Elle se déconnecte au bout de 2 minutes. Yes5. Elle se déconnecte au bout de 5 minutes. Yes8. Elle se déconnecte au bout de 8 minutes. Sélectionner une des options appuyant sur la touche Pour sortir appuyer la touche et la balance se mettra en marche avec la configuration effectuée mémorisée. -
Page 55: Sélection Du Filtre De Stabilité
SéLECTION DU fILTRE DE STAbILITé jusqu´à l´écran affiche “f1 105” et la touche Appuyer sur la touche Pour sélectionner le filtre de stabilité de 1 à 15 utiliser les touches Pour confirmer appuyer sur la touche et pour sortir la touche En augmentant la valeur de filtrage, la réponse de la balance se fait plus lente, ce qui fait que dans des conditions défavorables, il faut trouver une solution de compromis. -
Page 56: Sélection Du Zéro Automatique
SéLECTION DU ZéRO AUTOMATIqUE Le point zéro dans les balances possède un perpétuel déplacement, même si c´est peu apprécié. Dans tous le cas, avec le temps qui passe, l´écran d´affichage ne marquerait pas zéro sans l´aide d´un dispositif interne qui le corrige automatiquement. -
Page 57: Sélection De L'eclairage Automatique De L'écran
touche Utiliser les touches pour sélectionner la valeur désirée et confirmer avec la touche Pour sortir appuyer la touche A.C Y. Échantillonnage automatique branché. A.C O. Échantillonnage automatique non branché. SéLECTION DE L’ECLAIRAgE AUTOMATIqUE DE L’éCRAN L´éclairage automatique est très utile dans des conditions d´éclairage ambiant peu favorables. -
Page 58: Sortie De Données Rs-232
SORTIE DE DONNéES RS-232 Mode: Signal EIA-RS-232 C´s UART ou signal USB. format Vitesse de transmission: 1200, 2400, 4800 et 9600 bauds bits de données: bit de parité: bit de stop: Code: ASCII Pin d´entrée: 2 (RxD) Pin de sortie: 3 (TxD) Pin de la signal: 5 (Mase) -
Page 59: Exemple De Transmission
HEAD 1 (2 bYTES) HEAD 2 (2 bYTES) OL – Surcharge ST – Stable NT – Poids net US – Instable gS – Poids brut DATA (8 bYTES) 2D (HEX) = “-“ (MOINS) 20 (HEX) = ” “ (ESPACE) 2E (HEX) = ”.” ( POINT DECIMAL UNIT (4 bYTES) g-20 ( HEX ) ;... -
Page 60: Tableau De Capacités
1 oz (AVOIDUPOIS OUNCE) =28.349523125g 1 GN (GRAIN) (U.K) =0.06479891 g 1 ozt (TROY OUNCE) =31.1034768 g 1 dwt (PENNYWEIGHT) =1.55517384 g 1 t1.T (TAEL) (TWN) =37.799375 g TAbLEAU DE CAPACITéS 150g×0.005g 300g×0.01g 600g×0.01g 1500g×0.05g 3000g×0.1g 150.045 300.09 600.18 1500.45 3000.9 750.18 1500.45... -
Page 61: Garantie
Cette balance est garantie contre les défauts de fabrication ou de pièce, pendant une année, à partir de la date de livraison. Durant cette période, gRAM PRECISON, SL, se chargera de la réparation de la balance. Cette garantie n’inclut pas les dommages causés par une utilisation impropre, surcharge, ou par faute de ne pas avoir suivi les recommandations écrites dans ce manuel (particulièrement de l’aparté... - Page 62 NOTES...
- Page 63 NOTES...
- Page 64 001/08072016 gram Precision S.L. Travesía Industrial, 11 · 08907 Hospitalet de Llobregat · Barcelona (Spain) Tel. +34 902 206 000 · +34 93 300 33 32 Fax +34 93 300 66 98 gram.es comercial www.gram.es...
Need help?
Do you have a question about the AH series and is the answer not in the manual?
Questions and answers