Table of Contents
Advertisement
Quick Links
Download this manual
See also:
Operating Manual
Advertisement
Table of Contents

Related Manuals for Gram AHV Series


Summary of Contents for Gram AHV Series
- Page 1 SERIES AH-300V / AH-600V / AH-1200V AH-1500V / AH-3000V OPERATION MANUAL...
- Page 2 INDEX English Precautions before using the balance Name and type of the instrument Keys and display description Keys function Display Function Power-Up Weighing mode Display range Zero-Setting Semi-automatic zero-setting Zero-tracking Initial zero-setting Tare Semi-automatic tare Units selection Overload alarm Counting mode Percentage weighing mode Calibration procedure Parameters setting...
-
Page 3: Table Of Contents
Baud rate Data bits Unit weight re-computing in counting mode Blacklight type Recovery of the default values from memory Specification of output interface Error messages Technical data Guarantee... - Page 4 ENGLISH PRECAUTIONS BEFORE USING THE BALANCE For safe and dependable operation of this balance, please comply with the following safety precautions: • Verify that the input voltage printed on the AC Adapter and the plug type matches the local AC power supply. •...
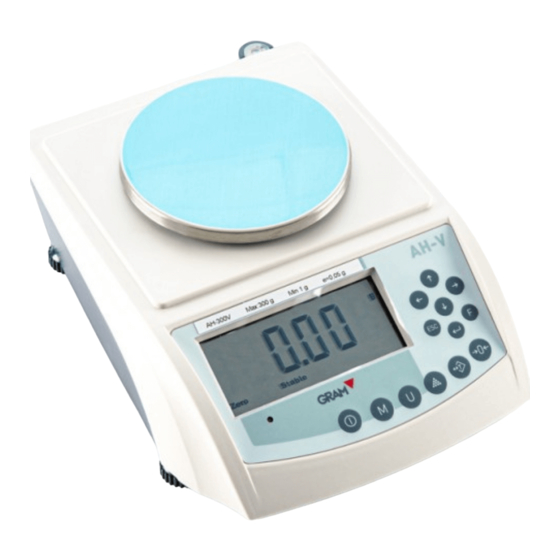
- Page 5 NAME AND TYPE OF THE INSTRUMENT The AH-V model weighing balance is a self-indicating weighing scale of Class II with single weighing range, an external AC mains adapter, and an internal rechargeable battery. The balance consists of analogue to digital conversion, microprocessor control, power supply, keyboard, and a weight display contained within a single enclosure.
- Page 6 Keys function ON/OFF switch. Function key to choose weighing, parts counting and percentage weighing. Units selection (8 units are available). To take samples in parts counting mode or percentage weighing mode. To subtract the container’s weight. To return the display to “0”. Confirmation key and print key.
- Page 7 Display When the Capacity of the balance is 600.0g, the last digit will be the auxiliary display digit (a symbol indicating the digit): When the Capacity of the balance is 150.00g, 300.00, 1500.0 and 3000.0g, the last digit will be blank in normal weighing mode only if the key is pressed to extend the display.
- Page 8 POWER-UP When power up the balance, the display will first show the software version (Ver. 1.01) for 2 seconds and then perform a self display test. Then it will show the Calibration counting times for about 1 second. After that it will automatically establish the current weight as a new zero reference point.
- Page 9 speed of ±0.25e/s and only when the indicator is at gross zero and there is no motion in the weight display. Initial zero-setting Initial zero-setting range: ±10% of Max When the initial zero-setting range is below -10% of Max, the display shows “-------”...
- Page 10 To clear the tare value, please remove the container on the pan, then the display will show a minus tare weight value and press key again. Note: 1. When performing the tare operation(s), make sure the instrument is in stable. 2.
- Page 11 Press key or key to choose the sample size (10, 20, 50 and 100 pcs). After a desired sample size has been chosen, put the samples as the chosen key. Then the “Mode” symbol sample size on the pan and press the starts flashing and the “C”...
- Page 12 Press key or key to switch between 100.0% or 100.00%. Put the sample considered to be 100% on the pan, and then press the to perform sampling process. Then the “Mode” symbol starts flashing and several seconds later, the “Mode” symbol and “P” disappears. Then the sampling procedure is finished.
- Page 13 Turn on the balance and press calibration button under the balance to enter calibration mode (break verification seal). When the salf-test procedure finished, the display will show as below: Press key to move to “SET”for parameters setting or “CAL.R” for ratio span calibration, or “CAL.W”...
- Page 14 1: g, ct 2: g, ct, GN 3: g, ct, ozt, oz, dwt, GN, t (Default) 4: Press key to choose the units manually from g, ct, ozt, oz, dwt, GN and t. keys to choose the unit, use key to set the unit to be on or off.
- Page 15 unavailable. LFT off: The mode with auxiliary display function or extended display function. (Default). Press key to confirm the choice and move to next setting; or press key to exit. 2. Capacity The display will show as below: keys to choose the capacity from Cap 0.3 (300g), Cap 0.6 (600g), Cap 1.2 (1200g), Cap 1.5 (1500g), Cap 3.0 (3000g) or Cap 6.0 (6000g).
- Page 16 Press key to display the ratio inputting status. key to move the digit; use keys to change the figure for the current digit. The ratio can only be a value between 0.80000 ~ 1.20000 ( = Mass weight value/Actual display weight value). Press key to confirm and exit to normal weighing mode.
- Page 17 key to move the digit; use keys to change the figure for the current digit. Put the Weights which is exactly equal to the displayed value and press key to confirm. The value flickers and the exit to normal weighing mode when it finishes. Weight loading The display show as below: Touch the pan lightly, the displaying value flickers;...
- Page 18 flicker, when it is stable, the display wil show a value which should be put on for the second time. Put on the Weights which equals the value displayed, and the value will flicker, when it is stable, the display will show a value which should be put on for the third time.
- Page 19 Press key to move to parameter “Unit” (To choose available units) or press key to move to parameter “A.OFF” (To choose auto-shut off time). Press key to enter into the parameter. Press keys to choose from 2m, 5m, 8m or No (auto. shut off is unavailable).
- Page 20 Press keys to choose the transmitting mode from tr.M.LP, tr.disp, tr.SEr, tr.A.PC, tr.M.PC, tr.A.dt, tr.M.dt, tr.A.LP . (Default: tr.M.LP). tr.M.LP: When the display is stable, the data can be printed by pressing a key (For LP-50 printer). tr.disp: Only the displaying data will be transmitted (for Extra Display). tr.SEr: The data will be transmitted continuously.
-
Page 21: Baud Rate
Label format (For PR Printer) Press key to move to “To choose transmitting mode” or press to move to “To choose baud rate”. Press key to exit to normal weighing mode; press key to enter into choosing label format. Press key to choose the Label format from Form 0 ~ Form 9. -
Page 22: Data Bits
Press key to move to parameter “trn” (transmitting mode) or press the key to move to parameter “rAtE” (to choose baud rate). Press key to enter into the parameter. Press keys to choose the baud rate from 1200, 2400, 4800 and 9600. (Default: 9600). -
Page 23: Unit Weight Re-Computing In Counting Mode
Press keys to choose the data bits from bit. N8 or bit. E7. (Default: bit. N8). Press the key to confirm and then the key to return to parameters menu. Press the to move to next setting or press again the to back to normal weighing mode. -
Page 24: Recovery Of The Default Values From Memory
Press key to move to parameter “A.C Y” or press the key to move to parameter “Bl.1” (to choose backlight type). Press keys to choose the backlight type from 1, 2 and 3. (Default: 1) 1. The backlight will be on automatically when a load exceeds 10e on the pan or pressing a key. - Page 25 Data Format: Head 1 Head 2 Data Unit CR LF HEAD 1 (2 BYTES) HEAD 2 (2 BYTES) OL – Over Load ST – Stable NT – Net Weight US – Unstable GS – Gross Weight DATA (8 BYTES) 2D (HEX) = “-“ (LESS) 20 (HEX) = ”...
-
Page 26: Error Messages
ERROR MESSAGES When the balance powered up or during the operation, the display may show some Error messages as below: E1, E2, E5 and OL. The messages may also be shown if the pan is not installed correctly or the operation environment is not suitable. -
Page 27: Guarantee
This balance is guaranteed for one year from the delivery date. The guarantee covers any fabrication defect of the material. During this period, GRAM PRECISION, SL, covers the manpower and the spare parts costs necessary for the reparation of the scale. - Page 28 006/12062018 Gram Precision S.L. Travesía Industrial, 11 · 08907 Hospitalet de Llobregat · Barcelona (Spain) Tel. +34 902 208 000 · +34 93 300 33 32 Fax +34 93 300 66 98 gram.es comercial www.gram-group.com...
Need help?
Do you have a question about the AHV Series and is the answer not in the manual?
Questions and answers