
Subscribe to Our Youtube Channel
Related Manuals for Gram CR-30


Summary of Contents for Gram CR-30
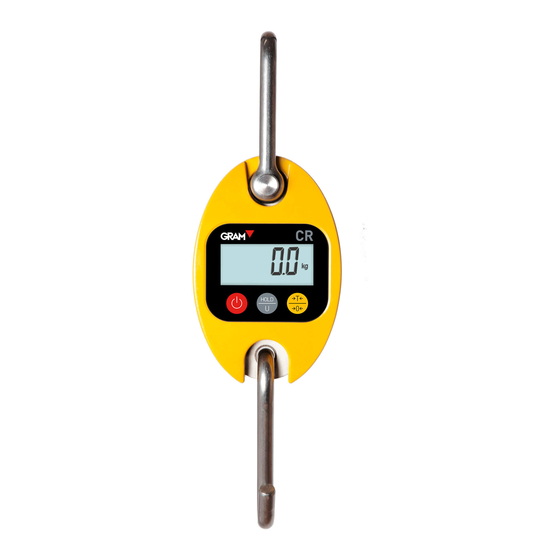
- Page 1 USER MANUAL MANUAL DE UTILIZACION MANUEL D´UTILISATION SERIES / SERIE / SÉRIE CR Models / Modelos / Modèles CR-30 CR-120 CR-300...
- Page 2 REV. 2A11M103T...
-
Page 3: Table Of Contents
NDEX Safety recommendations Characteristics Specifications Capacity and readability Schematic diagram Dimensions Use of crane scale Turn on Turn off Tare Hold function Weight units Reset to zero Settings Auto-turn off configuration Auto-zero configuration Zero manual Backlight configuration Possible errors Guarantee EC Declaration of Conformity... -
Page 4: Safety Recommendations
SAFETY RECOMMENDATIONS Before using the crane scale, please, read this manual carefully and follow the instructions. DON´T overload the crane scale, this could seriously damage the loadcell (repair not covered by the warranty) DON´T leave any weight on the hook for a long time, this reduces the accuracy of the equipment and shorts the life of the loadcell ... -
Page 5: Specifications
SPECIFICATIONS Precision Class GB/T 11883-2002 Class III equivalent to OIML R76 Tare range 100% F.S. Auto-zero ±50% F.S. Manual zero ±2% F.S. Zero-track 0.5e/s Stabilization time of ≤10 seconds reading Stand-by Stable and no action in 3 seconds Auto-turn off Stable and no action in 3 minutes 100% F.S. -
Page 6: Capacity And Readability
CAPACITY AND READABILITY Model Maximum capacity E (kg) Division (n) CR-30 30 kg 0.01 3.000 CR-120 120 kg 0.05 2.400 CR-300 300 kg 3.000 SCHEMATIC DIAGRAM DIMENSIONS... -
Page 8: Use Of Crane Scale
USE OF CRANE SCALE Turn on Press the key for 1 second to turn on and restart the crane. Turn off Press the key for 1 second to turn-off the crane. The display will show the message “OFF” TARE Press the key to subtract the weight of a container. - Page 9 If the weight exceeds the 100%F.S., or if it is less than 0, no Tare may be made. If the reading is not stable, no Tare may be made. Tare function reduces the range of capacity of crane scale. Example: If Tare is made with a container of 10 kg and the maximum capacity is 50 kg, the available capacity will be of 40.18 kg (5000 -1000 + 9 additional divisions)
-
Page 10: Hold Function
Hold Function Press the HOLD / U key to hold the data shown on the display (value frozen on the display) The message “HOLD” will appear and the weight will remain frozen on the display. Press again the HOLD / U key to deactivate the Hold function. The message “HOLD”... -
Page 11: Reset To Zero
Reset to zero Press the key for 1 second to reset the display to zero. The message “ZERO” will appear on the display and the display will remain at zero. The reset-to-zero function cannot be made if the reading is not stable or a ... -
Page 12: Auto-Zero Configuration
Auto turn-off modes: 0 (disabled) 5 (5 minutes) 15 (15 minutes) 30 (30 minutes) 60 (60 minutes) Press the key to access to the Auto Zero configuration. Press the HOLD / U key to choose the desired mode. Auto-zero modes: ... -
Page 13: Backlight Configuration
2 (2%F.S.) 4 (4%F.S.) 10 (10%F.S.) 20 (20%F.S.) 50 (50%F.S.) Press the key to access to backlight configuration. Press the HOLD / U key to choose the mode. Backlight modes: off (disable) 5 (5 seconds) 15 (15 seconds) 30 (30 seconds) 60 (60 seconds) on (never) When one of modes: 5, 15, 30 or 60 is set the backlight will turn off... -
Page 14: Possible Errors
When the “on” mode is set the backlight is always activated. Press the key to exit and to return to normal weighing status. POSSIBLES ERRORS Symptom Possible causes Solution Display in blank when you Discharged battery Replace the battery press the On/Off key. - Page 15 During this period, GRAM PRECISION covers manpower and spare parts costs necessary for the reparation of the scale. This guarantee does not cover the failures caused by an inappropriate use or overload. The guarantee does not cover the freight cost (transport) necessary to repair the scale.
-
Page 16: Consejos De Seguridad
CONSEJOS DE SEGURIDAD Antes de utilizar el gancho, por favor, lea atentamente este manual de instrucciones y siga las indicaciones. NO sobrecargar el gancho pesador, esto podría dañar seriamente la célula de carga (avería no cubierta por la garantía) ... -
Page 17: Especificaciones
ESPECIFICACIONES Clase de precisión GB/T 11883-2002 Class III equivalente a OIML R76 100% F.S. Rango de Tara ±50% F.S. Auto-Cero Cero Manual ±2% F.S. Zero-tracking 0.5e/s Tiempo de ≤10 segundos estabilización de la lectura Auto-reposo Estable y ninguna acción en 3 segundos Auto-desconexión Estable y ninguna acción en 3 minutos 100% F.S. -
Page 18: Capacidad Y Resolución
CAPACIDAD Y RESOLUCION Modelo Capacidad máxima E (kg) División (n) CR-30 30 kg 0.01 0CR-120 120 kg 0.05 2.400 CR-300 300 kg 3.000 DIAGRAMA ESQUEMATICO DIMENSIONES... -
Page 20: Modo De Empleo
MODO DE EMPLEO Encender Pulsar la tecla durante 1 segundo para encender e inicializar el equipo. Apagar Pulsar la tecla durante 1 segundo para apagar el equipo El display muestra el mensaje de apagado “OFF” Display Tara... - Page 21 Pulsar la tecla para sustraer el peso de un recipiente ó peso. El mensaje “TARE” aparece en el display la lectura queda a cero. Si el peso es superior a 100%F.S., ó menor a 0, la función de tara no se podrá realizar. Si la lectura no es estable, no se podrá...
-
Page 22: Función Hold
Función Hold Pulsar la tecla HOLD / U para que la lectura del display quede fijada en el display El mensaje “HOLD” aparece y el peso queda fijado en el display. Pulsar de nuevo la tecla HOLD / U para desactivar la función Hold. -
Page 23: Puesta A Cero
Puesta a cero Pulsar la tecla durante 1 segundo para poner a cero la lectura del display. El mensaje “ZERO” aparece y la lectura queda a cero La puesta a cero del display no se puede efectuar si la lectura no es estable ó se ha efectuado una tara. -
Page 24: Ajustes
Ajustes Para acceder al modo de ajuste, mantener pulsadas simultáneamente las teclas y HOLD / U durante 1 segundo. Pulsar la tecla para accede a la opción Auto-Off (Autodesconexión) y pulsar la tecla HOLD / U para cambiar el modo. La Autodesconexión se puede configurar: ... - Page 25 2 (2%F.S.) 4 (4%F.S.) 10 (10%F.S.) 20 (20%F.S.) 50 (50%F.S.) Pulsar la tecla para acceder a la opción Cero Manual y pulsar la tecla HOLD / U para cambiar el modo El Cero Manual se puede configurar: 0 (desactivado) 2 (2%F.S.) 4 (4%F.S.) 10 (10%F.S.)
-
Page 26: Posibles Averías
15 (15 segundos) 30 (30 segundos) 60 (60 segundos) on (nunca) Cuando se configura a 5, 15, 30, ó 60, la iluminación se apagará transcurridos los minutos seleccionados. Cuando se configura como “off”, la iluminación está desactivada y nunca se activará. Cuando se configure como “on”, la iluminación está... - Page 27 Esta balanza está garantizada contra todo defecto de fabricación y de material, por un periodo de 1 año a partir de la fecha de entrega. Durante este periodo, GRAM PRECISION, se hará cargo de la reparación de la balanza. Esta garantía no incluye los daños ocasionados por uso indebido o sobrecargas.
- Page 28 Mode d´emploi Allumer Eteindre Tare Fonction HOLD Unités de poids Remise à zéro Réglage Configuration Auto-Off Configuration Auto-Zéro Zéro manuel Éclairage de l´écran Avaries possibles Garantie Déclaration CE de conformité...
- Page 29 CONSEILS DE SECURITE Avant d’utiliser le crochet, il est fortement conseillé de lire attentivement ce manuel d’instruction et de suivre les indications. NE PAS le crochet peseur, cela pourrait endommager sérieusement le capteur de surcharger charge (ce genre d’avarie n’entre pas dans la garantie) ...
- Page 30 Classe de précision GB/T 11883-2002 Classe III equivalent à OIML R76 100% F.S. Rang de Tare ±50% F.S. Auto-Zéro ±2% F.S. Zéro Manuel Suivi du zéro 0.5e/s Temps de stabilisation ≤10 secondes de la lecture Mode veille Stable sans aucune action pendant 3 secondes automatique Auto-déconnexion Stable sans aucune action pendant 3 minutes...
- Page 31 CR-30 30 kg 0.01 3.000 CR-120 120 kg 0.05 2.400 CR-300 300 kg 3.000 DIAGRAMME SCHEMATIQUE...
-
Page 32: Mode D'emploi
DIMENSIONS MODE D’EMPLOI Allumer Appuyer sur la touche pendant 1 seconde pour allumer et initialiser l’équipement. -
Page 33: Eteindre
Eteindre Appuyer sur la touche pendant 1 seconde pour éteindre l’équipement. Le display affiche le message “OFF” pour signaler que l’équipement est éteint Display Tare Appuyer sur la touche pour soustraire le poids d’un récipient ou d’un poids Le message “TARE” apparait sur l’écran, la lecture ... -
Page 34: Fonction Hold
La tare réduit le rang de capacité du dynamomètre. Exemple: Si l’on effectue la tare d’un récipient de 10kg et la capacité maximale du crochet est de 50kg la capacité disponible sera de 40.18 kg (5000 -1000 + 9 divisions supplémentaires) Pour supprimer la tare, appuyer de nouveau sur la touche Le message “TARE”... -
Page 35: Remise À Zéro
Appuyer à nouveau sur la touche HOLD / U pour désactiver la fonction Hold. Le message “HOLD” disparaît et le mode de pesage normal se rétablit. Unités de pesage Appuyer sur la touche HOLD / U pendant 1 seconde pour sélectionner l’unité... -
Page 36: Réglage
Le message “ZERO” apparaît et la lecture reste à zéro. La remise à zéro de l‘écran ne peut pas s’effectuer si la lecture n’est pas stable ou qu’on a effectué une tare. Si le poids est au-dessus du rang de Zéro Manuel, ... - Page 37 L’Auto-déconnexion peut se configurer: 0 (désactivée) 5 (5 minutes) 15 (15 minutes) 30 (30 minutes) 60 (60 minutes) Appuyer sur la touche pour accéder à l’option Auto-Zéro; et appuyer sur la touche HOLD / U pour changer le mode. L’Auto-Zéro peut se configurer: ...
- Page 38 le mode. Le Zéro Manuel peut se configurer: 0 (désactivé) 2 (2%F.S.) 4 (4%F.S.) 10 (10%F.S.) 20 (20%F.S.) 50 (50%F.S.) Appuyer sur la touche pour accéder à l’option éclairage et appuyer sur la touche HOLD / U pour changer le mode.
- Page 39 Quand on configure à 5, 15, 30, ou 30, l’éclairage s’éteindra après que le temps sélectionné se soit écoulé. Quand on configure comme “off”, l’éclairage est désactivé et s’activera jamais. Quand on configure comme “on”, l’éclairage est activé et reste toujours activé.
-
Page 40: Garantie
Cette balance est garantie contre tout défaut de fabrication et de matériel, pour une période de 1 an à partir de la date de la livraison. Pendant cette période, GRAM PRECISION, se chargera de la réparation de la balance. Cette garantie n’inclut pas les dommages causés par une mauvaise manipulation ou surcharge. - Page 41 PRODUCT: Crane Series CR PRODUCTO: Gancho Serie CR PRODUIT: Crochet Serie CR The above mentioned crane meets with following European Standards: El gancho indicado anteriormente cumple las siguientes Normas Europeas: Le crochet indiqué ci-après respecte les Normes Européennes suivantes: Electromagnetic compatibility 2004/108/EC Compatibilidad electromagnética 2004/108/CE Compatibilité...
- Page 42 October / Octubre / October 2011...
Need help?
Do you have a question about the CR-30 and is the answer not in the manual?
Questions and answers