Table of Contents
Advertisement
Quick Links
Advertisement
Table of Contents

Related Manuals for Lightspeed 955Access


Summary of Contents for Lightspeed 955Access
- Page 1 955Access Classroom Audio System User Manual...
-
Page 3: Table Of Contents
TABLE OF CONTENTS SECTION 1: Important safety instructions Overview System components and unpacking Standard components & Optional accessories Front panel controls & indicators Rear panel controls & connections Flexmike controls and connections SECTION 2: Charging the Flexmike Daily Operation Operating the Flexmike Using Flexmike as wireless audio link Output to Assistive Listening Device (ALD) Audio integration... -
Page 4: Important Safety Instructions
IMPORTANT SAFETY INSTRUCTIONS Read these instructions. 13. Unplug this apparatus during lightning storms or when unused Keep these instructions. for long periods of time. Heed all warnings. 14. Refer all servicing to qualified Follow all instructions. service personnel. Servicing is required when the apparatus Do not use the apparatus near has been damaged in any way,... -
Page 5: Overview
SECTION 1: OVERVIEW SYSTEM COMPONENTS AND UNPACKING The standard configuration of the 955 Access will contain: 955 Access and Power Supply MICROPHONE AUDIO IN TONE AUDIO OUT POWER MAX TREBLE BASS Flexmike Classroom Microphone Flexmike Cradle Charger & Power Supply PLEASE NOTE: The 955 Access and any wireless components (microphones, Media Connector, pods) are registered, or paired, together at the factory and are labeled as such with ID numbers. -
Page 6: System Components And Unpacking
SYSTEM COMPONENTS AND UNPACKING CONT’D Speakers Systems can be configured with a variety of different speaker types, including the following: TCQ (x 1) DRQ (x 4) 4jCS (x4) WMQ (x 4) (plenum rated) (Available in U.S. and Canada only) (Available in U.S. only) - Page 7 Standard Components U.S. and Canada Wireless audio base station 24V-2.5A-NA 24V/2.5A power supply FMCC Transceiver cradle charger, power supply 5V-1.0 5V power supply for FMCC Flexmike classroom transceiver with battery pack and lanyard NH2.4V AA NiMH rechargeable battery pack for Flexmike, one per Flexmike Flexmike lavaliere cord SPEAKERS...
- Page 8 Charging cable for Sharemike MCA-1881 Wireless audio transceiver USB3DC MCA-1881 power supply USB-MCB USB Type A-Micro B power cable for MCA-1881 5V-1.0-INT 5V charging power supply for USB3DC *For further information on Flexcat for small group instruction, please visit www.lightspeed-tek.com...
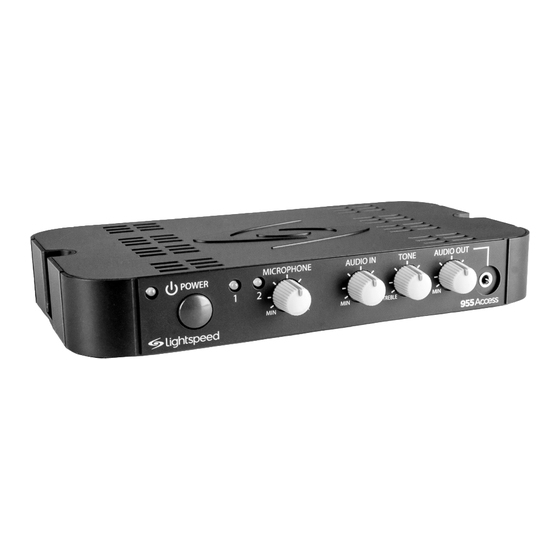
- Page 9 FRONT PANEL CONTROLS & INDICATORS MICROPHONE AUDIO IN TONE AUDIO OUT POWER MAX TREBLE BASS 1. POWER LIGHT: This light will turn blue when power is on. 2. POWER BUTTON: Press and hold this push button to turn the system power on or off.
- Page 10 REAR PANEL CONTROLS AND CONNECTIONS AUDIO INPUTS REGISTER DC INPUT 24V/2.5A PAGEFIRST INPUT SPEAKER OUTPUTS 1. REGISTRATION: Press this button 5. SPEAKER OUTPUTS: This if there is a new component, such euro-block connector is used to as a microphone, to be registered. connect the 955 Access to the loudspeaker(s).
-
Page 11: Flexmike Controls And Connections
FLEXMIKE CONTROLS AND CONNECTIONS POWER/MUTE SWITCH: press and hold to power on, press to mute, press and hold to power off. MIC 1 STATUS: lighted to indicate microphone is registered as MIC 1 • Blue: solid = normal operation; Blue: flashing = linking in progress •... - Page 12 FLEXMIKE CRADLE CHARGER DC POWER PORT: Connet the 5V/1.0A DC power cord here. OPTIONAL USB CHARGING PORT: Plug the charging cord for the optional Sharemike microphone here.
-
Page 13: Daily Operation
SECTION 2: DAILY OPERATION... - Page 14 The power button light will glow green to indicate that charging is complete and a full charge has been reached. Replacement NiMH battery packs may only be purchased through Lightspeed Technologies (part # NH2.4V). Do not attempt to charge with other battery packs.
- Page 15 2. OPERATING THE FLEXMIKE Once the Flexmike is charged, follow these steps to set it up for use. 1. Remove the Flexmike from the cradle charger and put it on by connecting the magnetic clasps behind your neck. Adjust the lanyard so that the Flexmike is at the top of the collarbone 2.
- Page 16 3. USING FLEXMIKE AS WIRELESS AUDIO LINK The Flexmike includes a 3.5mm audio input jack to connect to an audio source like a laptop or MP3 player. The Flexmike will transmit the audio signal to be played through the system. If your system includes two Flexmikes, you can use one mic for instruction and the second mic to transmit audio through the system.
- Page 17 4. OUTPUT TO PERSONAL ASSISTIVE LISTENING DEVICE (ALD) Turn the AUDIO OUT volume control on the front panel all the way down (fully counterclockwise). MICROPHONE AUDIO IN TONE AUDIO OUT POWER 2. Determine the size and type of audio input jack on the device as many manufacturers’...
- Page 18 5. AUDIO INTEGRATION Video In Projector Projector Speaker(s) Teacher’s Microphone Audio Out VGA Out Access Transmission AUDIO IN AUDIO OUT LINK POWER Audio Out Video Out Audio In MICROPHONE AUDIO IN TONE AUDIO OUT POWER Audio Out Video Out DVD/VCR MAX TREBLE BASS 955 Access...
- Page 19 DAILY OPERATION INSTRUCTIONS At start of day, remove the microphone from the cradle charger and put on. Power / • The microphone will default to the Mute position, Mute the status will turn to red. • Place the microphone around your neck. •...
-
Page 20: Section 3
SECTION 3: OPTIONAL ACCESSORIES SHAREMIKE: CONTROLS & CONNECTIONS 1. POWER BUTTON 2. MIC 2 LIGHT: This light indicates operation status when Sharemike is registered as MIC 2 (Standard) • Blue: solid = normal operation; blinking - link in process • Red: solid = muted 3. - Page 21 SHAREMIKE: CHARGING 1. Make sure the charger is plugged 4. Leave the Sharemike plugged in into a wall outlet. Connect one overnight (8-10 hours) to obtain end of the charging cable into a full charge. The light will turn the jack labeled CHARGE on the green when charging is complete.
-
Page 22: Section 4
SHAREMIKE: INITIAL SET-UP 1. Ensure the 955 Access is on. The blue light on the front of the 955 Access will glow. 2. Turn on the Sharemike by pressing and holding the power button until the LED lights. 3. Grip the barrel in the center section. - Page 23 MEDIA CONNECTOR CONTROLS AND CONNECTIONS MICROPHONE AUDIO IN AUDIO OUT LINK POWER 1. POWER LIGHT: This light will turn blue when power is on. 2. POWER BUTTON: Press and hold this pushbutton to turn the system power on or off. 3.
- Page 24 MEDIA CONNECTOR CONTROLS AND CONNECTIONS CONT’D USB1 power adaptor and cable 1. TONE CONTROL: Adjusts the is solid when a link is established. audio tone, adding more bass This is only used when adding or or treble for a more rich or crisp replacing a Media Connector.
-
Page 25: Using The Media Connector
USING THE MEDIA CONNECTOR The Media Connector, when paired together with the 955 Access, becomes the primary volume control for the microphones and audio sources you’ve connected. 1. Plug the micro USB end of the power cable into the USB port on the back of the Media Connector. - Page 26 OPTIONAL MEDIA CONNECTOR: Audio Integration The MCA is designed to integrate with the 955 Access and multiple audio sources, allowing other instructional technologies to be clearly heard throughout the classroom. Video In Projector Projector Speaker(s) Teacher’s Teacher’s Microphone Audio Out VGA Out Access Transmission...
- Page 27 FLEXCAT AUDIO PODS FOR SMALL GROUP INSTRUCTION Flexcat is a flexible two-way communication system that can be seamlessly added to the 955 Access classroom audio system to foster and facilitate small group instruction. With the small group audio pods and remote, Flexcat opens up communication and interactoin between the teacher and student groups, including: •...
-
Page 28: Maintenance And
SECTION 4: MAINTENANCE & TROUBLESHOOTING BATTERY REPLACEMENT Replacement of battery pack in Flexmike. (Part # NH2.4V) Slide the battery door open. Carefully pull the battery pack away from the Flexmike and disconnect the cable. Connect the cable of the new battery pack as shown and insert the battery pack into the compartment. - Page 29 Please dispose of all batteries properly. Lightspeed provides battery recycling at no charge. Contact us at 800-732-8999 for details. Available in U.S. only. Customers outside the U.S. should contact their local reseller.
- Page 30 • Confirm batteries are charged each night. A blinking red light on the power button indicates a low battery. • Confirm proper batteries are used. The Flexmike requires the Lightspeed NH2.4V rechargeable battery pack. The Sharemike requires the Lightspeed BA-NH2APK rechargeable pattery pack.
- Page 31 TROUBLESHOOTING CONT’D • Confirm that microphone is not muted. A solid red light on the top of microphone will indicate it is muted. • Check speaker connections on the 955 Access. Make sure the cables are properly connected (see page 9 of this manual or the Installation Guide for more information).
-
Page 32: Warranty, Safety
1. Warranty on Access transceivers is FIVE (5) YEARS. 2. Warranty on Lightspeed NiMH rechargeable batteries is one (1) year. 3. A prepaid shipping label will be provided by Lightspeed for warranty repairs within the United States. Customers outside the U.S. should refer to the Lightspeed website (www.lightspeed-tek.com) for warranty repair instructions. -
Page 33: Safety Warnings And Certifications
European Union Directives: 2004/108/EC Electromagnetic Compatibility (EMC) and 2006/95/EC Low Voltage Directive (LVD). Lightspeed Technologies launched a formal product recycle program in Europe that complies with the European Union Directive 2002/96/EC on Waste Electrical and Electronic Equipment (“WEEE Directive”). - Page 34 Européenne suivantes : 2004/108/EC Electromagnetic Compatibility (EMC) and 2006/95/EC Low Voltage Directive (LVD). Lightspeed Technologies a lancé un programme de recyclage de produits en Europe conformément à la directive de l’Union Européenne 2002/96/CE relative aux déchets d’équipements électriques et électroniques (directive «...
- Page 35 FCC Notice to user This device complies with Part 15 of the FCC Rules. Operation is subject to the following two conditions: (1) This device may not cause harmful interference; and (2) This device must accept any interference received, including interference that may cause undesired operation. This equipment has been tested and found to comply with the limits for a Class B digital device, pursuant to Part 15 of the FCC Rules.
- Page 36 NOTICE FOR USB NOTE: Lightspeed is not responsible for any changes or modifications not expressly approved by the party responsible for compliance. Such modifications could void the user’s authority to operate the equipment. NOTE: This equipment has been tested and found to comply with the limits for a Class B digital device, pursuant to part 15 of the FCC Rules.
- Page 37 EU Declaration of Conformity According to EU Directives EMC 2014/30/EU, LVD 2014/35/EU, RED 2014/53/EU Manufacturer: Lightspeed Technologies, Inc. Address: 11509 SW Herman Rd, Tualatin, Oregon 97062 We herewith declare that the following systems comply with the appropriate basic safety and health requirements of the Directive based on its design and type, as brought into circulation by us.
-
Page 38: System Specifications
SYSTEM SPECIFICATIONS 955 ACCESS Description: Wireless audio hub Frequency response: 60 Hz - 7 kHz DC power Input: 24V/2.5A Power output: 40 Watts total (20 W/channel) Total harmonic distortion <1% @ 10W Wireless communication: Access Technology (1.9 GHz + RF4CE) Tone control: 1 bass/treble control Audio inputs:... - Page 39 SHAREMIKE Description: Handheld transceiver Wireless communication: Access Technology (1.9 GHz) Audio distortion: <1% Integrated microphone: Uni-directional dynamic Audio input: 3.5mm Battery power: 2 AA NiMH battery pack Battery life: 8 hours (fully charged) Charging: 5V charging jack Power: On/off button Registration: Push button for registration with Access Link...
- Page 40 L IG HTSP EE D T EC H N OL OG I ES 11 509 S W HERM AN R O A D / TU AL AT IN , O R 9 7 062 T OLL F REE : 8 00. 7 3 2 . 8 9 9 9 / PH ON E : 5 0 3 .6 8 4 .5 5 38 / FAX : 503.6 84.3 197 LI GHTSP EED - TEK.
Need help?
Do you have a question about the 955Access and is the answer not in the manual?
Questions and answers