Lightspeed Topcat User Manual
Classroom audio system
Hide thumbs
Also See for Topcat:
- User manual (32 pages) ,
- Installation manual (32 pages) ,
- Registration manual (13 pages)
Table of Contents
Advertisement
Advertisement
Table of Contents

Related Manuals for Lightspeed Topcat


Summary of Contents for Lightspeed Topcat
- Page 1 TOPCAT Classroom Audio System U s e r M a n u a l...
-
Page 2: Important Safety Instructions
IMPORTANT SAFETY INSTRUCTIONS Read these instructions. 11. Only use attachments/ accessories specified by the Keep these instructions. manufacturer. Heed all warnings. 12. Use only with a cart, stand, Follow all instructions. tripod, bracket or table specified by the manufacturer, Do not use the apparatus near or sold with the apparatus. - Page 3 • USE A LICENSED ELECTRICIAN FOR POWER CONNECTIONS. The TOPCAT system uses standard 100 – 240VAC power. Obtain the services of a licensed electrician when supplying and connecting power to the ceiling enclosure. BE SURE electrical installation complies with local building codes.
-
Page 5: Table Of Contents
PageFirst Interface Amplifying External Audio Equipment Output to Assistive Listening Device (ALD) SECTION 4: Common Problems and Solutions Troubleshooting TOPCAT and Media Connector Registration Set-up and Operation of the REDMIKE VC and TOPCAT SECTION 5: Five-Year Limited Warranty Warranty, Safety Safety Warnings &... -
Page 6: Section 1
SECTION 1: OVERVIEW SYSTEM COMPONENTS AND UNPACKING The standard configuration of the TOPCAT will contain: ® TOPCAT Media Connector and Power Supply Cradle Charger and Power Supply REDMIKE® VC Volume Control Microphone... -
Page 7: Optional Components
SYSTEM COMPONENTS AND UNPACKING CONT’D Audio Cable Kit Hardware for optional wall-mounting of Media Connector and ISR OPTIONAL COMPONENTS Optional equipment which may be part of your TOPCAT system: REDMIKE® Share Handheld Mic & Charger Cable DC Extension Cable... -
Page 8: System Components
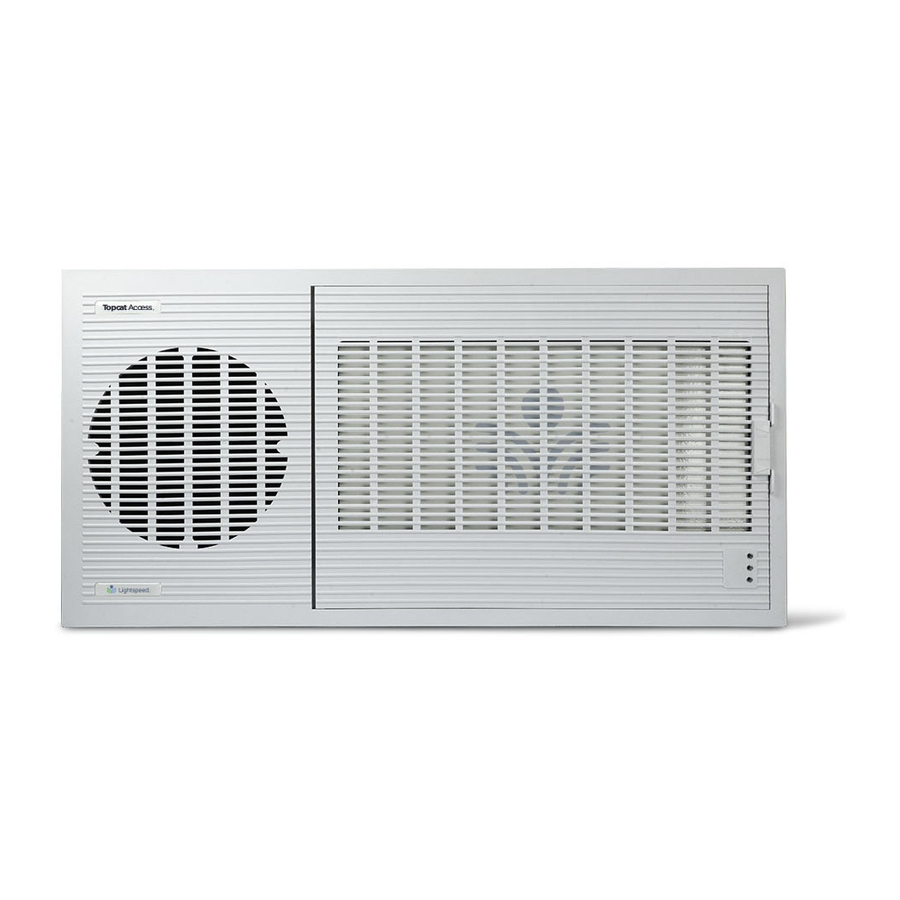
SYSTEM COMPONENTS Equipment which may be part of your TOPCAT: Standard Components (U.S. and Canada) TOPCAT all-in-one ceiling mount system 24V-2.5-NA 24V/2.5A power supply for TOPCAT REDMIKE VC microphone with battery NH2A27 AA NiMH rechargeable sensing battery for REDMIKE AC-RMLC2... - Page 9 TOPCAT SIDE PANEL CONTROLS AND CONNECTIONS 1. CH A VOLUME: Controls the volume level for microphone set to channel A. It is preset at the factory to its 11 o’clock position. Turn clockwise to increase volume SIDE VIEW or counter clockwise to decrease volume.
- Page 10 MEDIA CONNECTOR CONTROLS AND CONNECTIONS AUDIO AUDIO AUDIO AUDIO AUDIO VOLUME 1.0A 1. POWER CABLE INPUT: Plug the power supply (5V/1.0A) into this jack. 2. FOUR AUDIO INPUTS: Connect standard audio devices to any of the 3.5mm stereo inputs. A provided cable allows connectivity to RCA stereo outputs common on DVD players and televisions...
- Page 11 RF link is established conjunction with the registration between Media Connector and the button on the TOPCAT module TOPCAT. This LED will glow green will cause the two modules to while the system modules remain synchronize as an operating linked.
- Page 12 A. The battery should only be 7. VOLUME CONTROLS (UP - replaced by a Lightspeed AA DOWN) rechargeable sensing battery (part #NH2A27). 8. CHARGER CONTACTS (+ -): These contacts interface with the 4.
- Page 13 REDMIKE Share is sensed, (REDMIKE Yellow microphone here. Protective Tab may not have been completely removed—see page 12, item 4.) A blinking green LED means a non-Lightspeed battery has been installed (possibly an alkaline battery).
-
Page 14: Section 2
1. TURN THE SYSTEM ON Press the POWER button on the Media Connector. The blue LED will glow. NOTE: since the TOPCAT is mounted in the ceiling, the Media Connector is used to remotely power the system on and off. - Page 15 REDMIKE VC is critical for proper volume adjustment. 4. Speak using a conversational level and TOPCAT will evenly distribute your voice throughout the room. 5. The TOPCAT has been set-up to provide optimum volume level during installation. REMEMBER: This equipment supplements the user’s voice so they are able to speak in a conversational tone.
-
Page 16: Charging The Redmike Vc
A blinking light indicates a charging or sensing error. See Troubleshooting section for more information. REDMIKE VC incorporates alkaline protection into the microphone design. Always use a Lightspeed rechargeable sensing battery. Replacement AA NiMH batteries may only be purchased through Lightspeed Technologies (part # NH2A27). -
Page 17: Using The Media Connector
The Media Connector can be used as the primary volume control for the audio sources you’ve connected. 1. Connect the audio source(s) to the Media Connector using the 3.5mm cables provided. 2. Set the audio source volume to provide sound through the TOPCAT. AUDIO AUDIO AUDIO AUDIO AUDIO VOLUME 1.0A... -
Page 18: Audio Integration
5. AUDIO INTEGRATION The Media Connector is designed to integrate multiple audio sources quickly and easily. TopCAT AUDIO AUDIO AUDIO AUDIO AUDIO VOLUME 1.0A... -
Page 19: Tips To Obtain Optimum Audio Performance
6. TIPS TO OBTAIN OPTIMUM AUDIO PERFORMANCE • Speak in a natural voice. A normal conversational speech level will provide an adequate signal. It is not necessary to increase the intensity of your voice—the audio system provides adequate amplification (approximately 5 – 10 dB) above ambient room noises. • Avoid wearing jewelry that may rub or bump against the microphone. -
Page 20: Section 4
SECTION 3: OPTIONAL ACCESSORIES REDMIKE SHARE: CONTROLS AND CONNECTIONS 1. POWER SWITCH: slide switch up audio signal to be played through for on and down for off. the system. 2. POWER/CHARGE INDICATOR: 4. CHANNEL SELECT SWITCH (CH A/B): Located in the battery this light glows blue when turned on and turns off to indicate low compartment, this switch is set to... -
Page 21: Redmike Share
REDMIKE SHARE: CHARGING Before use, the REDMIKE Share should be charged. It will take 8-10 hours for the REDMIKE Share to obtain a full charge. A fully charged REDMIKE Share will last for over 7 hours of use. If the microphone is used daily, it should be kept plugged into the charging cradle - REDMIKE Share can be left connected to a cradle charger for up two weeks without causing degradation to battery life. -
Page 22: Pagefirst Interface
3. As a page is broadcast, the sensor clip detects the audio signal through induction and immediately mutes the TOPCAT. 4. When the page is over, the audio from the TOPCAT returns to normal volume level. (For full installation details, refer to the TOPCAT Installation Guide.) - Page 23 USING THE REDMIKE VC TO AMPLIFY EXTERNAL AUDIO EQUIPMENT The REDMIKE VC includes a 3.5mm audio input jack to connect to an audio source like a laptop or MP3 player. The REDMIKE VC will transmit the audio signal to be played through the system. If your system includes two REDMIKE VCs, we recommend using channel B (student mike) to amplify the external audio equipment so the teacher’s volume on the channel A (teacher mike) does not have to be adjusted.
-
Page 24: Output To Assistive Listening Device (Ald)
OUTPUT TO ASSISTIVE LISTENING DEVICE (ALD) 1. Turn the ALD (Assistive Listening 4. With the TOPCAT and ALD turned Device) volume control on the on, speak into the REDMIKE VC Media Connector front panel all and slowly adjust the ALD way the down. -
Page 25: Troubleshooting
REDMIKE Share. If you review these instructions and still have questions, write down the serial number and model number of your system and call Lightspeed Technical Services at 800.732.8999, 5 a.m. – 5 p.m., PST. Customers outside of the U.S. should contact their local reseller. -
Page 26: Topcat And Media Connector Registration
(These components come pre-registered from the factory.) On occasion, one of these modules may be replaced so the registration process will be needed. Use the following table to determine if your TOPCAT and Media Connector are registered. MC Power... -
Page 27: Setup And Operation Of The Redmike Vc And Topcat
Once the REDMIKE is charged, follow these steps to set it up for use. NOTE: This procedure is easier with two people. 1. Turn the TOPCAT power on. The indicated on the back of the Mic. blue LED on the Media Connector REMEMBER: This equipment will glow. -
Page 28: Warranty, Safety & Specifications
FIVE (5) YEARS, beginning at the date of the purchase invoice. If such malfunction occurs, the product will be repaired or replaced (at Lightspeed’s option) without charge during the warranty period. -
Page 29: Safety Warnings And Certifications
• Connect the equipment into an outlet on a circuit different from that to which the receiver is connected • Consult the dealer or an experienced radio/TV technician for help Caution: To maintain the compliance with the FCC’s RF exposure guideline, place Media Connector & TOPCAT at least 20 cm from nearby persons. -
Page 30: Précautions De Sécurité Et Certifications
• En contactant le revendeur ou un technicien expérimenté en radio/télévision Attention : afin d’assurer la conformité aux exigences de la FCC en matière d’exposition aux RF, placez le Media Connector et le TOPCAT à une distance de 20 cm minimum des personnes les plus proches. -
Page 31: Declaration Of Conformity
Product: TOPCAT SERIES Model Number(s): TopCAT (TC1881), Media Connector (MC1881) Conforms to the following EU Directives and the standards stated: Low Voltage Directive: 73/23/EEC and amendments; UL/lEC 60065, CB Certificate EMC Directives: 89/336/EEC, 92/31/EEC, 93/68/EEC, 2004/108/EC, EN 55022:2006+A1, ETSI EN 301406V2.1.1 (2009-07), ETSI EN 301 489-6 V1.3.1 (2008-08),... -
Page 32: System Specifications
SYSTEM SPECIFICATIONS OVERALL SPECIFICATIONS TOPCAT Specifications Description Two-way hybrid speaker system with exciter technology sound panel and low frequency cone driver Panel Size 16.25” x 8.25” Frequency Response 60 Hz - 18 kHz @ 10dB Impedance 4 Ohms Power Handling... - Page 33 SYSTEM SPECIFICATIONS CONT’D INFRARED SENSOR INTEGRATED SENSOR / RECEIVER (ISR) Power From TOPCAT Reception Coverage Rooms up to 1200 sq ft / 110 m (ceiling 12ft / 3.66 or less) Mounting Integrated on TOPCAT ceiling clip / wall bracket Receiving Diodes...
- Page 36 LIGHTSPEE D TE CHNOLOGIES 1 1509 SW HERMAN RO AD / TUAL ATI N, OR 970 62 TOL L F REE: 800.732 .89 99 / PHO NE: 503.68 4.5 538 / FAX: 503.684.3197 LIG HTSPEE D-TEK. COM MN0375US01-6...
Need help?
Do you have a question about the Topcat and is the answer not in the manual?
Questions and answers