
Related Manuals for INVENTOR Cool 8000btu


Summary of Contents for INVENTOR Cool 8000btu
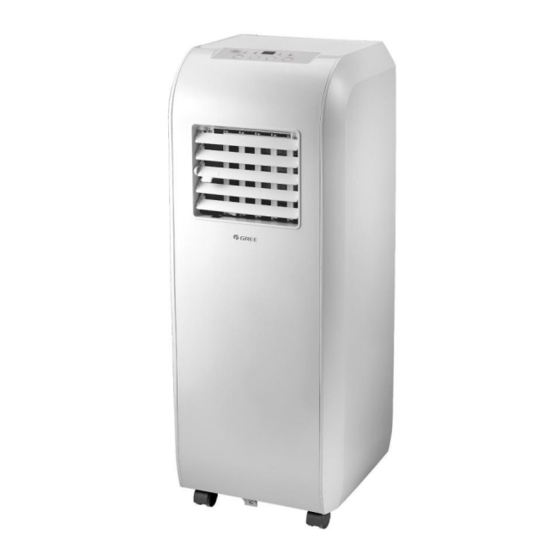
- Page 1 Inventor Portable Air Conditioner Model Number: Cool 8000btu INSTRUCTION MANUAL SAVE THESE INSTRUCTIONS FOR FUTURE REFERENCE...
-
Page 2: Table Of Contents
Many features have been built into your Inventor air conditioner to assure quiet operation, the best circulation of cool, dry air, functional controls, and the most economical operation. -
Page 3: Bs Plug Wiring
BS Plug Wiring Wiring Instructions: Should it be necessary to change the plug please note the wires in the mains lead are coloured in accordance with the following code: BLUE - NEUTRAL BROWN – LIVE GREEN AND YELLOW - EARTH As the colours of the wires in the mains lead of this appliance may not correspond with the coloured markings identifying the terminals in your plug, proceed as follows:... -
Page 4: Specification
SPECIFICATION Model no. Cool 8000 8000 BTU/hr Cooling capacity 2345watts Power/Ampere consumption for cooling 1130 W/ 4.6A Air volume (H/M/L) 350X300X250 m Humidity removal capacity 0.75L/hour Power supply 220-240V~. 50Hz Compressor rotary Noise Level 56/54/52 dB(A) Refrigerant R410A (460g) Fan speed Timer 1~24 hours Cooling: 16 ~ 30... -
Page 5: Working Principle
WORKING PRINCIPLE Under function of fan motor, indoor airflow changed into cooled air through evaporator then blew out, while the indoor airflow changed into heated air though condenser then blew out. There are 2 flues designed on structure of this unit: heated air is discharged from rear air outlet vent on back air conditioner while cooled air from front air outlet vent of the unit. - Page 6 When only used as dehumidifier, remember to take off heat discharge pipe from unit and install it onto unit when the unit is used as air conditioner. Since partial indoor air will be heated as heat air and discharged to outside by discharge pipe after cycling then outdoor air will enter to maintain balance air pressure, thus the air conditioner will only lower...
-
Page 7: Structure
STRUCTU Front Rear... -
Page 8: Operating Methods
OPERATING METHODS Location Requirements Of The temp. range of this unit is ° ° the Unit C - 30 Unit Setup Place the unit on horizontal floor when using and maintain a distance for above 50cm from walls, surface of flammable objects or other obstructions. -
Page 9: Functions And Operation Methods Of Control Panel
Functions and operation methods of control panel Panel Control Under ON status, after each pressing of the button on control panel, the air conditioner will give out a sound. Meanwhile, corresponding indicator on control panel will be bright. The display may be off during some mode l. -
Page 10: Environmental Temperature
Ambient temperature Ambient Temperature range of the unit is 16°C - 30 °C. Cool Mode 1 In the COOLING Mode the appliance must be placed close to a window or opening so that the warm exhaust air can be ducted outside through the window. 2 Press to turn on unit, press MODE to select cool mode, which is indicated ON / OFF... -
Page 11: Operation Of Wireless Remote Control
Operation of wireless remote control Names and functions of wireless remote control Note: Be sure that there are no obstructions between receiver and remote controller; do not drop or throw the remote control; do not let any liquid in the remote control or place the remote control directly under the sunlight or any place where is very hot. -
Page 12: Timer Button
Timer TIMER button - You can set both pre-set stop and delayed start while unit is in ON position or OFF position. Remote When unit is in ON position, first press TIMER button to go to Control Pre-set stop setting, then “T-OFF” light will illuminate, tap or hold the + button or the - button to change delay stop timer at 0.5 hour increments up to 24 hours. -
Page 13: Guide For Operation- General Operation
Guide for operation- General operation 1. After powered on, press ON/OFF button, the unit will start to run. 2. Press MODE button, select desired running mode, 3. Pressing + or - button, to set the desired temperature. (It is not possible to set the temp. at AUTO mode.) 4. -
Page 14: Drainage Methods
DRAINAGE METHOD During the process of cooling or drying, excess condensation will occur inside the unit, although the water will be evaporated by the coil for maximum efficiency. In very warm temperature or high humidity condition, it will require water drainage. When the internal water tank is full the buzzer will beep 8 times as a warning,” “water full indicator will light up on the panel with H8 displayed on LED display window and the unit will stop working. - Page 15 2. Attach the drain hose clamp (C) to the back panel of the air conditioner near the drain port (A) with the screw provided. 3. Attach one end of the drain hose (D) to the drain port (A) with the clip (E). Make sure the hose is fully inserted into the drain port (A).
-
Page 16: Accessories And Installation Of Heat Exhaust Hose
ACCESSORIES AND INSTALLATION OF HEAT EXHAUST HOSE Installation of the Exhaust Hose and Adapter 1. Position the Air conditioner to its required location. See “Location Requirements.” 2. Insert one end of the flexible exhaust hose into the exhaust adapter. 3. Twist clockwise to lock hose into place. 4. - Page 17 If the pipe are to be bent, please install it by following the requirements shown in the picture below. An example of an improper installation is shown in following figure (If the pipe is bent too much, it would easily cause malfunction.)
-
Page 18: Maintenance
Maintenance Mobile AC There are wheels at bottom of mobile air conditioner that enable the unit moves among rooms conveniently according to need. Warning Plug off power plug from socket and cut off power before any maintenance to prevent creepage. Clean air filter If too much dust is deposed on the filter, performance of air conditioner will reduce, thus it is better to clean filter at least once every 2 weeks. -
Page 19: Malfunction Analysis
MALFUNCTION ANALYSIS If a malfunction occurs, please check the following before maintenance: Troubles Possible Causes Solutions The air conditioner The power supply is not 1. Insert the power plug tightly. doesn't start. connected well. The power plug 2. Replace the power plug or is not inserted tightly. -
Page 20: Safe Note And Notice
SAFE NOTE AND NOTICE Location - Don't place the unit in narrow location. Ensure better ventilation for unit to prevent malfunction occurs. - Don't place the unit in direct sunlight as it may reduce of effect of cooling. - The unit should be at least 50cm away from surface of flammable thing. - Don't soak the unit or operate it in place where is easy to get wet to prevent creepage. -
Page 21: Fault Check List
FAULT CHECK LIST The air conditioner does not run Is the air conditioner plugged in? Is there a power failure? Is the ‘WATER FULL’ indicator flashing? Is the room temperature below the set temperature? The machine seems to do little ... - Page 22 ONE (1) YEAR LIMITED WARRANTY SAVE THIS WARRANTY INFORMATION Georges Industrial Services Ltd guarantees this product free from defects in materials and workmanship for a period of one (1) year from the date of purchase, limited to parts only. Faults arising from a faulty installation is specifically excluded. This unit must be operated under conditions as recommended, at voltages indicated on the unit.
Need help?
Do you have a question about the Cool 8000btu and is the answer not in the manual?
Questions and answers
Where can I get a heat exhaust hose with an exhaust adapter and a window exhaust adapter for Inventor Cool 8000 BTU