
Subscribe to Our Youtube Channel
Related Manuals for INVENTOR M2GHP290-12


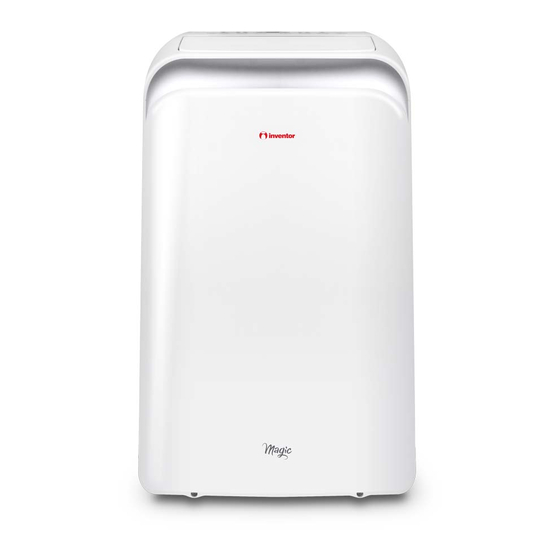
Summary of Contents for INVENTOR M2GHP290-12
- Page 1 AIR CONDITIONING SYSTEMS PORTABLE • USER’S MANUAL • ΕΓΧΕΙΡΙΔΙΟ ΧΡΗΣΗΣ • MANUAL UTILIZATORULUI MODEL: M2GHP290-12 ENGLISH | ΕΛΛΗΝΙΚΑ | ROMANA...
-
Page 2: Table Of Contents
Contents Safety Precautions ..............................3 Cautions ...................................4 Warnings (for using R290/R32 refrigerant only) ...................5 Preparation ................................10 Installation ................................11 Operation ................................14 Maintenance ............................... 17 Troubleshooting ..............................18 Design and Compliance Notes ........................19 Sociable Remark ..............................20... -
Page 3: Safety Precautions
|Safety Precautions WARNING: “Safety Hazard Symbol”, it is very important to please pay close attention to the below, to avoid any serious injury. WARNING: To avoid any serious injuries or possible unit damage, please read carefully and follow the below safety guidelines: - The installation of this unit must be according to this manual, as improper installation may cause water leakage, electrical shock or even a fire. -
Page 4: Cautions
|Cautions CAUTIONS - This appliance can be used by children aged from 8 years and above and persons with reduced physical, sensory or mental capabilities or lack of experience and knowledge if they have been given supervision or instruction concerning use of the appliance in a safe way and understand the hazards involved. -
Page 5: Warnings (For Using R290/R32 Refrigerant Only)
|Warnings (for using R290/R32 refrigerant only) - Do not use any other means other than the recommended to expedite the defrosting process or to perform a cleaning of the unit, other than those recommended by the manufacturer. - This device should never be stored in an area in combination with other ignition sources (for example: a gas appliance an electrical heater, open flames etc.) - Do not attempt to penetrate the unit with a tool or try to burn. - Page 6 |Warnings (for using R290/R32 refrigerant only) 1. Transport of equipment containing 6) No ignition sources flammable refrigerants See transport Work that is in relation to a refrigeration regulations system which involves exposing any pipe works 2. Marking of equipment using signs See local that contains or has contained flammable regulations refrigerant gases should be carried out be...
- Page 7 |Warnings (for using R290/R32 refrigerant only) The repair and the maintenance to the electrical are the only type that can be worked on, while components must include safety checks and live in the presence of flammable atmosphere. also component inspection procedures. If there The test apparatus should be at the correct is any fault, that may compromise the safety of rating.
- Page 8 |Warnings (for using R290/R32 refrigerant only) in order to make any repairs or for any other OFN. The system must also be leak tested purposes, conventional procedures should on completion of charging but prior to be applied. However, it is strongly suggested commissioning.
- Page 9 |Warnings (for using R290/R32 refrigerant only) refrigerant. The label must be dated and signed. is drained from a system, it shall be carried out Ensure that there are labels on the equipment safely. stating the equipment contains flammable refrigerant. Important Note Regarding Fluorinated 16.
-
Page 10: Preparation
|Preparation control panel horizontal louver blade upper air filter (swing automatically) (behind the grille) handle (both sides) upper air intake drain outlet Panel air outlet lower air filter lower air intake drain outlet (only for pump heating mode) power cord buckle Caster power cord outlet power plug socket... -
Page 11: Installation
|Installation |Installation Choosing The Right Location - The air conditioner should be placed on a firm foundation to minimize noise and vibration. For safe and secure positioning, place the unit on a smooth, level floor strong enough to support the unit. - The unit must be placed near a properly rated grounded outlet. - Page 12 |Installation Europe Part Description Quantity Part Description Quantity Unit Adaptor 1 pc Bolt 1 pc Exhaust Hose 1 pc Security Bracket and Screw 1 set Drain Hose 1 pc Window Slider Adaptor 1 pc Drain Hose Adaptor(only for Wall Exhaust Adaptor A 1 pc 1 pc heat pump mode)
- Page 13 |Installation |Installation Type 2: Wall Installation (optional) Note: Once the Exhaust Hose assembly and 1.Cut a 125mm (4.9inch) hole into the wall Adjustable Window Slider are prepared, choose for the Wall Exhaust Adaptor B. 2.Secure the from one of the following installation methods. Wall Exhaust Adaptor B to the wall using the Type 1: Hung Window or Sliding Window four Anchors and Screws provided in the kit.
-
Page 14: Operation
|Operation NOTE: The control panel may be look like the following: NOTE: On some models is instead of °F. On some models (WIRELESS light) is instead of (power light). NOTE: ION, FOLLOW ME, WIRELESS features are not available. ION is not applicable for R32/R290 units. - Page 15 |Operation Swing button Sleep(Eco) button Used to initiate the Auto swing feature. When Used to initiate the SLEEP/ECO operation. the operation is ON, press the SWING button can stop the louver at the desired angle. Power button Power switch on/off. Timer button Used to initiate the AUTO ON start time and LED display...
- Page 16 |Operation Operation Instructions COOL operation TIMER operation - Press the "MODE" button until the "COOL" indicator - When the unit is on, press the Timer button will initiate light comes on. the Auto- off stop program, the TIMER OFF indicator - Press the ADJUST buttons "+"...
-
Page 17: Maintenance
|Operation drain hose adaptor √ WAIT 3 MINUTES BEFORE RESUMING OPERATION drain hose Once the unit has stopped its operation, it can not be adaptor restarted within the first 3 minutes, for the protection of the device. Operation will automatically restart after 3 minutes. -
Page 18: Troubleshooting
|Maintenance Maintenance Tips - Power off the unit and unplug. - Clean the air filter every two weeks to prevent - Clean the air filter as per the instructions in the inferior fan operation due to dust. previous section. Reinstall the clean and dry filter - The water collection tray must be drained before storing. -
Page 19: Design And Compliance Notes
Heat (electrical heat mode) 30°C (86°F) NOTE: To be in compliance EN 61000- 3- 11, the product M2GHP290-12 shall be connected only to a supply of the system impedance: | Zsys|=0.348 ohms or less. Before connect the product to public power network, please consult your local power supply authority to ensure the power... -
Page 20: Sociable Remark
|Sociable Remark When using this unit in the European countries, the following information must be followed: DISPOSAL: Do not dispose this product as unsorted municipal waste. This appliance requires special treatment for disposal. It is prohibited to dispose of this appliance in domestic household waste. There are several possibilities for disposal: A. - Page 21 Postal Code* Invoice Number* Phone Number* Additional Details E-mail* Subscribe to Inventor's Newsletter * Required field With the current warranty card you accept the terms and conditions. SEND once the warranty submission has been completed a confirmation message will be þ...
- Page 22 |Περιεχόμενα Οδηγίες Ασφαλείας ............................23 Προειδοποιήσεις (αφορά ψυκτικό υγρό τύπου R290/ R32) ..............25 Εγκατάσταση ............................... 31 Λειτουργία ................................34 Συντήρηση ................................38 Σφάλματα ................................39 Σχεδιασμός και Προδιαγραφές ........................40 Γενικές Παρατηρήσεις - Απόρριψη Συσκευής ................... 41...
-
Page 23: Οδηγίες Ασφαλείας
|Οδηγίες Ασφαλείας Προειδοποίηση: Αυτό το σύμβολο υποδεικνύει ότι μπορεί να προκληθεί θάνατος ή σοβαρός τραυματισμός σε περίπτωση που δεν ακολουθήσετε τις οδηγίες. Προειδοποίηση: Για την αποφυγή θανάτου, προσωπικού τραυματισμού ή τραυματισμού τρίτων πρέπει να ακολουθούνται οι παρακάτω οδηγίες. Αγνοώντας τις οδηγίες, μπορεί να προκληθεί θάνατος... - Page 24 |ΠΡΟΣΟΧΗ ΠΡΟΣΟΧΗ - Αυτή η συσκευή μπορεί να χρησιμοποιηθεί από παιδιά ηλικίας από 8 ετών και άνω και άτομα με μειωμένες σωματικές, αισθητηριακές ή διανοητικές ικανότητες ή έλλειψη εμπειρίας και γνώσης, αν έχουν επιτήρηση ή οδηγίες σχετικά με τη χρήση της συσκευής με ασφαλή τρόπο και κατανοούν τον...
-
Page 25: Προειδοποιήσεις (Αφορά Ψυκτικό Υγρό Τύπου R290/ R32)
|Προειδοποιήσεις (αφορά ψυκτικό υγρό τύπου R290/ R32) - Μην χρησιμοποιείτε μέσα επιτάχυνσης της διαδικασίας απόψυξης ή για να καθαρίσετε τη μονάδα, πέραν εκείνων που συνιστώνται από τον κατασκευαστή. - Η συσκευή θα πρέπει να αποθηκεύεται σε δωμάτιο χωρίς την ύπαρξη πηγών ανάφλεξης (για παράδειγμα: ανοικτές... - Page 26 |Προειδοποιήσεις (αφορά ψυκτικό υγρό τύπου R290/ R32) 1. Μεταφορά του εξοπλισμού που περιέχει ανίχνευσης διαρροών που χρησιμοποιείτε είναι εύφλεκτα ψυκτικά μέσα. κατάλληλος για χρήση σε εύφλεκτα ψυκτικά Δείτε τους κανονισμούς μεταφοράς. υγρά, π.χ. χωρίς παραγωγή σπινθήρων, επαρκώς 2. Σήμανση του εξοπλισμού μέσω των σφραγισμένος...
- Page 27 |Προειδοποιήσεις (αφορά ψυκτικό υγρό τύπου R290/ R32) που υπάρχει ενδιάμεσο ψυκτικό κύκλωμα θα Βεβαιωθείτε ότι η μονάδα είναι τοποθετημένη πρέπει γίνουν οι απαραίτητοι έλεγχοι ψυκτικού με ασφάλεια. Βεβαιωθείτε ότι οι μονώσεις ή υγρού. Όλες οι ενδείξεις του εξοπλισμού πρέπει να οποιοδήποτε...
- Page 28 |Προειδοποιήσεις (αφορά ψυκτικό υγρό τύπου R290/ R32) του LFL ψυκτικού υγρού που χρησιμοποιείται. O πλήρωση, το σύστημα θα πρέπει να εξαερίζεται σε εξοπλισμός ανίχνευσης της διαρροής θα πρέπει ατμοσφαιρική πίεση για να επιτρέπει κάθε εργασία να καθορίζεται σε ποσοστό LFL ψυκτικού υγρού που...
- Page 29 |Προειδοποιήσεις (αφορά ψυκτικό υγρό τύπου R290/ R32) διαδικασία αποκατάστασης πρέπει να επιβλέπεται εκκενώνονται και, αν είναι δυνατόν να ψύχονται συνεχώς από αρμόδιο πρόσωπο. πριν πραγματοποιηθεί η ανάκτηση. Ο εξοπλισμός και η ανάκαμψη των φιαλών πρέπει Ο εξοπλισμός ανάκτησης θα πρέπει να είναι να...
- Page 30 |Προετοιμασία πριν από την Εγκατάσταση Πάνελ χειρισμού Οριζόντια περσίδα (κινείται αυτόματα) Πάνω φίλτρο αέρα (πίσω από τη γρίλια) Λαβή μεταφοράς (και στις δυο πλευρές) Πάνω φίλτρο αέρα Έξοδος αποστράγγισης Πάνελ Εξαγωγή αέρα Κάτω φίλτρο αέρα Κάτω εισαγωγή αέρα Έξοδος αποστράγγισης (μόνο...
-
Page 31: Εγκατάσταση
|Εγκατάσταση Επιλέγοντας τη σωστή τοποθεσία εγκατάστασης Η θέση εγκατάστασης θα πρέπει να πληροί τις ακόλουθες προϋποθέσεις: - Βεβαιωθείτε ότι έχετε εγκαταστήσει τη συσκευή σας σε επίπεδη επιφάνεια για την ελαχιστοποίηση του θορύβου και των κραδασμών. - Η μονάδα πρέπει να εγκατασταθεί κοντά σε γειωμένη πρίζα, και... - Page 32 |Εγκατάσταση Ευρώπη Εξάρτημα Περιγραφή Ποσότητα Εξάρτημα Περιγραφή Ποσότητα Αντάπτορας 1 pc Βίδα 1 pc Αγωγάς Εκκένωσης 1 pc Στήριξη Ασφαλείας και 1 set Αγκυρόβιδες Κιτ Παραθύρου 1 pc Αγωγός Αποστράγγισης 1 pc Α Κιτ Παραθύρου (μόνο για 1 pc επιτοίχια εγκατάσταση) Αντάπτορας...
- Page 33 |Εγκατάσταση ΣΗΜΕΙΩΣΗ: Όταν ο αγωγός αέρα και το κιτ Τύπος 2: Επιτοίχια Εγκατάσταση (Προαιρετικό) παραθύρου έχουν ετοιμαστεί, διαλέξτε μία από 1. Ανοίξτε οπή 125mm ( 4.9 ίντσες) στον τοίχο τις ακόλουθες μεθόδους εγκατάστασης. για τον αντάπτορα αγωγού Β. Τύπος 1: Εγκατάσταση Κρεμαστού ή 2.
-
Page 34: Λειτουργία
|Λειτουργία ΣΗΜΕΙΩΣΗ: Το πάνελ χειρισμού μπορεί να μοιάζει με το παρακάτω: ΣΗΜΕΙΩΣΗ: Σε μερικά μοντέλα είναι αντί του °F. Σε μερικά μοντέλα η (λυχνία WIRELESS) είναι αντί της ( λυχνίας power). ΣΗΜΕΙΩΣΗ: ΙΟΝ, FOLLOW ME, WIRELESS δεν διατίθενται. Η λειτουργία ΙΟΝ δεν είναι διαθέσιμη στις... - Page 35 |Λειτουργία Πλήκτρο Swing Πλήκτρο POWER Χρησιμοποιείτε για να ενεργοποιήσετε τη Ενεργοποίηση/Απενεργοποίηση της ΑUTO λειτουργία της κίνησης των περσίδων. μονάδας. Όταν η λειτουργία είναι ενερογποιημένη, πιέζοντας το πλήκτρο SWING σταματά η Οθόνη LED περσίδα στην επιθυμητή γωνία. Αναγράφει την ρυθμισμένη θερμοκρασία σε...
- Page 36 |Λειτουργία Oδηγίες λειτουργίας Λειτουργία TIMER Λειτουργία COOL -Όταν είναι ενεργοποιημένη η μονάδα, πιέζοντας Πιέστε το πλήκτρο MODE ώστε να ανάψει η ένδειξη το πλήκτρο TIMER θα ξεκινήσει η διακοπή της του “COOL”. λειτουργίας AUTO με την λυχνία του TIMER OFF να - Πιέστε...
- Page 37 |Λειτουργία √ √ Αναμονή 3 λεπτών πριν την επανεκκίνηση ΣΗΜΕΙΩΣΗ: Βεβαιωθείτε ότι ο αγωγός είναι SCALE 0.500 MODEL B MODEL A λειτουργίας τοποθετημένος σωστά για την αποφυγή τυχόν Μετά την παύση λειτουργίας της μονάδας, διαρροών. Στρέψτε τον αγωγό προς το σημείο χρειάζονται...
-
Page 38: Συντήρηση
SCALE 0.500 | Συντήρηση Καθαρισμός της Μονάδας ΠΡΟΕΙΔΟΠΟΙΗΣΗ: Καθαρίστε τη μονάδα χρησιμοποιώντας - Πάντα να αποσυνδέετε τη μονάδα πριν τον SCALE 0.500 ένα καθαρό υγρό πανί και ένα ήπιο καθαρισμό ή τη συντήρηση. απορρυπαντικό. - ΜΗΝ χρησιμοποιείτε εύφλεκτα υγρά ή χημικές... -
Page 39: Σφάλματα
|Σφάλματα Πραγματοποιήστε τον έλεγχο των παρακάτω προτού απευθυνθείτε σε τεχνικό: Πρόβλημα Πιθανά Αίτια Σφάλματα P1 Κωδικός Σφάλματος Το λεκανάκι συμπυκνωμάτων είναι γεμάτο. Απενεργοποιήστε τη συσκευή, αφαιρέστε το νερό από το λεκανάκι και Η μονάδα δεν λειτουργεί επανεκκίνηστε τη μονάδα. πιέζοντας το πλήκτρο ON/OFF Στη... -
Page 40: Σχεδιασμός Και Προδιαγραφές
30°C (86°F) ΣΗΜΕΙΩΣΗ: Σύμφωνα με την οδηγία: TEN 61000-3-11, η μονάδα M2GHP290-12 πρέπει να συνδέεται μόνο σε πρίζα με προδιαγραφές: | Zsys|=0.348 ohms η λιγότερο. Προτού συνδέσετε τη μονάδα σε δημόσιο δίκτυο, συμβουλευτείτε τον κατασκευαστή η τον τοπικό αντιπρόσωπο ώστε να... -
Page 41: Γενικές Παρατηρήσεις - Απόρριψη Συσκευής
|Sociable Remark When using this unit in the European countries, the following information must be followed: DISPOSAL: Do not dispose this product as unsorted municipal waste. This appliance requires special treatment for disposal. It is prohibited to dispose of this appliance in domestic household waste. There are several possibilities for disposal: A. - Page 42 Rufnummer* Αριθμός παραστατικού* E-mail* Τηλέφωνο* Επιπλέον στοιχεία Διεύθυνση email* Να εγγραφώ στο newsletter της Inventor * Απαραίτητο πεδίο Αποστέλοντας τη φόρμα εγγύησης αποδέχεστε τους όρους και τις προϋποθέσεις. AΠΟΣΤΟΛΗ Μόλις ολοκληρωθεί η υποβολή της εγγύησης θα λάβετε την επιβεβαίωση þ...
- Page 43 Cuprins Atentionari ................................44 Avertizari (la utilizarea agentului frigorific R32/R290) ................46 Preparation ................................51 Instalare ................................52 Operare ................................55 Mentenanta ................................. 58 Diagnoza ................................59 Note despre design si conformitate ......................60 Remarca Sociala ..............................61...
-
Page 44: Atentionari
|Atentionari AVERTIZARE: Acest simbol indica pericol de ranire sau deces. AVERTIZARE: Respectati urmatoarele instructiuni, pentru a preveni daunele materiale, ranirea sau moartea. Utilizarea incorecta sau ignorarea instructiunilor pot produce pagube materiale sau moarte. - Instalarea trebuie efectuata urmand strict aceste instructiuni. O instalare incorecta a produsului poate duce la scurgeri de apa, electrocutare sau pericol de incendiu. - Page 45 |Atentionari ATENTIONARI - Acest aparat poate fi folosit de copiii de peste 8 ani şi de catre persoane cu capacitati fizice,senzoriale sau mentale reduse, sau lipsite de experienta şi cunoştinte daca li se acorda supraveghere sau instruire cu privire la utilizarea în siguranta si daca inteleg riscurile implicate. Copiii nu trebuie lasati să...
-
Page 46: Avertizari (La Utilizarea Agentului Frigorific R32/R290)
|Avertizari (la utilizarea agentului frigorific R32/R290) - Nu accelerati procesul de degivrare si nu folositi alte produse de curatare, fata de cele recomandate de producator. - Depozitati aparatul intr- o incapere fara surse continue de scanteie/caldura (flacara deschisa, un aparat ce functioneaza cu gaz sau incalzitor electric). - Nu strapungeti si nu ardeti aparatul. - Page 47 |Avertizari (la utilizarea agentului frigorific R32/R290) 1. Transportul echipamentului ce contne Persoana ce va lucre la traseul frigorific, ce agenti frigorifici inflamabili. Regulile vor fi include lucrul cu conducte ce contin sau au expuse mai jos. continut agent frigorific, nu va folosi dispozitive 2.
- Page 48 |Avertizari (la utilizarea agentului frigorific R32/R290) inspectie a componentelor respective. circuitului, inainte de a va asigura ca acest In cazul unei defectiuni, ce poate compromite fapt nu va depasi tensiunea si amperajul siguranta, nici un component nu va fi conectat la acceptate de echipament.
- Page 49 |Avertizari (la utilizarea agentului frigorific R32/R290) Atunci cand accesati traseul frigorific, pentru tehnicianul sa se fi familiarizat cu echipamentul, a efectua lucrari sau pentru alte scopuri, cunoscand sistemul in detaliu. Recuperati respectati procedurile conventionale. Datorita agentul frigorific in deplina siguranta. Inainte de flamabilitatii agentului frigorific, alegeti cu incepere, se vor preleva mostre de ulei si agent atentie cea mai buna solutie pentru situatia...
- Page 50 |Avertizari (la utilizarea agentului frigorific R32/R290) de freon recuperate. Asigurati- va ca aveti suficiente containere pentru intreaga cantitate de freon recuperate din sistem. Toate containerele sunt destinate tipului de freon recuperat si vor fi etichetate corespunzator (ciilindrii freon recuperat). Containerele vor fi echipate cu supape de reglare a presiunii si supape de inchidere.
-
Page 51: Preparation
|Preparation panou de control flaps orizontal (oscilare automata) filtru de aer (in spatele grilei) maner (in ambele parti) priza admisie aer superioara priza de scurgere Panou priza de aer filtru de aer inferior priza admisie aer priza de scurgere (doar pentru pompa de caldura) suport cablu de alimentare... -
Page 52: Instalare
|Instalare Alegerea locatiei potrivite Locatia in care urmeaza sa instalati aparatul, trebuie sa respecte urmatoarele recomandari: - Suprafata pe care se va instala aparatul, trebuie sa fie dreapta si neteda, pentru a reduce zgomotul si vibtatiile. - Aparatul se va instala in apropierea unei prize cu impamantare iar tavita de colectare (disponibila in partea din spate a aparatului) trebiue sa fie accesibila. - Page 53 |Instalare Other Regions Articol Descriere Cantitate Articol Descriere Cantitate Adaptor 1 pc Surub 1 pc Furtun evacuare 1 pc Balama cu surub 1 set Furtun de scurgere 1 pc Adaptor fereastra 1 pc Adaptor pentru furtunul de Adaptor pentru evacuare scurgere (valabil doar pentru 1 pc prin perete (valabil doar...
- Page 54 |Instalare Nota: Dup ace ati asamblat furtunul de Tip 2. Evacuare prin perete. evacuare si glisierele pentru fereastra, puteti 1. Decupati o gaura in perete, de 125mm (4.9 alege una dintre cele doua tipuri de instalare. inch), pentru a instala adaptorul B pentru Tipul1: Fereastra normala sau glisanta evacuarea prin perete.
-
Page 55: Operare
|Operare NOTA: Panoul de control va arata precum de mai jos: NOTA: La unele modele, simbolul , va fi afisat in loc de °F. Pentru unele modele, simbolul (indicator wireless), va fi afisat in locul indicatoului luminos de alimentare. NOTA: ION, FOLLOW ME, WIRELESS nu sunt disponibile. Functia de IONIZATOR nu este disponibila pentru unitatile cu R32/R290. - Page 56 |Operare Buton oscilare flaps Butonul SLEEP (ECO) Folositi- l pentru activarea functiei de oscilare Apasati butonul pentru a activa functia automata a flapsurilor. In timpul oscilarii, SLEEP/ECO. apasati inca o data butonul SWING pentru a bloca flapsul in pozitia dorita. Butonul POWER Porneste sau opreste unitatea.
- Page 57 |Operare Instructiuni de operare nivelul vitezei ventilatorului. Temperatura nu Modul COOL poate fi schimbata. - Apasati butonul MODE pana cand indicatorul - Nu atasati furtunul de evacuare la fereastra. din dreptul modului "COOL"se aprinde. Programarea temporizatorului - Apasati butoanele de reglare "+" si "-" - Atunci cand unitatea este pornita, apasati butonul pentru a alege temperatura incaperii.
-
Page 58: Mentenanta
|Operare Adaptor pentru √ furtunul de ASTEPTATI 3 MINUTE PANA LA REPORNIRE scurgere Adaptor Dupa ce unitatea a fost oprita, aceasta nu va pentru furtunul de putea fi repornita in primele 3 minute. Acesta scurgere este un sistem de protectie. Apăsați catarama cablului de MANAGEMENTUL ALIMENTARII Atunci cand, pe o... -
Page 59: Diagnoza
|Mentenanta Sfaturi pentru mentenanta posibilitatea aparitiei mucegaiului. - Curatati filtrul o data la 2 saptamani, pentru a - Opriti aparatul si scoateti- l din priza. mentine performantele aparatului. - Curatati filtrul respectand instructiunile oferite - Tavita de colectare a apei trebuie sa fie golita in sectiunea precedenta. -
Page 60: Note Despre Design Si Conformitate
30°C (86°F) electrica) NOTA: Pentru a respecta EN 6100- 3- 11, produsul M2GHP290-12, va fi conectat doar la un sistem electric cu impedanta: |Zsys|=0.348 ohmi sau mai mica. Inainte de conectarea produsului la reteaua electrica, cereti mai multe informatii distribuitorului dumneavoastra de energie electrica, pentru a va asigura ca reteaua respecta valorile de mai sus. -
Page 61: Remarca Sociala
|Remarca Sociala Atunci cand utilizati acest produs in tarile din Uniunea Europeana, respectati urmatoarele instructiuni: Scoaterea din folosinta: Nu aruncati acest produs impreuna cu deseul municipal. Colectarea acestui produs se face separat. Este interzisa aruncarea acestui produs impreuna cu deseul casnic. La eliminarea acestui aparat, respectati urmatoarele aspecte: A) Autoritatile locare va pun la dispozitie puncte de colectare, in care deseurile electronice pot fi lasate gratuit. - Page 62 Rufnummer* Numar Factura* E-mail* Numar de telefon* Detalii aditionale E-mail* Abonati-va la Newsletter-ul Inventor * Camp obligatoriu Cu acest certificat de garantie acceptati Termenii si Conditiile. TRIMITE þ Odata ce garantia a fost activata, veti primi un email de confirmare...
- Page 64 AIR CONDITIONING SYSTEMS PORTABLE v 1.0...
Need help?
Do you have a question about the M2GHP290-12 and is the answer not in the manual?
Questions and answers