
Related Manuals for INVENTOR COOL/FCOOL-8BS


Summary of Contents for INVENTOR COOL/FCOOL-8BS
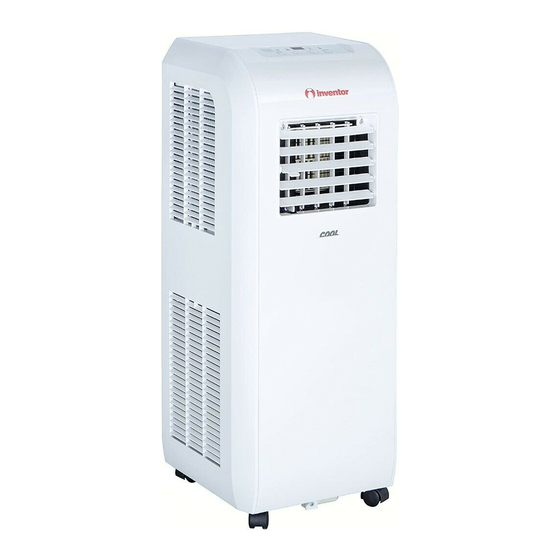
- Page 1 AIR CONDITIONING SYSTEMS AIR CONDITIONING SYSTEMS PORTABLE • SERVICE MANUAL MODELS: COOL FCOOL-8BS ENGLISH ENGLISH...
-
Page 2: Table Of Contents
Service Manual Table of Contents Part Ⅰ : Technical Information ............1 1. Summary ....................1 2. Specifications ..................2 3. Outline Dimension Diagram ..............4 4. Refrigerant System Diagram ............5 5. Electrical Part ...................6 5.1 Wiring Diagram ...................6 5.2 PCB Printed Diagram ................ -
Page 3: Part Ⅰ : Technical Information
Service Manual Part : Technical Information Ⅰ 1. Summary COOL FCOOL-8BS Remote Controller: YX1F T-ON T-OFF AUTO SWING COOL SLEEP LOCK SPEED HEAT ON/OFF MODE SWING SLEEP TIMER Technical Information... -
Page 4: Specifications
Service Manual Parameter Unit Value Model GPC08AH-K3NNC3D Rated Voltage V ~ 220-240 Power Rated Frequency Supply Phases Cooling Capacity Btu/h 8000 Heating Capacity Btu/h Cooling Power Input Heating Power Input Cooling Power Current Heating Power Current Rated Input 1130 Rated Current Air Flow Volume(H/M/L) 330/300/250 Dehumidifying Volume... - Page 5 Service Manual Compressor Manufacturer/ ZHUHAI LANDA COMPRESSOR Trademark CO., LTD. Compressor Model QXA-A083A130 Compressor Oil RB68EP Compressor Compressor Type Rotary L.R.A. Compressor RLA Compressor Power Input Overload Protector UP3-A0 Fan Type Centrifugal Diameter Length(DXL) Φ146X108.5 Fan Motor Speed(H/M/L) r/min 1250/1150/1050 Output of Fan Motor Fan Motor RLA 0.41...
-
Page 6: Outline Dimension Diagram
Service Manual 3. Outline Dimension Diagram COOL/FCOOL-8BS Unit:mm Technical Information... -
Page 7: Refrigerant System Diagram
Service Manual 4. Refrigerant System Diagram CENTRIFUGAL FAN CENTRIFUGAL FAN Discharge HEAT HEAT EXCHANGE EXCHANGE (EVAPORATOR) (CONDENSER) Suction Accumlator COMPRESSOR Capillary Strainer Technical Information... -
Page 8: Electrical Part
Symbol Color Symbol Name White Green COMP Compressor Yellow Brown Grounding wire Blue YEGN Yellow/Green Black Violet Orange ●Electric Diagram COOL/FCOOL-8BS These wiring diagrams are subject to change without notice; please refer to the one supplied with the unit. Technical Information... -
Page 9: Pcb Printed Diagram
Service Manual 5.2 PCB Printed Diagram (1)Silk screen on main board COOL/FCOOL-8BS TOP VIEW NAME 1 Connect neutral wire 2 Piezoresistance 3 Fuse 4 Drive replay of compressor 5 Buzzer 6 Interface of display board Interface of high-level detection switch... - Page 10 Service Manual (2)Silk screen on display board COOL/FCOOL-8BS TOP VIEW receiving head connect with main baord BOTTOM VIEW Technical Information...
-
Page 11: Function And Control
COOL/FCOOL-8BS MODE button + / - button ON/OFF button Button function introduction == Note: ● After putting through the power, air conditioner will give out a sound. After that, you can operate the air condition by pressing buttons on control panel. -
Page 12: Remote Controller Introduction
Service Manual 6.2 Remote Controller Introduction Buttons on Remote Controller ON/OFF button T-ON T-OFF MODE button AUTO SWING COOL SLEEP LOCK SPEED HEAT +/- botton MODE ON/OFF FAN button SWING SWING button SLEEP TIMER SLEEP button TIMER button Icon Display on Remote Controller Timer on Timer off Sending signal T-ON T-OFF... - Page 13 Service Manual When selecting auto mode, air conditioner will operate automatically according to ex-factory setting. Set temperature can't be adjusted and won't be displayed either. Press FAN button to adjust fan speed. (This function is not available in this air conditioner.) When selecting cool mode, air conditioner will operate under cool mode.
-
Page 14: Replacement Of Batteries In Remote Controller
Service Manual Replacement of Batteries in Remote Controller battery 1. Press the back side of remote controller on the spot marked with , and then push out the cover of battery box along the arrow direction. 2. Replace two No.7 (AAA 1.5V) dry batteries and make sure the positions of + and -- polar are correct. -
Page 15: Introduction Of Basic Mode Function
Service Manual 6.3 Introduction of Basic Mode Function 1. Temperature Parameter ◆ Indoor setting temperature (T preset ◆ Indoor ambient temperature (T amb. 2. Basic Functions of System After the unit is energized, the interval of start-up time for compressor is no less than 3min under any conditions; when the compressor is started, the unit is off without the temperature change in 6min. - Page 16 Service Manual 3.4 TIMER Function ● General timer a) TIMER ON: It can set timer on when the system is off, the setting time range is 0.5h-24h, when the time of setting timer on reaches, and the system runs with the previous setting mode. b) TIMER OFF: It can set timer on when the system is on, the setting time range is 0.5h-24h, when the time of setting timer off reaches, the system stop to work.
-
Page 17: Part Ⅱ: Maintenance
Service Manual Part Ⅱ : Installation and Maintenance 7. Notes for Installation and Maintenance Safety Precautions: Important! 10. Check if there is electric leakage on the unit body. If yes, please eliminate the electric leakage. Please read the safety precautions carefully before 11. - Page 18 Service Manual Main Tools for Installation and Maintenance 1. Level meter, measuring tape 2.Screw driver 3.Scissors, saw 4.Electroprobe 5. Universal meter 6.Torque wrench, open-end wrench, inner hexagon spanner 7. Electronic leakage detector 8. Vacuum pump 9. Pressure meter 10. Pipe pliers, pipe cutter 11.
-
Page 19: Installation Procedures
Service Manual Installation procedures Start installation Preparation before installation Read the requirements Prepare tools for electric connection Install wire hook Install drainage pipe Install window frame Install heat discharge pipe and joint pack up heat discharge pipe Check after installation and test operation Finish installation Note: this flow is only for reference;... -
Page 20: Install
Service Manual 8. Install 8.1 Install Drainage Pipe 8.2 Install Window Frame Note: install drainage pipe before using, otherwise poor Note: If the inner width of window is below 28"(718mm), drainage will affect normal operation of the unit. please remove the adjusting plate from window frame and then cut the window frame to make its width the same as the width of window. -
Page 21: Installation And Disassembly Of Heat Discharge Pipe
Service Manual (3) Cut the sponge B to a proper length and attach it to the window sash window frame. sponge B (adhesive) clip of rear connection plate Window height (H) window sash windowsill (3) Cut the sponge B to a proper length and attach it to the window (4) Close the window securely against the window frame. - Page 22 Service Manual (2) Insert joint A of heat discharge pipe (the side with "TOP" is upwards) into the groove until you hear a sound.(As shown in following fig the side with "TOP" is upwards clasp groove (3) Aim the locating pole of joint B of heat discharge pipe at the opening of joint C;...
-
Page 23: Operation Test
Service Manual (2) Press the clasp and lift joint A upwards to remove it.(As shown in following fig disassemble upwards clasp joint A 8.4 Operation test ●Put through the power supply and then press ON/OFF button on remote controller to start the unit. ●Press mode button to select auto, cooling, drying, fan or heating function, and then check if the unit operates normally. -
Page 24: Clean And Maintenance
Service Manual 8.6 Clean and Maintenance Warning ●Before cleaning the air conditioner, please turn off the unit and disconnect power. Otherwise, it may cause electric shock. ●Do not wash air conditioner with water. Otherwise, it may cause electric shock. ●Do not use volatile liquid (such as thinner or gas) to clean the air conditioner. Otherwise, it may damage the appearance of air conditioner. -
Page 25: Maintenance
Service Manual 9. Maintenance 9.1 Error Code Display Method of Indoor Unit Indicator lamp (During blinking, ON for 0.5S and NO. Malfunction OFF for 0.5 S) A/C Status Possible Causes Error Name Code Operation COOL HEAT Inidicato Indicator Indicator 1. The wiring terminal between indoor ambient temperature sensor and main Indoor board is loosened or poorly contacted. - Page 26 Service Manual Display Method of Indoor Unit Indicator lamp (During blinking, ON for 0.5S and Malfunction OFF for 0.5 S) A/C Status Possible Causes Error Name Code Operation COOL HEAT Inidicato Indicator Indicator During cooling or drying operation,condensate water will flow into Water chassis.
-
Page 27: Malfunction Detection Flowchart
Service Manual 9.2 Malfunction Detection Flowchart (1) Malfunction of temperature sensor F1, F2, F4 Troubleshooting for F1,F2,F4 malfunction the wiring terminal between the temperature sensor and the controller loosened or poorly contacted? Insert the temperature sensor tightly Is malfunction eliminated Is there short circuit due to trip - over of the parts? Make the parts upright... - Page 28 Service Manual (2) Malfunction of Overcurrent Protection E5 Troubleshooting for E5 malfunction Is the supply voltage unstable Normal fluctuation is within 10 % of the rated Malfunction is with big fluctuation? voltage on the nameplate eliminated Is the supply voltage too low Malfunction is Adjust the supply voltage to maintain it within Malfunction is...
- Page 29 Service Manual (3) Bucket full protection H8 Start up the unit H8 is displayed Discharge water by referring Whether water tray is full to instruction manual Check whether wires for water-level Whether malfunction switch are connected tightly is eliminated? Adjust connection Whether malfunction Replace water-level is eliminated?
- Page 30 Service Manual (4) Malfunction of Insufficient fluorine protection F0 (4) Troubleshooting for F0 malfunction Heat exchangers are Clean the heat exchangers and remove Malfunction is too dirty or the air inlet/outlet eliminated. blockage of air inlet/outlet. is blocked. Compressor doesn't work Malfunction is Make compressor run normally.
- Page 31 Service Manual (5) (5) Malfunction of Overload protection for compressor H3 Troubleshooting for H3 malfunction Heat exchangers are Clean the heat exchangers and remove Malfunction is too dirty or the air inlet/outlet eliminated. blockage of air inlet/outlet. is blocked. Fan motor is not working Check motor and re-install the moto Malfunction is Abnormal fan speed;...
- Page 32 Service Manual (6) Overload malfunction E8 Troubleshooting for E8 malfunction Operate the unit after ambient tempeature and Whether the environment Malfunction is humidity is decreased or move the unit to the eliminated. is formidable. place with low abient temprature and humidity. Heat exchangers are Clean the heat exchangers and remove...
-
Page 33: Maintenance Method For Common Malfunction
Service Manual 9.3 Maintenance Method for Common Malfunction 1. Air Conditioner Can't be Started Up Possible Causes for Malfunction Distinguish Method (A/C status) Maintenance Method No power supply; power plug Check whether there’s power supply; hasn’t been inserted tightly and Operation indicator is OFF and buzzer won’t give Check power plug and wire connection. - Page 34 Service Manual 3. Fan Can't Swing Possible Causes Discriminating Method (Air conditioner Status) Troubleshooting Connect wires according to wiring diagram to Wrong wire connection, or poor Check the wiring status according to circuit make sure all wiring terminals are connected connection diagram firml...
-
Page 35: Exploded View And Parts List
Service Manual 10. Exploded View and Parts List COOL/FCOOL-8BS 36 37 40 41 42 Maintenance... - Page 36 Service Manual Part Code Description GPC08AH-K3NNC3D Membrane 63066036 Display Board 30567026 Guide blade lever 2 10586015 Guide blade 1 10516059 Guide blade 2 10516062 Front Panel 20006078S Right side plate 20056112 Discharge Tube 03001300037 Inhalation Tube 03001000047 00106531 Overload Protector 00180259 15006032 Splash Water Flywheel...
-
Page 37: Removal Procedure
Service Manual Warning: disconnect power supply before 11. Removal Procedure removal; discharge the refrigerant completely before unsoldering the pipes. 1.Remove remote controller box remote controller box Break out the remote controller box, then push the middle of remote controller box to make clasps remove from remote controller box. - Page 38 Service Manual 3.Remove panel assy Remove the five screws fixing panel, lift and pull outward to remove the panel. panel screws assy for C4 panel 4.Remove rear plate Remove the six screws fixing rear plate to remove the rear plate. screws rear plate...
- Page 39 Service Manual Step Procedure 5.Remove left & right side plate screws screws Remove left side plate: unscrew 7 screws as diagram shown to remove left side plate. Remove right side plate: unscrew 7 screws of right side plate to remove it. left side plate right side plate 6.Remove electric box cover...
- Page 40 Service Manual Step Procedure 7.Remove electric box assembly electric box wiring Pull out wiring of electric box, then unscrew 3 screws of electric box to remove electric box assembly. electric box screws assembly 8.Remove facing bar screws facing bar Unscrew 2 screws fixing facing bar to remove it.
- Page 41 Service Manual Step Procedure 10.Remove evaporator assembly spot weld screws screws Unsolder the spot weld, then unscrew 5 screws fixing evaporator to remove it. (note: The refrigerant must be discharg- ed before unsoldering.) evaporator assembly 11.Remove facing bar 2 screws facing bar 2 Unscrew 3 screws fixing facing bar to remove the facing bar 2.
- Page 42 Service Manual Step Procedure 12.Remove facing bar 1 screws facing bar 1 Unscrew 4 screws fixing facing bar to remove the facing bar 1. 13.Remove duct assembly Unscrew 2 screws to remove duct assembly. duct assembly screws Maintenance...
- Page 43 Service Manual Step Procedure 14.Remove connecting rod and vertical louver connecting rod vertical louver 1 Break out connecting rod and vertical louver by hand to remove them. vertical louver 2 15.Remove volute (upper) and mesh enclosure volute (upper) Unscrew 4 screws as diagram shown to remove volute (upper) and mesh enclosure.
- Page 44 Service Manual Step Procedure 16.Remove centrifugal louver (upper) centrifugal louver (upper) Unscrew nuts of centrifugal louver (upper) and motor to remove centrifugal louver (upper). 16.Remove volute (lower) and water tray volute (lower) Unscrew 3 screws as diagram shown to remove volute (lower) and water tray. water tray screws Maintenance...
- Page 45 Service Manual Step Procedure 18.Remove diversion ring screws remove diversion ring. diversion ring 19.Remove centrifugal louver (lower) centrifugal louver (lowe r) Unscrew nuts of centrifugal louver anticlockwise, take out gasket to remove the centrifugal louver (lower). 20.Remove motor screws motor the motor.
- Page 46 Service Manual Step Procedure 21.Remove water retaining tray screws water retaining tray Unscrew 2 screws fixing water retaining tray to remove water retaining tray. 22.Remove condenser assembly spot weld screws Unscrew 2 screws, then unsolder the spot weld to remove condenser assembly. (Note: The refrigerant must be discharged before unsoldering.) condenser assembly...
- Page 47 Service Manual Step Procedure 23.Remove compressor assembly bolts Unscrew 3 bolts of compressor chassis, then take out gasket to remove compressor. compressor and spareparts 24.Remove motor sub-assy, water level switch sub-assy and caster wheel screws screws (1) Unscrew 2 screws of bottom of sub-assy to remove motor sub-assy.
-
Page 48: Appendix
Service Manual Appendix: Appendix 1: Reference Sheet of Celsius and Fahrenheit Conversion formula for Fahrenheit degree and Celsius degree: Tf=Tcx1.8+32 Set temperature Fahrenheit Fahrenheit Fahrenheit display Fahrenheit display Fahrenheit display Fahrenheit Celsius (℃) Celsius (℃) Celsius (℃) temperature temperature temperature (℉)... -
Page 49: Appendix 2: List Of Resistance For Temperature Sensor
Service Manual Appendix 2: List of Resistance for Temperature Sensor Resistance table of temperature sensor (15K) Temp( Resistance(k ) Temp( Resistance(k ) Temp( Resistance(k ) Temp( Resistance(k ) 138.1 18.75 3.848 1.071 128.6 17.93 3.711 1.039 121.6 17.14 3.579 1.009 16.39 3.454 0.98... - Page 50 Service Manual Resistance table of temperature sensor (20K) Temp( Resistance(kΩ) Temp( Resistance(kΩ) Temp( Resistance(kΩ) Temp( Resistance(kΩ) 181.4 25.01 5.13 1.427 171.4 23.9 4.948 1.386 162.1 22.85 4.773 1.346 153.3 21.85 4.605 1.307 20.9 4.443 1.269 137.2 4.289 1.233 129.9 19.14 4.14 1.198 18.13...
- Page 51 Service Manual Resistance table of temperature sensor (50K) T emp( Resistance(kΩ) T emp( Resistance(kΩ) T emp( Resistance(kΩ) T emp( Resistance(kΩ) 853.5 18.34 4.75 799.8 93.42 17.65 4.61 89.07 16.99 4.47 703.8 84.95 16.36 4.33 660.8 81.05 15.75 4.20 620.8 77.35 15.17 4.08 580.6...
-
Page 52: Appendix 3: Resistance Value Table Of Humidity Sensor
Service Manual Appendix 3: Resistance Value Table of Humidity Sensor HIS-06 temperature and humidity characteristic5℃~ 14℃ Unit:KΩ Relative Temperature(℃) humidity 5℃ 6℃ 7℃ 8℃ 9℃ 10℃ 11℃ 12℃ 13℃ 14℃ 5.35 4.92 4.55 4.23 3.95 3.70 3.47 3.25 3.05 2.87 5.80 5.33 4.93... - Page 53 Service Manual 1128.50 1033.61 953.39 883.90 822.61 767.78 704.83 647.37 594.51 545.56 1325.87 1213.40 1118.31 1035.94 963.29 898.30 823.48 755.17 692.34 634.16 1563.51 1430.14 1317.38 1219.71 1133.55 1056.48 967.04 885.39 810.28 740.74 1855.67 1695.83 1560.69 1443.63 1340.37 1248.00 1140.34 1042.06 951.64 867.93 2213.60...
- Page 54 Service Manual 50.20 46.55 43.12 39.89 36.83 33.93 31.76 29.69 27.71 25.82 56.00 51.92 48.08 44.47 41.05 37.80 35.35 33.02 30.79 28.65 62.80 58.20 53.88 49.80 45.95 42.29 39.51 36.87 34.34 31.92 70.00 64.95 60.21 55.74 51.51 47.50 44.33 41.31 38.42 35.65 78.80...
- Page 55 Service Manual 5.49 5.21 4.94 4.68 4.43 4.19 3.97 3.75 3.54 3.34 5.93 5.62 5.33 5.04 4.77 4.50 4.26 4.02 3.80 3.57 6.49 6.13 5.79 5.46 5.14 4.84 4.57 4.32 4.07 3.83 7.00 6.61 6.24 5.88 5.53 5.20 4.91 4.63 4.35 4.09 7.59...
- Page 56 Service Manual HIS-06 Characteristic of temperature and humidity 35℃ ~ 45℃ Unit:KΩ Relative Temperature(℃) humidity 35℃ 36℃ 37℃ 38℃ 39℃ 40℃ 41℃ 42℃ 43℃ 44℃ 45℃ 1.20 1.17 1.14 1.11 1.08 1.05 1.02 1.00 0.98 0.95 0.93 1.27 1.23 1.20 1.16 1.13 1.10...
- Page 57 Service Manual 89.40 82.99 76.75 70.68 64.76 59.00 55.58 52.24 48.98 45.80 42.68 103.00 95.43 88.06 80.89 73.91 67.10 63.17 59.33 55.59 51.93 48.35 119.00 110.35 101.94 93.75 85.77 78.00 73.18 68.47 63.88 59.39 55.00 139.00 129.32 119.90 110.73 101.80 93.10 86.80 80.66...
- Page 58 AIR CONDITIONING SYSTEMS AIR CONDITIONING SYSTEMS PORTABLE Scan here to download the latest version of this manual.
Need help?
Do you have a question about the COOL/FCOOL-8BS and is the answer not in the manual?
Questions and answers